


TRIFOX’s MTB Integrated Handlebar Super Sale, Up To 59% OFF Discount.This Carbon Integrated Handlebar RHB200, Suitable for the fork tube with a diameter of 28.6mm. Now it only needs USD$49.9, Random colors reduced by USD$5, is USD$44.99. Another product is the 28.6mm AERO Integrated MTB Handlebar RHB100, One-shaped Integrated Handlebar for Mountain bikes.
In addition to the saddle, another major component that affects the long-distance road riding experience is the handlebar. Nowadays, handlebar manufacturers and brands provide handlebars of different widths and lengths for various riders. So in the face of a dazzling array of handlebars, how should we choose the one that suits us?This article is about two points to consider when choosing a handlebar, whether you are buying a handlebar for the first time or want to further upgrade your bicycle, these two points are applicable.Choose the length of the handlebarIn the choice of the length of the handlebar, there are mainly two opinions.The first argument is that the long handlebars can better reflect the effect of leverage, allowing the rider to use more power to control the bicycle. And the long handlebars also help to open our chests and breathe easier.The second argument is more inclined to use short handlebars. This argument believes that narrow handlebars can stretch people's shoulders and back, thereby reducing muscle tension and fatigue. Not only that, but the shorter handlebars can also make the aerodynamic effect more prominent.My original handlebar was at least 44cm in length, but now my handlebar is only 42cm in length.I still remember when I was changing the handlebars, I was always worried. First of all, I know that depending on the length of the handlebars, there will be great differences in the feelings of cycling. These differences are reflected in the feeling of support and chest stretch when cycling, and the second is because of my body shape. More than the average rider huge.After changing to the new handlebar, I did feel that the leverage on this shorter new handlebar would be less than that of the old handlebar, but from my overall feelings of support, I got used to it quickly.In terms of comfort, because the new handlebars are shorter, the distance between my hands is closer, so my triceps also need to exert more force. But this may also be the reason why I don't tighten my arms when riding a bike. In short, I have already digested the difference in feeling.In terms of breathing, I didn't obviously feel that these two handlebars of different lengths had any effect on my breathing, so I couldn't make a statement.Eddie Audi, the founder of a bicycle fitness center in Atlanta, said "According to experience, the distance between the two shoulder lock joints should match the length of the handlebar. But this is only the conclusion that most people have concluded. Not necessarily applicable to everyone."(Note: Acromioclavicular joint, referred to as AC joint. It refers to the sliding or planar joint formed by the acromioclavicular articular surface and the outer end of the clavicle, located on the outermost side of the scapula.)Eddie Audi also said, "Short handlebars will make our elbows and forearms tight, which can easily lead to forearm fatigue. But in fact, long handlebars have their own problems."So having said so much, if we want to buy the most suitable handlebars, we still need to try and experience them ourselves.But here, this article can still make a suggestion. That is, if you feel your back and neck muscles tight and tired every time you finish riding, then your handlebars may be too long. But if you feel that your arm muscles are very tired or have chest tightness or nervousness when riding a bike, then the handlebars are too short for you.Selection of handlebar shapeEddie Audi said, "When choosing a flat or round handlebar shape, the size of the hand is a very important determinant. People with larger hands can use a wide and flat handlebar, and people with smaller hands can use it. It is more suitable for thinner handlebars. This is because people who are not big enough need to open their hands when using wide handlebars, which will increase the burden on the forearms. This principle is similar to the grip of a tennis racket."This suggestion is very useful.In my own experience, because I am tall and strong, my hands are also very large, so I always prefer to use wide and flat handlebars. But when I checked my bicycle recently, I suddenly changed myself to a thin round alloy handlebar, and the experience was very poor.
Regardless of whether it is the first bike or the Nth bike, before the start, I will hesitate to assemble a bicycle, hoping to achieve the 100 points in my mind. Let us simply analyze the characteristics of buying a complete bike and assembling a bicycle to help you consume fewer brain cells.Unless you have a tool wall, know the specifications and compatibility of various parts, and have special channels to get cheap parts, it will not be cheap to buy parts separately. If you are newer, you will buy a lot of strange or wrong things, easy to spend wrong money.Compared with buying a complete bike the advantages of assembling the bicycle:Freely decide what grade of parts to be equipped on the bike;Freely decide what purpose the bicycle will be used for;The complete bike can only be exchanged for different models according to different purposes. It is not as free as assembling a bicycle, and the reality may be cruelerThe paint you like does not have the function you want,Have the features you want but don't have the paint you like,The paint you like plus the features you want, but it doesn't have the size you wantAssembling a bike requires a lot of time to search for parts, and after finding them, they will have to assemble them one by one, and buy a new one in case the specifications are wrong. It is also a way to pay the bicycle shop to assemble the bike, but it also takes time and also requires an assembly fee. But it's faster than the time it takes to explore. Inexperienced users may damage the parts by themselves. At this time, it is best to find a professional to help you assemble the bike. Buying the complete bike only needs to spend time looking for the bike, and the rest is handled by the professional technicians of the store, which will save a lot of time overall.A sense of accomplishment: Of course, it is more than buying a complete bike! Seeing his bike taking shape step by step, the sense of accomplishment is indescribable! That feeling is the same as seeing a child raised all the way finally grow up and have a successful career.Skills: If cycling is an important activity in your life, it is best to learn how to assemble a bicycle by yourself, and prepare some equipment for long-term use. If you learn how to build a bicycle, you can better maintain your bike. When you encounter problems during cycling, you can find out and know how to solve them in time. At the same time, when you buy the next bicycle, you can quickly assemble it. When you have your own channels, you can save more money than buying the whole bike!Click Here to buy Carbon Fiber Full Suspension MTB Frame
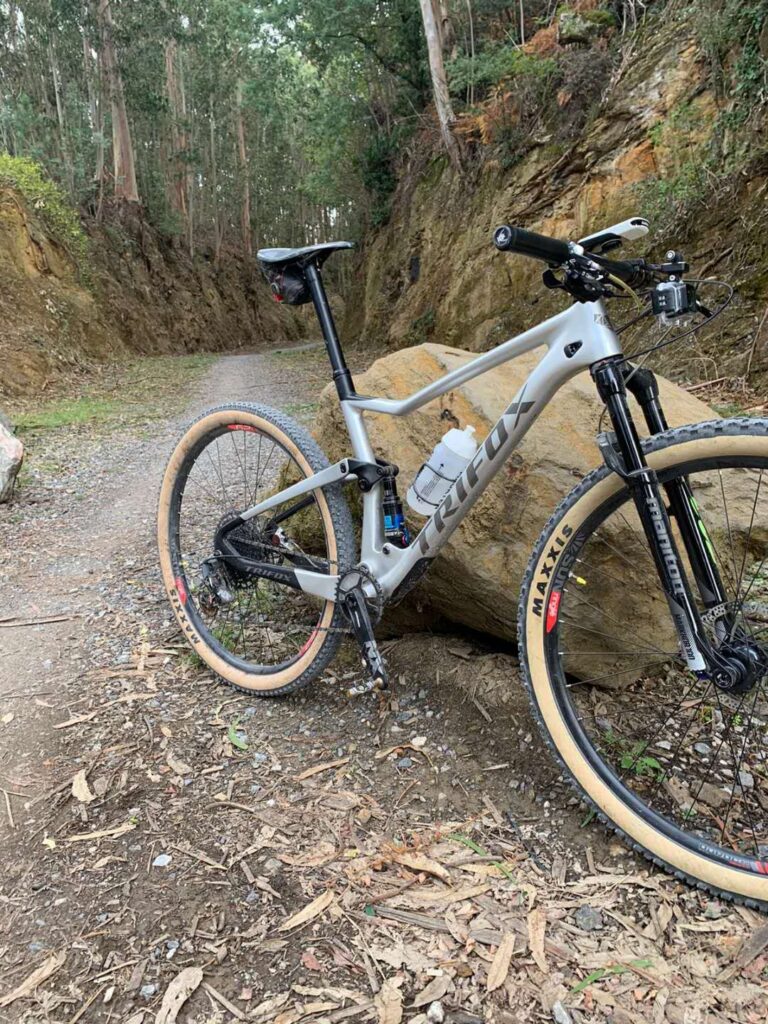
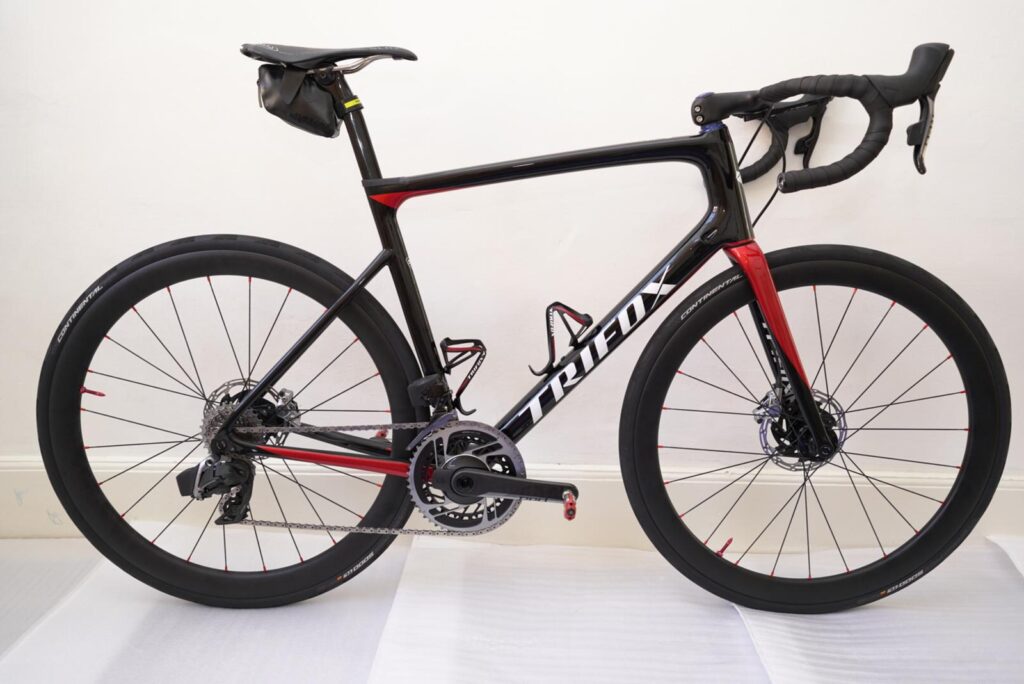
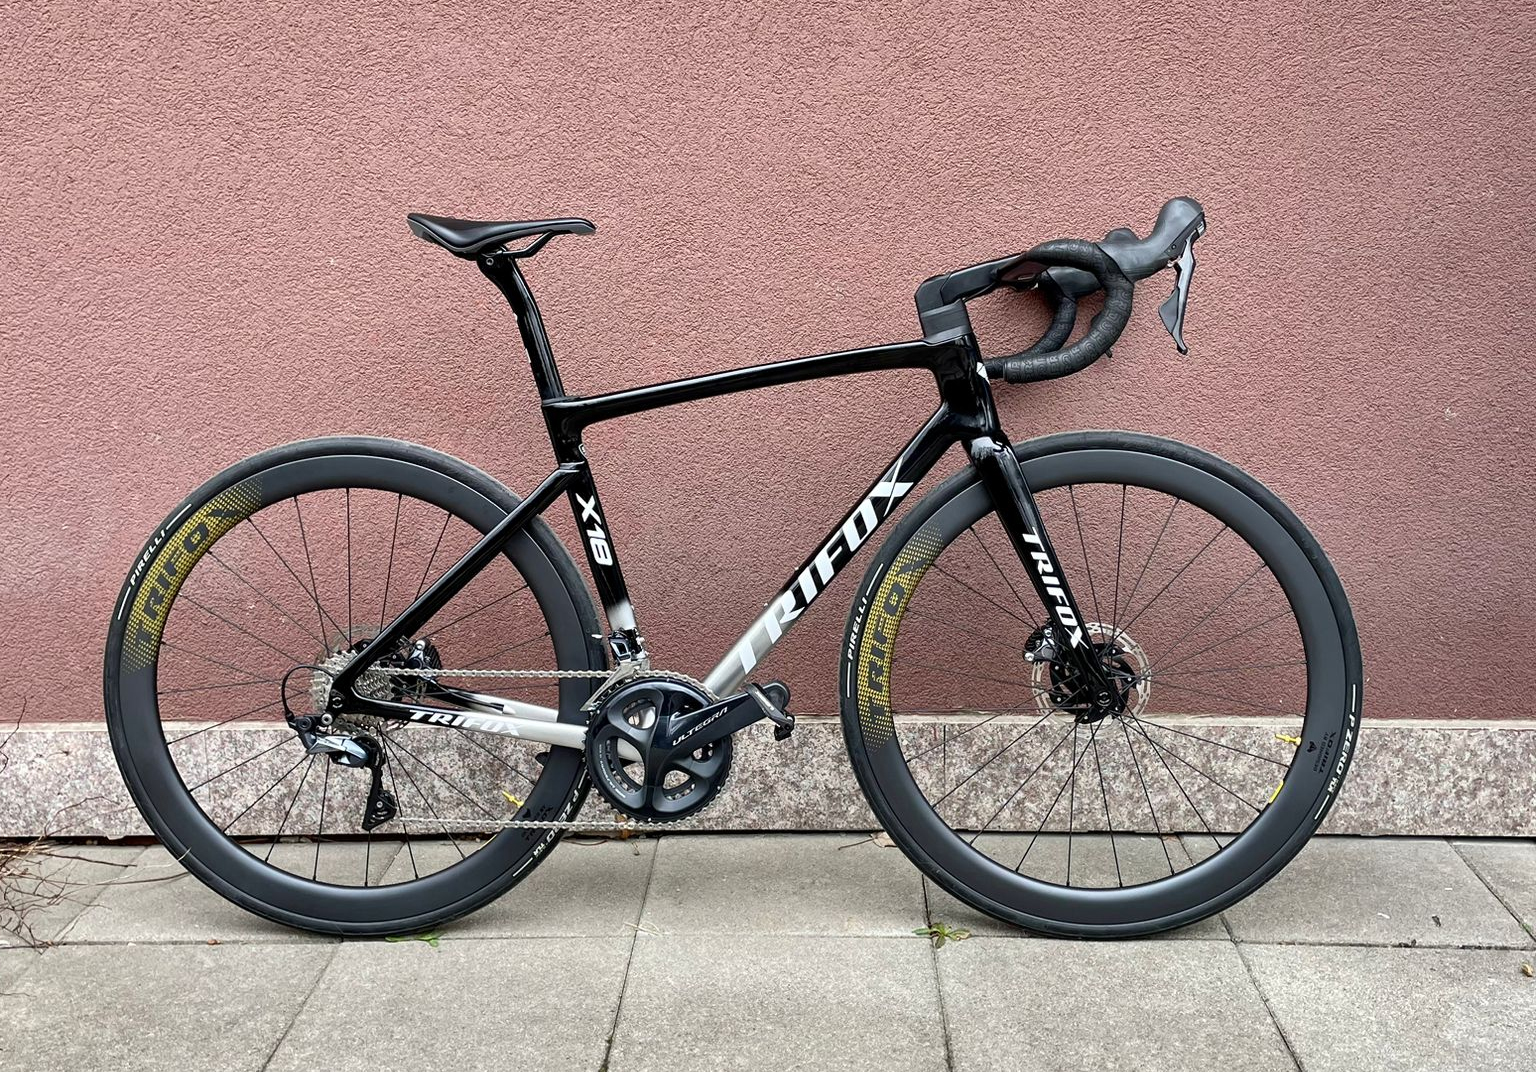
Let's start counting from the beginning.I had been thinking about buying a carbon full suspension frame for a couple of years and using the parts of my bike.After many turns, looking at web pages, comments, photos, forums... I was between three different frames and in the end I decided on the Trifox for geometry, aesthetics and for all the benefits that it assumed since I had read a lot about it.The day I decided to buy it, I contacted them and my first surprise was that the price had gone up. I thought it would be due to the global pandemic that was hitting us and that over time the price would drop, so I asked my contact. and he gave me the explanations of why he had raised the price and that it would not go down.I bought it even thinking that it was very expensive, but over time I realized that my thinking was wrong and that its price is very good.I had to wait since with the issue of the Denis pa the shipment was delayed a bit but as soon as it arrived and I opened the box I realized that I had made a master purchase.The packaging was perfect with great care so that the painting did not suffer any damage during the long journey.At first glance, the painting is very beautiful and the Titanium paint finish is spectacular; I had just fallen in love.Next step, take it to the store to assemble it with all the parts from my other bike.Here several unimportant problems arose, parts that did not work for me and some shock absorber bushings that did not work for my dt swiss xr carbon shock absorber, so in order not to delay any longer, I bought another shock absorber that would be worth a rock shox monarch that this one was worth perfectly.Now if it was already mounted, greased and waiting for me to take it out to run, jump, go up, go down and everything that I ordered it to do.First contact, a 20 km ride to get everything ready, saddle height, you tighten this screw that is loosening….And the next day to give it cane.Galdames greenway (50 km) flat to go full speed and see how fast and rigid the bike is.And I am not disappointed at all, it is a missile, very fast and rigid, the suspension behaves very well, absorbing small irregularities in the terrain and it does not rock anything, it is very reactive when you hit it with acceleration, it does not cost anything and you can see that the force that you print to the pedals it goes directly to the wheels and that is due to the rigidity of the frame, here I began to notice the looks of other cyclists at my bike, if the frame is beautiful how are people not going to look at me.Second contact 70 km through real mountains, uphill trails, downhills here we are going to really test it well on all types of terrain.We start leaving the house at a leisurely pace, putting a thousand eyes on the entire bike to see if everything is still in order.We spent a few kilometers on the bike path without any problem, everything is ok.We reached kilometer 15 and reached the mountain.First strong climb very bumpy and broken and the bike behaves as it has been rigid up to now, picking up all the bumps in the terrain and without losing an iota of rigidity and tracing all the way where you send it.A slight turn of the handlebars and the bike stops there and goes without problems.Climbing it behaves like a true thoroughbred, a world championship bike, a bike that if Niño Schurter rode it would win a world championship at least.After a few straight kilometers going up we reached the top and now it's time to go down; And how can it be otherwise? I love going down with this bike and it's a bike that goes down almost better than it goes up.You trace the curves wonderfully and it absorbs the bumps very well. Also, being a carbon frame, it is noticeable that the same frame also absorbs the bumps somewhat and that is due to the layers and shapes of the carbon that is very well studied so that it behaves like that. .Here the little extra weight that the frame has is not a small inconvenience like going uphill but it is a plus and makes the bike faster and more rigid.This is how I spend the next 25 km hallucinating with the behavior, benefits, rigidity, absorption, reactivity... of the frame.Now I realize that the almost €1000 that I have paid for the frame is a few euros since a frame of this caliber but from any other renowned brand is worth double or more.After a few months and a few kilometers of use, I still think the same thing and the only thing I think about is how it would behave if it were mounted with all the best that there is on the market, although later I tell myself that I already know that it would behave for 10 years now. I know that there is a UCI Wc Mtb team that competes with the frame under the name of another brand.The only thing that I think the frame lacks a little is the weight, although I am sure that when they review the frame they will use better fibers to reduce the weight of the frame than if they lowered it by 200 grams. it would stay at an amazing weight.As I said, after spending time with it, I totally recommend buying it and that each one assemble it with the parts they can (the best, the worst, new or second-hand) because it will surely be a very good bike since its frame behaves good in all situations (mountain, road, trails, ups, downs...)Click Here to buy Trifox Carbon Fibre Full Suspension MTB Frame

1. FrameTo clean the frame, you can use a rag dipped in water to pour on the parts, so that the mud stuck to the bottom of the frame will easily become soft when exposed to water. At this time, just wipe with a rag to easily remove the mud. It is not advisable to use a high-pressure water gun to wash the sludge on the bicycle, because this cleaning will easily enter the bottom bracket or hub and affect the life of the parts.At this time, you need to pay attention to some places where mud is easy to accumulate on the frame, such as the position of the bottom bracket on the bottom bracket. After washing off the muddy water on the frame with clean water, wipe it with a semi-dry damp cloth. When there is dirt on the frame, just wipe it back and forth several times, and the frame will be clean. Remember not to scrub with detergent and soapy water.2. Wheels, tires, and seat postWhen washing the wheelset, you can choose to use the shoe brush dipped in detergent to brush the sand on the tire. When washing the rim, it is best to use a semi-dry damp cloth and carefully wipe the brake pads on the rim. Simply scrub the spokes. After washing the hub, do not use a high-pressure water gun to remove the detergent. Simply dip it in water and wipe it with a clean cloth. When washing the seat post and the saddle, be careful not to let muddy water flow into the seat tube along the seam of the seat post clamp. Under the saddle, it is often the place where mud and water fly up the most, so you must carefully wipe off the mud with a rag.For tires, you can use a slightly harder brush to remove the sand and dust from the tires for simple maintenance.3. Shifter, front derailleur, and rear derailleurAfter washing the above parts, the next step is to wash the shifter. The shifter is more complicated. There is more butter in the parts for lubrication. When cleaning the shifter, it is best to wipe it gently with a rag, and it will be clean. When washing front and rear derailleurs, you can directly aim the water pipe at the gap between the front and rear derailleurs to rinse with water, so that the mud and sand stuck in the front and rear dials can be washed away. After flushing, you can also use detergent to wash off the oil on the front and rear derailleurs.4. Fork, pedal, brakeIt's easy to clean the front fork and pedals. The pedals only need to be washed off with mud. It is best not to rinse the front fork with water. When scrubbing the inner tube of the front fork, wring out the water on the rag before wiping. Some impurities will remain on the inner tube of the front fork after using it for a period of time. You can gently wipe it off with a cotton swab. It is best to develop a habit of keeping the front fork clean. This is also the most basic maintenance of the front fork. When washing the brake (subject to the V brake), you can directly flush the mud and sand left in the brake with a water pipe to prepare for the next maintenance.For chain wheel, front and rear transmissions, guide wheels, etc., dust and small dirt can be removed with a brush.5. Crankset, freewheel, and chainIn the entire cleaning process, these three accessories may be the dirtiest parts. Because the lubricating oil is left on the accessories, dust is most likely to adhere. We can pour the same dishwashing detergent on the cloth first, and then clean the chainring after dipping it in water. When washing the chainring, try to wash every tooth with a cloth as much as possible. After washing, rinse with water. You will be pleasantly surprised to find that the crankset is as bright as new under the scrubbing with a dishcloth.The next thing to wash is the freewheel. To wash the freewheel, remove the rear wheel for cleaning. First, release the rear brake so that the brake does not pinch the wheel. First, loosen the screws on both sides of the rear wheel quick release. At this time, tap the rear wheel lightly and the wheel will come out.Put the wheels on the ground, wipe them carefully on the freewheel with a rag, pay attention to the position of the rear derailleur when putting the wheels back on the bicycle, and slowly pull the rear derailleur to put the wheels in. This process is very simple, and you can understand it after disassembly and assembly once or twice.
Cyclists need to improve the three main elements of speed, strength, and endurance: training content, nutritional supplies, and equipment. Here to share with you, the coup disassembly of upgrading equipment.1. Lighter wheelsThe first thing to upgrade is the wheels. why? Everything comes from the rules of physics, and the rolling weight has a greater impact than the static weight (frame). This means that only a few hundred grams of weight loss can dramatically increase the speed. You will speed up on flat roads and throw away riders, and you will be more powerful when climbing hills. You will especially feel the importance of lightweight wheels.2. Aerodynamic wheelsAnother way to increase speed is aerodynamic wheels. Many wind tunnel test results have shown that when the speed exceeds 40 kilometers per hour, the aero wheel can save 1-2% of pedaling output. The reason is very simple. The higher the frame height, the more aerodynamic wheels can reduce turbulence and reduce air resistance in headwinds. However, although it runs fast, it is also more difficult to control than the low-frame high-wheelset, so it is recommended to use it in the time trial.3. TiresIn theory, the closest contact between a bicycle and the ground will have a great impact on rolling speed and comfort. However, people don’t care very much and just use standard tires when buying a bicycle. This is very wrong. Our suggestion is to try high-weave-density road tires. A tire with a high TPI number means that the higher the fine nylon thread is woven inside, it can reduce the rolling resistance and increase the speed. But there are advantages and disadvantages; the disadvantage is that high TPI numbers are more prone to snake bites. When winter comes, change to winter tires with thicker rubber layers.4. Derailleur kitThe electronic kit can be said to be a major evolution in the evolution of bicycles in recent years. When the traditional mechanical kit is still pulling the cord, the electronic kit has sent electronic signals to the front and rear derailleur, which is a wireless signal near the speed of light. Among the many benefits, the most important is more precise and quick gear shifting.5. BB bottom bracketIf you use a poor-quality BB bottom bracket, your large plate crankset will not rotate smoothly and save effort, so you will waste some energy when you step on each lap. It is recommended that top players who pursue performance choose BB bottom brackets with ceramic bearings for two reasons, both of which are critical: the first is that ceramic bearings will reduce resistance; the second is that their life span is more than ten times that of steel bearings.6. Power meterThe function of the computer should not only display basic information such as speed and RPM. If you care about your pedaling performance, the power meter is already an indispensable helper. The power meter can actually measure the wattage of the power generated by the rider on the bicycle, and then transmit this information to your bicycle watch mounted on the handle.Why are these power data so useful? Because when you have the FTP functional threshold power (Functional Threshold Power)-that is, the data of the maximum average power obtained in an hour of exhausting and stable riding, you can match your physical lactic acid threshold Ride in the interval. This is very helpful for the sprint high-intensity (121%-150 FTP) in the first interval (about 55% FTP) and the sixth interval.
Cycling is a great activity that can help you stay fit and lose weight. But how much time is appropriate for cycling each day?Riding for 30 minutes three to four times a week can help accelerate your weight loss and significantly improve your fitness levels. 30 minutes of moderate-intensity cycling 4 times a week can burn about 1.3 kg of fat per month.30 Minutes to Bike and Lose Weight The average person burns about 400 to 700 calories riding a bicycle for half an hour under average riding conditions. In order to lose 1 pound of fat, you need to burn 3600 calories, which is equivalent to 5 to 7 hours of moderate cycling. Riding more than 3 or 4 times a week can be challenging for beginners. It is recommended that you start with fewer rides and slowly increase the intensity as your knees and joints adapt. How far can you ride in 30 minutes? Most new cyclists can cover 8-10km in 30 minutes. Ride at an average speed of 19-26 km/h on a flat road. As the weather and terrain change, so will the average speed and distance traveled. If you’re cycling in the city, you also need to consider traffic. The following factors can affect your speed, in order of importance: your fitness level terrain headwind or crosswind bike type tire width and pressureHow Fast Does Your Performance Improve After 30 Minutes of Ride? Unfit individuals may feel the need to take a break after riding for 10-15 minutes. If you fall into this category, there is no shame in it, and no need to panic or throw in the towel prematurely. If you can only ride 10-15 minutes without a break at first, and you ride the bike 2-3 times a week, within three weeks you’ll be able to ride 30 minutes without any problem. Your fitness level will increase exponentially in the beginning. After a month of regular cycling, you’ll feel energized and fit enough even on moderately difficult climbs, and you’ll also notice a big boost to your health in other areas (such as when climbing stairs and not out of breath). How often should you ride? You should start out cycling 2-4 times a week depending on your current fitness level. Riding less than twice a week won’t get your muscles going enough, and starting out more than 4 times a week will initially take its toll on your body too much. Remember that a new rider’s muscles and joints need time to get used to riding and they need time to recover. Experts recommend 30 minutes of cardiovascular exercise at least five times a week to maintain a healthy lifestyle. So cycle 5 times a week, and of course, any combination of cycling, running, and walking. The most important thing is to find something you enjoy doing and something that keeps you fit, and cycling is definitely a good choice.
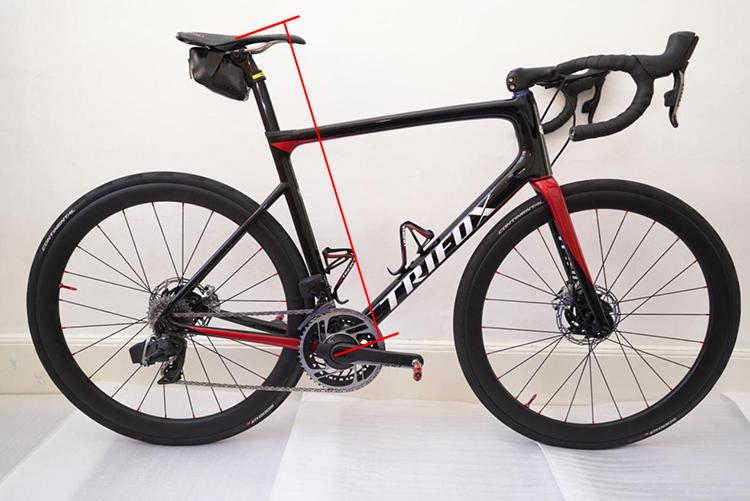
When buying a frame, many riders only choose the model based on their height, which often leads to a series of frame size deviations, difficulty in adjusting the height of the saddle, and pain caused by excessive extension in subsequent riding. Today I will bring you a little knowledge, on how to choose the correct frame size.We need to clarify the difference between Bike Sizing and Bike FittingBike Sizing, based on the measurement of human body data, ensures that the rider buys the frame and parts of the correct size, and the measurement is simple, only basic tools are needed to lay the foundation for subsequent Bike Fitting.Bike Fitting is based on kinematics data to adjust some of the contact points between the rider and the bicycle and make reasonable adjustments to the riding posture based on the rider's physical assessment and riding style.Bike Sizing, as a basic operation, assists us in choosing the correct road bike size, making the bike more suitable for its own value and increased riding comfort. Therefore, friends can go to a nearby bicycle shop for professional size measurement or use simple tools to measure the size of their own bikes at home.Basic measurement preparation:Level, tape, cycling pants, cycling socks, paper, pens, etc., you can start measuring with basic preparations.Measurement span●Take off your shoes and stand at approximately the distance between your feet◆Lift up the level forcefully and hold it against the pubic bone■Measure the vertical height, the data is accurate to millimetersNote: In this step, avoid wearing any daily casual pants or jeans. The thickness of the crotch of ordinary pants and cycling pants is different, and there will be large errors in the measurement.Assess lower limb flexibility●Place your arms on your shoulders and stand with your feet shoulder-width apart (place your arms on your shoulders, which can reduce the tester's awareness of touching the ground with his hands and reduce the evaluation error caused by excessive pressure on the upper limbs)◆Knees stretched straight, legs perpendicular to the ground●Bend the hips to the back of the lower extremities tight■Observe the inclination of the sacrumNote: When flexing the hip, if the hip has a certain amount of backward tilt and the lower limbs are not stretched, it will affect the final judgment and evaluation. It can be carried out against the wall to prevent variables that affect the evaluation.03 Record and calculate●Record the measured span height data (accurate to mm)◆Evaluate the degree of flexibility of the lower limbs. The acceptable drop angle is different for different flexibility, and the flexibility is poor. In the setting of the car, it is necessary to consider reducing the drop from the seat to the handlebar.■Calculate the approximate seat cushion heightCalculation formula: span height×0.887, which is the height of the saddle (the length from the center point of the bottom bracket to the apex of the center of the saddle, as shown in the figure below)04 Check the size chart to determine the frame sizeIt is obtained by calculation, and after rounding the value, you can find the corresponding frame size in the size table.How to determine the size of the frameMeasure the distance from the Crotch to the ground as AThen the size of the road bike frame is A(cm)x0.67=BThe size of the mountain bike frame is (B-11)x0.394=CExampleIf A=77cmThen the applicable road bike frame is 77×0.67=51.6cmThe applicable mountain bike frame size is (51.6-11)x0.394=16″Measure the distance from the bottom to the ground as AThen the size of the road bike frame is A(cm)x0.67=BThe size of the mountain bike frame is (B-11)x0.394=CHow to determine the length of the frameMeasure the distance from the lower straddle to the clavicle as EMeasure the distance from the armpit to the thumb joint as FThen the horizontal length of the frame (including the stem length) is DD=(E+F)/2 +XStem Length=D-ET(effective top tube length)If E=58cm, F=55cm, thenThe length of the road bike body is (58+55)/2+4=60.5cmThe size of the mountain bike body length is (58+55)/2 +8=64.5cmThe stem length of the road bike is 60.5 -53.9 = 6.6cmThe stem length of the mountain bike is 64.5 -56 =8.5cmEveryone's body length, foot length, and hand length are different. However, most of today's frames can be adjusted by adjusting the front, rear, and height of the saddle, and the distance of the handlebars, and making slight adjustments to match the most suitable cycling posture. Choose the correct size based on your height, and then "fine-tune" the saddle or stem and handlebar to suit the length of your hands and feet. Choose an unsuitable frame, and then "replace" the saddle or stem and handlebar to suit the individual. The height and length of the hands and feet are the same. Some people choose a frame based on the length of their feet alone. For example, if a person with 180cm legs has short legs and a foot length of 75cm, he would choose a 16-inch frame. But the legs are short relative to the body and must be longer. If it fits his feet, it cannot fit his upper body. There is no way to fine-tune it. Therefore, you must choose the correct frame based on your height to have room for fine-tuning.For a bicycle with a 26-inch wheel diameter, a height of 180cm is the most suitable size for a seat tube of 18 inches, 170cm is 17 inches, and of course, 160cm is 16 inches! The height of 150-160 can choose a frame of 14-15.5 inches. If you are taller than 180, it is recommended to try your friend's 18 to 21-inch frame in person (due to the same wheel diameter, the size of the frame under 160 and over 180 will start to deviate).700c frame wheel diameter road bike: top tube length 49 (+-0.5cm) suitable for riders with a height of 155 (+-5cm); top tube length 50 (+-0.5cm) suitable for a height of 160 (+-5cm); Top tube length 51 (+-0.5cm) is suitable for height 165 (+-5cm); top tube length is 52 (+-0.5cm) is suitable for height 170 (+-5cm) and top tube length is 53 (+-0. 5cm) is suitable for height 175 (+-5cm); the top tube length 54 (+-0.5cm) is suitable for the height of 180 (+-5cm). The above is the general recommended value. For those with short bodies and long legs, try not to exceed the recommended value.The frame is the most important backbone of the bicycle. Choose the right frame and cycling life is wonderful (it will be fine if you want to change anything in the future); if you choose the wrong frame, cycling will be frustrating. It is useless to choose an oversized frame, which is not a wise choice to increase the weight of the frame and reduce the handling flexibility.Mountain bikes are based on the subjective comfort of the individual riding. In addition, the horizontal angle of the high-span or low-span "up tube" (connected to the head tube to the seatpost) frame can be considered, so that the foot will not be allowed to land when the rider stops. Straddle down to the frame, and don't deliberately choose a high-span frame that is too small to cater to the lack of leg length. Choose the frame size that best suits your height and take into account the foot length. Choose a frame with a high or low top tube span, so that you can achieve the ultimate goal of "tailor-made".After reading it, there should be no problem with the size of the bicycle frame. Click here to buy a safe and comfortable frame.
Do you need a road bike?1. Road bikes can commute, but they are not good at commuting; road bikes can go for outings, but they are not suitable for outings; road bikes are a nightmare for long distances, road bikes cannot be parked casually, road bikes have too many skills, and road bike adjustments rely on With rich experience…2. Road bike is a piece of sports equipment, road bike sport is a hobby, and road bike hobby is a burden. You will enjoy the burning sensation of the diaphragm instead of the envy of others.This is not an article that encourages you to join the road bike circle. If you have the willpower, have the financial base, have time to exercise, and are interested in road bikes, then consider buying a road bike.What should I pay attention to before purchasing?1. I want to buy a road bike, but what kind of bike is called a road bike?① Reasonable geometric designBecause of the low riding posture on the road, the geometrical settings of the vehicle itself are extremely demanding. Incorrect body geometry and size are very easy to cause personal injury, and in many cases this injury will be considered as a fatigue symptom after exercise, waiting for you to find out, It's too late to regret.② 700c wheel diameter, tire diameter below 30cThe 700c wheel diameter is a follow-up standard, and the tire diameter below 30c can ensure low enough rolling resistance on the paved road.③ Drop handlebarThe purpose of the handlebar design is to ensure that the rider can adopt a low wind resistance posture and allow the rider to perform a variety of postures.④ Bicycle Brake/Shifter GroupsetsThe Bicycle Brake/Shifter Groupsets are a milestone in the development of road bikes. It reduces the rider's movement range when shifting, and does not have to leave the corners of the fingers to avoid accidents caused by operating errors.⑤ Self-locking pedalWithout self-locking fixation, many technical actions cannot be completed-such as rocking a bike and low-position downhill. and it is easy to cause danger in the open environment of the road race. Therefore, it is necessary equipment for road bike sports.2. What size bike should I buy?① For normal people, the simplest correspondence between height and frame is basically certain, and the fine-tuning of the body proportions depend on the seat tube and the stem.② The basic attribute to measure the size of the frame is the equivalent horizontal center to center length and the seat height (Center to Top) length. Among the two, the horizontal top tube is the most direct and important data. Due to the promotion of compression racks, many manufacturers currently do not directly indicate the size of the frame by the length of the horizontal up tube but use the label or the length of the riser to indicate it. When considering the frame, you must query its official website geometric information to obtain the horizontal upper tube data of each size.The following is a reference for height and frame size. Since the top tube settings of various frame levels are different, only the range options are given.<160cm: It is recommended to be the same length first…otherwise you can only choose a special children's road bike.161-165cm: It is recommended to have the same length and height first… Be sure to buy it. The horizontal top tube is 49-51cm.166-170cm: It is recommended to use a frame with a 50.5-52 horizontal up tube, and the maximum length should not exceed 52.5cm171-175cm: It is recommended to use a frame with a 52-53 horizontal up tube, and the maximum length should not exceed 53.5cm176-180cm: It is recommended to use a 53-55.5cm frame, and the maximum size should not exceed 56cm181-185cm: It is recommended to use a frame of 55.5-57.5cm, and the maximum size should not exceed 58cm186-195cm: It is recommended to use a 57.5-59cm frame, and the maximum size should not exceed 59.5cm>195cm: If you can't use a frame of about 59.5-60cm, you probably need to customize a bike… A finished frame with a horizontal top tube exceeding 60cm is very rare.The above is for reference only. The easiest way is to find a suitable place to do a fitting, but the fitting will change with the change of skills and physical conditions. If there is no fitting condition, you need to specifically consider which end your height is in the range. For example, if your height is 181cm, buying a 58cm equivalent frame is obviously prone to problems, but if it is 185cm, buying a 55.5cm frame may not be impossible. In addition, these reference data only need special attention on the first bicycle. When you constantly modify the bicycle settings, you will know what kind of bike geometry you need: large or small frame, layback seatpost or straight seatpost, the angle of the stem, the drop bar, and the reach of the drop handlebar… these experiences are only for individuals.The heights of some well-known cyclists are listed below, and the top tube dimensions of the frame and the equivalent level of the frame are just for viewing:Alexander Vinokourov: 177cm, Tarmac SL4, 537mmLance Armstrong: 178cm, Madone 6, 544mmDavid Zabriskie: 183cm, R5 VWD, 548mmDenis Menchov: 178cm, Aeroad CF, 560mmFabian Cancellara: 186cm, Madone 6, 560mm


