


Are you looking to upgrade or replace your mountain bike hub but unsure how to install it properly? Worry not! We will provide a step-by-step guide to help you install your mountain bike hub and achieve a smooth, efficient ride.Step 1: Gather the Necessary Tools and MaterialsBefore you begin, make sure you have the following tools and materials handy:A new mountain bike hubA spoke wrenchA truing stand (optional, but helpful for wheel alignment)Grease and lubricantRim tape (if applicable)Step 2: Remove the Old HubStart by removing the wheel from your bike and taking off the tire, tube, and rim tape (if present). Carefully remove the spokes connecting the old hub to the rim, taking note of the lacing pattern for future reference.Step 3: Prepare the New HubApply grease to the new hub's bearings and axle, ensuring smooth operation and reducing friction. If you've chosen a versatile hub like the Trifox M827 bicycle hub, make sure to select and install the appropriate end caps for your desired axle type (quick release or thru-axle).Step 4: Lace the SpokesFollowing the lacing pattern you observed earlier, connect the new hub to the rim using the spokes. Make sure to tighten the spokes evenly and securely. A truing stand can be helpful during this process to ensure proper wheel alignment.Step 5: Align and True the WheelOnce the spokes are laced, check the alignment of your wheel. Adjust the spoke tension as needed to achieve a straight, true wheel. This process may require patience and precision, but it's essential for a smooth ride.Step 6: Reinstall the Rim Tape, Tube, and TireWith the new hub installed and the wheel aligned, reinstall the rim tape (if applicable), followed by the tube and tire. Inflate the tire to the recommended pressure.Step 7: Mount the Wheel on Your BikeFinally, mount the wheel back onto your bike, ensuring the axle is correctly seated in the dropouts. For hubs like the Trifox M827, make sure the end caps match your bike's axle type for a secure fit. Reattach any brake components and give your bike a thorough inspection before taking it for a test ride.Trifox M827 hub installation can be a straightforward process when you follow these steps and pay attention to details. Choosing a high-quality, versatile hub can further enhance your biking experience by providing a smooth ride and easy adaptability to different axle types. Happy riding!
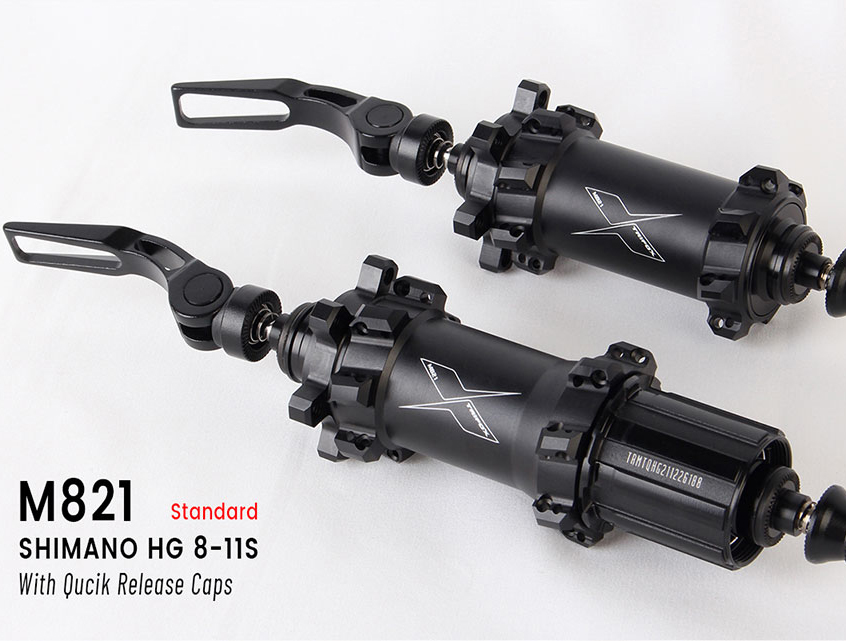
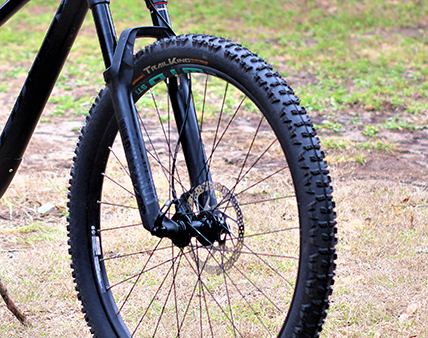
Mountain biking has evolved over the years, with various advancements in technology leading to improved performance and enhanced riding experience. However, some riders still prefer the classic approach to mountain biking, which includes using rim brakes. In this article, we will discuss rim brake hubs, their role in mountain biking, and how they offer an efficient solution for your traditional bike setup.What are Rim Brake Hubs?Rim brake hubs are the central component of a wheel that connects the spokes to the axle and allows the wheel to spin freely while supporting the weight of the bike and rider. These hubs are specifically designed to work with rim brakes, which apply friction directly to the wheel's rim to slow down or stop the bike.Advantages of Rim Brake HubsLightweight: Rim brake hubs are generally lighter than disc brake hubs, as they don't require additional components like rotor mounts.Simplicity: Rim brakes are easier to maintain and adjust compared to disc brakes, making them a popular choice for casual riders and those who prefer minimalist setups.Cost-effective: Rim brake hubs and accompanying brake systems tend to be more affordable than their disc brake counterparts.Disadvantages of Rim Brake HubsLess effective braking: Rim brakes may not provide the same level of stopping power and modulation as disc brakes, especially in wet or muddy conditions.Rim wear: Prolonged use of rim brakes can lead to wear on the wheel's rim, potentially requiring more frequent rim replacements.Choosing the Right Rim Brake HubWhen selecting a rim brake hub for your mountain bike, consider factors such as material, bearing system, and compatibility with your bike's components. High-quality hubs, like the rim brake hub Trifox M821, are made from durable materials like aluminum alloy and feature a smooth-rolling bearing system to ensure reliable performance.Additionally, make sure the hub is compatible with your bike's axle type and spoke count. A versatile hub that offers various options for axle types and accommodates different spoke counts can be an excellent choice for a custom mountain bike build.In conclusion, rim brake hubs remain a popular choice for riders who appreciate the simplicity, lightweight design, and cost-effectiveness of traditional mountain biking setups. By understanding the advantages and disadvantages of rim brake hubs and considering factors like material, bearing system, and compatibility, you can choose the right hub to enhance your classic mountain biking experience.
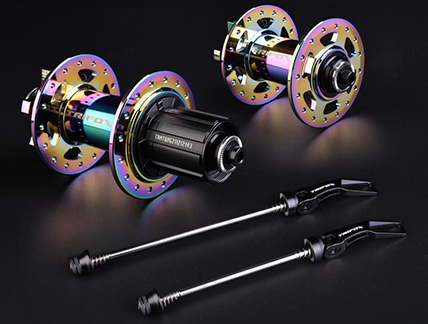
Mountain biking is an exhilarating sport that demands not only skill but also a reliable and high-performance bike. One crucial component of your mountain bike is the hub, which connects your wheels to the bike frame. In this article, we will discuss the differences between quick release (QR) and thru-axle (TA) mountain bike hubs, their advantages, and how the Trifox M827 hub offers the best of both worlds with its easy-to-maintain and versatile design.Quick Release HubsQuick release hubs have been the standard choice for many years. They feature a hollow axle with a skewer running through it, secured by a lever on one end and a nut on the other.Advantages of Quick Release Hubs:Easy to install and remove the wheel without toolsLightweight designGenerally more affordableDisadvantages of Quick Release Hubs:Less stiffness and stability compared to thru-axle hubsNot as secure, potentially leading to the wheel coming loose during aggressive ridingThru-Axle HubsThru-axle hubs are becoming increasingly popular in modern mountain bikes. They consist of a solid axle that passes through the hub and directly screws into the bike frame, providing a sturdier connection.Advantages of Thru-Axle Hubs:Increased stiffness and stability, improving handling and performanceMore secure, reducing the risk of the wheel coming looseBetter alignment for disc brakes, ensuring consistent braking performanceDisadvantages of Thru-Axle Hubs:Heavier than quick release hubsWheel removal and installation can be slower and may require toolsThe Trifox M827 Bike Hub: A Versatile and Convenient SolutionThe Trifox M827 mountain bike hub offers a unique solution that combines the advantages of both quick release and thru-axle systems. Its design allows for easy conversion between QR and TA by simply swapping the end caps, providing riders with the flexibility to choose the best setup for their riding style and bike compatibility.Additionally, the M827 hub is made from durable materials like aluminum alloy 6061, 7075, and chromoly steel, ensuring longevity and reliable performance. The hub also features 2 bearings in the front and 4 bearings in the rear for smooth operation, and it's compatible with 14G 32-hole spokes and 6-bolt disc brakes.In conclusion, the Trifox M827 mountain bicycle hub offers a versatile and convenient solution for riders looking to enjoy the benefits of both quick release and thru-axle systems. With its easy-to-maintain design and high-performance features, the M827 hub is an excellent choice for enhancing your mountain biking experience.
Hub spacing is one of the key factors to consider when selecting the right wheels for your bike. This critical measurement determines how the wheel fits into the frame. Bike hub standards can be confusing, and the wrong measurement can lead to incompatibility. In this blog post, we aim to provide you with a clear understanding of hub spacing standards to help you make an informed decision when choosing your bike's wheels. 1. Quick Guide to Bike Hub Spacing Standards There are four common bike hub spacing standards. They are: - 100mm front quick-release spacing - 135mm rear quick-release spacing - 110mm front thru-axle spacing - 142mm rear thru-axle spacing Thru-axle refers to a type of axle that threads through the wheel hub and is secured on the other side, while quick-release refers to the skewer that tightens down on the axle to hold the wheel in place. 2. What’s the difference between quick-release and thru-axle? Quick-release hubs are often used on rim brake bikes, while thru-axle hubs are used for disc brake bikes. Thru-axle hubs have a larger diameter than quick release, which means they provide more stiffness and stability. They also help to reduce rotor rub and wheel flex – two of the biggest issues that can lead to poor braking performance. 3. What hub spacing is most common? The most common hub spacing standard for road bikes is 100/130mm for quick releases, while for mountain bikes is 110/142mm thru-axle. However, there are also other hub spacing standards, such as 12x142mm, 15x135mm, and 12x150mm. Before purchasing a new wheelset or bike frame, always check the hub spacing to ensure compatibility. 4. What hub spacing should I choose? The perfect hub spacing you need should depend on the type of biking you intend to do. If you’re a roadie, you would most likely need a 100/130mm quick-release spacing. For mountain biking, you would most likely need a 110/142mm thru-axle. Remember, when choosing hub spacing, it’s always better to go with the standard size. This will make it easier to find replacement parts, such as wheels and cassettes. 5. How do I measure hub spacing? If you want to know the hub spacing of your bike, you need to measure the space between the inside of the dropouts where the wheel fits in. For quick-release hubs, measure the distance between the two ends of the skewer. For thru-axle hubs, measure the internal width of the dropouts which will be the same as the distance between the two ends of the axle. Conclusion: Understanding hub spacing standards is essential when it comes to choosing the right wheels for your bike. Knowing the right hub spacing measurement ensures compatibility with your frame and helps to ensure that you can easily replace your wheels and other parts when it matters the most. Remember, taking a little time to research and understand the hub spacing standards will save you time and money in the long run. So, take the time to check the measurements before making any purchase, and always ride safely with the perfect wheels for your bike.
Cycling enthusiasts love to know how to take care of their bicycle’s components, not only because it is essential for smooth riding but also because knowledge is power. If you are one of those bike enthusiasts wondering how to measure the spoke hole diameter on a hub, which is one of the crucial components in a bike's wheel, you are in the right place. In this blog post, we will discuss the steps to measure the spoke hole diameter on a hub. Before we dive into the process of measuring the spoke hole diameter on a hub, let us first discuss what it is. The spoke hole diameter is the distance across the hole to the opposite side of the hub. The most common spoke hole diameters are 2.6mm and 2.9mm, with a few exceptions. For example, some lightweight components use smaller diameter spoke holes. To measure the spoke hole diameter, you can use a vernier caliper or a ruler with millimeter markings. You need to measure the hub's hole from the inside of the spoke bed to the opposite side, across the center of the axle. Once you have found the center of the axle, you can measure the diameter of the spoke hole. Another way to measure the spoke hole diameter on a hub is to use a drill bit and a caliper or ruler. First, find a drill bit that is larger than the spoke hole diameter and smaller than the hub's hole. Ensure the bit fits the hole snugly but can still turn freely. Once you have the appropriate drill bit, place it in the spoke hole and use your caliper or ruler to measure the drill bit's diameter. This measurement will be the diameter of the spoke hole. If you have access to an electronic spoke tension meter, you can measure the spoke hole diameter by using it. Electronic spoke tension meters can measure the spoke tension and use it to calculate the spoke hole diameter. This method is easier, faster, and more precise than using a caliper or ruler. You can also use the manufacturer’s specifications to identify the spoke hole diameter. Most manufacturers attach a tag on the hub, which lists every specification, including the spoke hole diameter. If you cannot find any tag or sticker on the hub, you can contact the manufacturer or look it up online. Conclusion: Measuring the spoke hole diameter on a hub is essential to ensure a perfect fit and proper tension of your spokes, which is crucial for a smooth and safe ride. Whether you use a vernier caliper, ruler, drill bit, electronic spoke tension meter, or manufacturer's specification, the process for measuring the spoke hole diameter is relatively straightforward. If you don't have any of the tools, you can always take your hub to a bike mechanic who can help measure it for you. Remember, knowledge is power, and taking care of your bike's components can make a significant difference in your cycling experience!
Buying a new bicycle can be exciting, but if you want to truly enjoy your riding experience, it is important to choose the right frame size for your body. A properly fitted bicycle not only ensures maximum comfort and control, but also minimizes the risk of injury and improves overall performance. With so many different bicycle frame sizes available, it can be overwhelming to choose the right one. In this blog post, we will walk you through the process of selecting the right bike frame size for you. 1. Start with Measuring Your Inseam The inseam refers to the distance between your crotch and the floor. It is an important measurement when determining your bicycle frame size. To measure your inseam, stand against a wall without shoes and place a book between your legs as if you were sitting on a saddle. Make sure the book is snug against your pubic bone. Mark the top of the book with a pencil and measure the distance from the floor to the mark. This measurement is your inseam. 2. Determine Your Ideal Frame Size Once you have your inseam measurement, use it to calculate your ideal bicycle frame size. There is no one-size-fits-all approach to determining the right frame size, but a general rule of thumb is that your ideal frame size is your inseam measurement multiplied by 0.65. For example, if your inseam is 80 cm, your ideal frame size would be approximately 52 cm (80 x 0.65 = 52). 3. Consider Your Riding Style Your riding style also plays a role in determining the right bicycle frame size. If you are primarily going to use your bicycle for commuting or leisurely rides, you may prefer a more upright riding position, which calls for a smaller frame size. On the other hand, if you are interested in racing or high-speed riding, a larger frame size will allow you to adopt a more aerodynamic riding position and generate more power. 4. Test Ride Different Bikes The best way to determine your ideal frame size is to try out different bikes. If you're purchasing a new bike, most bike shops will offer you a fitting session to help you find the right size. Take the time to test ride several bikes with different frame sizes, styles, and brands to find one that feels comfortable and suits your riding needs. 5. Fine-Tune Your Fit with Adjustments Remember that your ideal bike fit is more than just your frame size. You can fine-tune your fit with adjustments such as saddle height, handlebar reach, and stem length. A professional bike fitting can help you optimize your riding comfort, efficiency, and performance. Conclusion: Choosing the right bicycle frame size can make all the difference in your riding experience. By measuring your inseam, determining your ideal frame size, considering your riding style, test-riding different bikes, and fine-tuning your fit with adjustments, you can find the perfect bike that feels comfortable and suits your riding needs. So, take the time to find your ideal bike fit and enjoy many hours of happy cycling!
If you are an avid mountain biker, you know that a good frame is essential for a smooth ride. That's where a dual suspension mountain bike frame comes into play. With its two sets of suspension systems, it absorbs all the bumps and inequalities on the trail. In this post, we will dive into everything you need to know about dual suspension mountain bike frames - from their benefits to how to choose the perfect one for you. Benefits of Dual Suspension Mountain Bike Frames One of the biggest benefits of a dual suspension mountain bike frame is the smooth ride it provides. With two sets of shocks, one at the front and another at the back, it absorbs all the impact of rough terrain, making it easier and more comfortable to ride. This means less stress on your body, and you can ride longer distances without getting fatigued. Another advantage is that a dual suspension frame provides better traction. When you are riding over bumps and obstacles, the wheels will stay in contact with the ground, allowing for better control and stability. This means you'll have more confidence to take on technical trails without worrying about losing your balance or control. How to Choose the Right Dual Suspension Mountain Bike Frame The first thing you need to consider when choosing a dual suspension mountain bike frame is the type of riding you will be doing. Cross country, downhill, or enduro, each requires a different frame design. For example, if you are into cross country riding, a frame with less travel and a stiffer suspension system would be better suited. On the other hand, if you are into downhill biking, you would need a frame with more travel and a more robust mechanism. Another factor to consider is the material of the frame. Dual suspension mountain bike frames are made from a variety of materials, including carbon, aluminum, and steel. Carbon and aluminum frames are lighter, but steel frames are more durable and offer better shock absorption. The geometry of the frame is also crucial. You want a frame that is comfortable to ride, has good stability, and the right head and seat angle. The ideal frame geometry will depend on your height, weight, and riding style, so it's essential to test out multiple frames to find the right fit. Maintenance Tips To ensure your dual suspension mountain bike frame performs at its best, it's crucial to maintain it properly. Routine maintenance includes cleaning the frame, checking the suspension for any leaks, and lubricating moving parts. It's also essential to adjust the suspension as needed for the type of riding you'll be doing. Conclusion: A dual suspension mountain bike frame can make a world of difference in your riding experience. With its ability to absorb bumps and provide more control, you'll be able to tackle more challenging trails and ride longer distances without feeling fatigued. By considering the type of riding you'll be doing, the frame material, and the geometry, you'll be able to choose the perfect dual suspension mountain bike frame for your needs. Remember to maintain it properly, and you'll be sure to get the most out of your investment.
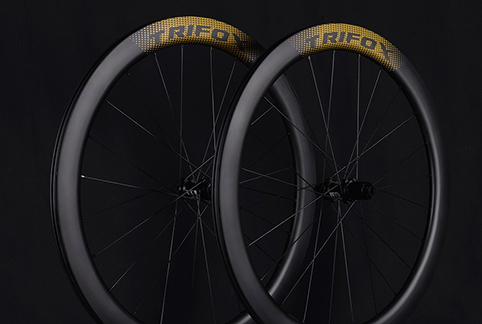
In recent years, the popularity of disc brakes on road bikes has grown exponentially, leading to an increasing demand for high-quality disc wheelsets. Among the various options available, carbon disc wheelsets have emerged as a top choice for performance-oriented cyclists. In this article, we will explore the advantages of upgrading to a carbon disc wheelset, specifically focusing on wheelsets designed for 700c road bikes.A carbon disc wheelset offers numerous benefits over traditional aluminum or alloy options. These advantages can be broadly categorized into three areas: performance, durability, and rider experience.PerformanceOne of the primary reasons many cyclists choose a carbon disc wheelset is the improved performance it provides. Carbon fiber is an extremely lightweight material, allowing for a significant reduction in rotational weight compared to aluminum or alloy wheelsets. This results in faster acceleration and more responsive handling. Additionally, carbon wheelsets tend to have better aerodynamics, which translates into reduced air resistance and improved speed on the road.DurabilityCarbon disc wheelsets are known for their exceptional durability. The inherent strength of carbon fiber allows these wheelsets to withstand the rigors of daily use while maintaining their shape and performance. Moreover, the disc brake system itself offers improved braking power and modulation, resulting in less wear and tear on the wheel rims. This means that carbon disc wheelsets can last longer than their rim brake counterparts, making them a wise investment for serious cyclists. Recommend a high quality carbon disc wheelset: Trifox Carbon Road Bike Wheels WT11Rider ExperienceFinally, upgrading to a carbon disc wheelset can significantly enhance the overall cycling experience. The combination of lightweight construction, improved aerodynamics, and superior braking performance creates a smoother, more enjoyable ride. Additionally, the increased stiffness of carbon wheelsets allows for better power transfer from the pedals to the wheels, giving riders a more efficient and responsive feel on the bike.In conclusion, a carbon disc wheelset is an excellent upgrade for any road cyclist looking to improve their performance, durability, and overall riding experience. With options like the wheelset disc 700c readily available, there has never been a better time to make the switch. Whether you're a seasoned racer or a weekend warrior, a carbon disc wheelset can provide the edge you need to reach new heights in your cycling journey.
Mountain biking is one of the most thrilling and exhilarating sports out there, and it's no wonder it has millions of avid fans worldwide. If you're one of them, you know how crucial it is to have the right equipment, and a 29er mountain bike frame can give you the extra edge you need. If you're looking to upgrade your ride, or you're considering getting into mountain biking, read on to learn everything you need to know about 29er mountain bike frames. A 29er mountain bike frame refers to a bike that has 29-inch wheels, as opposed to a traditional mountain bike with 26-inch wheels. These larger wheels increase your bike's ability to roll over obstacles, giving you better traction and a smoother ride. They also have a larger contact patch with the ground, which means you have more control and grip on the trail. Overall, a 29er provides better efficiency, speed, and stability. One of the most significant benefits of a 29er mountain bike frame is that it has a larger frame size, making it an excellent option for riders who are taller or prefer a bigger bike. Additionally, the increased wheel size allows for a more relaxed riding position, reducing the stress and strain on the rider's back and neck, making it more comfortable to ride for longer periods. When shopping for a 29er mountain bike frame, you'll want to consider the frame material. The three most common materials are aluminum, carbon fiber, and titanium. Aluminum is the most affordable option and is durable, while carbon fiber is lighter and more expensive. Titanium is the rarest and most expensive option, but it's also the most durable and long-lasting. Another important factor to consider when selecting a 29er mountain bike frame is the suspension system. There are two main types of suspension: full suspension and hardtail. Full suspension provides a more comfortable ride on rough terrain by absorbing bumps, while hardtail has a simple suspension system and tends to be lighter and more efficient. Ultimately, it comes down to your preference and riding style. Conclusion: A 29er mountain bike frame can be an excellent investment for anyone who enjoys mountain biking. Larger wheel sizes provide better stability, efficiency, and speed, while the increased frame size and riding position make for a more comfortable ride. When shopping for a 29er mountain bike frame, consider the frame material, suspension system, and your personal needs and preferences. Whether you're a professional racer or a casual rider, a 29er mountain bike frame can take your riding to the next level.


