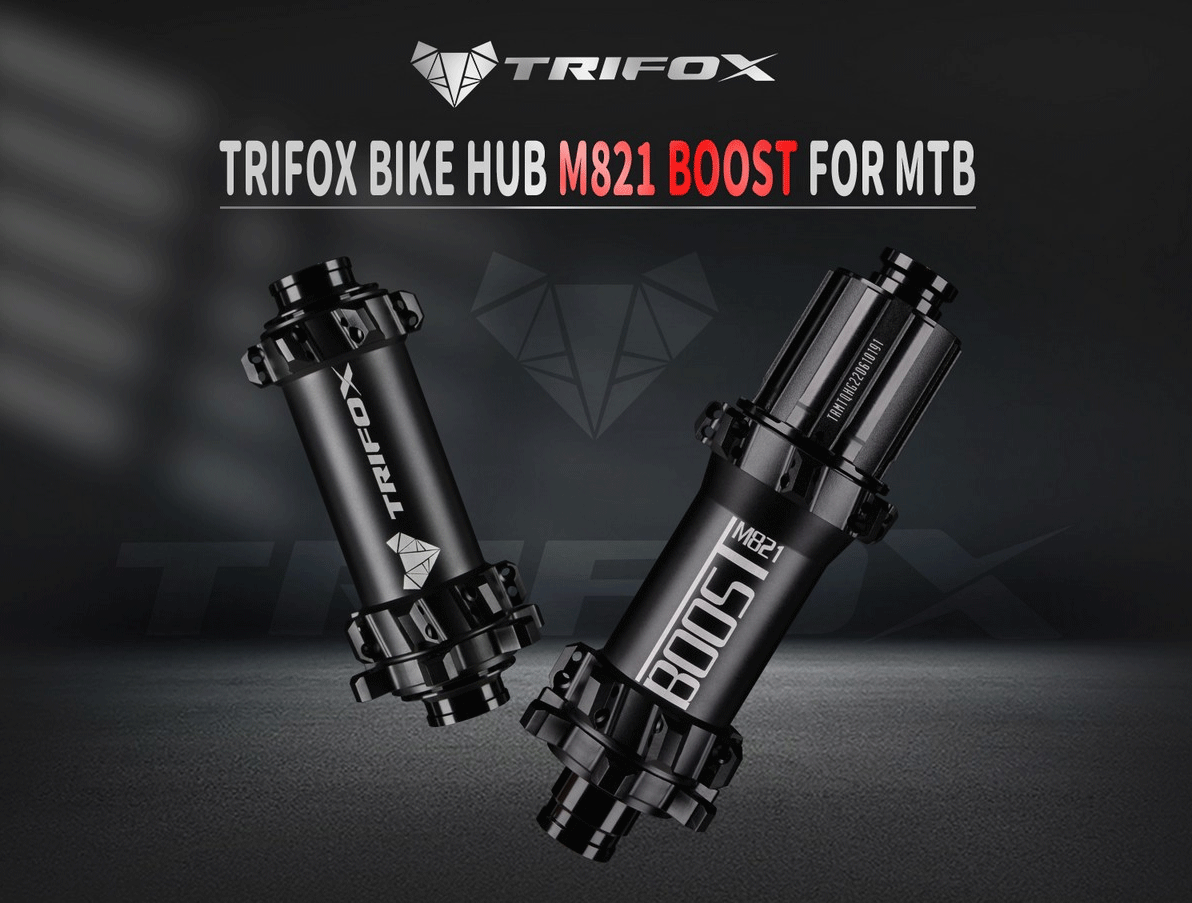
Bicycles have been a popular mode of transportation for a long time now, and their parts have been evolving too. Although quick release axles have become the norm, some riders still prefer bolt-on axles due to their strength and security. If you are one of those riders who would like to convert your bike hub to bolt-on axles, then you have come to the right place.In this post, we will discuss How to convert a hub to bolt-on axles Step 1: Remove the quick-release axle The first step in converting your bike hub to bolt-on axles is to remove the quick-release axle. Start by opening the quick release lever and unscrewing the axle counter-clockwise. Hold the nut on the opposite side with a thin wrench to prevent the axle from turning. Once the axle comes out, remove the bearings and keep them aside. Step 2: Remove the washers and cones Next, remove the washers and cones from the hub. You may need to use a cone wrench to loosen the cones. Keep the washers and cones aside. Step 3: Insert the bolt-on axles Insert the bolt-on axles into the hub and tighten them with a cone wrench. Make sure the axles are tightened evenly on both sides, so the wheel runs straight. Place one washer and cone on each axle, followed by the bearings. Push the axle through the hub and secure the other set of cone and washer. Step 4: Check the wheel alignment Check the wheel alignment by placing it on a flat surface. If the wheel wobbles or tilts to a side, you may need to adjust the cones. Loosen the axle nut on the opposite side and tighten the other side slightly until the wheel runs straight. Repeat until the wheel is perfectly aligned. Step 5: Secure the bolt-on axles Once the wheel is aligned, secure the bolt-on axles by tightening the nuts on both sides with a wrench. Make sure the nuts are tightened evenly, not too tight or too loose. You can also use a torque wrench to ensure the right amount of tightness. Conclusion: There you have it, the ultimate guide to How to convert a hub to bolt-on axles. It might seem daunting at first, but with some patience and the right tools, it's actually pretty easy. By converting to bolt-on axles, you'll have a more secure and sturdy ride. Just remember that safety is always the top priority when working on your bike, so don't hesitate to seek professional help if needed. Happy biking!
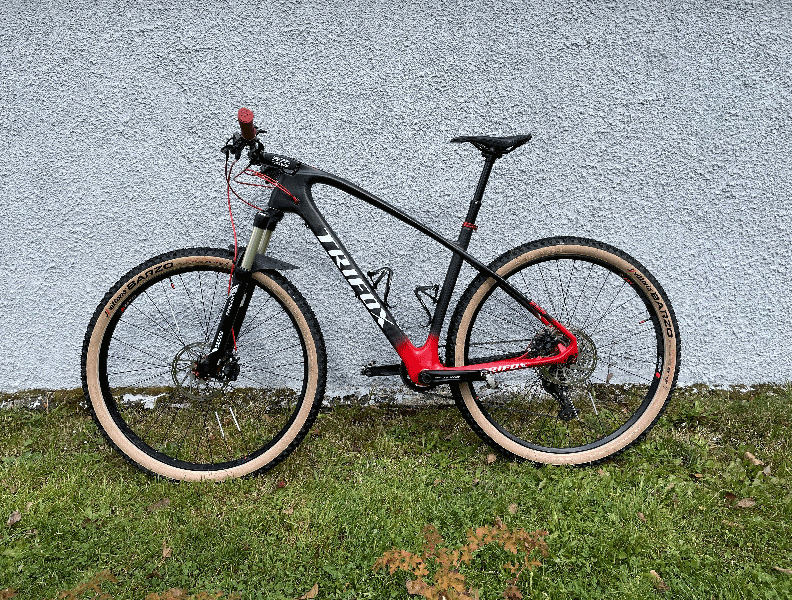
Mountain biking is an exhilarating activity that requires sturdy, reliable gear. The Carbon hardtail mountain bike frame MFM200 is an excellent option for those seeking a lightweight, durable, and versatile frame. Whether you’re a cross-country rider or an avid racer, it has all the features to provide you with an excellent riding experience. 1. Affordable Entry Point Starting cross country riding or racing can be daunting, specifically in terms of gear costs. The Carbon hardtail mountain bike frame MFM200 offers an affordable entry point for those wanting to explore the mountain riding realm. Better yet, as your skills improve, the frame provides the potential for growth, ensuring lasting value and enjoyment. 2. Lightweight and Durable Carbon MTB Frame MFM200 features a lightweight material that withstands the most intense off-road adventures. The frame’s strength is impressive, given its weight, making it the perfect companion for challenging trails. It’s light enough to provide a smooth ride, and the strength ensures it won’t break under pressure. 3. Precision and Agility The bike's 29er wheels allow for precise and agile movement, even when navigating the most intricate trails. The bike is designed to be easily controllable and the frame provides excellent support for making sharp turns and sudden stops, providing you with the ultimate riding experience. The wheels provide excellent balance and support to the bike, placing you in full control when riding. 4. Elegant Cable Routing The MFM200's elegant cable routing offers a tidy appearance, safeguards your cables, and simplifies the process of upgrading to a dropper post for enhanced functionality. The bike's design accommodates for upgrades, making it easy to change parts to increase the bike's performance. 5. Accommodates High-Quality Components The hardtail mountain bike frame MFM200 seamlessly accommodates high-quality components, such as performance wheels and a dropper post, to upgrade your riding experience. The frame allows you to exhaust countless opportunities and possibilities, making it highly customizable and perfect for mountain enthusiasts. 6. Absorbs Road Bumps The frame clearance for tires up to 2.1 inches ensures that the bike effectively absorbs road bumps, providing you with a smoother and more comfortable riding experience. This feature adds further to the bike's strength, making it an excellent choice for bumpy and challenging terrains. 7. Customizable Setup Based on your Derailleur Hanger preference, you can select either Quick Release or Thru Axle Skewers to achieve a customized setup. This customization further ensures that the bike feels like an extension of yourself, enabling you to fully realize your riding potential. Conclusion: If you’re looking for a reliable, affordable, and customizable mountain bike frame that supports your riding and racing needs, the Carbon MTB Frame 29er Hardtail MFM200 is undoubtedly the perfect option. Its lightweight and durable design, precision and agility, and customizable setup make it an ideal bike for mountain enthusiasts at all experience levels. So why wait? Invest in the Carbon MTB Frame MFM200 and experience the ultimate mountain-riding experience today!
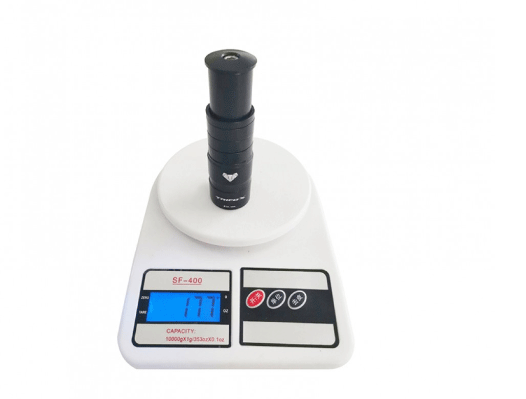
Cycling can be an incredibly enjoyable and healthy hobby, but many people struggle to get comfortable on their bike. Poor body positioning can lead to discomfort and even injury, particularly if you are cycling for long periods. If you are looking for a way to easily adjust the height of your handlebars, then an adjustable stem riser could be a great investment for you. First of all, what is an adjustable stem riser? It is essentially a mechanism that enables you to raise the height of your handlebars, allowing you to find the perfect riding position. With an adjustable stem riser, you can increase the height of your handlebars by 50mm to 85mm. This may not seem like much, but it has a considerable impact on comfort levels, particularly when it comes to long rides. The primary benefit of adjustable stem risers is their ability to improve rider comfort. By raising the height of your handlebars, you can reduce pressure on your neck, back, and wrists, which can become uncomfortable on longer rides. Additionally, an adjustable stem riser helps you to maintain a more comfortable grip on your bike, reducing the risk of hand fatigue and allowing you to enjoy the ride without discomfort. One of the best things about adjustable stem risers is the ease of installation. For example, with Trifox Alloy Bike Stem Riser SR100, installation is incredibly straightforward. First, you remove the top hex screw, then loosen the rear screws of the stem and remove it. Next, loosen the rear screw on the handlebar raiser, insert the stem raiser, and adjust the height according to the spacer you need. Then, simply install the stem, tighten the top screw, the rear screw of the stem, and the rear screws on the stem riser. Another significant benefit of adjustable stem risers is that they are suitable for a wide range of cyclists. Whether you are an experienced cyclist or just starting, an adjustable stem riser can help you find a comfortable riding position and reduce the risk of discomfort or injury. Additionally, adjustable stem risers can be used on most types of bikes, including road bikes, mountain bikes, and hybrid bikes, making them an incredibly versatile option. Conclusion: An adjustable stem riser is a low-cost, high-impact accessory that can transform your cycling experience. By raising the height of your handlebars, you can ride in comfort, which is particularly important when you are cycling long distances. Additionally, adjustable stem risers are incredibly easy to install and are suitable for a wide range of cyclists and bike models. If you are experiencing discomfort or struggling to find a comfortable riding position, then an adjustable stem riser could be just what you need to take your cycling to the next level.
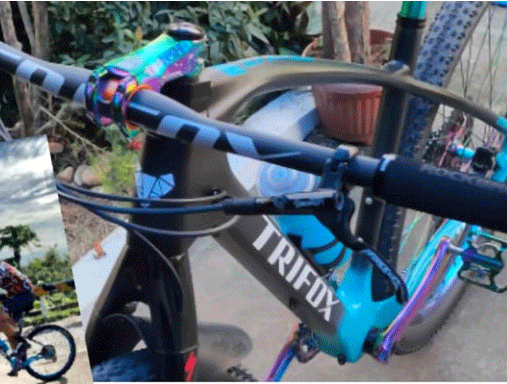
Mountain biking has gained immense popularity over time and is now considered a recreational sport globally. The equipment used for this sport has undergone considerable changes over the years. The invention of the flat bar has revolutionized the game and improved the biking experience. A flat bar provides mountain bikers with more control and better maneuverability while traversing through rugged terrain. This article provides an in-depth look at what a mountain bike flat bar is and introduces the Trifox 31.8mm Carbon Flat Bar FHB100. The Trifox 31.8mm Carbon Flat Bar FHB100 is a top-of-the-line handlebar that is known for its exceptional quality. It is made from T700 carbon fiber, which makes it incredibly strong and lightweight. The 3K matt finish provides an elegant look and is also fingerprint resistant. The bar's max length of 740mm gives the rider an extended grip, making it perfect for all types of mountain biking, including downhill and cross-country riding. The handlebar's riser bars are specifically designed for mountain bikes and provide enhanced control and comfort. The rise helps in better posture while riding, preventing fatigue and injury. Its design also allows for a comfortable grip, which keeps the rider's hands from slipping when riding over rocks or other rough surfaces. This feature enables riders to maneuver through tricky terrain with ease, making mountain biking a thrilling experience. Another significant feature of the Trifox 31.8mm Carbon Flat Bar FHB100 is its compatibility with a 31.8mm stem. This ensures that the handlebar can easily fit into most mountain bikes, making it a versatile product. The handlebar is also available in various logo colors, such as red, silver, gray, and green, providing the rider with an option to customize according to their preferences. The Trifox 31.8mm Carbon Flat Bar FHB100 is an ideal choice for mountain bikers who want to take their biking experience to the next level. The bar's build quality and ergonomic design make it an excellent investment. It's also lightweight, providing the rider with a more comfortable ride on long-distance rides. It should be noted that a flat bar is not suitable for riders who engage in aggressive downhill riding, as it is not as durable as a riser bar. Conclusion: In conclusion, mountain biking is an exciting sport that requires the right equipment to ensure a thrilling and safe experience. A flat bar is an essential component for mountain biking, providing enhanced control and better maneuverability. The Trifox 31.8mm Carbon Flat Bar FHB100 is a high-quality product that should be considered as an investment to improve a rider's mountain biking experience. Its lightweight, ergonomic design, and compatibility with most mountain bikes make it an ideal option for all types of mountain biking.
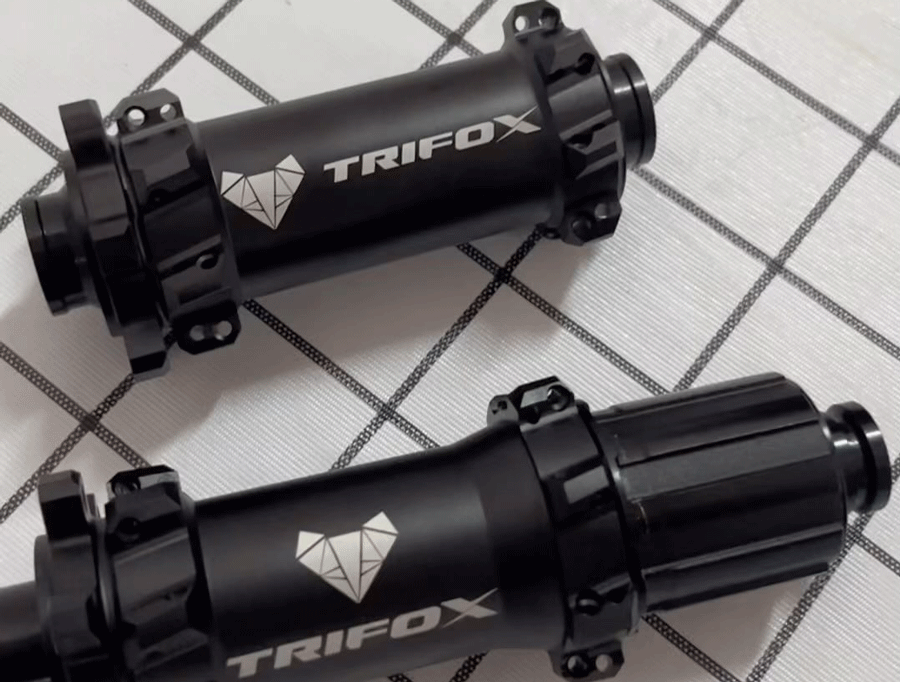
Measuring the spoke hole diameter on a hub is a crucial step in building or servicing a wheel. An accurate measurement will help you choose the right spoke and nipple size, improve wheel strength, and prevent spoke breakage. In this blog post, we will guide you on how to measure the spoke hole diameter on a hub. Step 1: Remove the rim tape and tire - Before you can start measuring, you need to remove the rim tape and tire from the rim. Flip the wheel upside down and unscrew the nipples and spokes using a spoke wrench. Be extra careful not to damage the threads. Step 2: Clean the spoke holes - Next, you need to clean the spoke holes. Use a small brush or rag to clean out any dirt or debris inside the hole to ensure accurate measurements. Make sure to remove any remaining grease if the holes were previously lubricated. Step 3: Use a spoke gauge - A spoke gauge is a handy tool that measures the diameter of the spoke holes. Insert the spoke gauge into the hole, and the gauge's end with the different diameters should sit flush with the rim's flange. The gauge's corresponding diameter will be displayed, which is the diameter of your spoke hole. Repeat this process for all the spoke holes, as they may vary in size. Step 4: Measure manually - In case you don't have a spoke gauge, don't worry, you can still measure manually. Take a digital caliper or a vernier caliper with a depth micrometer and a set of small measuring rods. Place the measuring rods one by one inside the spoke hole, and then use the depth micrometer to read the diameter. Be careful not to push the measuring rod too hard inside the hole, which can cause a false measurement. Step 5: Verify the measurements - After measuring all the spoke holes, it's essential to validate your measurements. Measure each hole's diameter at least three times to ensure accuracy and identify any inconsistencies. If the measurements vary, take the average of the measurements and use this as the base diameter. Conclusion: Measuring the spoke hole diameter is a simple yet crucial step in building or servicing a wheel. With the correct spoke and nipple size, a strong and precise wheel can be assembled. Follow these steps, and you will be able to measure your spoke holes accurately and ensure the durability and quality of your wheels.
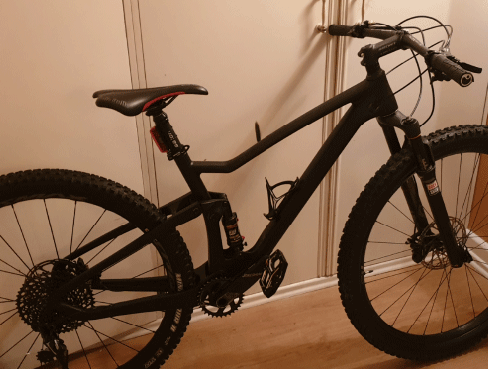
Explore Your Mountain Biking Adventures with Full Suspension MTB Frames for Sale-If you're an adrenaline junkie and love to explore the great outdoors, mountain biking is the perfect activity for you. But to truly enjoy the ride and tackle any obstacle with ease, you need the right tools. And nothing is more essential to a mountain biker than a full-suspension MTB frame. These frames offer the ideal combination of shock absorption, precision, and agility to tackle any terrain. In this blog post, we'll dive into the Trifox Full Suspension Carbon MTB Frame MFM100 - a bike that is sure to elevate your mountain biking experience to the next level. The Trifox Full Suspension Carbon MTB Frame MFM100 is designed for the ultimate off-road experience. This frame boasts a carbon build that is both strong and lightweight, ensuring every ride is efficient and fast. From tight berms to steep rocky descents, this bike instills confidence as you tackle more rugged trails, all while offering forgiveness when your chosen route isn't ideal. One of the biggest advantages of the Trifox MFM100 frame is its 29er wheels. These wheels are perfect for maneuvering the bike with ease and precision on even the most intricate and technical trails. They are designed to roll effortlessly over obstacles, providing maximum traction and control at all times. This makes the Trifox MFM100 a perfect choice for both beginners and experienced riders looking for that extra edge. With a 68.5° Head Tube Angle headset cups, the Trifox MFM100 provides the flexibility to customize your bike's geometry and fine-tune its handling according to your preferences. Whether you're looking for a more stable ride or just want to make your bike more responsive, this full suspension MTB frame has you covered. The Trifox MFM100 also features Boost technology, which includes a 148 x 12mm spacing that enables wider hub flange separation. This innovative design results in a potentially stronger and more rigid rear wheel, enhancing your bike's performance and stability on even the most challenging terrain. Lastly, the internal cable routing feature on the Trifox MFM100 provides a sleek and clean appearance for your bike, as well as improving its aerodynamics and protecting the cables from damage. With clearance for tires up to 2.35″, this bike can effectively absorb road bumps, ensuring a much smoother and more comfortable riding experience. Conclusion: When it comes time to choose your next full suspension MTB frame for sale, consider the Trifox Full Suspension Carbon MTB Frame MFM100. With its carbon build, 29er wheels, customizable geometry, Boost technology, internal cable routing, and tire clearance, it offers a perfect combination of performance, agility, and comfort. Ride with confidence knowing that this bike can handle anything you throw at it and be prepared for some serious fun and adventures on the trails. Happy riding!
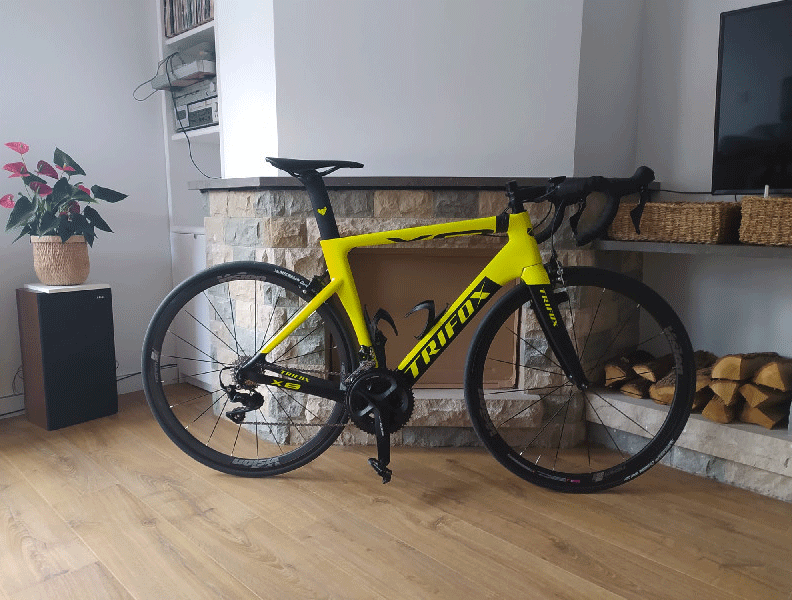
How Choosing the Right Road Bike Frame Size by Height?When it comes to choosing the right bike, there are several factors to consider, including the frame material, components, and, most importantly, the size. The size of your bike frame can significantly affect your comfort and performance while riding. One size does not fit all, and it is crucial to choose the right frame size, especially for road bikes. This blog post will guide you through how to select the best road bike frame size based on your height. 1. Why is your height essential for choosing the right bike frame size? The height of the rider determines the size of the frame that will be suitable for them. A bike that is too small or big for you can result in discomfort, making it difficult to ride efficiently and safely. A bike with the right size will allow you to pedal comfortably, take corners without sacrificing balance, and transfer power efficiently. 2. How to measure your height accurately? To determine your height accurately, you can place your back against a wall with your feet together, and your socks off. You can then use a tape measure to measure from the top of your head down to the floor. Ensure that you stand straight, as even a slouch can alter the measurements. 3. Choosing the right frame size based on your height: Based on your height, you should choose a bike frame size that corresponds to your height range. For example, if you are within the height range of 5'7" - 5'9", you should choose a frame size of 54 - 56 cm. Most bike brands have size charts that provide a different frame size range based on height. However, it is essential to note that there are slight variations in frame measurements based on bike brands. 4. Factors that affect bike frame sizing: Apart from your height, other factors can affect your bike frame sizing, including your inseam length, arm length, and flexibility. If you have a longer inseam or arms, you may need a more extended reach, which can affect the size of the bike frame you choose. Additionally, more flexible riders may choose a smaller frame size to accommodate their reach without compromising their performance. 5. The importance of trying out different frame sizes: While using a size chart can help you choose the right frame size based on your height, it is essential to try out different frame sizes to determine the best fit for you. Most bike shops allow you to test ride their bikes, so take advantage of that to find the frame size that feels comfortable for you. Also, remember that the fit is not just about the frame size, but also the handlebar and seat height adjustment. Conclusion: Choosing the right road bike frame size based on your height is critical to ensuring that you have an enjoyable and comfortable ride. When selecting the bike frame size, consider factors like your inseam length, arm length, flexibility, and most importantly, try out different frame sizes to determine your best fit. A well-fitting frame size enables you to ride efficiently, transfer power efficiently, and take corners with confidence. With the above guide, you can easily and confidently choose the right road bike frame size for your height.
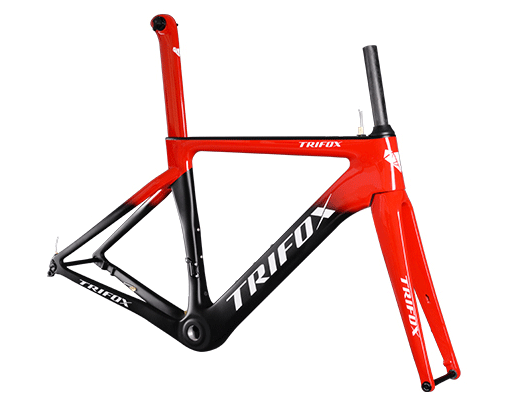
Cycling is one of the most exhilarating and physically demanding sports there is, and with the right equipment, it can be an even more enjoyable experience. If you're looking to take your cycling to the next level, investing in a high-quality road bike frame set can do wonders for your performance. One frame set that stands out is the Carbon Aero Disc Cycling Frameset X8TA, which is designed for optimum aerodynamics, comfort, and performance. In this blog post, we explore why this particular frameset is worth considering for cyclists looking to take their rides to the next level. 1. Aerodynamics The Carbon Aero Disc Cycling Frameset X8TA features aerodynamically designed T800 carbon fiber which provides excellent comfort and reduces wind resistance. With its streamlined profile, this bike can cut through the wind with ease, making it faster and easier to ride. Additionally, it comes with internal cable routing to enhance aerodynamics, further reducing the drag during cycling. 2. Versatility This frame set is perfect for various cycling activities, from extended road trips to club rides and even racing. It provides a swift and smooth riding experience, thanks to its lightweight construction and comfortable design. You'll enjoy an equally enjoyable experience across different cycling activities, making it a great option for cyclists looking for a versatile bike. 3. Compatibility Another noteworthy feature of the Carbon Aero Disc Cycling Frameset X8TA is its compatibility with both DI2 and mechanical groupsets. Whether you have a high-tech electronic drivetrain or a classic mechanical setup, this component ensures compatibility, providing smooth and efficient performance for your bike. 4. Tire Clearance The frame set comes equipped with clearance for tires up to 25C. This feature ensures that the bike can effectively absorb road bumps, providing a smoother and more comfortable riding experience. You can tackle varying terrains without worrying about jolts on your hands, making this frame set even more comfortable. 5. Precision Handling The way a bike handles can significantly impact your overall cycling performance and safety. The Carbon Aero Disc Cycling Frameset X8TA features a threaded axle that attaches the wheel to the frame or fork, providing precise alignment and improved handling. This feature enhances overall performance and safety of the bike, providing an enjoyable and confident ride on various terrains and conditions. Conclusion: Investing in the perfect bike frame set can make a significant difference in your cycling experience. The Carbon Aero Disc Cycling Frameset X8TA is an excellent choice, offering aerodynamics, compatibility, versatility, tire clearance, and precision handling. By choosing this frame set, you can unleash your cycling potential, taking your rides to the next level. So, why not give it a try?
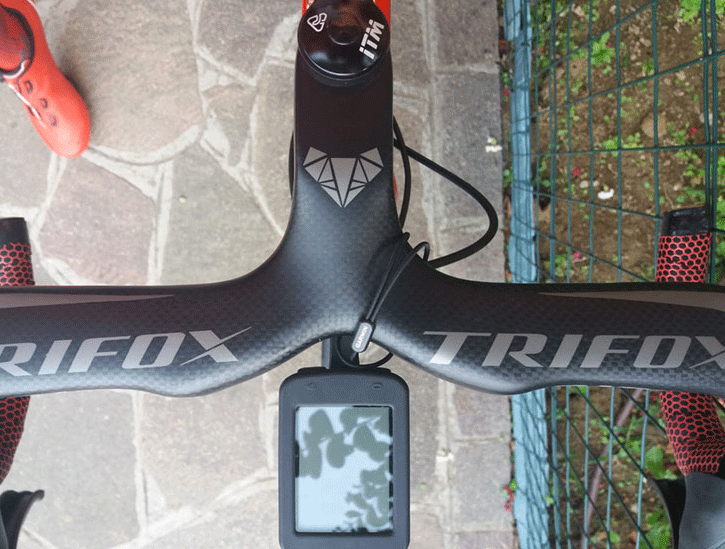
Cycling enthusiasts are constantly searching for ways to improve their speed and performance on the road. From aerodynamic helmets to high-tech cycling shoes, there are several tools out there to help both casual and competitive cyclists take their rides to the next level. One of the most crucial components to consider is the handlebar. Introducing the carbon aero handlebar - a highly effective tool to unlock speed and performance on your rides. 1. What is a Carbon Aero Handlebar? A carbon aero handlebar is a lightweight component, made from high-quality materials like carbon fiber, designed to enhance the aerodynamic capabilities of a bike. Unlike traditional handlebars that are round and tapered, aero handlebars are flat and streamlined. This design helps to reduce wind resistance and provides a smoother ride with better control. Carbon fiber is the preferred material for aero handlebars because it is lightweight, durable, and provides better shock absorption. 2. Benefits of a Carbon Aero Handlebar The benefits of a carbon aero handlebar go beyond just reducing wind resistance. They provide superior stability and control, reducing pressure on your hands and wrist when riding in a low position. Aero handlebars also provide improved grip, increasing your leverage and enhancing your overall performance. One of the biggest benefits of the carbon fiber component is weight reduction. Reduced weight allows the rider to improve their overall speed and endurance as less energy is required to pedal. With the addition of an aero handlebar, the overall weight of the bike can be significantly reduced, allowing for faster and more efficient cycling. 3. Installation and Maintenance Installations of a carbon aero handlebar can be easy or complex, depending on the type of bike and its components. It is essential to seek assistance from a professional and ensure that the handlebar is properly fitted to provide optimal performance. Proper maintenance is also crucial for longevity and performance. Carbon fiber components must be handled with care to prevent damage and should be inspected regularly for cracks or other damages that could compromise their integrity. 4. Cost Implications The cost implication of a carbon aero handlebar depends on the type, quality, and design. The carbon fiber design is more expensive than traditional handlebars, but the price is justified by the performance-enhancing benefits. It's important to determine your budget for the project while also considering the potential cost-saving benefits over time. Conclusion: In conclusion, using a carbon aero handlebar is a smart and effective way to improve your speed and performance during your rides. The high-quality components provide superior stability, control, and grip, significantly reducing pressure on your wrist and hands. It also enhances your speed and endurance, allowing you to ride longer and faster. Although they may cost more than traditional handlebars, the long-term cost-saving benefits and improved cycling experience is worth every penny. With the addition of carbon aero handlebars, you can transform any ride into a smoother, faster, and more enjoyable experience.


