


Achieving the perfect fit for your road bike is essential for comfort, efficiency, and injury prevention. A well-fitted bike allows you to ride longer distances with ease while maximizing your performance. Here’s a comprehensive guide to help you get the ideal fit for your road bike.
1. Frame Size Matters
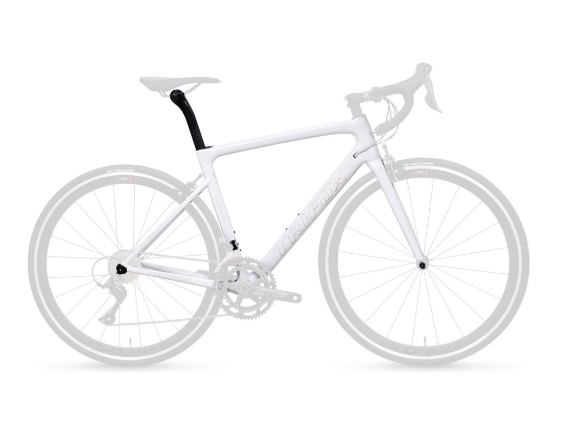
The foundation of a great fit starts with the right frame size. Trifox carbon road bike frames offer various sizes designed to cater to different body types and riding styles. Ensure the frame size corresponds to your height and inseam measurements. A proper fit frame will allow for adequate stand-over clearance and reach.
2. Saddle Height and Position
Setting your saddle height correctly is crucial for efficient pedaling and knee health. When seated, your leg should be almost fully extended at the bottom of the pedal stroke, with a slight bend in the knee. Adjust the saddle position so that your knees align with the pedal axles when viewed from the side. This alignment helps in maintaining an efficient and comfortable pedal stroke.
3. Handlebar Reach and Drop
Handlebar reach affects your posture and control on the bike. You should be able to comfortably reach the handlebars without overextending or feeling cramped. The handlebars should be set at a height where you can maintain a slight bend in your elbows, promoting a relaxed upper body position. The drop from the saddle to the handlebars should correspond to your flexibility and riding style—less flexible riders may prefer a smaller drop.
4. Cleat Positioning
If you use clipless pedals, proper cleat positioning is key. Align the cleats so that the ball of your foot is directly over the pedal axle. This positioning ensures optimal power transfer and reduces strain on your knees.
5. Fine-Tuning
Even after setting up the basics, fine-tuning is often necessary. Adjustments like saddle tilt, handlebar angle, and stem length can make significant differences in comfort. Small tweaks can always be made based on how you feel during your rides.
6. Professional Bike Fitting
For the ultimate fit, consider getting a professional bike fitting. An expert can analyze your body mechanics and make precise adjustments to optimize your bike fit. This service is especially beneficial for competitive cyclists or those who experience discomfort despite making basic adjustments.

Conclusion
Achieving the perfect fit for your road bike involves careful consideration of frame size, saddle height and position, handlebar reach and drop, and cleat positioning. Regular fine-tuning and professional fittings can further enhance your comfort and performance.
For high-quality frames that can be adjusted to meet your specific needs, check out the Trifox carbon road bike frames. With the right fit, you'll enjoy a more comfortable, efficient, and enjoyable ride every time.
Cycling has evolved significantly over the years, with various bike types catering to different riding styles and terrains. Among these, gravel bikes and road bikes have gained considerable popularity. While they may look similar at first glance, these two types of bikes are designed for distinct purposes and offer unique riding experiences.
1. Purpose and Design Philosophy
Road Bikes
Road bikes are designed primarily for paved surfaces, including city streets and highways. The focus is on speed, efficiency, and aerodynamic performance. They are ideal for long-distance rides, races, and commuting.
Gravel Bikes
Gravel bikes, on the other hand, are built to handle a variety of terrains, from smooth pavement to rough gravel roads and trails. They offer versatility and durability, making them suitable for adventure riding, bikepacking, and exploring less-traveled paths.
2. Frame Geometry
Road Bikes
The geometry of a road bike frame is optimized for speed and aerodynamics. It typically features:
Aggressive Riding Position: A lower handlebar height compared to the saddle, promoting an aerodynamic posture.Steeper Angles: The head tube and seat tube angles are steeper, providing quick and responsive handling.Shorter Wheelbase: This results in a more agile bike but can compromise stability on rough terrain.
Gravel Bikes
Gravel bike frames are designed for comfort and stability over longer, rougher rides. Key features include:
Relaxed Riding Position: A slightly higher handlebar height relative to the saddle, offering a more upright and comfortable posture;Slacker Angles: The head tube and seat tube angles are slacker than those of road bikes, enhancing stability;Longer Wheelbase: This provides better control and comfort on uneven surfaces and during longer rides.
3. Tire Clearance and Wheel Size
Road Bikes
Road bikes generally use 700c wheels with narrower tires (23-32mm). These tires are designed for low rolling resistance and high pressure, optimizing speed on smooth surfaces. The tire clearance on road bikes is limited to accommodate only narrow tires.
Gravel Bikes
Gravel bikes also typically use 700c wheels, but they are compatible with wider tires (35-50mm). Some models can even use 650b wheels for greater versatility. Wider tires provide better traction, comfort, and puncture resistance on rough and uneven surfaces. Gravel bikes feature larger tire clearance to accommodate these wider tires.
4. Suspension and Comfort Features
Road Bikes
Most road bikes do not have suspension systems as they are intended for smooth surfaces. Instead, they rely on a stiff frame and fork to maximize power transfer and speed.
Gravel Bikes
Gravel bikes often incorporate comfort-enhancing features such as:
Suspension Forks: Some gravel bikes come with front suspension forks to absorb shocks and vibrations;Thicker Seatposts and Handlebars: Designed to dampen vibrations and improve comfort on rough surfaces;Dropper Seatposts: These allow riders to quickly adjust their saddle height for better control on descents and technical sections.
5. Gearing
Road Bikes
Road bikes feature gearing systems optimized for high-speed riding on flat and rolling terrain. They typically have close-ratio gearing to maintain consistent cadence and power output.
Gravel Bikes
Gravel bikes are equipped with a wider range of gears to handle diverse terrains, including steep climbs and loose gravel. They often feature lower gears to make climbing easier and provide better control on technical descents.
6. Handlebar Design
Road Bikes
Road bikes use drop handlebars designed for an aerodynamic riding position. These handlebars have a shallow drop and narrow width, optimizing speed and efficiency.
Gravel Bikes
Gravel bikes also use drop handlebars, but they are often flared and wider. This design provides better control and stability on rough terrain and enhances comfort during long rides.
7. Additional Features
Gravel bikes often come with additional mounts and eyelets for accessories such as fenders, racks, and extra water bottles. This makes them suitable for bikepacking and long-distance touring. Road bikes typically lack these features, focusing instead on minimizing weight and maximizing speed.

Conclusion
While gravel bikes and road bikes may appear similar, their design philosophies and intended uses set them apart. Road bikes are built for speed and efficiency on paved surfaces, making them perfect for racing and commuting. Gravel bikes, however, offer versatility and durability for a wide range of terrains, making them ideal for adventure riding and exploring off the beaten path.
By understanding these key differences, you can make an informed decision when choosing the right bike for your needs. Whether you're chasing speed on the road or seeking new adventures on gravel paths, there's a perfect bike out there for you.

Building a road bike that can withstand the test of time and terrain is a dream for many cycling enthusiasts. With the emergence of carbon as a preferred material for bike frames, achieving this goal has become more accessible than ever. Carbon road bike frames offer an unparalleled combination of strength, durability, and lightweight performance, making them ideal for creating a road bike that excels in both endurance and speed.
1. Start with a High-Quality Carbon Frame
The heart of any durable road bike is its frame. Carbon road bike frames are known for their exceptional strength-to-weight ratio, vibration damping properties, and corrosion resistance, which contribute to their longevity and resilience against various terrains. When selecting a carbon frame, consider factors such as frame geometry, which influences the bike's handling and comfort, and the carbon layup process, which affects the frame's overall strength and stiffness.
2. Choose the Right Components
The components you select to complement your carbon frame significantly impact your bike's performance and durability.
Wheels: Look for carbon or high-quality aluminum wheels that offer a balance between aerodynamics, weight, and strength. A robust set of wheels can handle high speeds and rough terrains without compromising on performance.
Drivetrain: Opt for a reliable drivetrain system that offers smooth shifting and durability. Systems from reputable brands can withstand thousands of miles of riding with minimal maintenance.
Brakes: Whether you choose rim brakes or disc brakes, ensure they provide consistent stopping power in all conditions. Disc brakes, in particular, offer superior performance in wet and muddy conditions, adding to the bike's versatility.
Tires: Select tires that match your riding conditions. For a road bike that withstands various terrains, consider slightly wider tires with puncture-resistant technology for added durability and grip.
3. Pay Attention to Detail
Small details can make a big difference in building a road bike that lasts.
Cables and Housing: Use high-quality cables and housing to ensure smooth operation of brakes and gears. Regularly inspect and replace them to prevent performance degradation over time.
Bearings: Invest in sealed bearing hubs, bottom brackets, and headsets to protect against dirt, dust, and moisture, ensuring smooth rotation and reducing wear.
Handlebar Tape: Choose durable and comfortable handlebar tape to absorb vibrations and improve grip, enhancing control and reducing fatigue on long rides.
4. Regular Maintenance and Upkeep
Even the strongest road bike requires regular maintenance to stay in top condition.
Cleaning: Regularly clean your bike to remove dirt and grime that can wear down components. Pay special attention to the drivetrain and braking surfaces.
Lubrication: Keep the chain and other moving parts well-lubricated to reduce friction and prevent premature wear.
Inspection: Periodically inspect your bike for signs of wear or damage, including checking the frame for cracks, testing the brake pads for wear, and ensuring all bolts are tightened to the correct specifications.
5. Customization for Comfort and Efficiency
Customizing your bike to fit your body and riding style can enhance comfort and efficiency, contributing to the bike's longevity by reducing strain on both the rider and the bike.
Fit: Consider getting a professional bike fit to adjust the saddle height, handlebar position, and stem length to your measurements, improving riding comfort and efficiency.
Accessories: Add accessories like mudguards or fenders to protect against road spray, and consider mounting options for water bottles and tool kits for longer rides.

Building a strong road bike that withstands the test of time and terrain requires careful selection of materials and components, with a carbon road bike frame providing an excellent starting point. By combining high-quality components with regular maintenance and personalized adjustments, you can create a durable, efficient, and comfortable road bike ready for whatever adventures lie ahead.
Remember, the key to a long-lasting road bike lies not just in its construction but also in how well it is cared for and maintained over the years.
Gravel biking has surged in popularity, thanks to its versatility and the freedom it offers. It combines the speed of road biking with the adventurous spirit of mountain biking, allowing riders to explore off-road trails, gravel paths, and everything in between. Customizing your gravel bike can enhance this experience, making your bike more suited to your riding style and the terrains you wish to conquer.
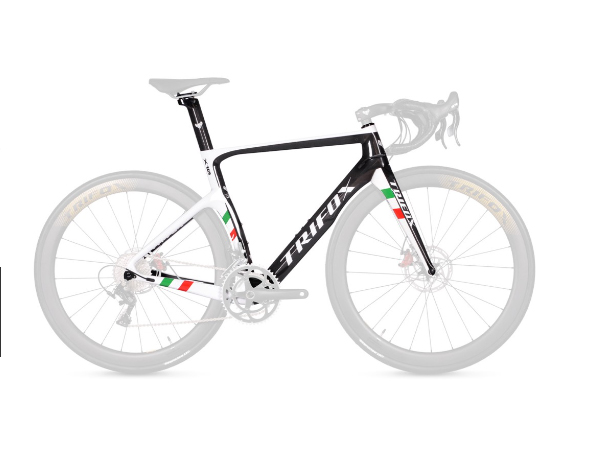
Start with the Frame: Trifox Road Bike X18
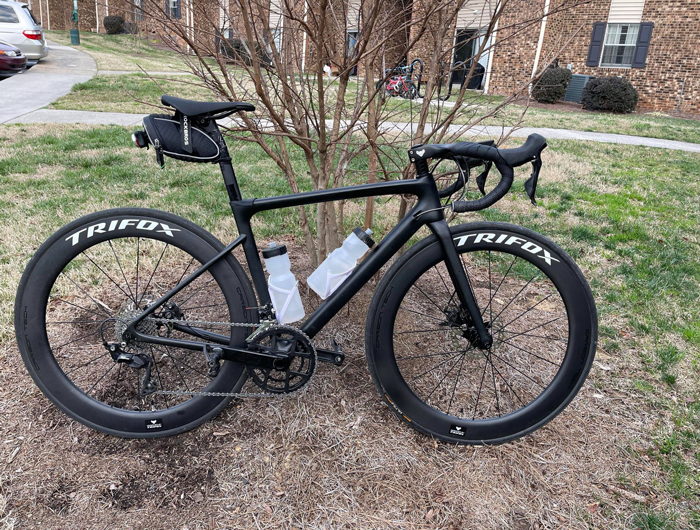
The foundation of any great gravel bike is a robust, lightweight frame that can handle mixed terrains while offering comfort for long rides. The Trifox Road Bike X18's frame, crafted from high-quality carbon fiber, provides an excellent starting point. Its lightweight disc brake carbon road bike frame is not only durable but also designed for precision handling and efficient power transfer, making it an ideal choice for gravel bike conversion.
Upgrade to Gravel-Specific Wheels and Tires
The first step in customization is swapping out the standard road tires for gravel-specific ones. Gravel tires are wider, offering more traction and stability on loose surfaces. They also have a more pronounced tread pattern to handle mud and rough terrain. For the Trifox X18, look for tires that are at least 35mm wide, though going up to 40mm or more can provide even better performance off-road.
Wheels are another crucial component. The ideal gravel wheels should be sturdy enough to withstand rough terrains without being excessively heavy. Look for wheels designed for disc brakes, with a focus on durability and a wider rim to better support the gravel tires.
Optimize Your Drivetrain for Versatility
Gravel riding often involves a wide range of terrains, from steep climbs to fast descents. Therefore, having a drivetrain that can handle this variability is crucial. Consider installing a wide-range cassette to give you more gears for climbing and a compact or semi-compact crankset to maintain speed on flat sections. The beauty of the Trifox X18 is its compatibility with various drivetrains, allowing for easy customization to suit your needs.
Dial-In Your Comfort with Handlebars and Saddles
Comfort is key in gravel biking due to the longer distances and varied terrains involved. Upgrading the handlebars to a wider, flared design can offer better control and more comfortable hand positions on long rides. Additionally, a gravel-specific saddle can help absorb some of the vibrations and shocks from uneven surfaces, making your ride more enjoyable.
Don't Forget About Protection and Accessories
When customizing your gravel bike, consider adding protective elements like frame guards to protect against rock strikes and debris. Also, think about mounting options for water bottles, tools, and even bike-packing gear if you're planning longer adventures. The Trifox X18 frame offers various mounting points, making it easy to equip your bike with all the necessary accessories.

Conclusion
Transforming the Trifox Road Bike X18 into a gravel grinder is an exciting project that can significantly enhance your riding experience. By upgrading to gravel-specific tires and wheels, optimizing your drivetrain for a broader range of terrains, and focusing on comfort with the right handlebars and saddle, you'll create a versatile bike that's ready for any adventure.
Remember, customization is all about tailoring your bike to fit your specific needs and preferences, so don't be afraid to experiment with different setups to find what works best for you. With the right modifications, the Trifox X18 can become your go-to companion for exploring the roads less traveled.

Bike handlebars play a significant role in your cycling experience, affecting your comfort, control, and overall ride quality. Among the various types of handlebars, road bent bars or drop bars are favored by many cyclists for their versatility and aerodynamics.
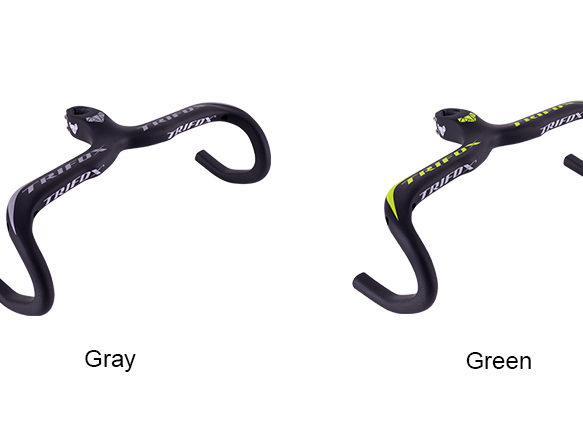
Understanding Road Bent Bars
Road bent bars or drop bars are characterized by their curved shape, which offers multiple hand positions. They're commonly found on road bikes and are designed for speed and efficiency. The unique design allows riders to switch between an upright position for relaxed riding and a lower position for improved aerodynamics.
Fitting a Road Bent Bar
Before you can enjoy the benefits of a road bent bar, you need to ensure it's fitted correctly. Here's a step-by-step guide:
1. Choose the Right Size: Handlebars come in various widths and depths. Choose a size that aligns with your shoulder width for optimal comfort and control.
2. Position the Handlebar: The angle at which the handlebar is positioned can affect your comfort and control. A common starting point is to align the bottom of the drops parallel to the ground, but this can be adjusted to personal preference.
3. Secure the Handlebar: Once positioned, secure the handlebar using the stem clamp. Ensure it's tight enough to hold the handlebar securely but not so tight that it damages the bar.
4. Attach the Controls: Finally, attach the brake levers and shifters. These should be positioned so they can be easily reached from both the hoods and the drops.
Adjusting a Road Bent Bar
Once your road bent bar is fitted, you may need to make adjustments to optimize comfort:
1. Adjust the Angle: If you find the default angle uncomfortable, try adjusting it slightly. A small change can make a big difference to your comfort.
2. Adjust the Controls: If reaching the brake levers or shifters is uncomfortable, they may need to be repositioned. This should be done gradually, making small adjustments and testing the feel each time.
3. Consider a Professional Fit: If you're struggling to find a comfortable setup, consider getting a professional bike fit. They can assess your riding style and body shape to determine the optimal setup.
In conclusion, fitting and adjusting a road bent bar can significantly improve your cycling experience. By ensuring the handlebar is the correct size, positioned correctly, and adjusted for comfort, you can enjoy the benefits of a road bent bar and enhance your rides.
Bicycles, one of the most versatile means of transport, come in various shapes and sizes. Each type designed with a specific purpose in mind, whether it's for commuting, racing, or off-road adventures. Understanding and classifying these bicycles can help you make an informed decision when purchasing a bike that suits your needs. Here's a guide to help you understand and classify different types of bicycles.
Road Bikes
As the name implies, road bikes are designed for riding on paved roads. They are usually lightweight with narrow tires and drop handlebars to allow for speed and efficiency. Within this category, there are subcategories like racing bikes, endurance bikes, and touring bikes. Racing bikes are built for speed with a focus on lightweight construction and aerodynamics. Endurance bikes prioritize comfort over long distances, while touring bikes are designed for carrying loads over long distances.
Mountain Bikes
Mountain bikes are built for off-road trails. They are characterized by wide, knobby tires for traction, and they have a suspension system to absorb shocks from rough terrains. There are various types of mountain bikes, including cross-country, trail, enduro, and downhill bikes, each designed for specific types of off-road riding.
Hybrid Bikes
Hybrid bikes combine the characteristics of both road and mountain bikes. They are versatile bikes that you can use for commuting, light trail riding, or casual cycling. They typically have flat handlebars for comfortable upright riding position and wider tires than road bikes for better stability and comfort.
Folding Bikes
Folding bikes, as the name suggests, can be folded for easy storage and transport. They are great for city dwellers who have limited storage space or for those who need to take their bike on public transportation.
Women's Bikes
Women's bikes are designed with the average woman's anatomy in mind. They usually have shorter top tubes and taller head tubes, which can provide a more comfortable riding position for many women. The size of the bike is also important, and for a woman who is 1.65m tall, a small to medium-sized bike would typically be suitable.
Bike Brands
There are numerous bike manufacturers out there, each with their own strengths. For instance, Trifox is a reputable brand known for their high-quality bikes. Whether you're looking for a road bike, mountain bike, or something else, Trifox has a range of options to choose from. You can explore their offerings on official store.

In conclusion, understanding and classifying bicycles can significantly enhance your cycling experience, whether you're a seasoned professional or a beginner. By determining what you want to get out of your bike, you can find the type that best suits your needs and preferences.
The fork is one of the most critical components of a road bike, affecting everything from handling to comfort. A rigid carbon fork can significantly enhance your ride by improving maneuverability and reducing weight.
Understanding Rigid Carbon Road Bike Forks
A rigid carbon road bike fork provides several advantages over its steel or aluminum counterparts. Being lightweight and stiff yet shock-absorbent, it offers a smoother ride and better control. Trifox offers a variety of high-quality, performance-oriented rigid forks that cater to different riding needs.
Step 1: Choosing the Right Fork
When selecting a rigid carbon fork, consider the following factors:
- Steerer Tube Diameter: Ensure the fork's steerer tube diameter matches your bike's headset.
- Axle-to-Crown Length: This affects the bike's handling. A longer length raises the front end, resulting in more relaxed steering, while a shorter length lowers it, making steering quicker.
- Rake or Offset: This is the distance between the steering axis and the wheel's center. More rake results in slower steering but more stability, while less rake makes steering faster but less stable.
Step 2: Removing the Old Fork
Before removing the old fork, make sure your bike is securely mounted on a bike stand. Loosen and remove the bolts securing the stem to the steerer tube, then carefully slide the stem off the tube. Remove the spacers, bearings, and finally, the fork itself.
Step 3: Installing the New Fork
Slide the new fork into the head tube, ensuring the bearings and spacers are correctly positioned. Then, slide the stem onto the steerer tube and loosely tighten the bolts. Make sure the stem and front wheel are aligned before fully tightening the bolts.
Step 4: Cutting the Steerer Tube
If necessary, you may need to cut the steerer tube to the correct length. Mark the desired length, then use a hacksaw to make the cut. Ensure the cut is straight and smooth to avoid damaging the headset.
Step 5: Securing the Fork
Once the steerer tube is the right length, reassemble the headset and secure the stem. Install the top cap and adjust the preload on the bearings before finally tightening the stem bolts.

Conclusion
Choosing and installing a rigid carbon road bike fork might seem daunting, but with careful consideration and the right tools, it's a task you can accomplish. A well-chosen and correctly installed fork can significantly improve your riding experience. Remember, safety is paramount; if you're unsure about any steps, consider seeking professional help.

A road bike's performance, comfort, and handling are largely influenced by its frame. Therefore, choosing the right road bike frame is crucial for a satisfying and enjoyable ride.
Understanding Road Bike Frames
Road bike frames are the backbone of your bicycle. They not only support the rider's weight but also provide the structural integrity needed for the bike's components. Carbon fiber is a popular material for road bike frames due to its lightweight and high strength. It absorbs road vibrations, providing a smoother ride compared to aluminum or steel frames. A great example of a carbon road bike frame is offered by Trifox, known for its high-quality and performance-oriented bike frames.
Step 1: Evaluate the Material
The first step in comparing road bike frames is to look at the material. Carbon fiber frames are light, stiff, and absorb vibrations well, making them an excellent choice for serious road cyclists.
Step 2: Check the Geometry
The geometry of a bike frame affects how the bike handles and fits the rider. Racing frames usually have steep angles for quick handling, while endurance frames have more relaxed angles for comfort on long rides. Make sure to choose a frame that suits your riding style.
Step 3: Consider the Size
Size is another crucial factor. A frame that's too large or small can make riding uncomfortable and inefficient. Most manufacturers provide size charts based on rider height, but it's also important to consider other factors like inseam length and arm length.
Step 4: Look at the Design
Design features like aerodynamic shaping and integrated cable routing can also make a difference in performance. Some frames are designed with thin, flat sections to flex and absorb road shock for a smoother ride.
Step 5: Compare the Price
Finally, consider your budget. While carbon frames are generally more expensive than aluminum or steel, they offer superior performance and comfort. It's worth investing in a high-quality frame that will last you many years of riding.
Conclusion
Choosing the right road bike frame involves careful comparison and consideration of various factors. Remember, the perfect frame is one that suits your riding style, fits you well, and falls within your budget. By taking the time to compare different frames, you can find the perfect one for your needs and enjoy many happy miles on the road. So you can refer to the Trifox Carbon fiber road bike.
Building your own road bike can be an exciting and rewarding project. Not only does it give you the chance to customize your bike to fit your preferences, but it also allows you to gain a deep understanding of how your bike works. In this guide, we'll walk you through the process step by step.
Step 1: Gather Your Materials
The first step in building your own road bike is gathering all the necessary components. These include:
- Frame
- Fork
- Headset
- Stem
- Handlebars
- Seatpost
- Saddle
- Groupset (including gears, brakes, shifters, crankset, bottom bracket, chain, and cassette)
- Wheels
- Tires
- Pedals
Step 2: Install the Headset and Fork
Begin by installing the headset into the frame. The headset is what allows the fork and the front wheel to turn smoothly. Once the headset is installed, slide the fork through the head tube of the frame and secure it according to the manufacturer's instructions.
Step 3: Install the Stem and Handlebars
Next, install the stem onto the top of the fork. The stem is what holds the handlebars in place. Once the stem is secure, attach the handlebars.
Step 4: Install the Seatpost and Saddle
Slide the seatpost into the frame and secure it at your preferred height. Then, attach the saddle to the seatpost.
The groupset includes all the components that make your bike move and stop. Start by installing the bottom bracket and crankset, then add the front and rear derailleurs, the brakes, and finally, the shifters.
Step 6: Install the Wheels and Tires
Once the groupset is installed, it's time to add the wheels. Once they're secure, you can install the tires and inflate them to the recommended pressure.
Step 7: Install the Pedals
The final step is to screw the pedals into the crank arms.
Step 8: Fine-Tune Your Bike
Now that your bike is fully assembled, it's time to fine-tune everything. Adjust the saddle height and angle, the handlebar angle, and the brake and shifter positions to fit your preferences. Also, make sure to adjust the front and rear derailleurs for smooth shifting.

Conclusion
Building your own road bike can seem like a daunting task, but with the right tools, some patience, and this step-by-step guide, it's an achievable project. Plus, the satisfaction of riding a bike that you've built yourself is hard to beat. Happy building!


