


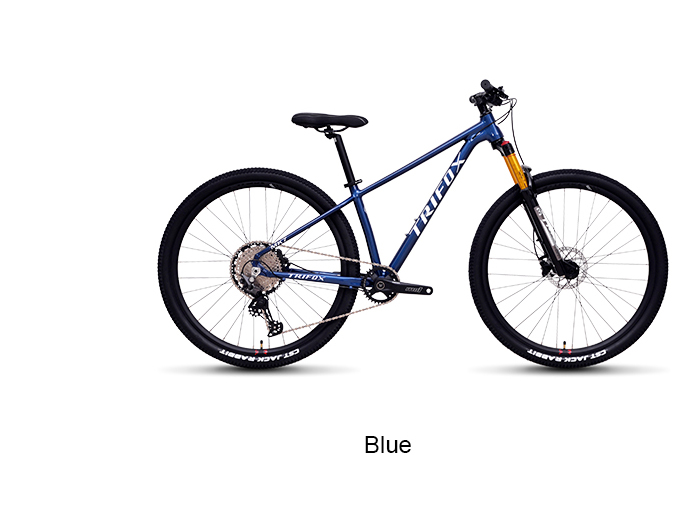
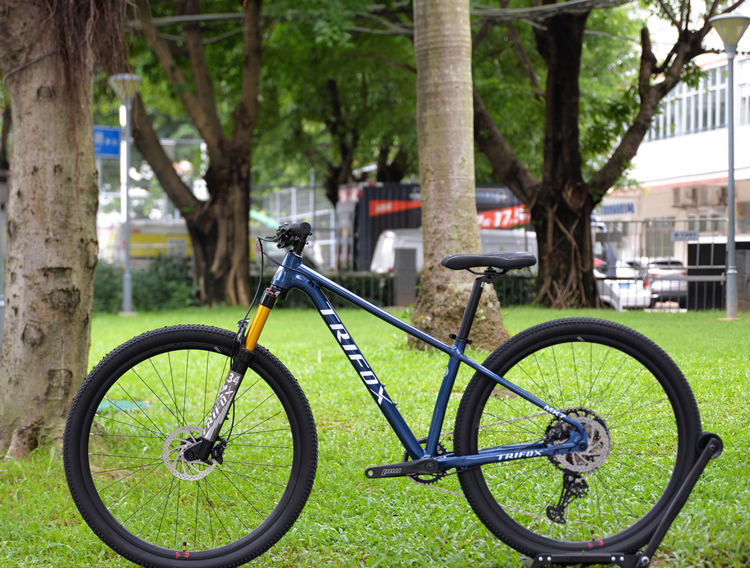
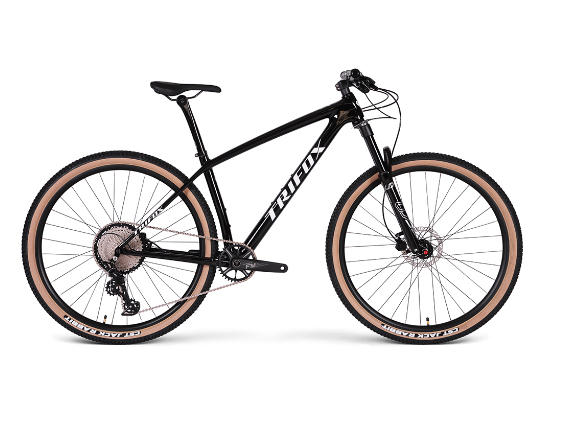
Choosing the right hardtail mountain bike (MTB) frame is crucial for optimizing your trail riding experience. A hardtail frame, which lacks rear suspension, offers a lightweight and efficient ride ideal for various terrains. Here's a guide on how to select and install a hardtail MTB frame, using the Trifox Carbon MTB Hardtail Frame MFM200 as an example.
Selecting the Right Frame
1. Material
The material of your frame affects weight, strength, and ride quality. The Trifox MFM200 is crafted from carbon fiber, known for its superior strength-to-weight ratio, providing excellent durability without compromising on performance.
2. Geometry
Frame geometry influences handling and comfort. Look for a frame like the MFM200 with a balanced geometry that offers stability on descents and agility on climbs.
3. Compatibility
Ensure the frame is compatible with your current components or any new ones you plan to install. Check for compatibility with wheel size, fork travel, and bottom bracket type.
Installing the Frame
1. Prepare Your Components
Gather all necessary components: fork, headset, bottom bracket, drivetrain, brakes, and wheels. Ensure they are clean and in good condition.
2. Install the Headset and Fork
Begin by installing the headset into the frame’s head tube, followed by the fork. Make sure these components are securely fitted.
3. Bottom Bracket and Crankset
Install the bottom bracket according to the manufacturer's specifications, then attach the crankset.
4. Drivetrain Setup
Mount the front and rear derailleurs, chain, and cassette. Adjust the derailleurs for smooth shifting.
5. Brakes and Wheels
Attach the brake calipers to the frame and install the wheels. Align the brake rotors with the calipers and ensure everything is properly tightened.
6. Final Adjustments
Check all components for tightness and alignment. Adjust the seat post, saddle, and handlebars to your preferred riding position.

By selecting a high-quality frame like the Trifox Carbon MTB Hardtail Frame MFM200 and following these installation steps, you'll be well on your way to enjoying optimal performance on the trails.

Choosing the best alloy frame for your bike is a crucial step in ensuring a comfortable and efficient ride. alloy frames, typically made from aluminum, offer a balance of strength, lightweight, and affordability.
First, consider your riding style. Are you an avid mountain biker, a road cyclist, or a commuter? Each discipline has specific requirements that an alloy frame can address. For mountain biking, durability and shock absorption are key. The [Trifox Aluminum Mountain Bikes]offer robust construction ideal for rugged terrains. On the other hand, road cyclists might prioritize lightweight and aerodynamics, which aluminum frames also cater to effectively.
Next, think about the frame geometry. The shape and angles of the frame can affect your riding posture and comfort. Mountain bikes generally have a more relaxed geometry, providing better control on rough trails. Road bikes feature a more aerodynamic geometry, placing the rider in a forward-leaning position for speed efficiency.
Another essential factor is the frame size. An incorrectly sized frame can lead to discomfort and potential injury. Measure your inseam and use sizing charts provided by manufacturers like Trifox to find the right fit. Most brands provide detailed guides to help you choose the correct frame size based on your height and riding style.
Additionally, check the weight of the frame. One of the advantages of alloy frames is their lighter weight compared to steel. This makes them easier to handle and maneuver, especially during climbs. However, ensure that the reduced weight doesn't compromise the frame's strength and durability.
Lastly, consider your budget. Alloy frames are generally more affordable than carbon fiber, making them an excellent choice for those looking for quality without breaking the bank. The [Trifox Aluminum Mountain Bikes]offer various options that combine performance and value.

In conclusion, choosing the best alloy frame for your bike involves understanding your riding needs, selecting the right geometry and size, considering the weight, and staying within your budget. With the right frame, you can enhance your riding experience, whether on rugged trails or smooth roads. Happy cycling!
Conquering mountain trails demands not only skill but also the right equipment. The Trifox PeakTrail Xtreme bike, with its top-tier components and design, is engineered to help you tackle the roughest terrains with confidence and style. Here's how you can master mountain trails with this exceptional bike.
1. Understand Your Equipment
The PeakTrail Xtreme bike features a TRIFOX suspension fork, which plays a crucial role in handling the various obstacles you'll encounter on the trail. Its butted aluminum frame, combined with hydroformed top and downtubes, offers both durability and a sleek appearance. This frame is designed for higher deformation resistance and tensile strength, ensuring reliability on challenging terrains.
2. Optimize Your Gear Shifting
Equipped with the SHIMANO DEORE M6100 12-speed Groupset, the PeakTrail Xtreme provides a wide range of gears to handle steep climbs and fast descents efficiently. Knowing when and how to shift gears can significantly impact your ride. Practice smooth transitions between gears to maintain momentum and avoid unnecessary strain on your bike’s components.
3. Leverage the 1x Drivetrain
The 1x Shimano drivetrain on the PeakTrail Xtreme simplifies gear shifting and reduces the chances of chain drops, allowing you to focus more on the trail ahead rather than managing multiple gears. This simplicity doesn’t compromise performance but rather enhances reliability and ease of use, especially useful in technical sections.
4. Utilize the Lightweight Design
One of the standout features of the PeakTrail Xtreme is its lightweight construction, which allows for faster acceleration and easier maneuverability. This is particularly advantageous when navigating sharp turns or climbing steep inclines. Use this to your advantage by practicing quick sprints and agile movements.
5. Regular Maintenance
Maintaining your PeakTrail Xtreme bike is essential for optimal performance. Regularly check the suspension fork, drivetrain, and brakes. Proper maintenance ensures that your bike remains reliable and ready for any trail.
6. Benefits Beyond the Bike
When you purchase the PeakTrail Xtreme bike, Trifox offers top-quality items, 24/7 live chat support, fast and reliable delivery options, and secure payment methods. These additional benefits ensure a seamless purchasing experience, allowing you to focus on enjoying your ride.
Mastering mountain trails requires both skill and the right bike. The PeakTrail Xtreme, with its robust features and performance-oriented design, is your ideal partner for any mountain adventure. Start exploring with confidence and elevate your riding experience today.
Learn more and get your PeakTrail Xtreme bike here.


Building a carbon bike from scratch can be a rewarding experience that allows you to customize every component to your liking. Here's a step-by-step guide to help you build, adjust, and maintain your carbon bike.
Building Your Carbon Bike
1. Gather Your Components
Frame: Start with a high-quality carbon frame.
Groupset: Choose a groupset (gears, derailleurs, brakes) that fits your riding style.
Wheels: Opt for lightweight, durable wheels.
Handlebars, Saddle, and Seatpost: Select components that offer comfort and performance.
2. Assembly
1. Install the Bottom Bracket: Use a torque wrench to ensure proper tightness.
2. Attach the Crankset: Align it with the bottom bracket.
3. Mount the Derailleurs: Attach the front and rear derailleurs.
4. Install the Chain: Thread it through the derailleur and crankset.
5. Attach the Wheels: Secure them to the frame.
6. Install the Handlebars and Saddle: Ensure they are comfortable and correctly aligned.
Adjusting Your Carbon Bike
1. Saddle Height: Adjust the saddle height so your leg is nearly straight at the bottom of the pedal stroke.
2. Handlebar Position: Adjust the handlebars for a comfortable reach and angle.
3. Derailleur Tuning: Fine-tune the derailleurs for smooth shifting.
4. Brake Adjustment: Ensure the brakes are centered and provide adequate stopping power.
Maintaining Your Carbon Bike
1. Regular Cleaning: Wipe down the frame and components after each ride.
2. Inspect for Damage: Regularly check for cracks or chips in the carbon fiber.
3. Lubricate the Chain: Apply lubricant to keep the chain running smoothly.
4. Check Bolts: Periodically check all bolts with a torque wrench to ensure they are properly tightened.
5. Wheel Maintenance: Check for true wheels and adjust spokes if necessary.
By following these steps, you’ll ensure your carbon bike remains in peak condition, providing you with an excellent riding experience. Happy cycling!
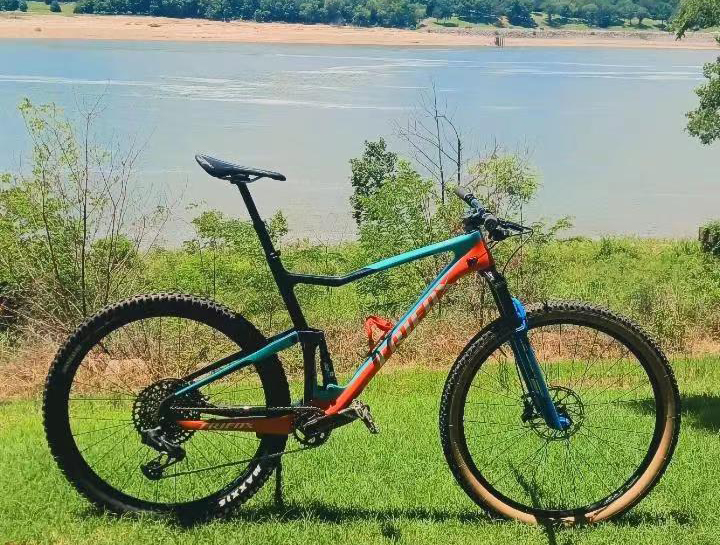
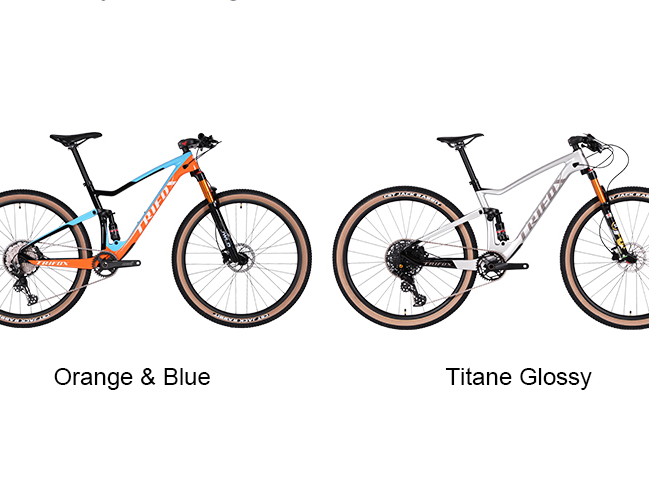
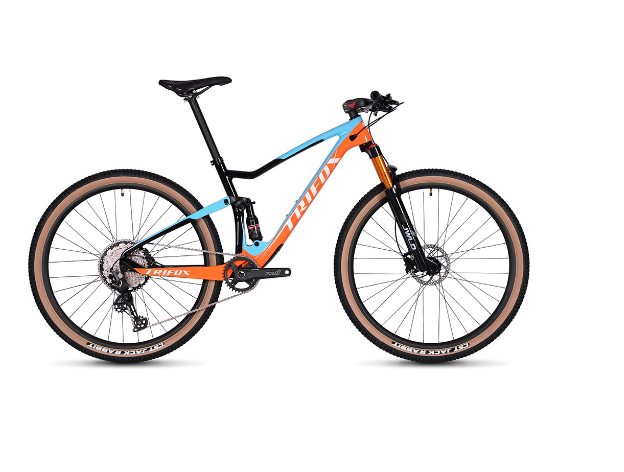
Setting up and adjusting a double suspension frame, such as the Trifox MFM100 Full Suspension Carbon MTB Frame, can significantly enhance your mountain biking experience. A well-tuned suspension system ensures better control, improved traction, and a more comfortable ride over rough terrain.
Understanding Double Suspension
Double suspension, or full suspension, refers to a bike that has both front and rear shock absorbers. This system helps absorb impacts from rough trails, allowing for a smoother ride and better handling. The Trifox MFM100, with its carbon construction, offers a lightweight yet durable option for serious riders.
Tools and Materials Needed
Shock Pump: For adjusting air pressure in the suspension.Allen Wrench Set: For making adjustments.Torque Wrench: For precise tightening.Sag Setup Tool (optional): For setting correct sag.Lubricant: For maintaining smooth operation.
Step-by-Step Setup and Adjustment Guide
Step 1: Install the Frame
If you haven't already installed your double suspension frame, follow these steps:
Install Headset and Fork: Begin by installing the headset and fork according to the manufacturer's instructions.Attach Rear Shock: Securely attach the rear shock to the frame using the provided hardware. Ensure bolts are torqued to the manufacturer's specifications.
Step 2: Setting the Sag
Sag is the amount of suspension travel used when you’re sitting on the bike in a neutral position. Proper sag setup is crucial for optimal performance.
Measure Sag: Ideally, sag should be around 25-30% of the total travel for both front and rear suspension.Adjust Air Pressure: Use a shock pump to add or release air from the front fork and rear shock until the desired sag is achieved. Most shocks have a recommended pressure range based on rider weight.
Step 3: Adjusting Rebound and Compression
Rebound and compression adjustments control how quickly the suspension returns to its original position after compression and how it handles impacts, respectively.
Rebound Adjustment: Locate the rebound adjustment knob, usually marked with a '+' and '-'. Start by setting it to the midpoint. Test the bike and adjust to your preference—slower rebound for rougher terrain, faster for smoother trails;Compression Adjustment: If your suspension has compression adjustment, start at the recommended factory setting. Adjust accordingly based on trail conditions and personal preference. More compression for smoother trails and less for rough, technical terrain.
Step 4: Fine-Tuning
Test Ride: Take your bike for a short ride over varied terrain. Pay attention to how the suspension feels and make note of any adjustments needed;Adjust as Needed: Based on your test ride, fine-tune the sag, rebound, and compression settings. Small adjustments can make a significant difference in performance.
Step 5: Maintenance Tips
Proper maintenance is essential for keeping your double suspension frame performing at its best.
Regular Cleaning: Clean the frame and suspension components regularly to prevent dirt and grime buildup;Inspect for Wear: Check for any signs of wear or damage, particularly on the stanchions and seals;Lubricate: Apply appropriate lubricant to moving parts as per manufacturer’s recommendations.

Conclusion
Setting up and adjusting a double suspension frame like the Trifox MFM100 Full Suspension Carbon MTB Frame can dramatically improve your riding experience. By carefully following the steps for installing, setting sag, adjusting rebound and compression, and maintaining your bike, you’ll enjoy a smoother, more controlled ride.
Whether you're tackling technical descents or cruising over rocky trails, a well-tuned suspension system ensures maximum performance and comfort. Happy riding!

Selecting the perfect racing bike frame is a crucial step toward optimizing your cycling performance. The frame is the backbone of your bike, influencing everything from weight and aerodynamics to comfort and handling. With numerous options available, making the right choice can be daunting.
1. Material Matters
The material of the bike frame significantly affects its performance characteristics. Here are the most common materials used in racing bike frames:
Carbon Fiber
Carbon fiber is the material of choice for high-performance racing bikes. It offers an excellent strength-to-weight ratio, meaning it is both lightweight and incredibly stiff. This stiffness ensures efficient power transfer from the pedals to the wheels, enhancing speed. Additionally, carbon fiber can be molded into aerodynamic shapes, further reducing drag.
Aluminum
Aluminum frames are known for their affordability and durability. While not as light or stiff as carbon fiber, modern aluminum frames can still provide excellent performance. They are more resistant to impact damage, making them a good option for riders who prioritize robustness.
Titanium
Titanium frames combine the best qualities of aluminum and steel. They are lightweight, corrosion-resistant, and offer a smooth ride due to their natural flex. However, titanium frames are typically more expensive, making them a premium choice for serious cyclists.
Steel
Steel frames are less common in racing due to their heavier weight. However, they offer unmatched durability and a comfortable ride, absorbing road vibrations effectively. Steel frames are often favored for long-distance touring rather than competitive racing.
2. Frame Geometry
The geometry of the bike frame influences how the bike handles and fits the rider. Key geometric aspects to consider include:
Top Tube Length
The top tube length affects the reach to the handlebars. A longer top tube provides a more stretched-out, aerodynamic position, while a shorter top tube offers a more upright, comfortable posture.
Head Tube Angle
A steeper head tube angle (73 degrees or more) results in quicker, more responsive steering, ideal for racing. A slacker angle provides more stability, which can be beneficial for endurance rides.
Seat Tube Angle
The seat tube angle determines the position of the saddle relative to the bottom bracket. A steeper angle (73-75 degrees) supports a forward, aggressive riding position, optimizing power output and aerodynamics.
Bottom Bracket Height
A lower bottom bracket enhances stability, especially at high speeds and during cornering, while a higher bottom bracket provides better ground clearance for rough terrains.
3. Aerodynamics
Aerodynamics play a critical role in racing performance. An aerodynamically optimized frame reduces air resistance, allowing you to maintain higher speeds with less effort. Features to look for include:
Narrower Tubing: Slender frame tubes reduce aerodynamic drag.Integrated Cables: Internal cable routing minimizes turbulence.Optimized Frame Shapes: Frames with teardrop or Kamm tail profiles cut through the air more efficiently.
4. Weight Considerations
A lighter frame allows for faster acceleration and easier climbing. Carbon fiber frames excel in this regard, with some high-end models weighing as little as 700 grams. When choosing a frame, balance weight savings with other performance factors like stiffness and durability.
5. Comfort and Compliance
Comfort is crucial for maintaining performance over long races. Look for frames with compliance features that absorb road vibrations, such as:
Seat Stays: Thinner, curved seat stays can flex slightly, improving ride comfort;Fork Design: Carbon forks with tapered steerer tubes enhance comfort and control;Seat Post: Some frames are designed to work with specific seat posts to further dampen vibrations.
6. Brand and Model Reputation
Choosing a frame from a reputable brand ensures high-quality construction and reliable performance. Brands like Trek, Specialized, and Cervelo are renowned for their racing bike frames. Research reviews and professional feedback to find models that consistently perform well.
7. Fit and Customization
Proper fit is essential for maximizing performance and avoiding injury. Many brands offer different frame sizes and customizable options. Consider visiting a professional bike fitter to determine the ideal frame size and geometry based on your body measurements and riding style.
8. Budget and Value
High-performance racing frames can be expensive, but investing in a quality frame is worthwhile for serious cyclists. Set a realistic budget and weigh the benefits of premium materials and features against the cost. Remember that additional components like wheels, groupsets, and handlebars also impact overall performance and should be factored into your budget.
Conclusion
Selecting the perfect racing bike frame involves careful consideration of materials, geometry, aerodynamics, weight, comfort, brand reputation, fit, and budget. By understanding these key factors and how they influence performance, you can make an informed decision that enhances your cycling experience.
Whether you're aiming for personal bests or podium finishes, the right frame can make all the difference in achieving your goals.

Choosing the right trail mountain bike is crucial for maximizing your outdoor adventures. With the vast array of options available, it can be challenging to determine what features and components are essential for your specific needs.
Understanding the Types of Mountain Bikes
Before diving into specifics, it's important to understand the different types of mountain bikes available:
Full Suspension Mountain Bikes
Full suspension bikes feature both front and rear shock absorbers, offering a smoother ride over rough terrain. They provide better control and comfort, especially on downhill trails or rugged paths with numerous obstacles.
Hardtail Mountain Bikes
Hardtail bikes have a front suspension fork but no rear suspension, making them lighter and more efficient on smooth trails and climbs. They are often preferred for cross-country riding due to their simplicity and lower maintenance requirements.
Customizable Options
Some manufacturers, like Trifox, offer customizable mountain bike options. This allows you to tailor your bike to your exact specifications, choosing each component to suit your style and riding preferences.
Key Components to Consider
When selecting a 29-inch trail mountain bike, pay close attention to the following components:
Bike Frames
The frame is the backbone of your bike, determining its overall strength, weight, and ride quality. Carbon fiber frames, such as those available from Trifox, are popular for their lightweight yet durable construction. Models like the Pioneer and M2 provide excellent performance and reliability.
Wheels and Tires
Wheels and tires significantly impact your ride's comfort and handling. Look for 29-inch wheels with tubeless-ready tires for improved traction and reduced risk of punctures. The larger wheel size helps roll over obstacles more easily, providing a smoother ride.
Suspension Forks
A high-quality suspension fork is essential for absorbing shocks and bumps on the trail. Adjustable forks allow you to fine-tune the suspension based on the terrain you're riding, ensuring optimal performance.
Handlebars and Stems
Handlebars and stems affect your bike's handling and comfort. Wider handlebars provide better control, while adjustable stems allow you to customize your riding position for maximum comfort.
Seatposts and Saddles
A comfortable saddle and adjustable seatpost are crucial for long rides. Dropper seatposts are a popular choice for trail riding, enabling quick height adjustments on the fly.
Drivetrain and Brakes
Choose a drivetrain that offers a wide range of gears to handle various terrains. Reliable hydraulic disc brakes are a must for consistent stopping power in all conditions.
Essential Accessories
To enhance your biking experience, consider these accessories:
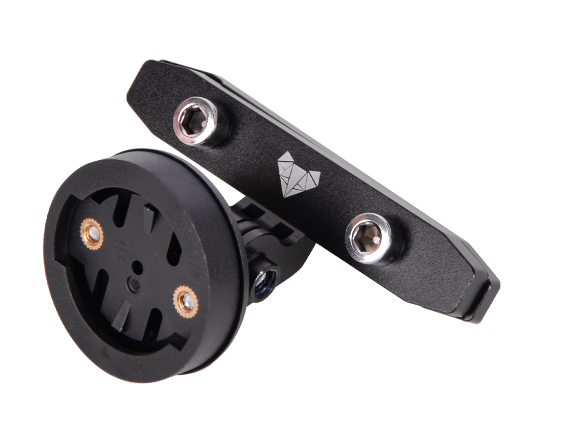
Computer Mounts and Bottle Cages
A computer mount allows you to track your ride data, while bottle cages ensure you stay hydrated on long journeys.
Seatpost Clamps and Handlebar Grips
Secure your seatpost with a reliable clamp and improve your grip with comfortable handlebar grips or tape.
Bike Pedals
Choose pedals that match your riding style. Clipless pedals offer better power transfer, while platform pedals provide more freedom of movement.
Bundles and Deals
Many brands, including Trifox, offer bundle deals that combine essential components at a discounted price. Bundles like Frameset & Wheelset or Frameset & Handlebar can provide significant savings while ensuring compatibility and performance.
Shop with Confidence
When purchasing your new mountain bike, consider the following benefits offered by reputable retailers like Trifox:
Conclusion
Choosing the perfect 29-inch trail mountain bike involves understanding your needs, selecting the right components, and considering additional accessories to enhance your riding experience. By carefully evaluating your options and taking advantage of bundles and deals, you can find a bike that meets your requirements and provides endless hours of adventure on the trails.
For a wide range of high-quality mountain bikes and components, visit Trifox and explore their extensive collection today.

Choosing the perfect size M bike for your riding style is an essential step towards a comfortable, efficient, and enjoyable cycling experience. Whether you're a seasoned rider or new to the biking world, understanding how to select the right bike size can greatly enhance your performance and overall enjoyment of the ride.
Understand Your Riding Style
The first step in choosing the perfect bike size is to clearly define your riding style. Are you into road biking, mountain biking, or hybrid cycling? Each style demands specific bike features and sizes for optimal performance. Road bikes, for instance, often require a snugger fit for aerodynamics and speed, while mountain bikes offer a bit more room for maneuverability on rough terrains.
Know the Size Chart
Bike sizes are typically categorized by frame size, which is measured in centimeters for road bikes and inches for mountain bikes. An M-size bike generally corresponds to a medium size, which is usually around 54-56 cm (21-22 inches) for road bikes and 17-18 inches for mountain bikes. However, these measurements can vary slightly between manufacturers, so it’s crucial to check the specific size chart provided by the bike brand.
Measure Your Height and Inseam
Your height and inseam length are pivotal measurements when determining the right bike size. To measure your height, stand against a wall without shoes and mark the top of your head to get an accurate measurement. For your inseam, stand with your back against the wall and a book between your legs—mimicking a bike seat—and measure from the top of the book to the floor. These measurements will help you find a bike frame that allows for proper leg extension and comfortable reach to the handlebars.
Evaluate Bike Geometry
Bike geometry plays a significant role in finding the right fit. It refers to the angles and lengths of different bike frame parts, including the top tube, seat tube, and head tube. A bike with a longer top tube may suit riders looking for a stretched-out position, typical of racing or long-distance road biking. On the other hand, bikes designed for agility and comfort, like many mountain and hybrid bikes, often have a shorter top tube to facilitate an upright riding posture.
Consider Adjustments and Components
Even within the same size, bikes can offer different levels of adjustability. Seat height, handlebar height, and reach can often be adjusted to fine-tune the fit. Additionally, the choice of components such as the saddle, pedals, and handlebars can affect your overall comfort and performance. For example, wider handlebars may offer more control for mountain biking, while narrower bars could be preferable for road cycling.
Test Ride Different Bikes
Nothing beats the insights gained from a test ride. Visit your local bike shop and try out several M-sized bikes within your preferred type. Pay attention to how each bike feels in terms of comfort, ease of pedaling, handling, and reach to the components. During the test ride, consider aspects like:
Comfort: Are you able to ride without straining your neck, shoulders, or back?
Control: Do you feel in command of the bike even when turning or going over bumps?
Efficiency: Can you pedal smoothly and effectively without feeling cramped or overly stretched?
Seek Professional Fitting
If you're investing in a high-end bike or if you plan to spend significant time riding, consider getting a professional bike fitting. A bike fitting expert will take comprehensive measurements and adjust your bike to fit your body dimensions precisely. This service can greatly improve comfort, efficiency, and prevent injuries associated with poor bike fit.

Final Thoughts
Selecting the perfect size M bike is a blend of art and science, requiring consideration of various factors tailored to your body dimensions and riding preferences. By understanding your riding style, knowing the size charts, taking accurate measurements, evaluating bike geometry, considering component adjustments, test riding, and potentially seeking professional fitting, you'll be well on your way to enjoying countless miles of comfortable and rewarding cycling experiences.
Remember, the right bike is not just about size; it's about the perfect synthesis of fit, form, and function to complement your unique riding style.

Mountain biking is an exhilarating sport, offering riders a unique blend of adventure, fitness, and nature. However, the right equipment can make a world of difference in your riding experience. One such crucial component is the bike's crankset.
Understanding the Crankset
The crankset, often referred to as 'the cranks,' includes the bicycle's chainrings, crank arms, and bottom bracket. It's responsible for converting the force generated by your legs into motion that drives the bike forward.
Factors to Consider When Choosing a Crankset
1. Crank Arm Length
The crank arm length is the distance from the center of the bottom bracket to the center of the pedal spindle. Most mountain bikes come with a standard 170mm or 175mm crank arm. However, the ideal length depends on your leg length and the type of riding you do. Shorter cranks (165-170mm) are better for technical trail riding where ground clearance is essential, while longer cranks (175-180mm) can provide more leverage for climbing steep hills.
2. Chainring Size
The size of the chainring significantly impacts your bike's gearing. Larger chainrings offer higher gear ratios, suitable for fast riding on smooth surfaces. In contrast, smaller chainrings provide lower gear ratios, making it easier to pedal uphill or on rough terrain. Many modern MTBs feature a single (1x) chainring setup for simplicity and efficiency, but traditional double (2x) or triple (3x) setups are also available.
3. Material
Cranksets can be made from various materials, including aluminum, carbon fiber, and steel. Aluminum cranksets are common due to their balance between weight, strength, and cost. Carbon fiber cranksets are lighter and stiffer but usually more expensive. Steel cranksets are durable and affordable but heavier than the other options.
4. Compatibility
Ensure that the crankset is compatible with your bike's bottom bracket system and the number of gears on your bike. Also, consider the chainline (the distance from the centerline of the bike to the chainring) to ensure optimal drivetrain efficiency and minimal wear.
5. Brand and Price
Like any bike component, cranksets come in various brands and prices. More expensive models typically offer better performance and lower weight. However, mid-range options can often provide excellent performance at a fraction of the price.
Choosing the right crankset for your MTB can significantly impact your riding experience. It's worth spending time researching and understanding what works best for your bike, riding style, and personal preference.
Remember, the ultimate goal is to enhance your enjoyment and performance on the trails. So, choose wisely, and happy riding!


