


Mountain biking is an exhilarating sport that combines the thrill of speed with the beauty of nature. However, to fully enjoy this activity, having a bike fitted with the right components is crucial, especially when it comes to wheels. They are the heart of your bike's performance on various terrains, impacting everything from stability and traction to control and speed.
The Importance of Quality Mountain Bike Wheels
Mountain bike wheels are fundamental in defining how your bike handles different terrains. A good set of wheels can transform your riding experience, offering improved grip on slippery surfaces, better rolling efficiency over rough trails, and enhanced durability against the obstacles that rugged landscapes throw at you. For riders on a budget, finding wheels that deliver on performance without a hefty price tag is essential. This is where the value proposition becomes a critical factor in the selection process.
Unveiling the Best Options Under $250
In the quest for affordable yet high-performing mountain bike wheels, certain brands stand out by offering products that strike an impressive balance between cost, quality, and performance. Among these, a notable mention must be made of wheels that cater to both casual enthusiasts and more serious cyclists who demand reliability and durability without compromising on performance.
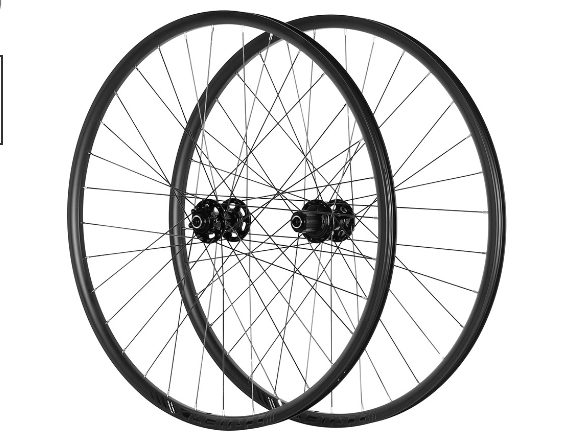
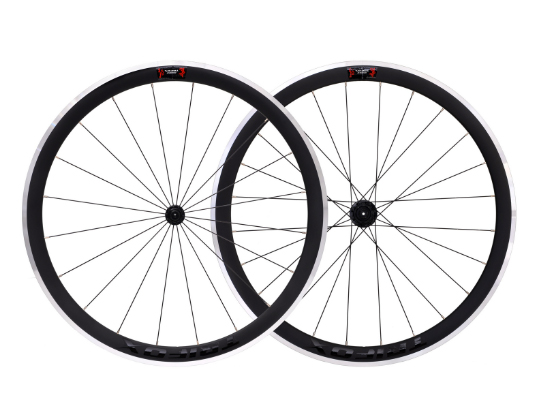
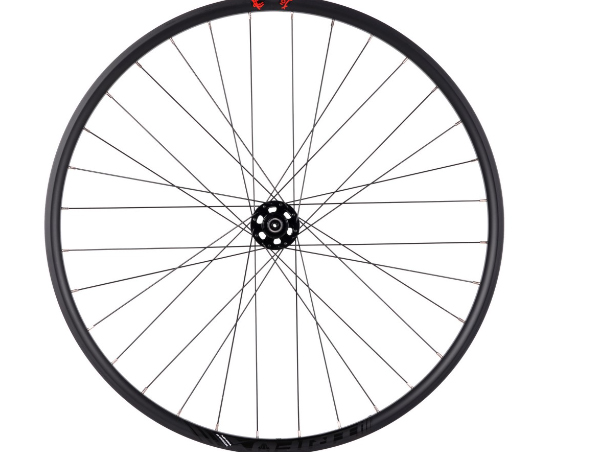
One such option is characterized by its alloy construction, which provides an excellent blend of strength and lightness. This specific model, designed with a wide rim profile, ensures better tire support, which is crucial for maintaining stability and traction on challenging terrains. Moreover, the incorporation of high-quality hubs and spokes translates into smoother rides and more reliable wheel performance, regardless of the trail conditions.
Features That Enhance Performance
The standout features of these wheels include their lightweight design, facilitating quicker acceleration and making it easier to maneuver the bike on tight trails or during steep climbs. Furthermore, the wide rim profile not only improves tire support but also significantly enhances the wheel's ability to absorb shocks and vibrations, leading to a more comfortable and controlled ride.
Additionally, the robust construction of these wheels means they are built to withstand the rigors of mountain biking, from navigating rocky paths to conquering muddy tracks and everything in between. Their versatility across different terrains makes them an ideal choice for riders looking to push their limits and explore new trails.
Exceptional Value for Money
Perhaps the most compelling aspect of these wheels is their affordability. Priced under $250, they represent an outstanding investment for cyclists who seek to elevate their riding experience without draining their bank accounts. This price point makes high-quality, durable, and performance-oriented wheels accessible to a broader audience, ensuring that more riders can enjoy the benefits of upgraded components.
Making the Right Choice
When selecting the best mountain bike wheels within this price range, it's important to consider your specific riding style and the typical terrains you encounter. Whether you're tackling technical singletracks, enjoying leisurely rides through scenic landscapes, or anything in between, ensuring that your wheels can handle the demands of your adventures is key.
Moreover, investing in wheels from reputable brands that are known for their commitment to quality and performance can provide peace of mind. These manufacturers often utilize advanced technologies and materials to create products that meet the needs of discerning cyclists, ensuring that even their more affordably priced offerings do not compromise on quality.
Conclusion
In the realm of mountain biking, where the quality of your ride is heavily influenced by the components of your bike, choosing the right wheels is paramount. For those operating within a budget, finding wheels that offer the perfect combination of performance, durability, and affordability is essential. With options available under $250, upgrading your mountain bike wheels no longer requires a significant financial investment, allowing you to enjoy enhanced performance on the trails without breaking the bank.
As the sport of mountain biking continues to grow, and as manufacturers innovate to meet the demands of riders, the availability of high-quality, affordable components like mountain bike wheels is a welcome development. It ensures that more individuals can experience the joy and thrill of mountain biking to its fullest, equipped with bikes that are ready to tackle whatever the trail throws their way.


When it comes to cycling, understanding tire sizes can be a bit confusing. Different countries use different measurements, and sometimes the same size can be described in multiple ways. However, comprehending this aspect is crucial as it impacts your bike's performance, comfort, and safety. This article aims to simplify tire sizing for you.
The Basics of Bicycle Tire Sizing
Bike tire sizes consist of two numbers. The first represents the diameter of the wheel (also known as the bead seat diameter), while the second indicates the width of the tire. Both these measurements can be in inches or millimeters, depending on the standard used.
Inch Marking
Inch markings are commonly used in the US and UK, and they're typical for mountain bikes and some road bikes. An example of an inch marking would look like this: 26 x 2.0. Here, 26 is the approximate outer diameter of the tire in inches, and 2.0 represents the width of the tire in inches.
ISO/ETRTO Marking
The International Organization for Standardization (ISO) and the European Tyre and Rim Technical Organisation (ETRTO) use a different system. They measure the exact diameter of the bead seat (where the tire sits on the rim), not the outer diameter. They also use millimeters instead of inches. So, a tire that is 50-559 by ISO/ETRTO standards would have a width of 50mm and a bead seat diameter of 559mm.
French Marking
French markings are often found on older road bikes. They use millimeters for width but a unique French system for diameter. For example, a 700C tire is approximately equivalent to a 622mm bead seat diameter in ISO/ETRTO or a 28" tire in inch marking.
Understanding Tire Compatibility
Knowing your tire size is crucial when replacing tires or inner tubes. The diameter of the new tire must match the diameter of the existing one. The width, however, can vary slightly. A wider tire will offer more comfort and grip but might be heavier and slower. A narrower tire, on the other hand, will be lighter and faster but might offer less grip and comfort.
Decoding Other Tire Markings
Apart from size, you might also see other markings on your bike tire. These can include:
-TPI (Threads Per Inch): This refers to the density of the casing fabric. A higher TPI often means a lighter tire with lower rolling resistance but could be more vulnerable to punctures.
- PSI (Pounds per Square Inch): This is the recommended range of air pressure for the tire.
- Directional Arrows: Some tires have a specific direction of rotation for optimal performance and will have arrows indicating this on the sidewall.

Understanding tire sizing can seem complex initially, but once you get the hang of it, it becomes straightforward. Remember, choosing the right tire size for your bike can significantly impact your cycling experience, so take the time to understand what works best for you.

A critical yet often overlooked component of a bicycle is the tire valve. The valve serves as the gateway through which air enters your tires, ensuring they are adequately inflated for optimal performance and safety. However, not all valves are created equal. The length of the valve can significantly affect its compatibility with your bike's wheel.
Understanding Valve Types
Before we dive into determining the right valve length, it is important to understand that there are primarily two types of valves: Presta and Schrader. Presta valves are typically found on high-end bicycles and are thinner and longer. Schrader valves are wider, shorter, and are commonly found on car tires and less expensive bikes.
Determining the Correct Valve Length
When it comes to choosing the correct valve length, the depth of your bike's rim is the primary factor you need to consider. Here's a step-by-step guide:
1. Measure the Rim Depth: Use a ruler or a caliper to measure from the outer edge where the tire sits to the inner edge where the valve will go. This measurement is your rim depth.
2. Add an Allowance: To ensure that the valve protrudes enough from the rim for easy inflation, add an allowance to the rim depth. A good rule of thumb is to add 15mm if you're using a hand pump and 5mm for a track pump.
3. Choose the Valve Length: The total of your rim depth and the added allowance is the minimum valve length you should look for.
Tips for Choosing Bike Tire Valves
Here are some additional tips to keep in mind when choosing bike tire valves:
1. Consider Your Pump: Some pumps may not work well with certain types of valves. Ensure the valve you choose is compatible with your pump.
2. Check for Valve Extensions: If you have deep rims and are struggling to find long enough valves, consider using a valve extender. This accessory screws onto the top of a Presta valve to lengthen it.
3. Don't Go Too Long: While it's important to ensure the valve is long enough to inflate the tire easily, a valve that is too long can be cumbersome and may get damaged more easily.
In conclusion, determining the correct length valve for bike tires involves understanding the type of valve, measuring your rim depth, and adding an allowance for easy inflation. By ensuring you have the right valve length, you'll have a much easier time maintaining the correct tire pressure and enjoying your rides.
When it comes to enhancing your cycling performance, the type of wheels you choose can make a significant difference. One of the popular options among both professional and amateur cyclists are deep section wheels. This guide will walk you through how to select and use deep section wheels for your bicycle.
Understanding Deep Section Wheels
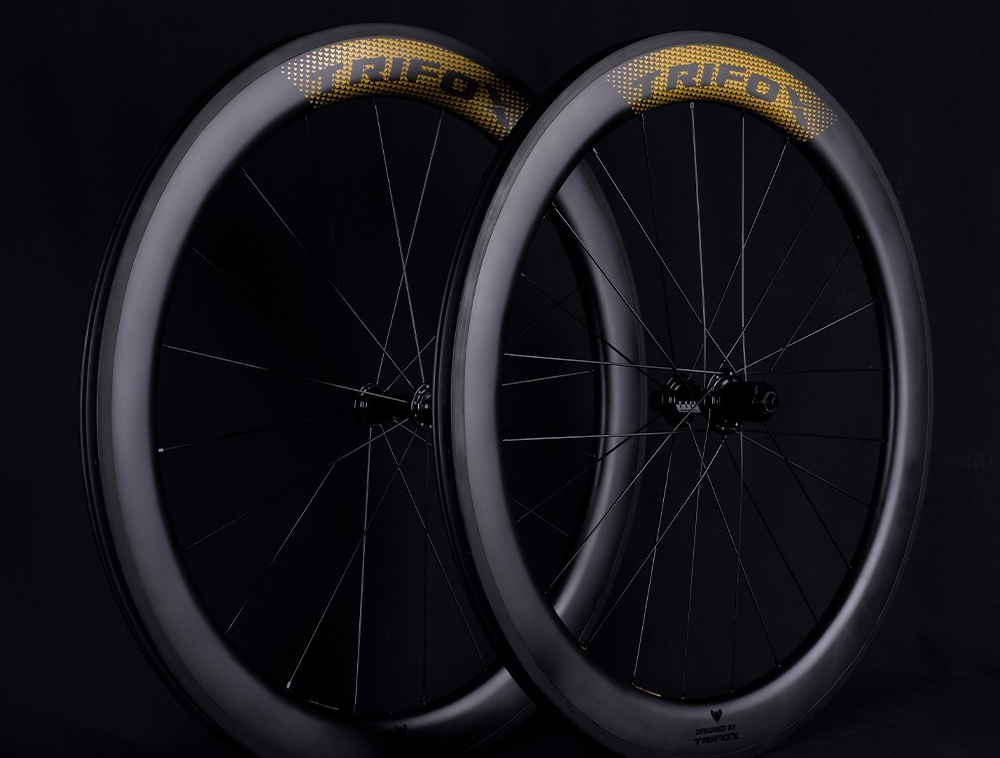
Deep section wheels are characterized by their larger rim depth, typically around 40mm or more. The deeper rim provides improved aerodynamics, allowing for faster speeds, particularly on flat surfaces. They're often made from carbon fiber to provide a balance between weight and strength.
Choosing the Right Deep Section Wheels
The process of choosing deep section wheels depends on several factors:
1. Riding Conditions: If you frequently ride in windy conditions, consider a shallower rim as deeper rims can catch the wind and affect stability. For calm, flat routes, a deeper rim can offer speed benefits.
2. Purpose: Are you racing, or is it for day-to-day use? For racing, especially on flat courses, deep section wheels can provide an edge. However, for everyday use, a shallower rim might be more versatile.
3. Weight: Lighter wheels are generally better, but not at the expense of durability. Carbon fiber deep section wheels like those offered by Trifox Bike provide a good balance.
4. Budget: As with any bike component, there's a wide range of prices. Determine what you're willing to spend before shopping around.

Using Deep Section Wheels
Once you've chosen your deep section wheels, it's important to use them correctly:
1. Installation: Ensure the wheels are properly installed on your bike. Incorrect installation can lead to performance issues and potential accidents.
2. Maintenance: Regularly check your wheels for signs of wear or damage. This includes checking the brake surface for wear, spokes for tension, and the wheel for true.
3. Riding Technique: Deep section wheels can feel different to ride, especially in windy conditions. Practice riding with them in various conditions to get a feel for how they handle.
4. Tire Pressure: Tire pressure can affect performance. Experiment with different pressures to find what works best for you and your new wheels.
In conclusion, deep section wheels can be a fantastic addition to your bicycle, offering potential speed benefits and an aggressive look. However, it's essential to choose the right wheels for your specific needs and use them correctly. With the right approach, you can maximize the benefits of these wheels and enjoy a smoother, faster ride.
Cycling is a passion for many, and part of the thrill comes from customizing and upgrading your bicycle. One such upgrade that can significantly improve your cycling experience is installing quick release carbon wheels. These wheels are not only lightweight and durable but also allow for easy installation and removal.

Understanding Quick Release Carbon Wheels
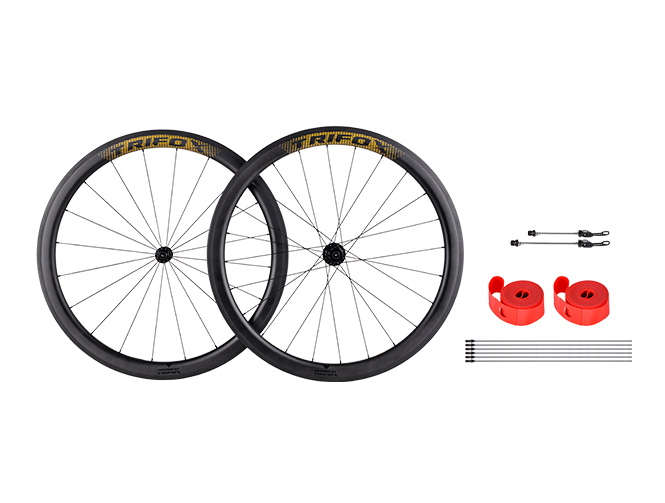
Quick release carbon wheels are a popular choice among cyclists due to their excellent balance of weight, strength, and aerodynamics. They come with a quick-release mechanism that makes it easy to install and remove the wheels without any tools. Trifox offers a range of high-quality quick release carbon wheels, including the Rim Brake Clincher Carbon Wheelset WT17 and the V-Brake Clincher Carbon Wheelset WT18.
Step 1: Prepare Your Bicycle
Start by preparing your bike. Position it so it's stable and won't tip over during the wheel installation process. If you have a bike stand, this would be the best time to use it.
Step 2: Remove the Old Wheels
To remove the old wheels, open the quick release lever on the wheel hub and unscrew the end nut if necessary. Once loosened, the wheel should slide out easily from the dropouts (slots in the frame and fork where the wheel axles go).
Step 3: Insert the New Wheel
Take your new quick release carbon wheel and slide the axle into the dropouts. Make sure the wheel is centered in the frame or fork.
Step 4: Secure the Quick Release
Once the wheel is in place, close the quick release lever to secure the wheel. The lever should be firm but not overly tight. If necessary, adjust the tension using the nut on the opposite side of the lever.
Step 5: Check the Installation
After installing the wheel, give it a spin to make sure it's turning freely. Also, check that it's securely held by the quick release and isn't wobbly or misaligned.
Conclusion
Installing quick release carbon wheels on your bicycle is a straightforward task that can greatly enhance your riding experience. It not only improves your bike's performance but also makes wheel removal for transportation or tire changes a breeze. As always, ensure you're familiar with your bike's specifications and the product details before starting the installation.

A new wheelset can dramatically improve the ride quality, speed, and control of your road bike. One crucial aspect of a wheelset is the rim brake, which is responsible for slowing down and stopping the bike. In this post, we'll guide you on how to choose and install a road wheelset rim brake for better control.
Choosing Your Road Wheelset Rim Brake
When selecting the right rim brake wheelset, consider these factors:
1. **Braking Surface:** Aluminum braking surfaces offer good braking performance in all conditions, while carbon surfaces can offer weight savings but may not perform as well in wet conditions.
2. **Rim Width:** Wider rims can accommodate wider tires, provide better stability, and improved aerodynamics.
3. **Rim Depth:** Deeper rims are more aerodynamic and rigid but might be heavier and more affected by crosswinds.
4. **Weight:** Lighter wheelsets can make a bike feel more responsive and easier to handle.
5. **Durability and Maintenance:** Consider the durability of the wheelset and how easy it will be to maintain and replace parts like spokes or bearings.
Installing Your Road Wheelset Rim Brake
Once you've chosen your ideal wheelset, it's time to install it. Here’s a step-by-step guide:
Step 1: Remove Old Wheels
Start by removing the old wheels from your bike. Release the brake calipers to allow the tires to pass through, then unscrew the quick release or thru-axle to remove the wheels.
Step 2: Install New Tires and Tubes
If your new wheelset didn't come with tires, you would need to install new ones. Put one side of the tire onto the rim, insert the tube, then work the other side of the tire onto the rim.
Step 3: Install the Cassette
The cassette is the set of gears on the rear wheel. To install it, simply slide it onto the freehub body of your new rear wheel and secure it with a lockring.
Step 4: Install New Wheels
Now it's time to put your new wheels onto your bike. Make sure the tires are facing the right direction, then slide the wheels into the dropouts and tighten the quick release or thru-axle.
Step 5: Adjust Brake Calipers
With the new wheels installed, you'll need to adjust the brake calipers to ensure they are centered over the rims and that the brake pads hit the rims squarely.
Step 6: Check and Inflate Tires
Finally, check that the tires are seated correctly on the rims and inflate them to the recommended pressure.
Fine-Tuning for Better Control
Once your new wheelset is installed, take the time to fine-tune your bike for better control. This could involve adjusting your saddle height, handlebar position, or even the tire pressure to suit your weight and riding style.
Conclusion
Choosing and installing a new road wheelset rim brake can significantly improve your cycling experience, offering better control, speed, and responsiveness. By understanding the key factors in choosing a wheelset and following the correct installation process, you can enhance your ride and enjoy the open road with newfound confidence. Happy cycling!

Rim brake road wheels are a critical component of any road bike when it comes to performance. They affect the handling, speed, and overall reliability of your bike. Whether you are a seasoned pro or just getting started, choosing the right set of wheels and maintaining them properly can make all the difference. In this post, we will guide you through the process of selecting the right rim brake road wheels for your bike and help you maintain them to ensure optimal performance.
Section 1: Materials and Construction
When choosing a rim brake road wheel, the first factor to consider is the material and construction. Carbon fiber wheels are popular due to their light weight and stiffness, but they can come with a hefty price tag. Aluminum wheels are more affordable and offer good performance, but may not be as light as carbon fiber. When it comes to construction, look for wheels with a higher spoke count as they tend to be more durable and better at distributing weight.
Section 2: Rim Width and Depth
Another crucial aspect to look at when choosing your rim brake road wheels is the width and depth of the wheel. Wider rims tend to offer better aerodynamics, better handling, and are better for larger tires. On the other hand, shallow rims are lighter and better for climbing. Depending on your riding style and preferences, you may want to opt for a deeper or shallower rim.
Section 3: Brake Pads and Wear
One of the most important aspects of maintaining your rim brake road wheels is checking your brake pads and wear regularly. Brake pads can wear out over time and may require replacement, so checking them periodically can save you from potential accidents. Also, ensure that the brake pads are compatible with your chosen wheels to avoid poor stopping power.
Section 4: Regular Cleaning and Lubrication
Maintaining your rim brake road wheels also involves regular cleaning and lubrication. Dirt and grime buildup can affect the performance of your wheels, so make sure to clean them regularly. Use a mild soap and water to clean the wheels, and then lubricate your bearings and spoke nipples to keep them running smoothly.
Section 5: Proper Storage
Finally, proper storage of your rims can help ensure their longevity. Store them in a cool and dry area, away from any moisture or dust. Additionally, if you are not using them for an extended period, consider removing the tires and tubes and storing them separately to avoid any damage or deformation.

Choosing and maintaining your rim brake road wheels can significantly impact your bike’s overall performance and longevity. It's crucial to consider the material, construction, rim width and depth, brake pads and wear, regular cleaning and lubrication, and proper storage.
By following these guidelines, you can ensure that your bike wheels are always optimally performing, giving you a smoother ride with less chance of accidents. So, ensure that you choose the right rims for your bike and stay mindful of their upkeep to keep riding at your best.

More and more cyclists are beginning to switch to disc brakes. With the advantages of improved stopping power, and superior modulation especially in wet conditions, it is not surprising to see why. But, is the 700c wheelset disc brake the right fit for your cycling needs? In this blog post, we will dive deep into everything you need to know about the 700c wheelset disc brake, including its features, advantages, and potential drawbacks. So, read on to find out more.
What is a 700c Wheelset Disc Brake?
Before we go to its features, let us first understand what is a 700c wheelset disc brake? A 700c wheelset is the most common size for road bikes with a diameter of 622mm. On the other hand, a disc brake involves the use of a rotor and caliper instead of a traditional brake pad that rubs against the wheel rim. When the brake is applied, the brake pads are squeezed against the rotor and slows down the bike.
Features of a 700c Wheelset Disc Brake
The 700c wheelset disc brake has some distinct features. Firstly, it brings superior stopping power and better modulation, especially in wet conditions. This is because the disc brake does not rely on the wheel's rim surface to provide stopping power, which is usually slick when wet. Furthermore, a 700c wheelset disc brake performs better on steep descents as it does not overheat like rim brakes can.
Secondly, it allows for wider tire clearance. Disc brakes do not require a brake track on the rim, which allows the use of wider tires and rims. This feature is especially desirable for cyclists who want to ride on rougher roads or trails, providing more grip and a smoother ride. Lastly, the 700c wheelset disc brake is great for durability. Rim brakes wear out the wheel, reducing its lifespan by creating grooves in the side of the rim. The disc brake does not come in contact with the rim, making it last longer.
Advantages of a 700c Wheelset Disc Brake
The advantages of the 700c wheelset disc brake are evident. For one, it offers superior stopping power regardless of weather conditions. Compared to rim brakes, the disc brake's caliper can be placed closer to the hub, ensuring maximum leverage and more stopping power. Secondly, the use of wider tires, thanks to the disc brake, results in a smoother ride. Finally, the 700c wheelset disc brake is more durable than rim brakes, creating more value for your money in the long run.
Potential Drawbacks of a 700c Wheelset Disc Brake
However, there are also a few disadvantages to a 700c wheelset disc brake. One of these is the potential for the disc brake to rub against the rotor. While it may seem minor, it can cause drag, reducing speed, and making riding more challenging. Secondly, disc brakes require more maintenance than rim brakes, which can be inconvenient for some riders. Finally, the 700c wheelset disc brake can be slightly more expensive to install and replace than rim brakes.
In conclusion, the 700c wheelset disc brake can be the right fit for your cycling needs. With its superior stopping power, wider tire clearance, and durability, the advantages of the disc brake generally outweigh the disadvantages. It is essential to be aware of the potential drawbacks, but as disc brakes become more popular, these issues will likely become less common. Overall, whether you are a professional road biker or an amateur rider, a 700c wheelset disc brake can provide significant performance benefits to your cycling experience, and it is undoubtedly worth considering.
When it comes to cycling, performance is key. One component that plays a pivotal role in how your bike behaves is the wheelset. For road cyclists, carbon rim brake wheels are an increasingly popular choice. They’re lightweight, strong, and offer superior braking performance. But what are carbon rim brake wheels, and why are they so popular?
1. What Are Carbon Rim Brake Wheels?
Carbon rim brake wheelset are made of a carbon fiber composite that makes them much lighter than traditional aluminum wheels. They’re also superior in terms of strength and stiffness, which means they offer better handling and responsiveness. The braking surface of a carbon rim brake wheel is made of a special material that provides excellent stopping power even in wet conditions. This is a significant advantage over traditional aluminum wheels, which tend to lose stopping power in the rain.
2. The Advantages of Carbon Rim Brake Wheelset
There are several advantages to using carbon rim brake wheels on your road bike. As we’ve already mentioned, they’re lightweight and strong, which means you can enjoy a more responsive ride. They also offer superior braking performance, which can be the difference between a safe ride and a dangerous one. In addition, carbon rim brake wheels will typically last longer than traditional aluminum wheels due to their superior strength. Finally, carbon rim brake wheels look great, with their sleek, modern design adding a touch of style to any road bike.
3. The Importance of Proper Maintenance
While there are many advantages to using carbon rim brake wheels, it’s important to keep in mind that they do require proper maintenance. One of the most important aspects of maintenance is ensuring that you’re using the correct brake pads. It’s also essential to regularly inspect your wheels for any signs of wear or damage. Proper storage is also crucial, as carbon rim brake wheels can be susceptible to damage from impacts, excessive heat, and humidity.
4. How to Choose the Right Carbon Rim Brake Wheelset
When it comes to choosing the right carbon rim brake wheels for your road bike, there are several factors to consider. First and foremost, you’ll want to determine your budget, as carbon rim brake wheels can be quite expensive. You’ll also want to consider things like weight, stiffness, and aerodynamics. Additionally, it’s important to choose a reputable brand that is known for producing high-quality, reliable wheels.
5. Recommended Carbon Rim Brake Wheels
If you’re in the market for a reliable set of carbon rim brake wheels, there are several options available. One popular choice is the TriFox Carbon Road Bike Wheels, which are lightweight, durable, and offer excellent braking performance. They’re available in a variety of sizes to fit virtually any road bike.

Carbon rim brake wheels are an excellent choice for serious road cyclists who are looking for the best possible performance from their equipment. By choosing a reputable brand and properly maintaining your wheels, you can enjoy a lighter, stronger, more responsive ride, with superior braking performance in all conditions.


