


Mountain biking thrives on adrenaline, but as trails get gnarlier, your hardtail might struggle. So, when is it time to switch to a full suspension bike?
1. Your Terrain Demands It
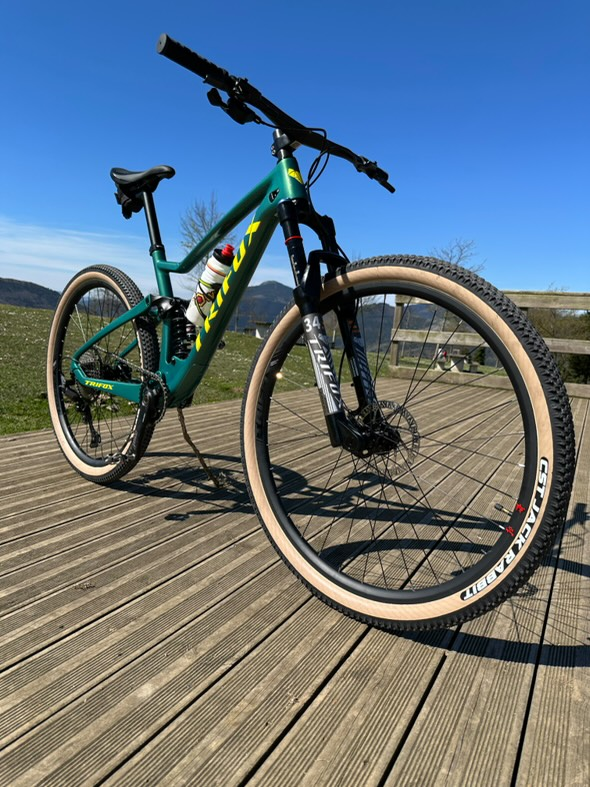
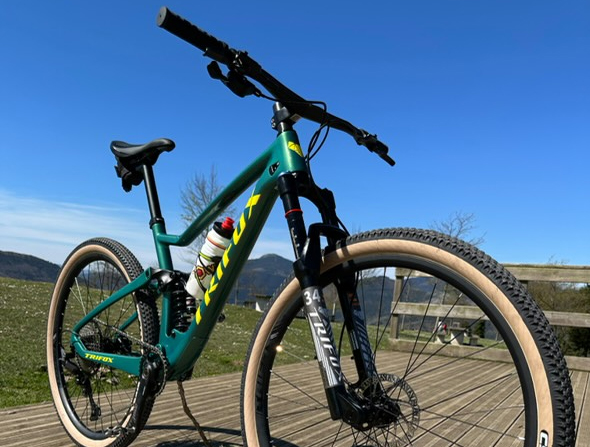
If you’re tackling rocky descents, root-covered paths, or technical drops, a full suspension bike absorbs shocks better, keeping you in control. TrifoxBike’s designs, like the Trifox Full Suspension MTB, feature optimized rear travel to smooth out rough trails, reducing fatigue and improving traction.
2. Your Riding Style Gets Aggressive
Downhill shredders, jump enthusiasts, and enduro racers benefit from dual suspension. The added stability at high speeds and landings protects your body and bike. TrifoxBike’s frames balance lightweight durability with responsive suspension, ideal for pushing limits.
3. You Ride Frequently
Regular riders logging long hours need comfort. Full suspension reduces joint strain, letting you ride longer. TrifoxBike integrates ergonomic designs without sacrificing efficiency, making their bikes a smart choice for daily adventurers.
4. Your Skills Outgrow Your Bike
Advanced riders tackling steeper lines or faster corners need bikes that match their progression. Full suspension offers confidence to tackle technical features. TrifoxBike’s models support skill growth with precision handling and adjustable setups.
5. Budget Allows for Investment
While pricier than hardtails, TrifoxBike delivers high-value builds with premium components like air shocks and durable pivots. If your riding justifies the cost, it’s a worthy upgrade.
6. You Prioritize Traction
Wet, loose, or uneven terrain demands grip. Full suspension maintains tire contact, enhancing control. Pair this with TrifoxBike’s grippy tire compatibility, and you’ve got a trail-eating machine.
7. Maintenance Doesn’t Intimidate You
Full suspension requires more upkeep, but TrifoxBike’s reliable seals and accessible pivot points simplify care, ensuring longevity.
Upgrade if your trails, style, or ambition demand more. TrifoxBike’s full suspension range blends performance and value, ready to elevate your ride.
The age-old debate between hardtail (front suspension only) and full-suspension mountain bikes boils down to one question: What kind of rider are you? Let’s dissect the pros, cons, and ideal use cases for both setups to help you decide—and explore how brands like Trifox cater to diverse preferences.
Hardtail (Without Rear Suspension)
Pros:
- Lightweight: Fewer parts mean easier climbing and faster acceleration.
- Lower Cost: Affordable to buy and maintain (no rear shock or pivot bearings).
- Efficiency: Direct power transfer makes pedaling feel responsive, ideal for smooth trails or XC racing.
- Simplicity: Less maintenance and easier DIY repairs.
Cons:
- Rough Ride: Rear impacts are absorbed solely by your legs, leading to fatigue on technical terrain.
- Traction Limits: Less control on loose or rocky descents.
Full-Suspension

Pros:
- Comfort & Control: Rear shocks smooth out bumps, reducing fatigue and improving grip on chunky trails.
- Versatility: Confidently tackle downhill, enduro, or all-day adventures.
- Speed: Maintain momentum through rough sections.
Cons:
- Weight & Cost: Heavier frame and higher upfront/maintenance costs.
- Complexity: More moving parts mean more potential for mechanical issues.
Who Should Ride What?
- Choose a Hardtail If: You prioritize budget-friendly efficiency, ride smoother trails, or love climbing. Models like Trifox’s hardtails excel here, blending lightweight frames with trail-ready geometry.
- Choose Full-Suspension If: You crave technical descents, endurance rides, or park laps. Trifox’s full-suspension bikes offer balanced travel and durability for aggressive terrain.
Key Considerations
1. Terrain: Rocks, roots, and drops? Full-suspension shines. Pavement or flow trails? Save weight with a hardtail.
2. Budget: Hardtails cost less upfront and long-term.
3. Skill Level: Beginners may appreciate a hardtail’s simplicity; advanced riders often leverage full-squish capabilities.
There's no “better” option—only what's better for you. Hardtails reward efficiency and simplicity, while full-suspension bikes unlock technical prowess and comfort. Test both if possible, and consider Trifox’s range to match your riding style. Whether you're chasing KOMs or sending drops, the right suspension setup ensures every ride feels like freedom.
Choosing the right mountain bike wheel size—26", 27.5", or 29"—can feel overwhelming, but understanding their strengths will help you pick the perfect match for your riding style.
26-Inch Wheels: The Classic Choice
Once the standard, 26" wheels are nimble and lightweight, offering quick acceleration and agility for technical trails or dirt jumps. They’re favored by freeriders and those prioritizing maneuverability over speed. However, they’ve lost ground to larger sizes due to reduced rollover capability on rough terrain.
27.5-Inch Wheels: The Balanced Performer
27.5" (650B) wheels strike a middle ground. They roll faster than 26" wheels, tackle obstacles more smoothly, and remain agile enough for tight corners and playful riding. This size suits trail and enduro riders who want versatility—ideal for everything from climbs to descents.
29-Inch Wheels: Speed & Stability
29ers dominate cross-country and endurance riding. Their larger diameter rolls over roots and rocks effortlessly, maintaining momentum on climbs and rough descents. While less nimble in tight spaces, they’re faster on flow trails and favored by taller riders seeking stability.
Mixed Wheel Sizes: The “Mullet” Setup
Some riders mix a 29" front wheel (for stability) with a 27.5" rear (for agility). This hybrid boosts confidence on descents while keeping the rear end lively—popular in downhill and enduro disciplines.
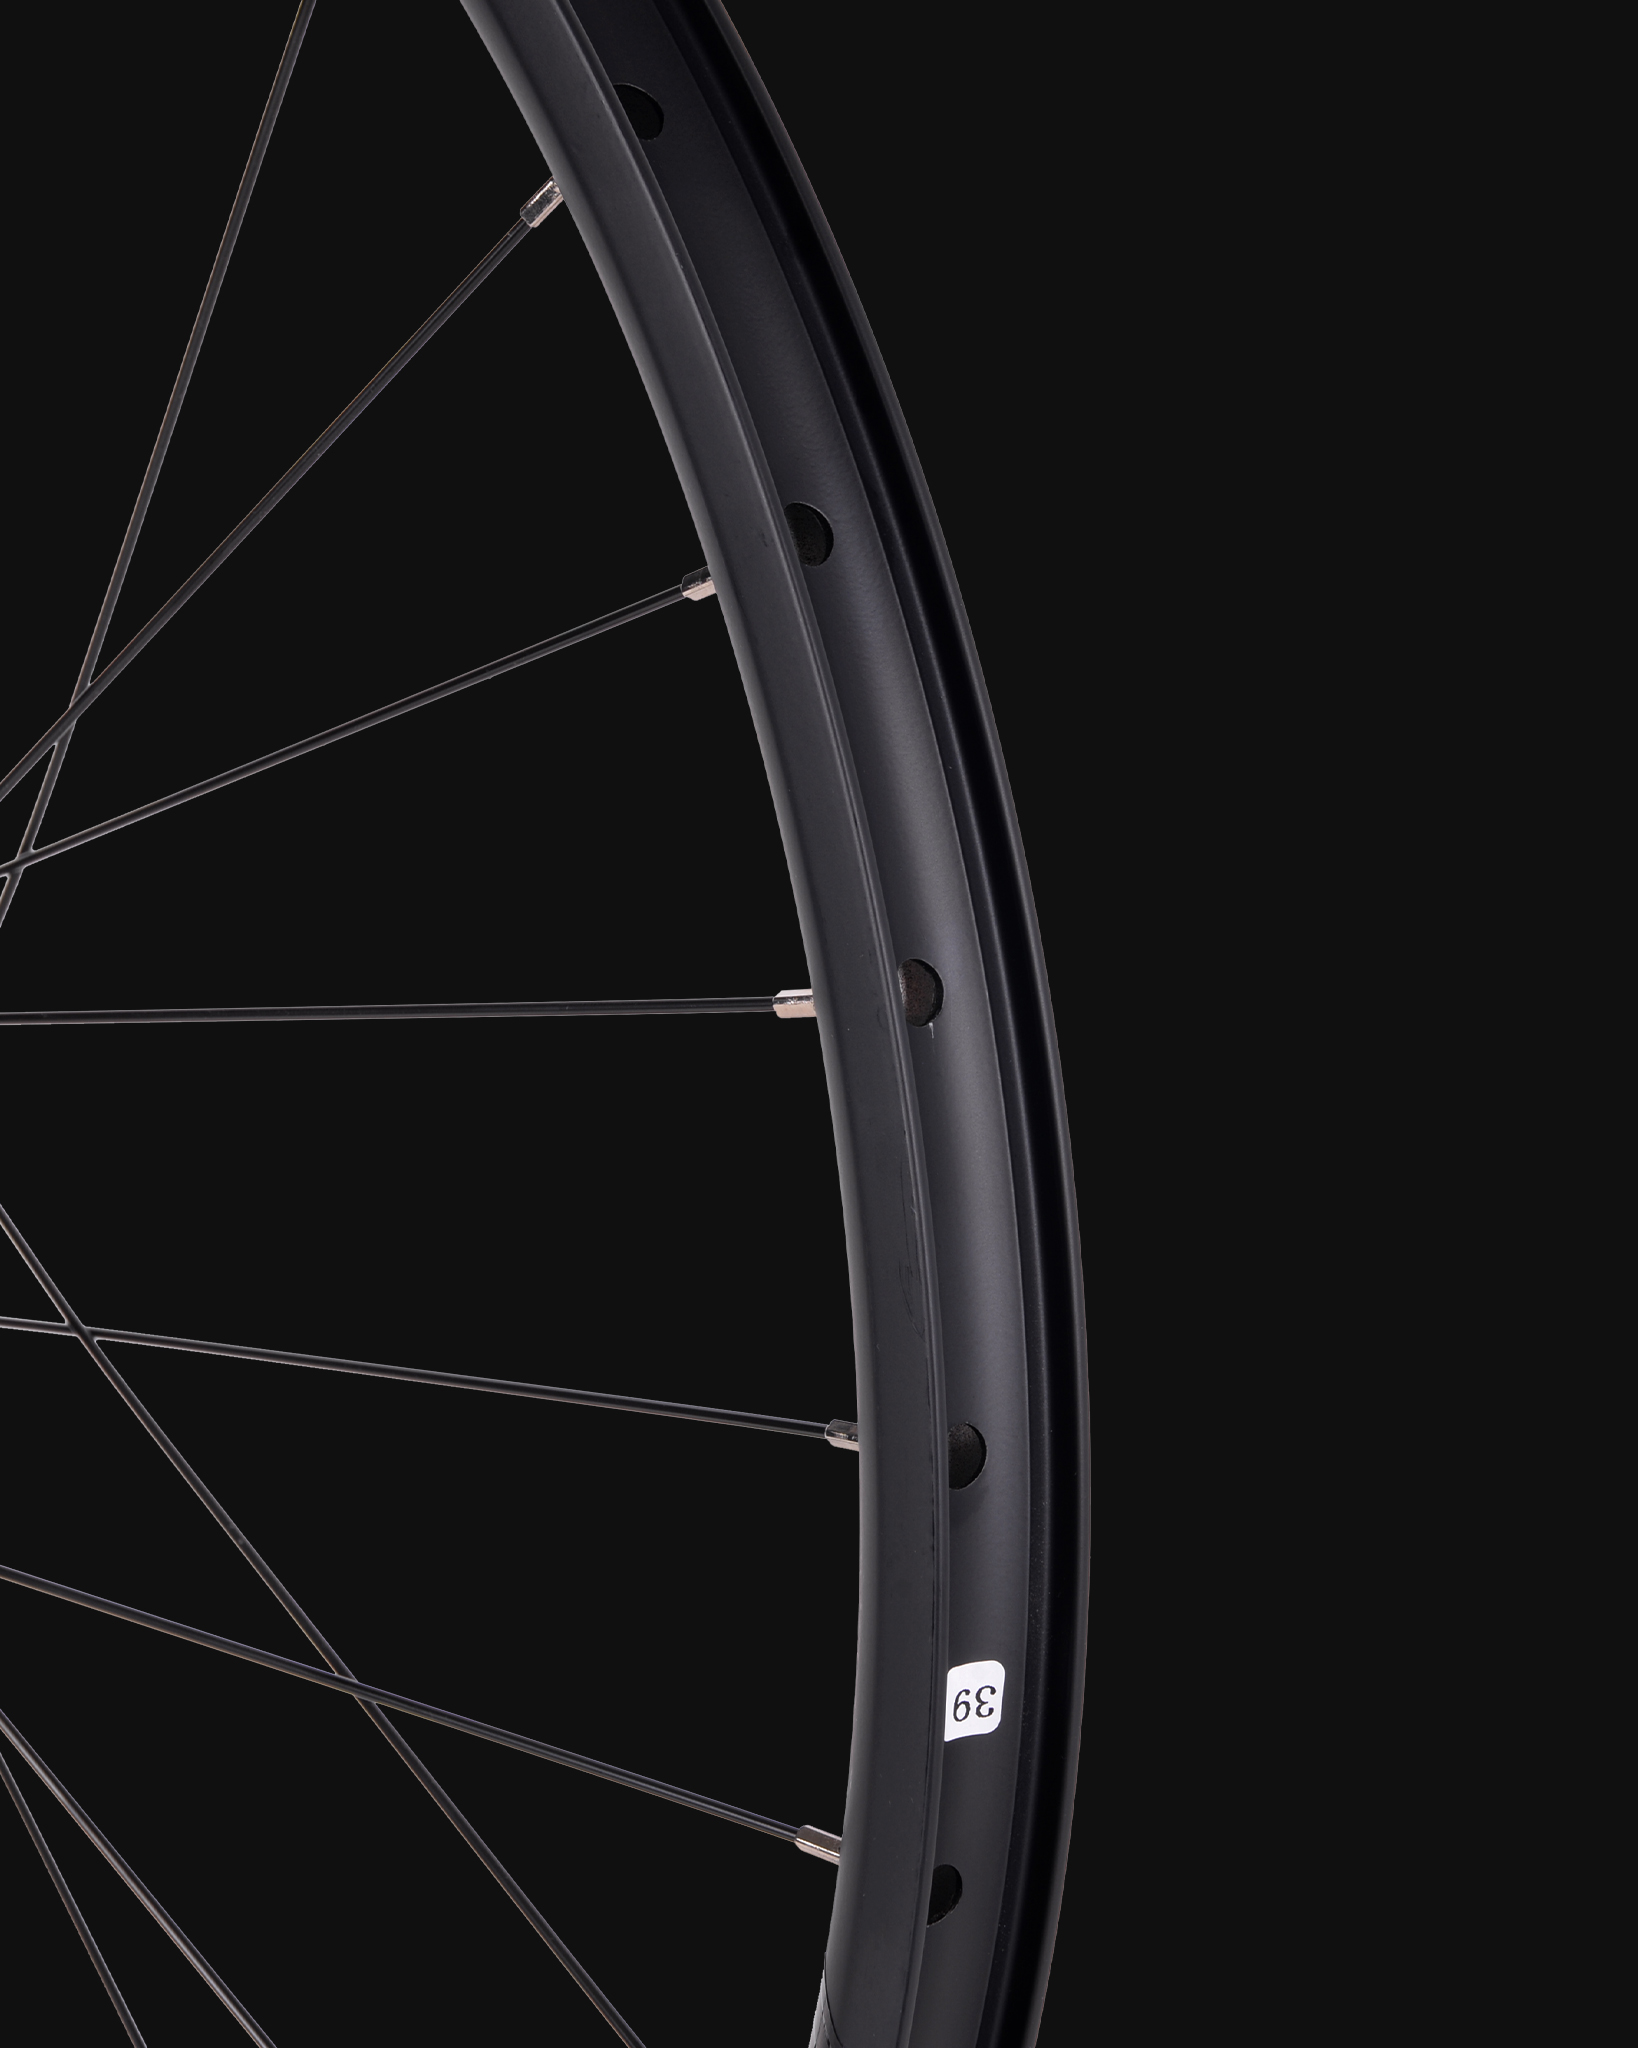
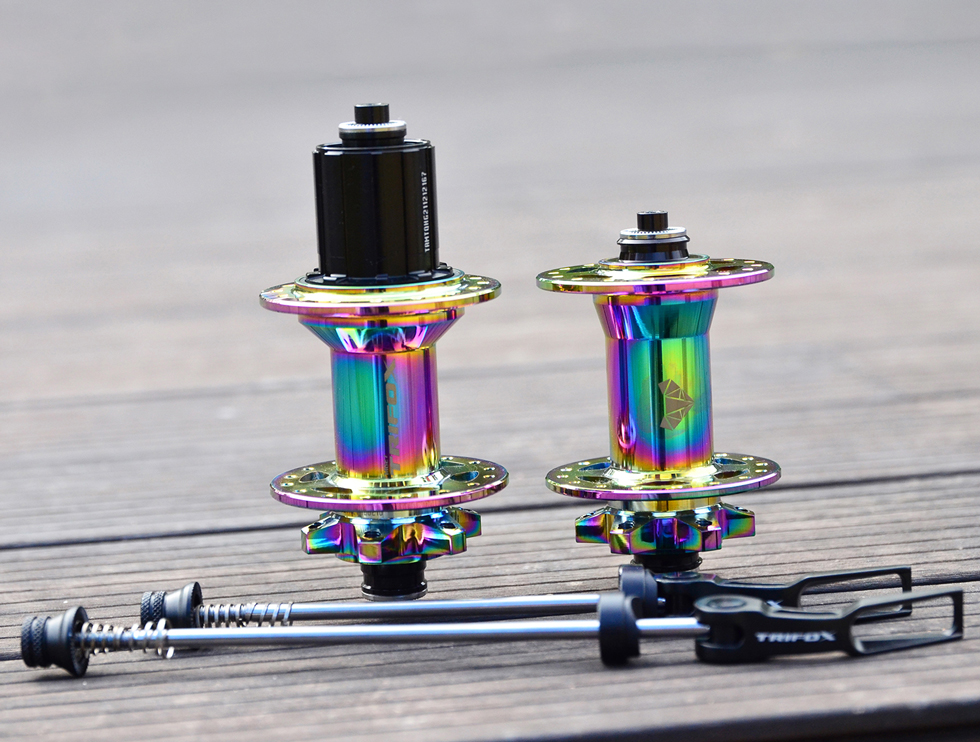
Trifox MTB Wheels: Built for Choice
Whether you prioritize speed, agility, or adaptability, Trifox’s MTB wheels offer robust carbon options across sizes. Their 29" models excel in efficiency, while 27.5" wheels cater to technical riders. Lightweight yet durable, they’re designed to enhance your preferred riding style.
Who Should Ride What?
26": Jumpers, dirt riders, or those on older frames.
27.5": Trail/enduro riders seeking a playful, all-rounder feel.
29": XC racers, endurance riders, or anyone prioritizing speed and stability.
There's no universal “best” wheel size—it depends on your terrain, height, and riding goals. Test different sizes if possible, and consider Trifox’s high-performance wheels to optimize your setup. Whether you’re carving singletrack or racing uphill, the right wheels elevate every ride.
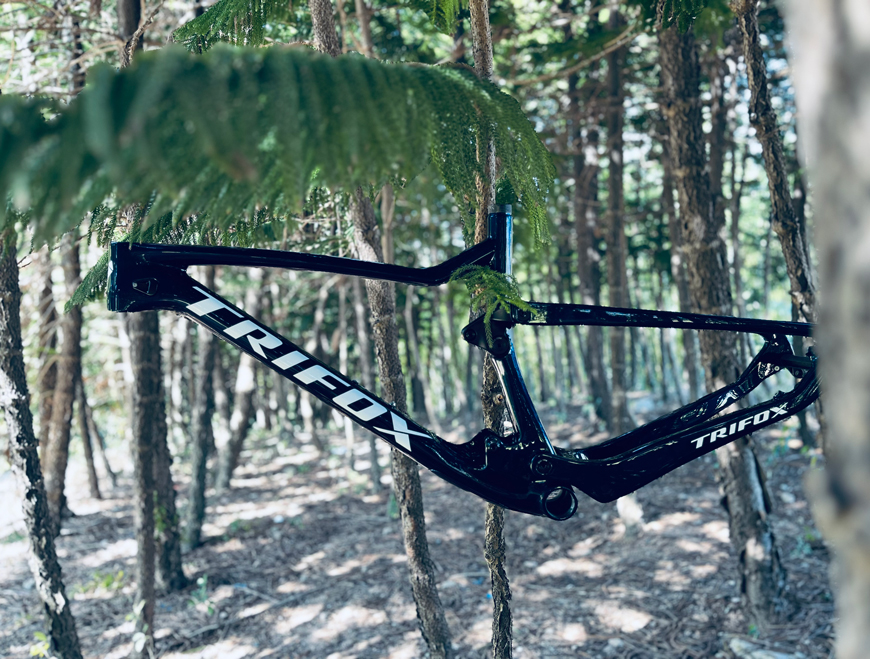
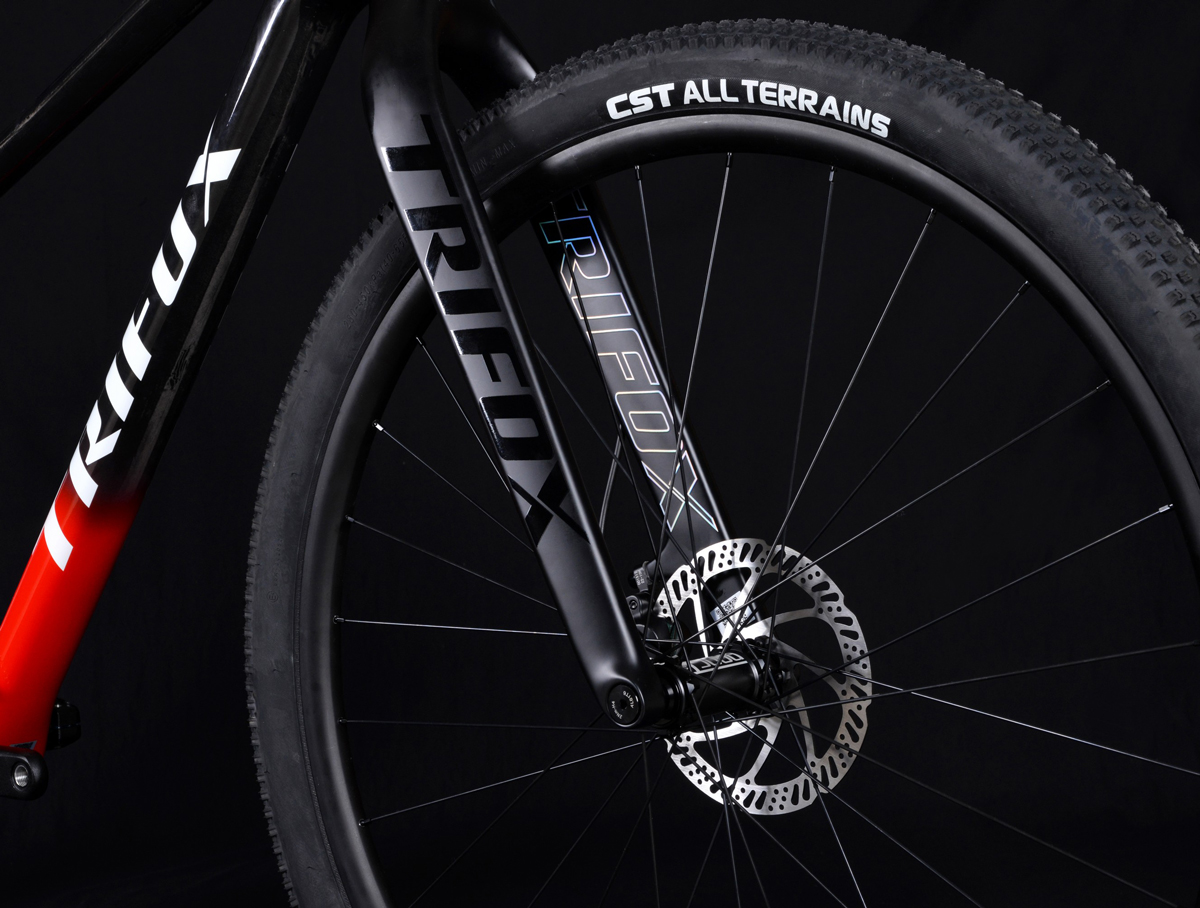
Mountain biking technology constantly evolves, and one debate among riders is whether to choose a frame with full internal cable routing.
What Is Full Internal Cable Routing?
Trifox hides brake and derailleur cables (or housing) inside the frame, creating a clean, streamlined appearance. Unlike traditional setups where cables run externally, Trifox routes them through the frame’s tubes, often exiting near components like the stem or rear derailleur.
Pros of Trifox
Aesthetics & Aerodynamics: A clutter-free frame looks sleek and may reduce drag marginally, though this matters more for racers.
Protection: Cables are shielded from mud, rocks, and trail debris, reducing wear and corrosion.
Durability: Less exposure means fewer snags on branches or accidental tugs during technical rides.
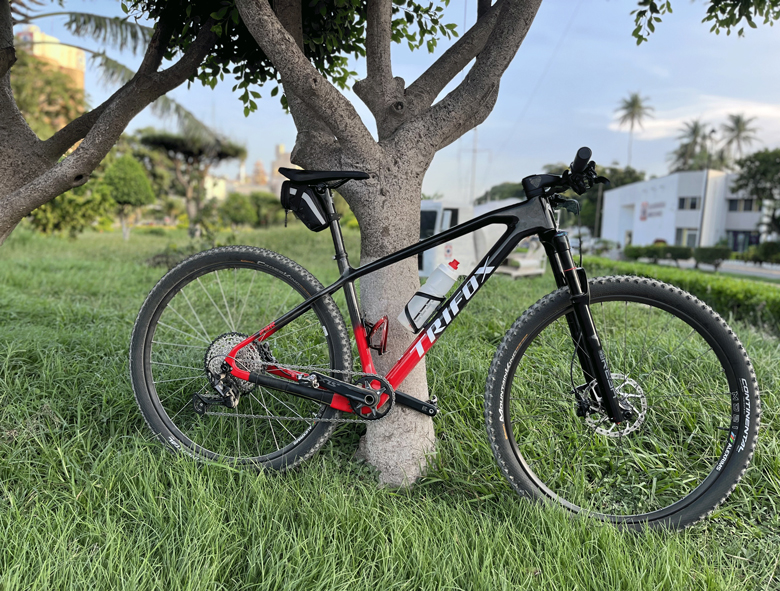
The Trifox SDY21 Frame: A Case Study
The Trifox SDY21 exemplifies Trifox done right. This lightweight carbon hardtail pairs Boost spacing stiffness with internal routing that’s thoughtfully designed. The cables enter through the headtube, minimizing friction points, and the carbon construction ensures durability without weight penalties. For riders prioritizing a clean build, it’s a compelling option.
Who Should Consider Trifox?
Weight-Weenies & Racers: The SDY21's minimalistic design shaves grams while maintaining performance.
Low-Maintenance Riders: If you prefer professional tune-ups and value long-term cable health, Trifox suits you.
Aesthetic Enthusiasts: Love a bike that looks as sharp as it rides? Internal routing delivers.
Who Should Skip It?
DIY Mechanics: If you love tweaking your bike trailside, external routing offers easier access.
Budget-Conscious Riders: Trifox frames often cost more, and installation might require extra tools.

Full internal cable routing isn't a must-have, but it’s a worthy upgrade for riders valuing aesthetics, protection, and modern design. The Trifox SDY21 frame balances these perks with practical engineering, making it ideal for those ready to embrace Trifox’s trade-offs. Before deciding, weigh your maintenance habits, budget, and riding style—because the best frame is the one that matches your trail needs.
The short answer? No—not all bike saddles fit all bikes. While many saddles use universal designs, compatibility hinges on two key factors: rail type and seat post clamp design. Here's how to ensure your next saddle upgrade works seamlessly with your bike.
1. Rail Types Matter
Saddle rails—the bars beneath the seat—vary in shape and material. Common rail styles include:
Round rails: The standard for most bikes, compatible with basic clamps.
Oval/7x9mm rails: Found on performance saddles; require clamps designed for oval shapes.
Carbon rails: Lightweight but need clamps that avoid over-tightening (common in high-end posts).
Carbon saddles, like TrifoxBike’s models, often use oval or round carbon rails. Check your seat post clamp's specs to confirm compatibility.
2. Seat Post Clamp Design
Clamps come in two styles:
Single-bolt: Adjusts saddle angle and position with one bolt; works with most rails.
Twin-bolt: Offers micro-adjustability but may require specific rail shapes.
If your post has a proprietary clamp (common on aero or integrated posts), verify rail compatibility before buying.
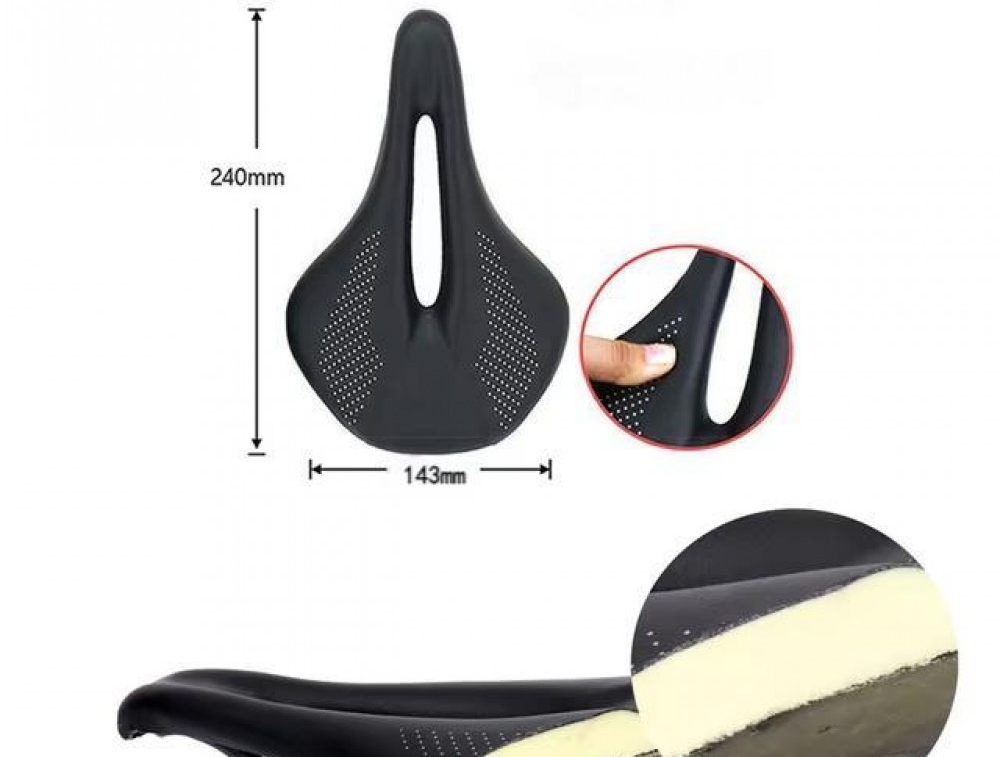
3. Saddle Width & Shape
While width doesn't affect fit, it impacts comfort. Saddles range from narrow (130mm) for racing to wide (155mm+) for endurance. Match width to your sit bones for a pain-free ride.
Why Choose Carbon?
Carbon saddles, like TrifoxBike’s saddle, blend comfort and performance. They’re lighter than nylon or steel-railed options, reduce vibration, and often feature ergonomic cutouts for pressure relief. Just ensure your clamp supports carbon rails to avoid damage.

While not all saddles fit all bikes, understanding rail types and clamp designs simplifies the process. Brands like TrifoxBike make it easier with standardized, high-performance options that balance weight, durability, and price. Ready to upgrade? Swap wisely and ride comfortably!
Building a high-performance bike doesn’t have to drain your savings. With strategic part selection and a focus on value, you can assemble a speedy, reliable ride without splurging on pro-level prices. The secret? Prioritize components that impact speed and durability while exploring budget-friendly brands like TrifoxBike, which offers quality parts at accessible prices. Here’s how to do it.
1. Frame: Start Smart
Skip ultra-light carbon if you’re on a budget. Aluminum frames offer stiffness and durability at a fraction of the cost. Modern alloys rival mid-tier carbon in weight and ride quality, making them ideal for performance-focused builds.
2. Groupset: Mid-Tier Wins
Shimano 105 or SRAM Rival deliver pro-level shifting precision without the premium price. Opt for mechanical over electronic shifting—it’s cheaper to maintain and nearly as responsive. Pair with a lightweight crankset and cassette for snappy acceleration.
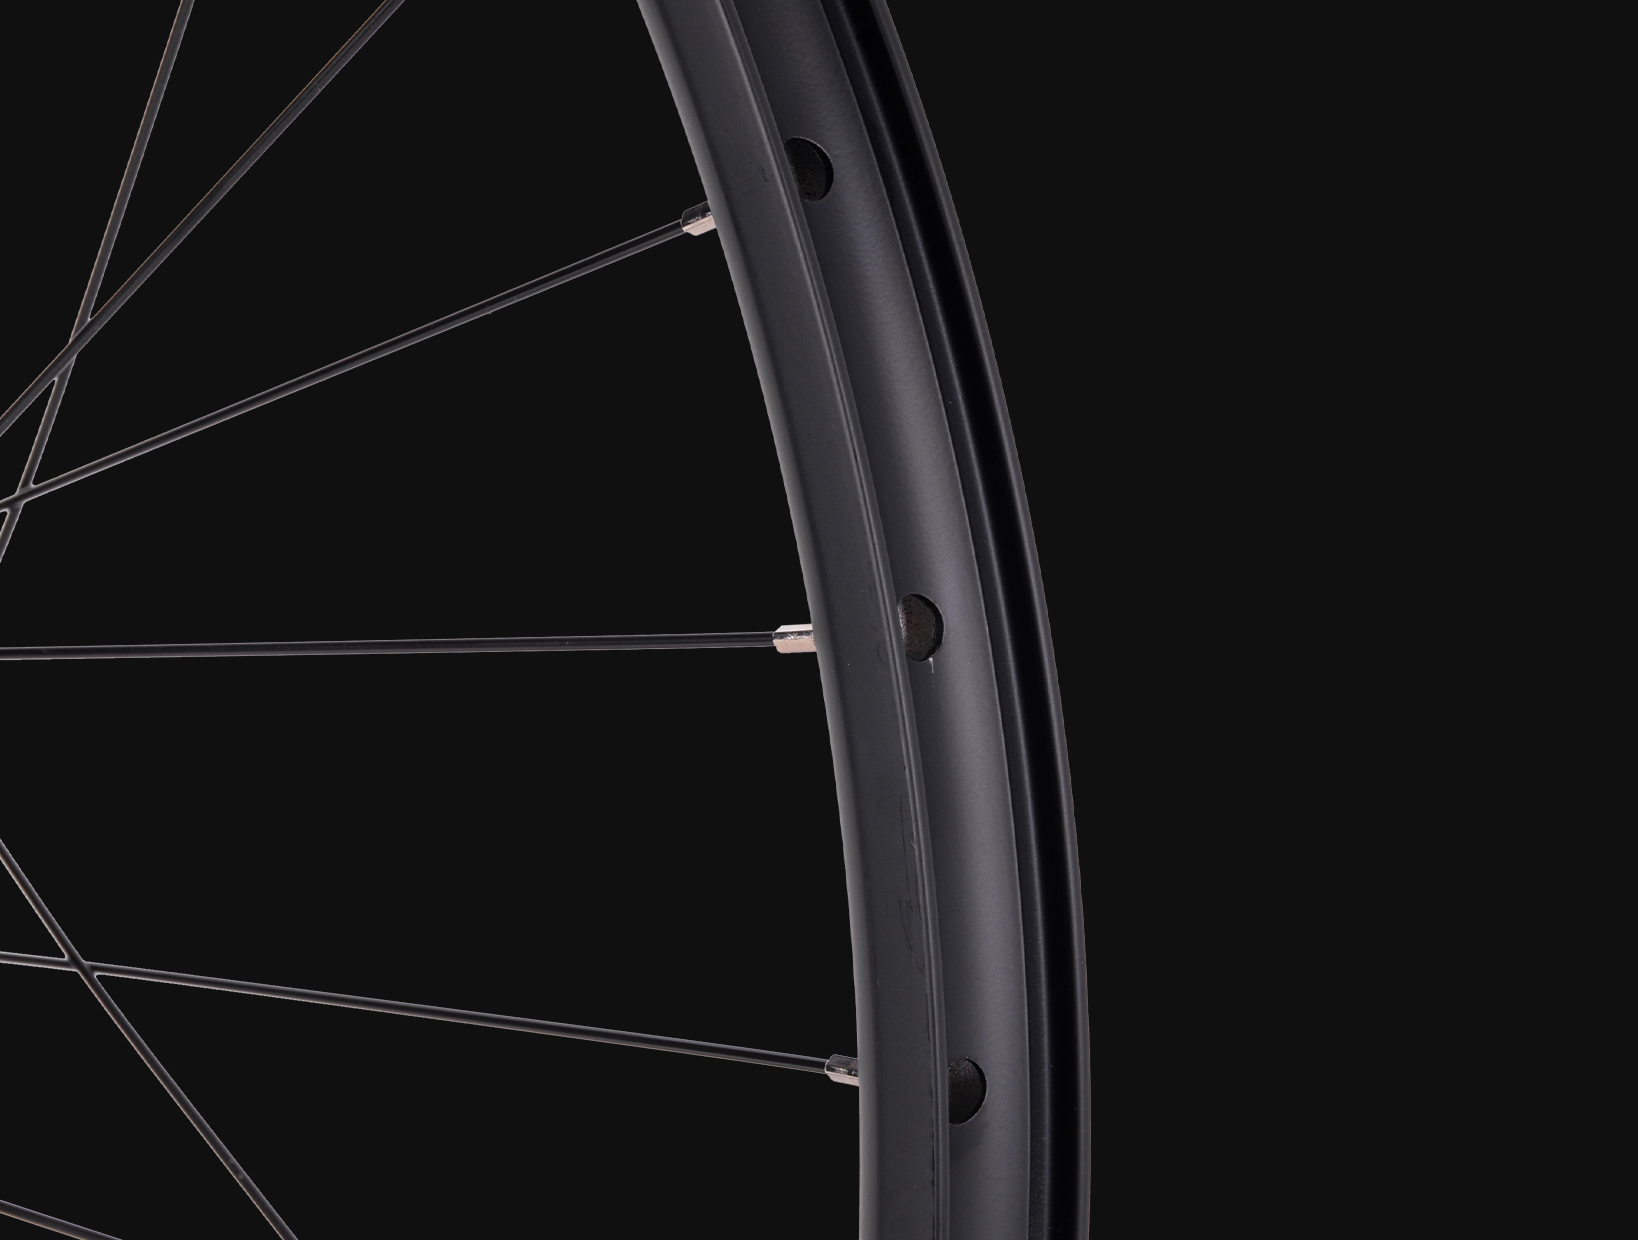
3. Wheels: Alloy Over Carbon
Deep-section alloy wheels improve aerodynamics and are more affordable than carbon. TrifoxBike’s alloy wheel options balance weight and stiffness, ensuring efficient power transfer. Save carbon upgrades for later.
4. Finishing Kit: Keep It Simple
Handlebars, saddles, and seatposts don’t need to break the bank. TrifoxBike’s accessories page offers ergonomic, lightweight options that enhance comfort without compromising performance.
5. Prioritize Upgrades
Focus spending on parts that boost speed first: wheels, then groupset, then frame. Small savings on components like stems or bar tape add up, letting you invest where it matters.
A high-performance bike is achievable on a budget with smart choices. Brands like TrifoxBike prove you don’t need top-shelf prices for quality. By balancing cost and performance, you’ll build a machine that’s fast, reliable, and uniquely yours—without the financial strain. Ready to start? Explore TrifoxBike’s catalog and begin your build today!
Integrated handlebars have surged in popularity among cyclists chasing sleek aesthetics and aerodynamic gains. But do their benefits outweigh the installation challenges and higher price tag? Let’s dive into the pros, cons, and who should consider this upgrade.
The Appeal of Integrated Handlebars
These one-piece systems combine the handlebar and stem into a unified design, reducing weight and cutting wind resistance. For road cyclists and XC mountain bikers, the aerodynamic edge can shave seconds on fast descents or sprints. The minimalist look also appeals to riders prioritizing a clean, modern cockpit. Brands like TrifoxBike offer models that balance performance and affordability, making them accessible to more riders.
The Downsides: Complexity and Cost
Installation is the biggest hurdle. Integrated bars require precise cable routing, often through the stem or frame, which can be time-consuming. Compatibility issues with existing components (e.g., shifters, brake lines) may arise, and cutting or adjusting the steerer tube demands technical skill—or a trip to your local bike shop. Cost is another factor: integrated setups can cost 2–3x more than traditional bars and stems.
Who Should Bite the Bullet?
Competitive riders or weight weenies will appreciate the marginal gains. Triathletes and road racers, in particular, benefit from the aerodynamic savings. However, casual riders or those who value adjustability might find the rigid setup limiting. Integrated bars lock you into a fixed riding position, which can be uncomfortable on long rides if the fit isn’t perfect.
Maximizing Value
If you're committed, opt for user-friendly systems with pre-routed cables or modular designs. TrifoxBike’s options, for example, offer durability without the premium price tag. Pair them with a professional fit session to ensure ergonomic alignment.
Integrated handlebars deliver undeniable performance and style perks—if you’re willing to tackle the installation learning curve and cost. For competitive cyclists or tech-savvy enthusiasts, they’re a worthy upgrade. For everyone else? Stick with traditional setups for simplicity and flexibility. Explore TrifoxBike’s range to find a balance that suits your ride style and budget.

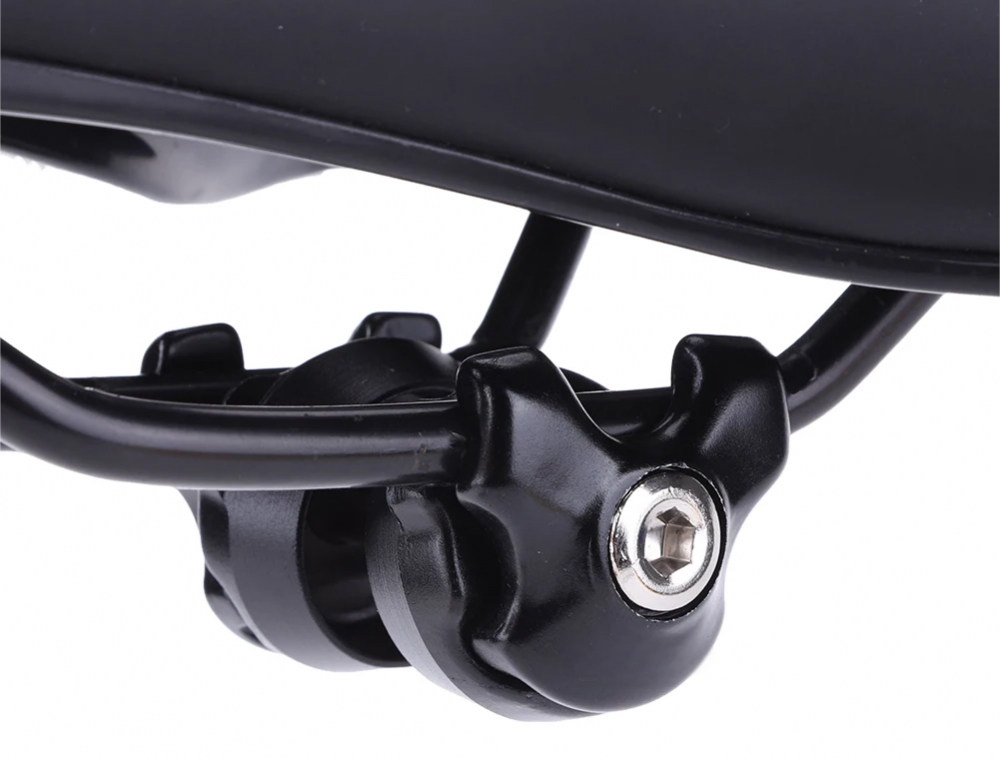
A poorly adjusted saddle clamp can turn even the smoothest ride into a wobbly, uncomfortable ordeal. Whether you’re rocking a carbon road bike or a rugged mountain bike, securing your saddle properly is key to efficiency, power transfer, and comfort.
Tools You'll Need
Allen keys (typically 4mm or 5mm)
Torque wrench (for carbon components)
Carbon grip paste (optional, but recommended)
Rag and cleaning brush
Step 1: Check Compatibility
First, ensure your saddle clamp matches your seat post and frame. The Trifox Saddle Clip comes in oval 7×9mm and round 7×7mm sizes to fit most carbon road and MTB frames. Confirm your seat post’s rail diameter (common sizes: 7mm round or 7x9mm oval) before proceeding.
Step 2: Install the Clamp
Clean the seat post and clamp interface to remove dirt or grease.
Apply a thin layer of carbon grip paste to prevent slippage (critical for carbon frames).
Slide the clamp onto the seat post, aligning it with the frame’s seat tube.
Step 3: Adjust Saddle Angle
Loosen the clamp bolts slightly to tilt the saddle. For most riders, a neutral angle (parallel to the ground) is ideal. Avoid extreme tilts—nose-down can cause hand strain, while nose-up may lead to discomfort.
Step 4: Set Saddle Height
Position the saddle at your preferred height, ensuring the seat post isn’t extended beyond the frame's minimum insertion mark. Tighten the clamp bolts evenly in a cross pattern to avoid misalignment. For carbon frames, use a torque wrench (typically 5–6Nm) to prevent overtightening.
Step 5: Secure the Rails
Slide the saddle rails into the clamp, centering them for even pressure. Tighten the rail bolts gradually, alternating sides to maintain balance. Double-check for lateral movement—if the saddle shifts, add grip paste and retighten.
文字
Step 6: Test and Refine
Hop on your bike and pedal lightly. If you feel rocking or discomfort:
Recheck bolt torque.
Ensure rails are fully seated in the clamp.
Adjust angle or height incrementally.
Why Choose the Trifox Saddle Clip?
This lightweight, corrosion-resistant clamp is engineered for carbon frames, offering secure grip without damaging delicate materials. Its oval and round options ensure compatibility with most saddles, while the sleek design keeps your setup looking pro.
Final Tips
Regular Checks: Saddle clamps can loosen over time—inspect before every ride.
Avoid Overtightening: Carbon components are fragile; stick to torque specs.
Upgrade Smart: If your current clamp slips or feels bulky, the Trifox Saddle Clip is a reliable, affordable fix.
Dial in your saddle clamp, and say goodbye to numb hands and wasted watts.
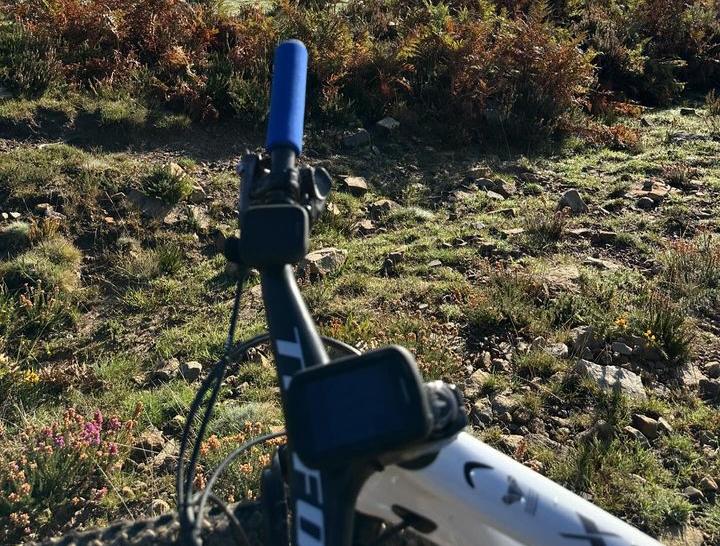
Choosing the right mountain bike fork can make or break your ride. With so many options—rigid, suspension, air-sprung, coil-sprung—it’s easy to feel overwhelmed. But don’t worry! We’re breaking down the most common MTB fork types and how they align with different riding styles.
1. Rigid Forks: Simplicity Meets Lightweight
Rigid forks (no suspension) are ultralight and low-maintenance, ideal for smooth trails, gravel paths, or bikepacking where weight savings matter most. They’re perfect for cross-country purists or riders prioritizing efficiency over comfort. However, they lack shock absorption, making them less suitable for technical terrain.
2. Hardtail Suspension Forks: Versatility on a Budget
Hardtail forks (front suspension only) strike a balance between efficiency and control. Air-sprung models (like Trifox’s carbon suspension forks) are lightweight and adjustable, ideal for trail riding or XC racing. Coil-sprung forks, while heavier, offer plush performance for all-day endurance rides.
3. Full Suspension Forks: Conquer the Gnar
Paired with a rear shock, full suspension forks soak up bumps on aggressive descents. Look for forks with 150–180mm of travel for enduro or downhill riding. Features like adjustable damping and lockouts (available in premium models) let you switch between climbing efficiency and downhill stability.
4. Hybrid Forks: The Best of Both Worlds?
Some forks blend air and coil springs for tunable performance. These hybrids cater to all-mountain riders who tackle mixed terrain. They’re adaptable but often come at a higher price point.
Key Considerations
Travel: Match fork travel to your terrain (80–120mm for XC, 130–150mm for trail, 150mm+ for enduro/downhill).
Weight: Carbon forks (like Trifox’s) reduce weight without sacrificing strength—critical for climbing.
Axle Standards: Boost spacing (110x15mm) improves stiffness and tire clearance.
Budget: High-end forks offer adjustability, but mid-range models can still deliver great performance.
Why Carbon Forks?
Carbon fiber forks, such as those from Trifox Bike, combine durability with vibration damping—key for long rides. They're also corrosion-resistant and excel in stiffness-to-weight ratios, making them a favorite among competitive riders.
Your fork choice depends on where and how you ride. For XC racers, a lightweight air-sprung carbon fork is ideal. Trail riders benefit from adjustable 120–140mm travel, while enduro shredders need burly 150mm+ forks. Check out Trifox Bike’s carbon forks to find a high-performance option tailored to your style.


