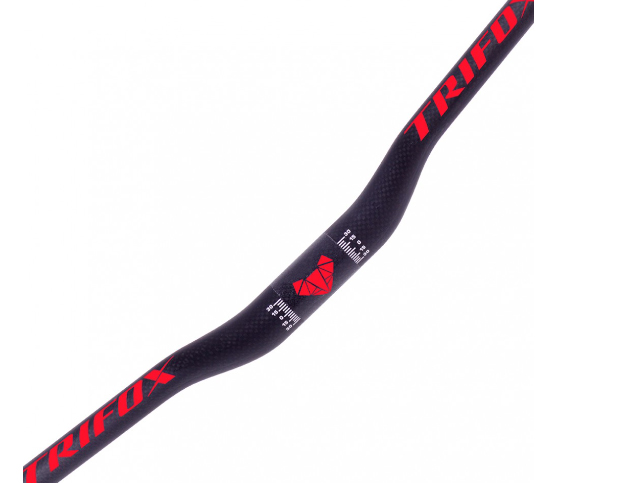
When it comes to cycling, the handlebar is more than just a steering mechanism—it's a critical component that affects control, comfort, and performance. A robust handlebar can elevate your riding experience, making it essential for cyclists of all levels to understand what constitutes a durable and reliable handlebar. Here’s what you need to know about robust handlebars and why they matter, using the Trifox Carbon Riser Handlebar RHB300 as an example.
1. Material Quality
The foundation of a robust handlebar lies in its material. High-quality materials like carbon fiber offer a blend of strength and lightweight properties. The Trifox Carbon Riser Handlebar RHB300 is made from premium carbon fiber, providing excellent durability without adding unnecessary weight. This balance is crucial for maintaining bike agility and rider comfort.
2. Design and Construction
A well-designed handlebar should distribute stress evenly to prevent weak points that could lead to failure. The Trifox RHB300 features a carefully engineered design that enhances structural integrity. Its riser shape also contributes to better control and ergonomics, allowing for a more comfortable and responsive ride.
3. Ergonomics
Comfort is key during long rides, and a robust handlebar should cater to ergonomic needs. The rise and sweep of the handlebar affect hand positioning and overall comfort. The Trifox RHB300 is designed with a thoughtful rise and back-sweep angle, ensuring a natural wrist position and reducing fatigue on extended rides.
4. Vibration Dampening
Cycling over rough terrain can transfer vibrations to your hands and arms, leading to discomfort or even injury. A robust handlebar like the Trifox RHB300 incorporates vibration-dampening properties inherent in carbon fiber. This helps absorb shocks and vibrations, resulting in a smoother and more enjoyable ride.
5. Strength and Durability
To withstand the rigors of various terrains, a handlebar must be strong and durable. The Trifox RHB300 has been subjected to rigorous testing to ensure it meets high standards of strength and longevity. This reliability means you can trust it to perform under demanding conditions, whether you're tackling mountain trails or rough urban streets.
Why Should You Care?
Investing in a robust handlebar is not just about enhancing your bike’s aesthetics. It directly impacts your safety, comfort, and performance. A high-quality handlebar ensures better control and stability, reducing the risk of accidents. Comfort enhancements from ergonomic designs reduce fatigue, allowing you to ride longer and more enjoyably. Moreover, the durability of a robust handlebar means fewer replacements and repairs, saving you money in the long run.
In conclusion, understanding what makes a handlebar robust and investing in a quality product like the Trifox Carbon Riser Handlebar RHB300 can significantly enhance your cycling experience. Prioritize quality, and you'll reap the benefits of a safer, more comfortable, and more enjoyable ride.
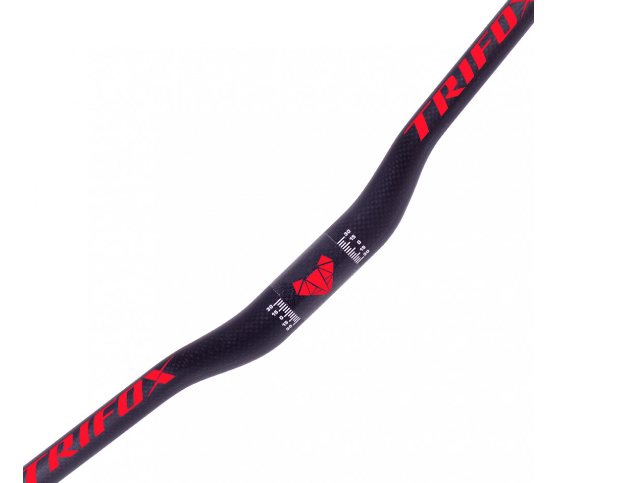
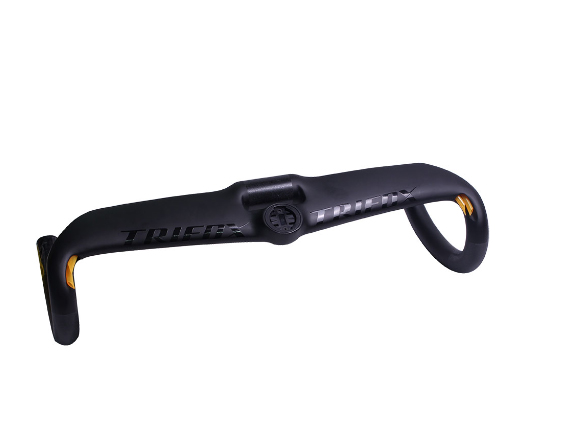
If you're looking to maximize your speed and efficiency on the road, installing aero bars on your bike is a great solution. Aero bars can significantly reduce wind resistance, allowing you to achieve faster speeds with less effort. Here's a step-by-step guide to installing road bike aero bars, using the Trifox Aero Aerofoil Section Carbon Drop Handlebar TC20AF.
1. Gather Your Tools and Materials
Before you begin, ensure you have all necessary tools and materials:
Aero bars (like the Trifox TC20AF)
Hex keys
Torque wrench
Handlebar tape
Scissors or a knife
2. Prepare Your Handlebar
First, remove any existing handlebar tape from your current handlebars. This will give you a clean surface to work with and prevent any obstruction during installation. Make sure to clean the handlebar thoroughly to remove any residue or debris.
3. Position the Aero Bars
Next, place the aero bars on the handlebar in the desired position. Typically, they should be placed centrally on the top section of the handlebar. Ensure they are symmetrical and aligned correctly. Adjust the angle to a comfortable position that allows you to maintain an aerodynamic posture.
4. Secure the Aero Bars
Using the hex keys, tighten the bolts to secure the aero bars in place. It's crucial to follow the manufacturer's torque specifications to avoid over-tightening, which can damage the carbon handlebar. If you don't have the specifics, generally, a torque setting of 5-6 Nm is recommended for carbon components.
5. Adjust the Armrests and Extensions
Most aero bars come with adjustable armrests and extensions. Set the armrests at a width and height that provides comfort and support for your forearms. Adjust the extensions so that your hands can reach the shifters and brakes comfortably while maintaining an aerodynamic position.
6. Rewrap the Handlebar Tape
Once the aero bars are securely installed and adjusted, rewrap the handlebar tape. Start from the ends of the handlebar and work your way up, ensuring the tape is tight and evenly wrapped. Cut off any excess tape and secure the ends with finishing tape.
7. Test Ride and Final Adjustments
Take your bike for a test ride to ensure everything feels comfortable and secure. Pay attention to how the aero bars handle and make any minor adjustments as needed. It may take a few rides to fine-tune the setup for maximum comfort and efficiency.
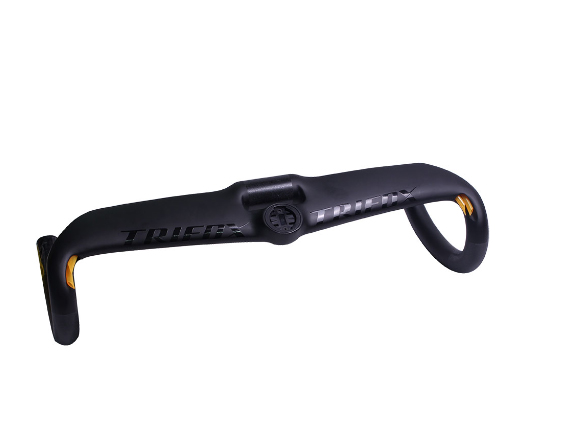
Installing aero bars, such as the Trifox Aero Aerofoil Section Carbon Drop Handlebar TC20AF, can greatly enhance your cycling performance by reducing aerodynamic drag. Follow these steps to achieve a secure and comfortable installation, and enjoy the benefits of improved speed and efficiency on your next ride.
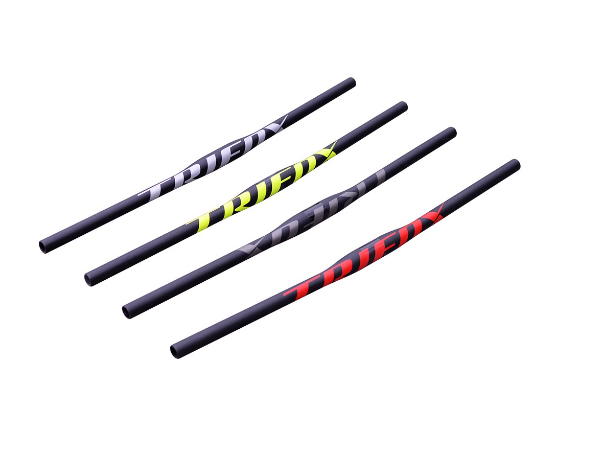
When it comes to enhancing your cycling experience, handlebars play a crucial role. If you're contemplating whether to switch to a flat bar, here are some compelling reasons why it might be the right choice for you.
1. Enhanced Control
Flat bars offer superior control, especially in technical terrains. The wider grip allows for better leverage, making it easier to navigate sharp turns, rough trails, and obstacles. This increased control is particularly beneficial for mountain bikers and commuters who face varying conditions daily.
2. Improved Comfort
A flat bar promotes a more upright riding posture, which can significantly reduce strain on your back, neck, and wrists. This ergonomic advantage makes long rides more comfortable, allowing you to enjoy your journey without discomfort.
3. Versatility
Flat bars are versatile and suitable for various types of riding, from urban commuting to cross-country adventures. Their straightforward design makes mounting accessories like lights, GPS units, and phone holders easier, enhancing your overall riding experience.
4. Durability and Safety
Flat bars are typically more robust than their drop-bar counterparts, providing increased durability. Their design also offers better stability and control, contributing to a safer ride, especially when navigating uneven or unpredictable surfaces.
Top Pick: Trifox Carbon Flat Bar
If you're looking for a high-quality flat bar, check out the Trifox Carbon Flat Bar FHB100. Known for its lightweight yet sturdy construction, this flat bar enhances both control and comfort, making it a great upgrade for your bike.
Conclusion
Switching to a flat bar can provide better control, improved comfort, and greater versatility, making it a worthwhile consideration for various types of cyclists. Whether you're tackling off-road trails or navigating city streets, the benefits of a flat bar are clear. Upgrade to a flat bar and experience the difference it can make in your riding experience.
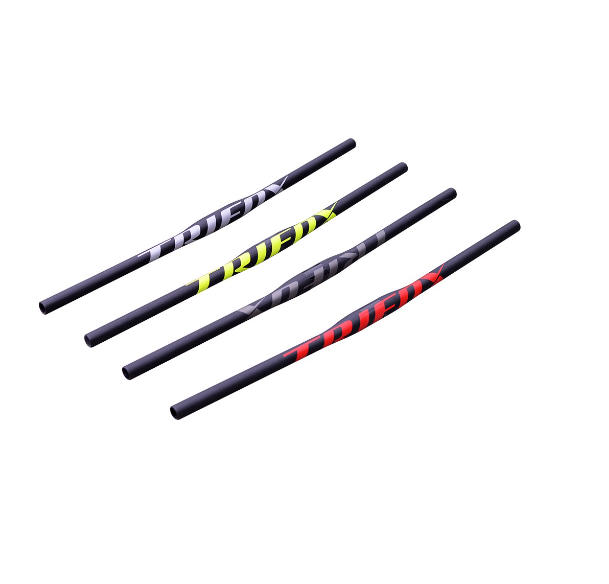
When it comes to optimizing your mountain bike, selecting the right components can make a significant difference in your riding experience. Among the many upgrades available, a carbon riser handlebar stands out for its numerous benefits. Let's delve into why choosing a carbon riser handlebar could be the perfect enhancement for your mountain biking adventures.
Lightweight and Strong
One of the most compelling reasons to opt for a carbon riser handlebar is its lightweight nature. Carbon fiber is known for its outstanding strength-to-weight ratio, making it an ideal material for handlebars. By reducing the weight of your bike's front end, you can achieve better maneuverability and control, especially on technical trails. This weight reduction is not just about performance; it also means less fatigue during long rides, allowing you to push your limits with greater ease.
Enhanced Vibration Dampening
Mountain biking often involves navigating rough terrains that can transmit a lot of vibration to your hands and arms. A carbon riser handlebar excels in damping these vibrations, offering a smoother and more comfortable ride. This feature is particularly beneficial during extended rides or on trails with constant bumps and jolts.
Improved Riding Position
Riser handlebars are designed to elevate the rider’s position, providing a more upright stance. This posture not only enhances comfort but also improves visibility and control over the bike. For riders who prefer a laid-back yet confident riding style, a riser handlebar is indispensable. The increased height also facilitates easier handling during descents and sharp turns.
Aesthetic Appeal
Let’s not overlook the aesthetic advantage. Carbon riser handlebars have a sleek, modern look that can instantly upgrade the appearance of your bike. With clean lines and a premium finish, they add a touch of sophistication to your setup.
Durability
Carbon fiber is incredibly durable and resistant to fatigue, making it a reliable choice for demanding off-road conditions. Unlike aluminum handlebars, which can bend or corrode over time, carbon handlebars maintain their integrity and performance for the long haul.
Top Pick: Trifox Carbon Riser Handlebar
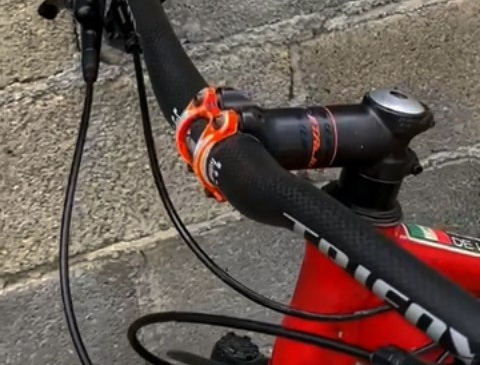
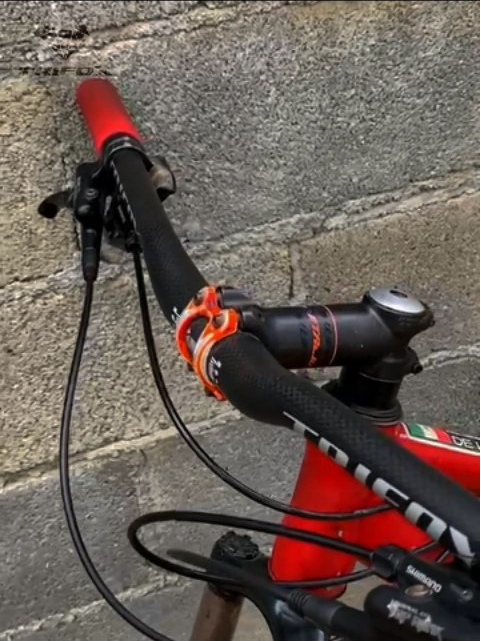
If you're considering upgrading to a carbon riser handlebar, check out the Trifox Carbon Riser Handlebar RHB300. Known for its exceptional quality and engineering, this handlebar offers all the benefits mentioned above. Designed with precision, it promises to enhance your mountain biking experience by combining strength, flexibility, and style.
Conclusion
Choosing a carbon riser handlebar for your mountain bike is more than just a performance upgrade; it’s an investment in comfort, durability, and overall riding enjoyment. Whether you're a seasoned rider or a beginner looking to improve your setup, the advantages of a carbon riser handlebar are clear.
From reduced weight and enhanced vibration dampening to improved riding position and aesthetic appeal, a carbon riser handlebar is a versatile component that can significantly elevate your mountain biking experience. Make the switch today and feel the difference on your next ride!
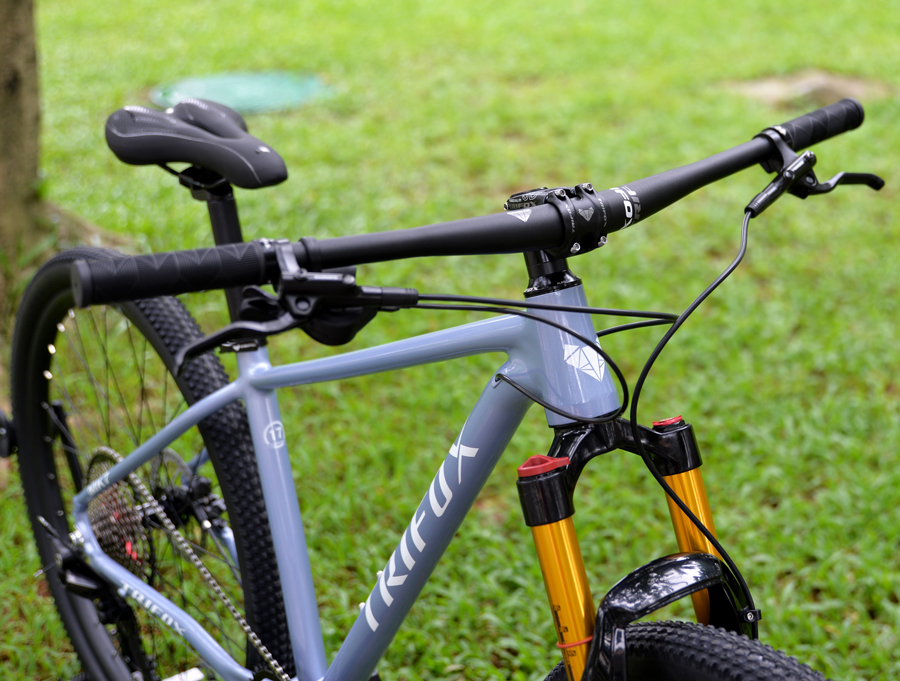
Choosing the right handlebar can significantly enhance your cycling experience, providing comfort, control, and efficiency. With options like the high-quality carbon bike handlebars from Trifox, it's essential to understand which type suits your riding style best. Here's a guide to help you make the perfect choice.
1. Identify Your Riding Style
Your riding style is the first consideration when selecting a handlebar. Are you into road racing, mountain biking, or casual commuting? Each style demands different handlebar characteristics for optimal performance.
Road Racing: For speed and aerodynamics, drop bars are usually preferred. They offer multiple hand positions and reduce drag;Mountain Biking: Flat or riser bars are ideal for control and stability on rugged trails;Commuting: Comfort and ease of use are key, making flat bars or cruiser bars a good choice.
2. Consider the Material
Carbon handlebars, like those offered by Trifox, provide several advantages. They are lightweight, strong, and absorb vibrations better than aluminum, offering a smoother ride. This is particularly beneficial for long-distance cyclists and competitive racers.
3. Understand Handlebar Dimensions
Width: A wider handlebar offers more control, especially in technical terrains, while a narrower bar can be more aerodynamic;Drop and Reach: For drop bars, consider the drop (vertical distance) and reach (horizontal distance). A deeper drop allows for a more aerodynamic position, while a shorter reach is more comfortable for casual rides;Rise: For flat and riser bars, the rise (height difference between the center of the bar and the ends) affects your riding posture. More rise means a more upright and comfortable position.
4. Test Different Shapes
Handlebars come in various shapes to suit different preferences:
Drop Bars: Ideal for road cyclists needing aerodynamic positions.Flat Bars: Common in mountain bikes for improved control;Riser Bars: Provide a higher position, enhancing visibility and comfort;Bullhorn Bars: Offer an aggressive position suitable for time trials and track racing.
5. Ergonomics and Comfort
Pay attention to ergonomics. Some handlebars have ergonomic bends or specific shapes designed to reduce fatigue and increase comfort on long rides. Carbon bars, such as those available from Trifox, often include these features, making them a great investment for serious cyclists.
6. Installation and Adjustments
Ensure proper installation and adjustment. Handlebars need to be securely fitted and adjusted to your preference. Seek professional help if necessary to avoid any mishaps that could affect your ride quality or safety.
Conclusion
Choosing the perfect cycling handlebar is crucial for enhancing your cycling experience. With options like the Trifox carbon bike handlebars, you can find the balance between weight, strength, and comfort tailored to your riding style. Take the time to assess your needs, try different options, and invest in the best handlebar for a more enjoyable and efficient ride.
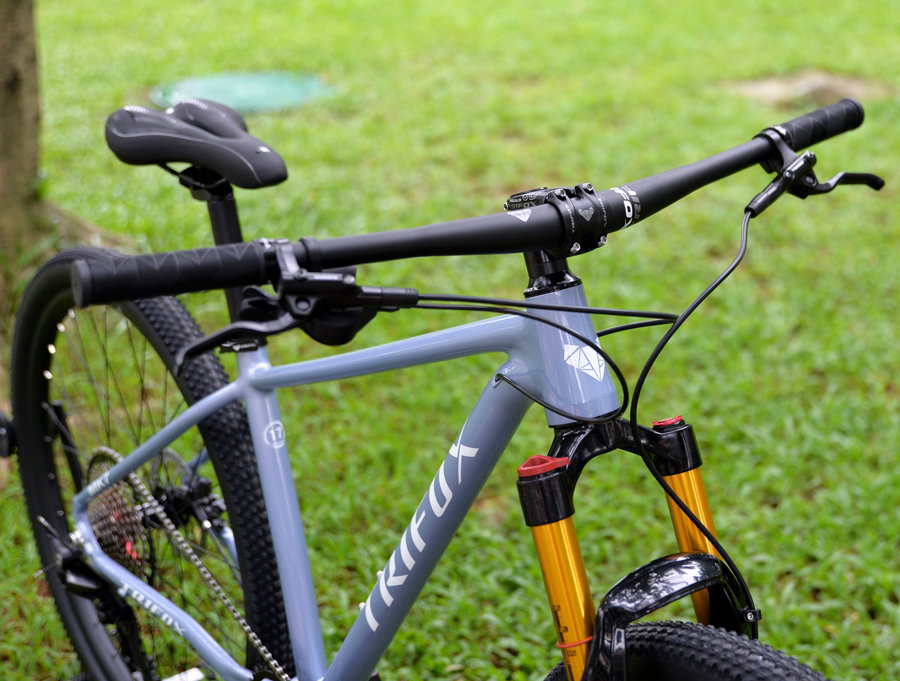
Explore Trifox's range of carbon bike handlebars here.
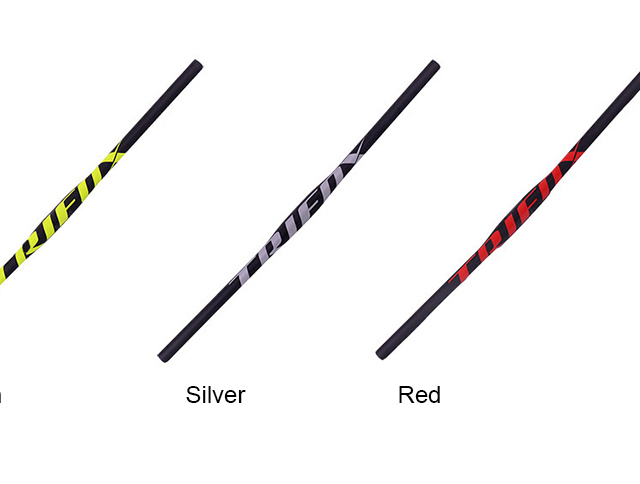
Selecting and installing a rise MTB handlebar can drastically improve your mountain biking experience, offering better control, comfort, and performance.
Selecting the Right Rise MTB Handlebar
1. Understanding Rise
The "rise" of the handlebar refers to how high the grips sit above the handlebar clamp area. Rise is measured in millimeters and typically ranges from 10mm to 50mm. A higher rise can provide a more upright and comfortable riding position, while a lower rise can offer better aerodynamics and control on steep descents.
2. Width Considerations
Handlebar width impacts control and stability. Wider bars (750mm-800mm) offer better leverage and stability, ideal for technical terrains. Narrower bars (650mm-700mm) are suitable for tighter trails and cross-country riding.
3. Material and Durability
Handlebars come in aluminum or carbon fiber. Aluminum bars are durable and affordable, while carbon fiber bars are lighter and can absorb more vibrations, enhancing comfort.
4. Backsweep and Upsweep
Backsweep (angle towards the rider) and upsweep (angle upwards) are crucial for ergonomics. Common backsweep ranges from 7° to 9°, while upsweep ranges from 4° to 6°. These angles can reduce strain on your wrists and improve handling.
Installing the Rise MTB Handlebar
1. Gathering Tools
You’ll need an Allen wrench set, torque wrench, and possibly a stem spacer kit. Ensure you have the correct tools for your bike's specifications.
2. Removing the Old Handlebar
Loosen and remove the stem bolts with an Allen wrench.Carefully detach the old handlebar, noting the position of any spacers.
3. Installing the New Handlebar
Position the new handlebar in the stem clamp.Adjust the angle to your preference, ensuring it aligns with the front wheel.
Tighten the stem bolts evenly using a torque wrench to manufacturer-recommended settings to avoid over-tightening.
4. Adjusting Controls
Reattach brake levers, shifters, and grips. Ensure they are positioned comfortably and securely tightened.
5. Test Ride and Fine-Tuning
Take your bike for a test ride to ensure everything feels right. Make minor adjustments as needed to perfect your setup.
Conclusion
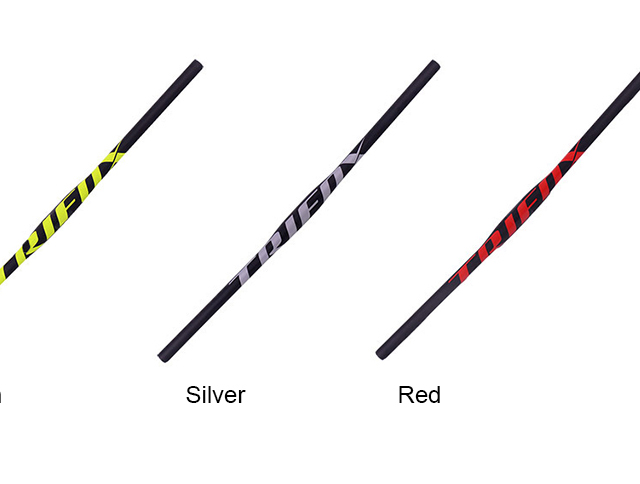
Selecting and installing the right rise MTB handlebar can significantly enhance your riding performance and comfort. Follow these steps to find the optimal bar for your style and ensure it’s installed correctly. Happy riding!
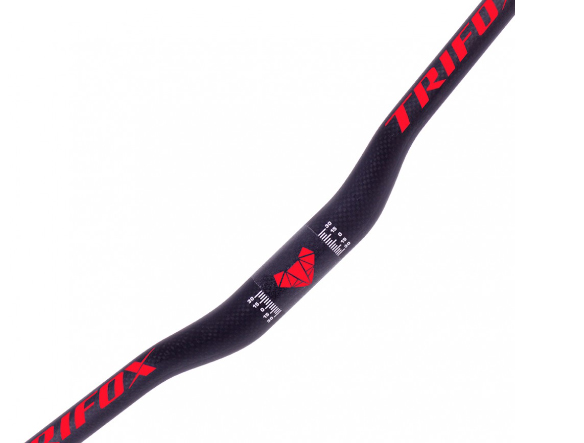
Upgrading to carbon handlebars on your bike can significantly enhance your riding experience. Carbon handlebars are lighter, more comfortable, and can absorb road vibrations better than their aluminum counterparts. However, installing and maintaining them requires some specific steps and attention to detail to ensure safety and longevity.
Why Choose Carbon Handlebars?
Before diving into the installation and maintenance, it’s worth understanding why carbon handlebars are a popular choice among cyclists:
Weight: Carbon handlebars are significantly lighter than aluminum, reducing the overall weight of your bike;Comfort: They offer better shock absorption, leading to a more comfortable ride over long distances;Aerodynamics: Many carbon handlebars come with aerodynamic designs that reduce drag;Aesthetics: Carbon handlebars often have a sleek, modern look that can enhance the appearance of your bike.
Tools You’ll Need
To install and maintain carbon handlebars, you’ll need the following tools:
Torque wrench;Allen keys (appropriate sizes for your bike);Carbon assembly paste;Clean cloth;Bike stand (optional but recommended).
Installation Guide
Step 1: Remove Old Handlebars
Secure Your Bike: Place your bike on a stable surface or use a bike stand to keep it steady;Remove Accessories: Remove any accessories attached to the handlebars, such as lights, bells, or GPS mounts;Loosen Stem Bolts: Use an Allen key to loosen the bolts on the stem to release the handlebars. Be careful not to lose any bolts or parts.
Step 2: Prepare for Installation
Clean the Stem: Wipe down the inside of the stem clamp with a clean cloth to remove any dirt or debris;Apply Assembly Paste: Apply a thin layer of carbon assembly paste to the clamping area of the stem and the new carbon handlebars. This paste increases friction and helps prevent slippage without the need for excessive tightening.
Step 3: Install Carbon Handlebars
Position Handlebars: Align the new carbon handlebars with the stem. Make sure they are centered and at the desired angle;Tighten Stem Bolts: Using a torque wrench, gradually tighten the stem bolts in a cross pattern. Refer to the manufacturer's torque specifications to avoid over-tightening, which can damage the carbon fiber. Typically, the recommended torque settings range from 4-6 Nm.Reattach Accessories: Attach any removed accessories back onto the new handlebars.
Step 4: Final Adjustments
Check Alignment: Ensure the handlebars are perfectly aligned with the front wheel;Test Ride: Take the bike for a short test ride to check for any movement or creaking noises. If you notice any issues, recheck the torque settings.
Maintenance Tips
Maintaining carbon handlebars is crucial for safety and performance. Here are some tips to keep them in top condition:
Regular Inspections
Visual Checks: Regularly inspect your handlebars for any cracks, chips, or other signs of damage. Carbon fiber can be damaged without obvious signs, so pay close attention;Torque Checks: Periodically check the torque on all bolts to ensure they are within the recommended range. Over time, bolts can loosen slightly
Cleaning
Gentle Cleaning: Use a soft cloth and mild soapy water to clean the handlebars. Avoid harsh chemicals or abrasive cleaners that could damage the carbon fiber;Dry Thoroughly: Make sure to dry the handlebars thoroughly after cleaning to prevent any moisture from affecting the material.
Handling
Avoid Impact: Handle your bike carefully to avoid impacts that could damage the carbon fiber. Always support the bike correctly, especially when placing it on bike racks or stands;Proper Storage: Store your bike in a safe place where it won’t be at risk of falling or being knocked over.
Replacements
Replace When Necessary: If you notice any signs of significant wear or damage, replace the handlebars immediately. Don’t take risks with compromised components;Follow Manufacturer Guidelines: Always adhere to the manufacturer’s guidelines regarding the lifespan and replacement intervals for carbon handlebars.
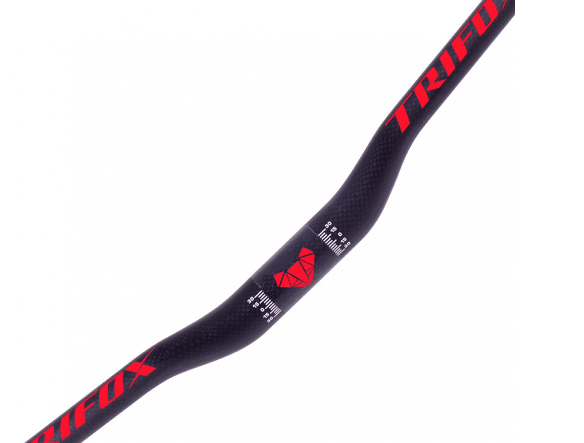
Conclusion
Installing and maintaining carbon handlebars is a worthwhile investment for enhancing your cycling experience. By following this guide, you can ensure a safe and efficient installation process and keep your handlebars in excellent condition for years to come. Remember, regular maintenance and careful handling are key to maximizing the benefits of your carbon handlebars. Happy riding!
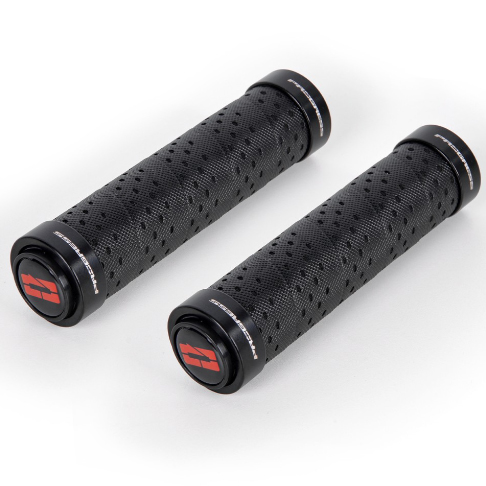
Achieving the perfect balance of comfort and control on your bike largely depends on one critical touchpoint: the handlebar grips. Whether you're navigating rugged trails, cruising city streets, or competing in a race, the right grips can significantly enhance your riding experience.
Understand Grip Types: Handlebar grips come in various shapes, materials, and textures. Ergonomic grips are designed to conform to the shape of your hand, reducing pressure points and fatigue during long rides. Lock-on grips feature a clamp system that prevents them from twisting or slipping, offering reliable control in all conditions. Foam grips, meanwhile, are known for their light weight and exceptional vibration damping properties.
Select the Right Material: Rubber grips are popular for their durability and range of textures, offering a secure grip in wet or dry conditions. Silicone grips are softer and absorb vibrations well but might wear out faster than rubber. For those seeking the ultimate in comfort and shock absorption, foam grips are an excellent choice, though they may not provide as much direct feedback as rubber or silicone.
Consider Bar Ends: For riders looking for additional hand positions and leverage, especially on climbs, grips with integrated or add-on bar ends can offer a significant advantage. They allow you to change your grip position, reducing strain on your hands, wrists, and shoulders during long rides.
Grip Texture and Thickness: The texture of your grips should match your usual riding conditions. Smoother grips may suffice for calm, road biking, while a more aggressive texture provides extra hold for off-road adventures. The thickness of the grips also plays into comfort, with thicker grips offering more cushioning but potentially feeling bulkier for riders with smaller hands. It's a personal preference, so consider testing a few options to find what works best for you.
Installation Tips: When installing new grips, cleanliness is key. Ensure both the handlebar and inside of the grips are clean and dry. For slip-on grips, a bit of hairspray or alcohol inside the grip can help it slide on easier and then stick in place once dry. For lock-on grips, simply slide them onto the bar and tighten the clamp bolts evenly for a secure fit.
Maintenance: Regularly check your grips for wear and tear, especially if you ride frequently or in harsh conditions. Worn-out grips can reduce your control over the bike and lead to discomfort or blisters.
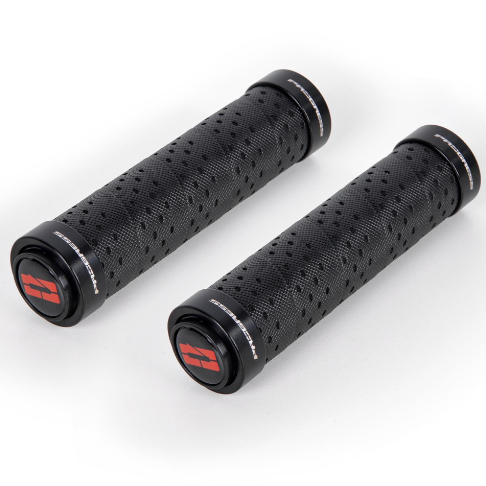
In Conclusion, upgrading to the best handlebar grips for your needs is a simple yet effective way to improve both comfort and control on your bike.
By understanding the types of grips available, choosing the right material and features for your riding style, and ensuring a proper installation, you can enjoy a more comfortable, controlled, and enjoyable ride every time.
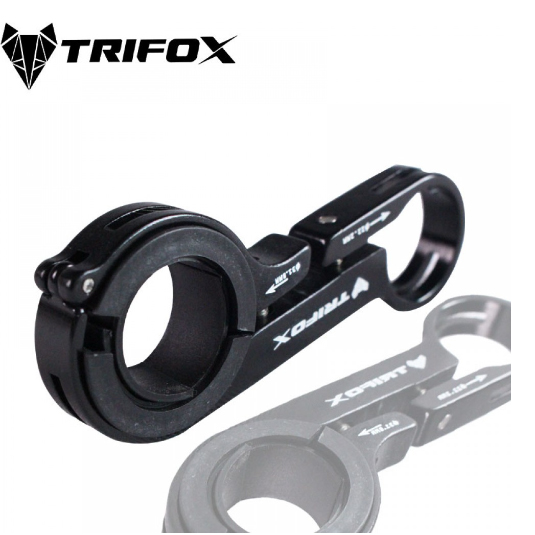
For avid cyclists and casual riders alike, comfort and functionality on long rides are paramount. A bicycle handlebar extender can significantly enhance your riding experience by providing extra space for mounting gadgets, improving control, and offering a more comfortable riding position. Here's how to make the most of this simple yet effective accessory.
Why Use a Handlebar Extender?
Handlebar extenders are perfect for when you need more room for lights, GPS devices, smartphones, or even a horn. They allow you to keep all your essential gear within easy reach, without cluttering your main handlebar space. Additionally, for those seeking a more upright riding posture, extenders can help alleviate back and neck strain by adjusting the height or angle of your handlebars.
Choosing the Right Extender
When selecting a handlebar extender, consider the material, length, and diameter. Aluminum extenders offer a great balance between strength and weight, while carbon fiber options provide the ultimate in lightweight durability. Ensure the extender is compatible with your bike's handlebar diameter and offers enough length to accommodate all your accessories.
Installation Tips
Installing a handlebar extender is a straightforward process that requires minimal tools:
Positioning: Decide where you want to place the extender on your handlebars. It should be easily accessible but not interfere with your riding.
Attachment: Loosen the screws on the clamp of the extender, wrap it around the handlebar, and then tighten the screws. Make sure it's secure but avoid over-tightening, which can damage the handlebar.
Mounting Accessories: Once the extender is in place, start mounting your accessories. Distribute the weight evenly to maintain balance and ensure the bike handles well.
Maximizing Comfort and Efficiency
With everything installed, take a test ride to adjust the positions of the mounted items for optimal comfort and accessibility. You might find that slight adjustments can make a significant difference in your overall riding experience.
Safety Considerations
Always ensure that your handlebar extender and mounted accessories do not obstruct your view or interfere with operating the bike. Regularly check that the extender is securely fastened and that there's no movement while riding.
In Conclusion
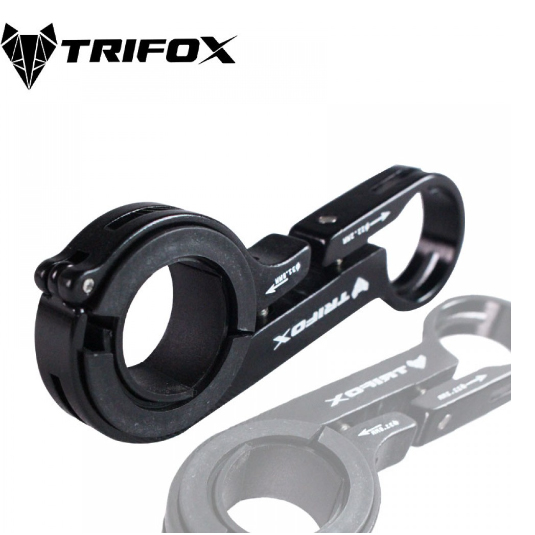
A bicycle handlebar extender is a simple upgrade that can vastly improve your cycling experience. By freeing up handlebar space, enhancing control, and allowing for a more comfortable riding position, it's an accessory worth considering for any cyclist looking to make their journeys more enjoyable and efficient.


