


Your handlebar is your primary connection to the trail. It dictates your posture, influences steering precision, and affects how fatigued your hands and arms feel after a long ride. But not all handlebars are created equal. The differences between a cross-country (XC) handlebar and a downhill (DH) handlebar go far beyond aesthetics—they reflect fundamentally different riding styles, terrain, and priorities. Here's what sets them apart and how to choose the right one for your bike.

Rise and Drop: Posture Matters
The most obvious difference between XC and downhill handlebars is the rise. XC handlebars typically have a low or flat rise (0–10mm), placing the rider in a low, aerodynamic position that prioritizes climbing efficiency and pedaling power. A lower front end shifts your weight forward, improving traction on steep climbs and reducing frontal drag.
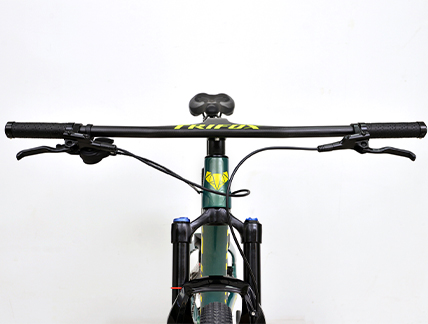
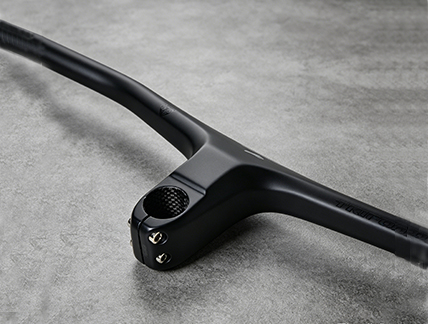
Downhill handlebars, by contrast, feature a significant rise—often 20–40mm or more. This raises the front end, shifting the rider's weight rearward for better control on steep descents. A higher bar also makes it easier to lift the front wheel over obstacles and provides a more upright, relaxed posture that reduces fatigue on long, rough runs. The RHB200's integrated design offers a -17° stem rise, which is aggressive and race-oriented—perfect for XC and trail riding where efficiency and a forward-leaning position are key.
Width: Stability vs. Maneuverability
Width directly affects leverage and control. XC handlebars are typically narrower, ranging from 680mm to 740mm. A narrower bar reduces frontal area for better aerodynamics and allows for quicker steering inputs—ideal for tight, twisty singletrack where agility matters more than raw stability.
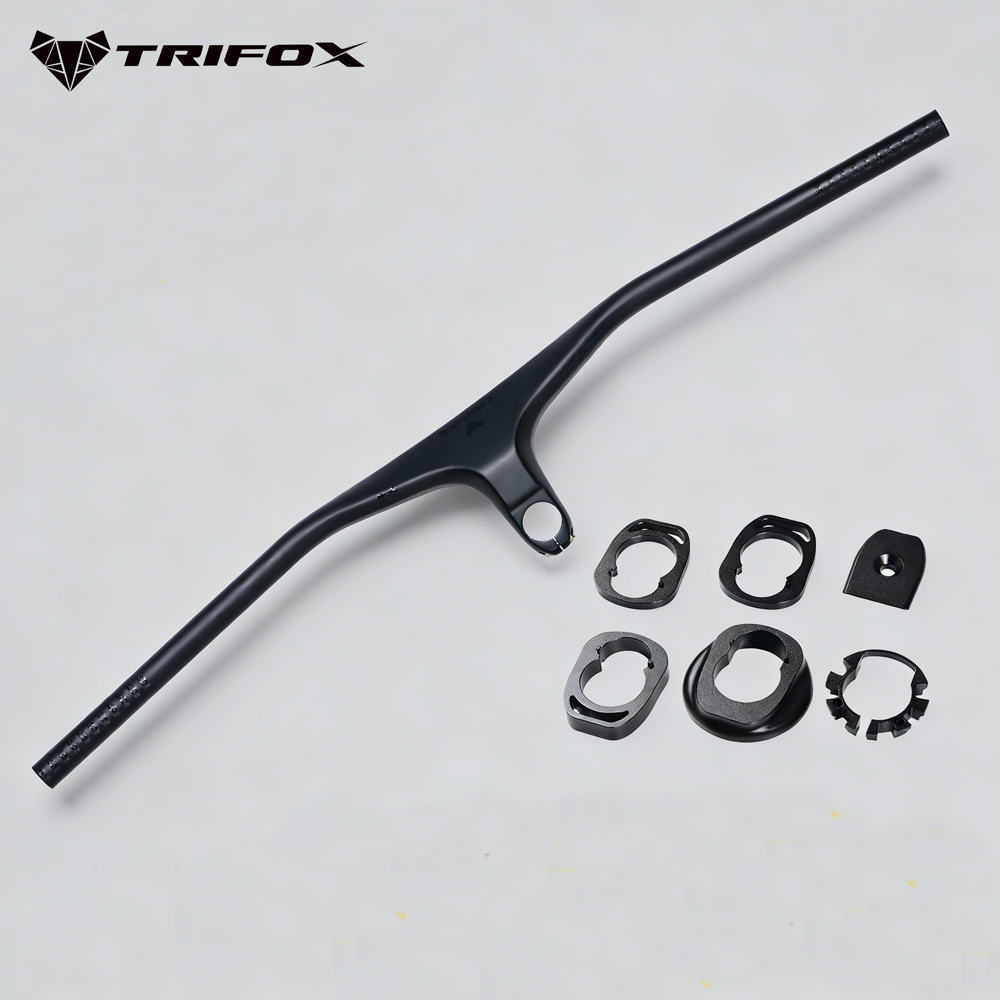
Downhill handlebars are significantly wider, often 760mm to 800mm or more. The extra width provides greater leverage for steering, making it easier to muscle the bike through rock gardens and maintain control at high speeds. It also opens up the chest for better breathing during intense efforts. The RHB200 comes with a maximum length of 800mm, making it versatile enough for both XC and more aggressive trail riding—you can cut it down to suit your preferred width and riding style.
Backsweep and Upsweep: Wrist Comfort and Control
Backsweep (the angle of the bar relative to the stem) affects wrist position and steering feel. XC handlebars often have a moderate backsweep of 6–9 degrees, which keeps the wrists in a neutral, comfortable position for long hours in the saddle. The RHB200 features a 9° backsweep, striking a balance between comfort and control that works well for both XC and trail riding.
Downhill handlebars sometimes have a more pronounced backsweep (9–12 degrees) to accommodate a more aggressive, attack position. Some also include upsweep (a slight upward bend at the ends) to further reduce wrist strain during steep descents. These small angular differences can significantly affect how natural the bar feels under your hands.
Stiffness and Material: Where Carbon Excels
Both XC and downhill riders benefit from carbon fiber's exceptional stiffness-to-weight ratio. However, the demands differ. XC riders prioritize lightweight construction for climbing and acceleration, while downhill riders need maximum stiffness for precise steering under heavy loads. The RHB200 is constructed from T800 carbon fiber, offering a rare combination: it's light enough for XC racing (just 280g for the complete bar and stem assembly) yet stiff enough to handle the demands of aggressive trail riding. The integrated, one-piece design eliminates the bar-stem interface, further increasing front-end stiffness and steering precision.
Integrated Design: The Best of Both Worlds
The Trifox RHB200 is an integrated carbon handlebar that blurs the line between XC and downhill categories. Its -17° stem rise and 9° backsweep make it ideal for riders who want a race-oriented position without sacrificing comfort. Available in stem lengths from 80mm to 110mm and an 800mm width that can be cut down, it offers the adjustability to suit a wide range of riding styles and body types. Whether you're a cross-country racer chasing podiums or a trail rider seeking better control on descents, the RHB200 delivers the stiffness, weight savings, and precision that modern mountain bikers demand.
Which One Is Right for You?
The choice between an XC and downhill handlebar comes down to your riding style and terrain. Choose an XC-oriented bar like the RHB200 (with its low rise and moderate width) if you prioritize climbing efficiency, quick steering, and lightweight performance. Choose a downhill bar if you spend most of your time on steep, technical descents and need maximum stability and control. For the majority of trail riders, a versatile carbon XC handlebar like the RHB200 offers the best of both worlds—light enough to climb, stiff enough to descend, and adjustable enough to fit your unique position. If you're a gravity-focused rider, you might lean toward a wider, higher-rise downhill MTB handlebar to match your aggressive style. Ultimately, the right handlebar is the one that keeps you comfortable, confident, and in control on the trails you love.
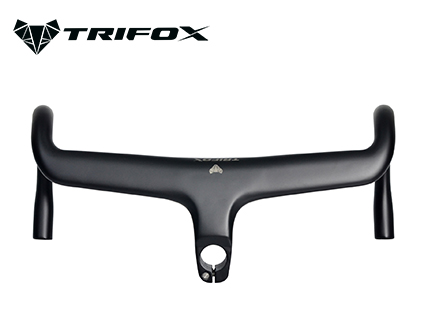
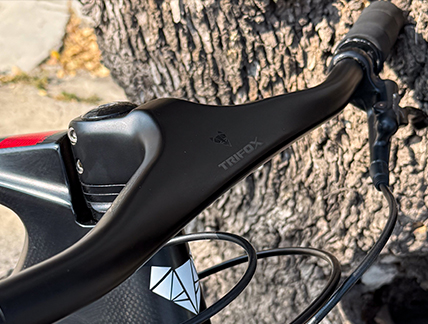
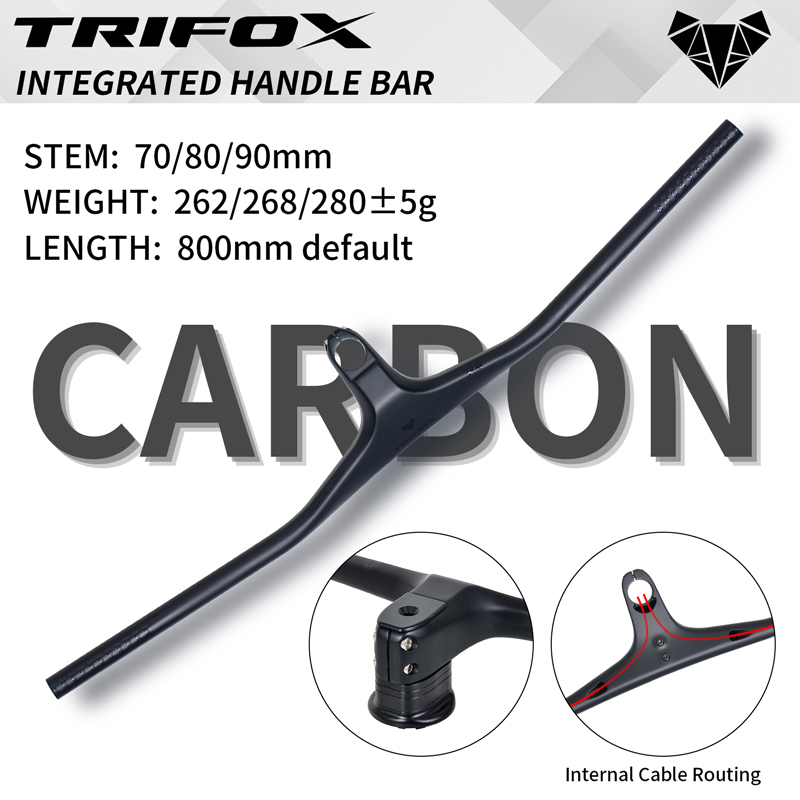
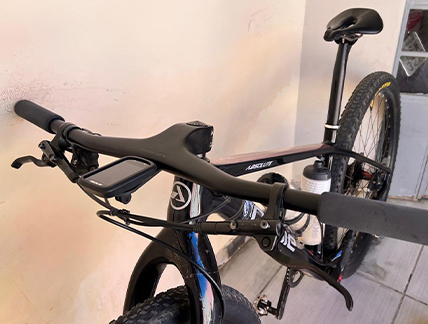
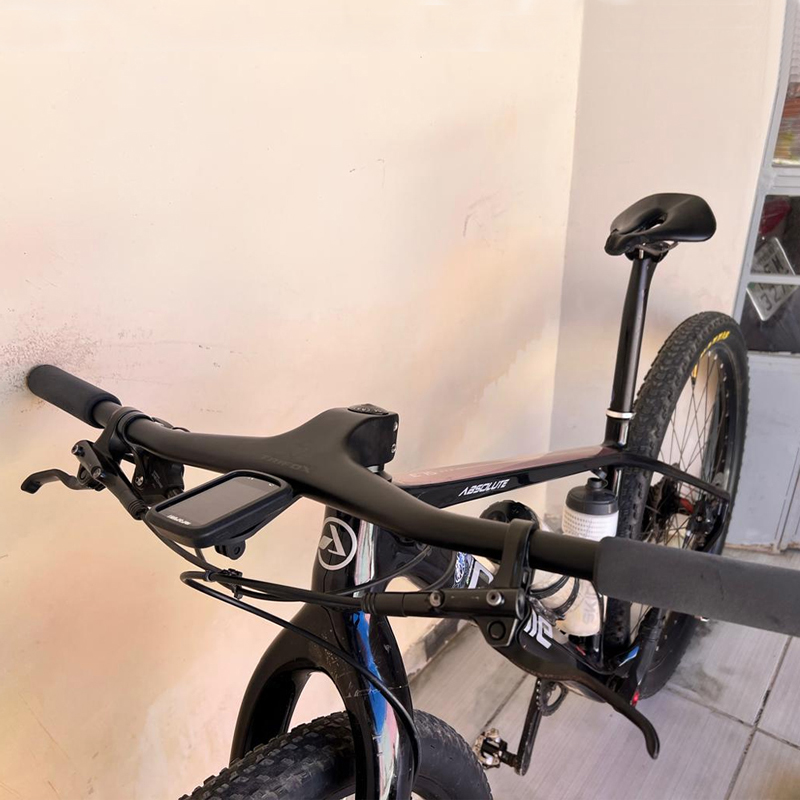
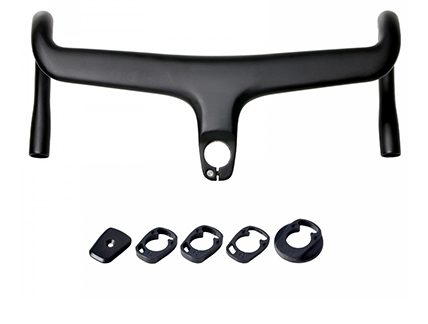
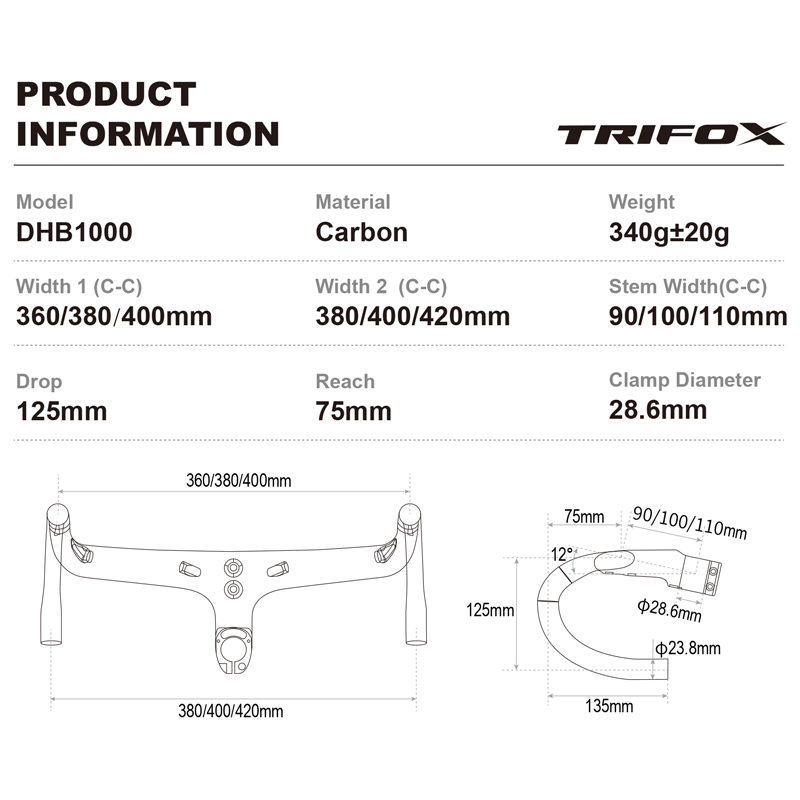
A carbon integrated drop bar is one of the most transformative upgrades you can make to your road bike. It cleans up your cockpit, improves aerodynamics, and delivers a level of stiffness and feedback that traditional bar-and-stem setups simply can’t match. But with the Trifox DHB1000 available in three widths (360mm, 380mm, 400mm) and three stem lengths (90mm, 100mm, 110mm), choosing the right combination is essential to unlocking its full potential. Here’s how to select the perfect fit.

1. Handlebar Width: Match Your Shoulders
Your handlebar width should be determined by the width of your shoulders—specifically, the distance between the bony protrusions at the top of your shoulders (your acromioclavicular or AC joints). This measurement, in centimeters, is your starting point.
Width by Shoulder Width:
• Less than 38cm → 360mm
• 38–40cm → 380mm
• More than 40cm → 400mm
A bar that matches your shoulder width promotes a natural, neutral wrist position, reduces strain on your neck and shoulders, and improves breathing and power output on the bike.
Narrower Bar (360mm): A 360mm bar reduces your frontal area, making you more aerodynamic. It suits riders with narrower shoulders or those who prioritize an aggressive, aero position—common among racers and time-trialists.
Wider Bar (400mm): A 400mm bar offers more leverage and stability, especially on descents. It suits riders with broader shoulders or those who prefer more control and confidence when cornering at speed.
Middle Ground (380mm): The 380mm option is the most popular choice, striking a balance between aerodynamics and control for the majority of riders.
2. Stem Length: Dial in Your Reach
The stem length determines how far you stretch to reach the handlebars. Getting this right is critical for comfort and power transfer.
For most road bikes, the ideal stem length falls between 90mm and 110mm, which makes the DHB1000’s options perfectly suited for a wide range of riders.
Stem Length Guide:
• 90mm – Shorter reach = more upright, quicker steering. Best for smaller frames or riders wanting less stretch.
• 100mm – The balanced “sweet spot”—neutral handling and reach. Suits most riders with average proportions.
• 110mm – Longer reach = more stretched, stable, aero position. Best for larger frames or flexible riders.
Choose 90mm if you have a smaller frame, shorter arms, or prefer a more upright, comfortable position.
Choose 100mm if you’re of average height and proportions—it’s the most common and versatile length.
Choose 110mm if you have a larger frame, long arms, or ride in an aggressive, stretched-out racing position.
Beyond Width and Length: Reach and Drop
The DHB1000 features a 75mm reach (compact) and a 125mm drop (moderate). These numbers are just as important as width and stem length.
75mm Reach: This compact reach is forgiving on your lower back and shoulders, making it ideal for long rides without sacrificing an efficient aero position.
125mm Drop: This moderate drop makes it easy to transition from the hoods to the drops, reducing wrist and neck strain while still allowing you to get low when you need to sprint or descend.
The DHB1000: A Premium Integrated Cockpit
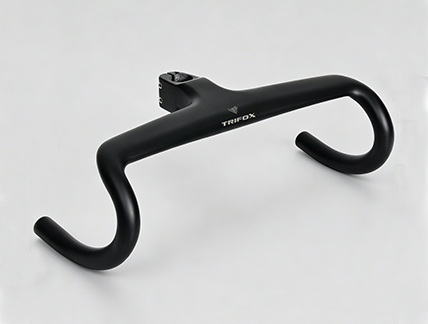
The Trifox DHB1000 is a carbon integrated drop bar that combines these adjustable dimensions with the benefits of a one-piece design. Constructed from T800 carbon fiber, it delivers the stiffness needed for precise handling and the vibration damping that keeps you comfortable on long rides. With fully internal cable routing, this best carbon bars for road bike option not only looks pro but also reduces drag and protects your cables from the elements. Available in 360mm, 380mm, and 400mm widths, and 90mm, 100mm, and 110mm stem lengths, the DHB1000 allows you to dial in your perfect cockpit fit.
Your handlebar is one of the most personal — and impactful — components on your mountain bike. It dictates your posture, influences how your bike handles, and directly affects how fresh your hands and arms feel after a long day on the trail. The choice between a flat bar and a riser bar isn't about which is "better" in absolute terms. It's about which one fits your riding style, your body, and the terrain you love to ride.
What's the Difference?
The distinction is simple. A flat bar has no rise — the grips sit at the same height as the stem clamp area, placing your hands level with the steerer tube. A riser bar features an upward bend, typically ranging from 10mm to 40mm, which elevates the grips and creates a more upright riding position. This seemingly small difference in height has cascading effects on weight distribution, steering precision, and overall comfort.
Flat Bars: Efficiency and Precision
A flat bar shifts your body weight forward, placing more pressure on the front wheel. This creates precise, direct steering — your inputs translate immediately to the trail, making flat bars a favorite among cross-country (XC) riders and marathon racers who prioritize pedaling efficiency and aerodynamic positioning. The lower center of gravity also improves stability on steep climbs and fast, rolling terrain. Because flat bars typically have a straight profile, they are often lighter than riser bars of similar construction, which is a critical consideration for weight-conscious builds.
The downside? A flat bar requires a more aggressive, stretched-out posture. On steep descents, you'll need to consciously shift your weight further back to stay balanced. While this position is efficient for pedaling, it can feel less forgiving on long, technical descents where a more upright stance offers greater leverage and control.
Riser Bars: Comfort and Control
By raising your hands, a riser bar brings your torso into a more upright, relaxed position. This posture reduces strain on your back, neck, and shoulders, making riser bars the default choice for trail, enduro, and downhill riders who spend extended periods in the saddle or tackle aggressive, technical terrain. The elevated front end also makes it easier to lift the front wheel for manuals or clearing obstacles, and it centers your weight between the wheels for greater control on descents.
Riser bars are generally slightly heavier than flat bars, and the more upright position can slightly reduce climbing efficiency and aerodynamics. However, for most trail riders, the trade-off in comfort and descending confidence far outweighs these minor penalties.
Carbon Fiber: The Material Advantage
Regardless of whether you choose a flat or riser bar, carbon fiber offers distinct advantages over aluminum. Carbon bars are remarkably lightweight, with a high strength-to-weight ratio that sheds grams without sacrificing durability. More importantly, carbon fiber has natural vibration-damping properties that absorb trail chatter and high-frequency buzz, reducing arm fatigue and keeping your hands feeling fresh on long, rough rides. Quality carbon bars also offer a degree of vertical compliance, flexing slightly to absorb impacts while remaining stiff enough for precise steering.
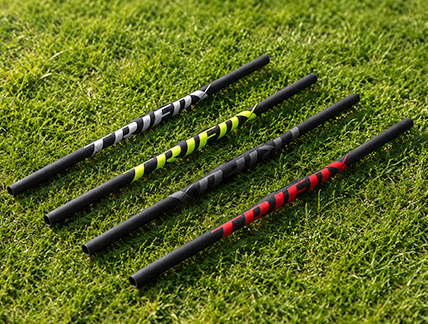
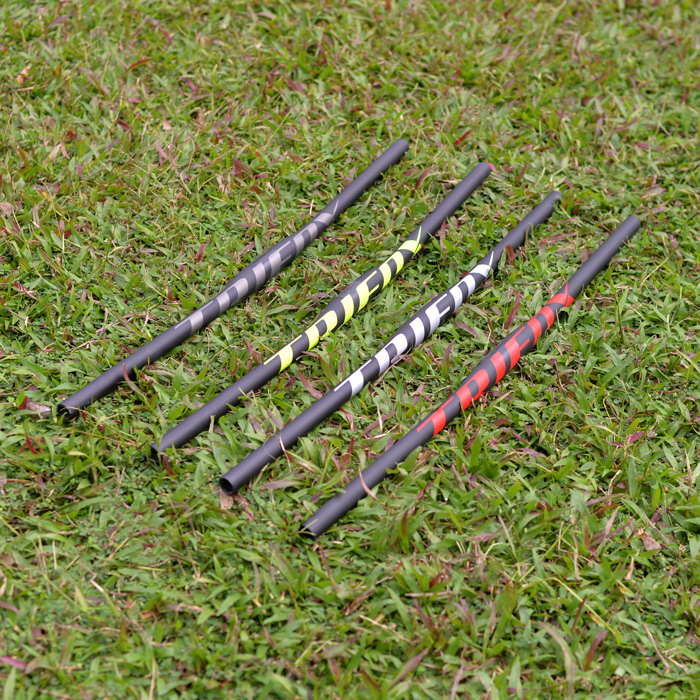
The Trifox FHB100: A Lightweight Carbon Flat Bar
For riders who prefer the efficiency and precision of a flat bar, the Trifox FHB100 is an exceptional choice. Weighing just 183 grams, it is one of the lightest best carbon trail handlebar options available. Constructed from T700 carbon fiber, it delivers the stiffness and vibration damping that define a premium carbon bar. With a 3-degree backsweep, it places your wrists in a natural, comfortable position, and its 740mm width provides a stable, confident platform for tackling challenging trails.
The FHB100 is built for riders who want a lightweight carbon trail handlebar that doesn't compromise on strength or control. Its 31.8mm clamp diameter ensures compatibility with a wide range of stems, and cut marks on each side allow for easy width customization to dial in your perfect fit.
Which One Is Right for You?
The decision comes down to your riding style. Choose a flat bar like the Trifox FHB100 if you primarily ride cross-country, value climbing efficiency, and prefer a low, aerodynamic position. Choose a riser bar if you ride more technical trails, prioritize descending control, and want a more upright, comfortable posture. Both have their place, and both can be transformed by the weight savings, vibration damping, and stiffness of a quality carbon construction.

Your mountain bike's front end is where the trail meets your control. Every input you make—steering, leaning, weighting the front wheel—travels through the handlebar. If that connection is compromised by flex, weight, or a less-than-optimal interface, your handling suffers, and so does your confidence. Enter the carbon mtb cockpit upgrade, exemplified by the Trifox RHB100. By fusing the bar and stem into a single, continuous carbon structure, this integrated handlebar delivers measurable improvements in stiffness, weight, and steering precision—all of which translate directly to better handling and stability on the trail.

Enhanced Stiffness: The Foundation of Precision
Traditional bar-and-stem combinations have an inherent weak point: the interface where the stem clamps the handlebar. Even with perfect torque, that junction can allow micro-flex under load, dulling steering response and absorbing energy that should be directed to the front wheel. The RHB100 eliminates that weak link entirely. Its integrated, one-piece design (with a 6° rise and 40/50/60/70mm stem length options) creates an exceptionally stiff, direct connection between your hands and the fork. The result is “zero detectable flex” under load—whether you're pulling up for a manual or leaning into a high-speed corner. This rigidity instills confidence, especially on technical descents where precise steering input is critical.
Independent research supports this advantage. One study on integrated cockpits found that a one-piece design increases front-end stiffness by up to 20% compared to a separate bar and stem combination. A stiffer front end means your steering inputs are translated more immediately and accurately, allowing you to hold your line through rock gardens, root sections, and loose corners with greater control and less correction.
Reduced Weight: Agility and Reduced Fatigue
At just 244 grams for the complete bar and stem assembly, the RHB100 represents a significant weight saving over almost any alloy combination. A typical alloy bar and stem setup often weighs over 400 grams; some integrated carbon designs are up to 40% lighter than their aluminum counterparts. This reduction is immediately noticeable when you pick up the bike—and even more so on the trail.
A lighter front end feels more agile and easier to maneuver. It reduces the bike's overall rotational inertia, making it quicker to turn and easier to loft over obstacles. Furthermore, reduced weight at the handlebar contributes to less arm fatigue over long rides. A lighter setup demands less muscular effort to control, helping you stay fresher and more in control during marathon XC races or all-day trail adventures.
Optimized Geometry: Natural Control Position
The RHB100's geometry—6° rise and 6° backsweep—is designed to place your hands in a natural, comfortable position that enhances control. The backsweep aligns your wrists with your forearms, reducing strain and improving leverage when pulling up on the bars or weighting the front wheel. The rise brings the grips to a height that balances an aggressive riding posture with all-day comfort, allowing you to maintain a stable, centered position over the bike.
Clean Cockpit: A Professional, Uncluttered Feel
While aerodynamics are less critical on a mountain bike than a road bike, the RHB100's integrated profile does offer benefits. The lack of a protruding stem faceplate creates a smoother, more aerodynamic surface. More importantly, the clean lines provide a tidy cockpit for mounting a computer or light, contributing to a professional, finished look. The printed alignment marks on the bar also simplify setup and ensure your controls are positioned perfectly.
T800 Carbon Fiber: The Material Behind the Performance
The RHB100 is constructed from premium T800 carbon fiber, which offers an excellent strength-to-weight ratio. T800 carbon provides the rigidity needed for precise steering while offering enough compliance to mitigate trail buzz and fatigue. This balance is critical: you want a handlebar that is stiff enough to transmit steering inputs accurately but compliant enough to absorb high-frequency vibrations that cause arm pump and hand numbness. The result is a ride that is both precise and comfortable, allowing you to ride harder and longer.
Conclusion
Upgrading to an integrated carbon MTB handlebar like the Trifox RHB100 is one of the most effective ways to improve your bike's handling and stability. By eliminating the bar-stem interface, you gain a stiffer, more responsive front end. By shedding significant weight, you gain agility and reduce fatigue. And by optimizing the geometry, you gain a more natural, controlled riding position. For riders seeking a high-performance aero bicycle handlebars upgrade that delivers tangible on-trail benefits, the RHB100 represents a significant and worthwhile step forward.
You’ve spent weeks researching, comparing stack heights and reach numbers, and finally settled on the perfect mtb handle bar rise. Then comes the moment of truth — you pull the old cockpit off, pick up a brake hose, and realize the fitting is 2mm too wide to slide through the handlebar’s entry port. The dream pauses. Integrated bars have revolutionized how mountain bike cockpits look and feel, but their neat, cable‑free exteriors hide a critical question: will your hoses and housings actually fit inside? Before you buy, modify, or replace a whole groupset, here’s how to check compatibility — with the RHB600 as your reference.
Know Your Bar: Internal vs. External Routing Options
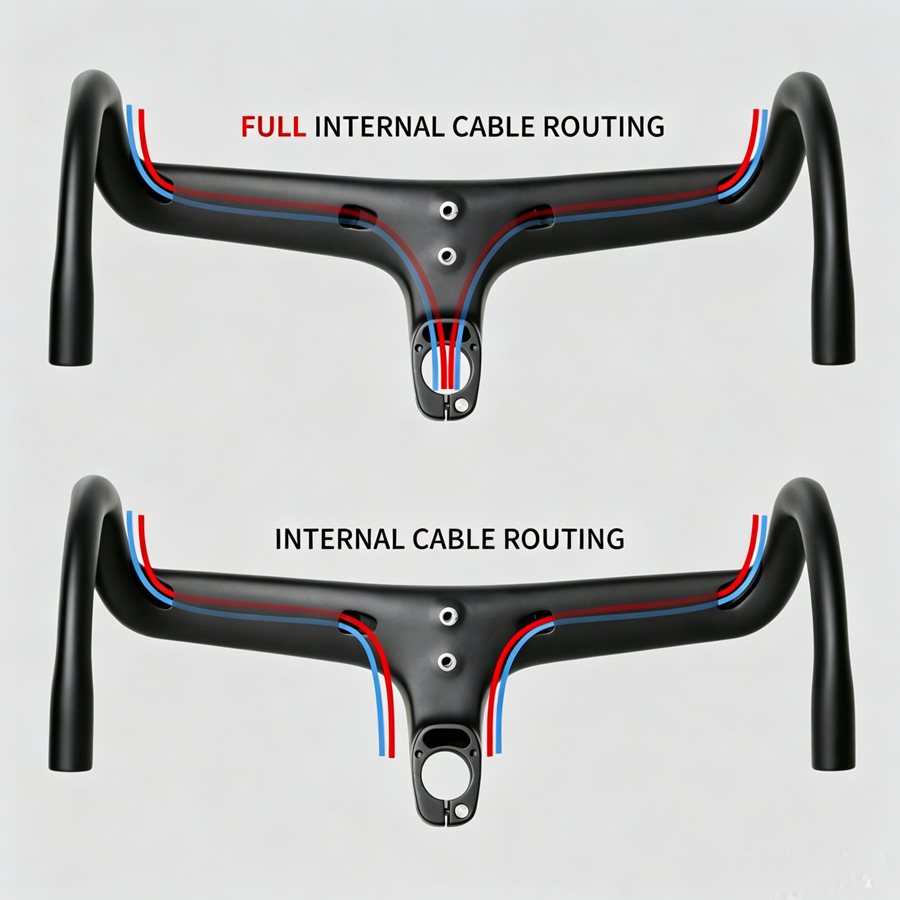
The Trifox RHB600 is available in two distinct routing configurations. The 52mm spacer version is designed for fully internal cable routing — your brake hoses and shifter cables enter the bar at the stem and travel completely inside the carbon structure, exiting at the lever mounting points. This is the cleanest look but the most demanding setup. The 42mm version uses semi‑external routing: cables run along the outside of the bar, tucked under a cover, which simplifies installation and maintenance while still tidying up the front of the bike. Knowing which version you need is step one.
Once you‘ve chosen your routing style, the real compatibility check begins. Hydraulic brake hoses are often the tightest fit. Shimano’s BH‑90 hose, for example, requires an 11.2mm‑wide connector at the lever end, while the BH‑59 uses a 13.2mm fitting — that extra 2mm can mean the difference between passing through or getting stuck. The RHB600’s internal channels are designed to accept most modern hydraulic hoses, but if you’re running SRAM’s Stealth‑a‑matic or Magura’s thicker fittings, you must measure your ferrule and olive outer diameter before installation. Some riders have found that switching to the lower‑profile Shimano OT‑RS900 housing provides a more flexible and slimmer profile, easing the routing process. If your hose fitting is too wide, you may need to replace the entire front hose with one that has a narrower connector — a task best left to a shop if you lack a bleed kit and the right barbs.
Mechanical Shifter Cables: Thinner Isn’t Always Easier
Mechanical shifting cables pose a different challenge. While a bare inner cable slides easily, it’s the compressionless shift housing that determines fit. Standard 5mm shift housing (common on older groups) can be a tight squeeze through integrated bar channels that expect 4mm housing. The RHB600’s internal diameter is engineered to accommodate both, but if you encounter resistance, swapping to Jagwire’s 4mm Pro or Elite Link housing (which uses segmented aluminum links) can dramatically reduce friction and improve bend radius while fitting through narrower ports. Before cutting any housing, run a test pull: feed the housing through the bar without the inner cable and ensure it moves freely from the stem opening to the lever exit. Any binding now will worsen under real‑world steering loads.
Dropper Post and Di2 Wiring: Hidden Clearance Issues
Modern cockpits often carry more than just brake hoses. If you run a dropper post, the remote cable housing follows the same path as your shifter cables — and must share the internal space. The RHB600’s internal channels are designed with enough capacity for one hose and one housing, but trying to squeeze two full‑size compressionless housings plus a hydraulic hose through the same bar can create friction that makes steering feel heavy. For heavy cable loads, consider using a wireless dropper (Reverb AXS, BikeYoke) or routing one of the cables externally through the 42mm spacer version. Di2 or AXS wiring (e‑tube wires) is much thinner and rarely causes issues, but the connectors themselves (e.g., EW‑SD50) are bulkier than the wire — feed the wire through first, then attach the connector, not the other way around.
Bend Radius and Lever Position: The Hidden Fit Factor
Even if your cables fit through the bar, they still need to exit cleanly at the levers. The RHB600’s 7° backsweep and 5° rise create a natural curve that most hoses can follow, but pushing a hose too tightly against a sharp internal edge can lead to long‑term chafing. Always inspect the exit ports for roughness and consider adding a small piece of adhesive‑backed foam or rubber lining where the hose makes contact. A hose that passes a static fit test can still fail after 100 miles of steering back and forth, as the constant micro‑movement saws through the outer layer. One forum user described discovering frayed cables at the point where housing exits the stem — a failure that only appears after hours of riding, not during initial assembly. To avoid this, leave a small loop of housing inside the bar rather than pulling everything taut; slack is your friend when it comes to internal routing longevity.
Tools and Techniques for a Smooth Install
If you‘ve confirmed compatibility but are still nervous, two tools can save you hours of frustration. A cable routing kit (a flexible guide wire with magnetic tips) allows you to pull hoses through blind channels without fishing blindly. And a 5mm or 4mm internal routing liner — essentially a thin plastic tube you slide into the bar first — creates a smooth pathway that you then pull your actual hose through. For extra insurance, wrap the end of your hose in a thin layer of electrical tape to prevent the end from snagging on internal carbon edges. And whatever you do, do not grease the hose: lubricant will attract dirt and eventually gum up the internal channel, making future cable swaps miserable. If you need slip, use a few drops of isopropyl alcohol — it evaporates cleanly.
Making the Final Call
Integrated bars like the RHB600 aren‘t just about looks — they’re about eliminating cable clutter, improving aero, and creating a cockpit that feels like one solid piece of equipment. But that clean profile demands careful preparation. By verifying your hose and housing diameters, using the correct routing version, and investing in a few cheap routing aids, you can avoid the disappointment of discovering incompatibility halfway through a build. The RHB600 is part of a new generation of carbon aero handlebars that make fully integrated cockpits accessible — but only if your cables are ready to take the ride with you.
Choosing a road handlebar is about more than finding a width that matches your shoulders. Beneath the surface, three hidden measurements silently govern how your bike feels and how you fit on it: reach, drop, and flare. Understanding these numbers can transform an ill‑fitting cockpit into a personalized command center — one where you ride longer, faster, and with greater control. The Trifox DHB1000 integrated carbon bar serves as an excellent case study, as its compact geometry strikes an ideal balance for riders seeking real‑world performance.
bicycle drop bars use these three measurements to define their shape.Reach is the horizontal distance from the center of the handlebar clamp to the most forward curve of the bar before it bends back toward the rider. In simple terms, it determines how far you must stretch to reach the hoods and drops. The DHB1000 has a 75mm reach, which falls into the “compact” category. A shorter reach (75‑80mm) is more forgiving on the lower back and shoulders, especially during long days in the saddle. A longer reach (85mm or more) creates a more stretched‑out, aerodynamic position favored by racers, but demands greater flexibility. For most enthusiasts, a compact reach like 75mm allows an efficient aero tuck without sacrifcing all‑day comfort.
While reach controls forward stretch, drop governs vertical posture. Drop is the vertical distance measured from the highest point of the handlebar (typically where the tops meet the stem) down to the lowest point of the drops. The DHB1000 features a 125mm drop. A shallower drop (110‑130mm) makes it easier to transition from hoods to drops, reducing strain on the wrists and neck during descending or sprinting. By contrast, a deeper drop (over 135mm) creates a more aggressive, aerodynamic tuck but can be uncomfortable for riders with limited flexibility. The 125mm drop on this bar is a modern “standard” — low enough to get aero when you need it, yet shallow enough to use comfortably without chronic discomfort. Being able to use the drops comfortably is critical, as it offers the greatest possible braking leverage while descending.
The third critical parameter is flare, which is measured in degrees. Flare describes how much the drops angle outward away from the centerline of the bike compared to the hoods. Traditional road handlebars have zero or minimal flare; gravel bars often have 12‑20 degrees. While the DHB1000 has a modest flare, this measurement is important for any road cycling handlebars. A small flare (2‑6 degrees) makes the drops slightly wider than the hoods, which improves stability and wrist clearance during hard cornering or descending. A larger flare (over 10 degrees) provides even more control on rough pavement or gravel but adds frontal area. For pure road riding, a subtle flare offers the best of both worlds — a narrow aero profile at the hoods with a slightly wider, more stable position when you need it most.
Width, reach, drop, and flare don’t exist in isolation — they work together as a system. A wider handlebar (the DHB1000 measures 400mm center‑to‑center) offers more steering leverage and stability, especially on descents. A narrower bar reduces frontal area and improves aerodynamics. When you combine a compact 75mm reach with a moderate 125mm drop, the result is a cockpit that is accessible to a wide range of riders — from weekend sportive participants to competitive club racers.
Integrated cockpits like the DHB1000 also eliminate the bar‑stem interface, which can creak or introduce unwanted flex. The one‑piece T800 carbon construction ensures that every steering input is transmitted directly to the fork without energy loss.Riders who have installed the DHB1000 note that the 400mm width and 75mm reach “put me in a nice aero position” while the fully internal routing gives a “professional look — no cables flapping in the wind.” Weight came in at 372g on the reviewer’s scale.
Ultimately, the right handlebar is the one that fits your body and your riding style. Use reach to find your comfort on the hoods, use drop to find your confidence in the drops, and use flare to fine‑tune your control. For most road cyclists, a compact integrated bar with a shallow drop and moderate reach — like the Trifox DHB1000 — represents the sweet spot of aerodynamic efficiency, all‑day comfort, and precise handling.
Modern XC racing demands a bike that feels like an extension of your body. Every input matters, every delay costs time, and every gram influences how you flow through a root garden or launch out of a pedal kicker. For years, riders chased these gains through separate high‑end bars and stems. Today, the next step has arrived: the fully integrated carbon cockpit. Here’s why more XC racers are making the switch and why the Trifox RHB200 represents a compelling case for your next build.
The Uncompromised Cockpit
Traditional bar‑and‑stem assemblies work, but they come with inherent compromises. The interface between the two components introduces a potential flex point. When you wrench the bike into a rocky switchback or power over a punchy climb, that interface can absorb energy that should be going into the trail.
An integrated carbon mtb handlebar eliminates this weak link. By molding the bar and stem as a single piece of continuous carbon fiber, manufacturers create a structure that can be tuned for exceptional stiffness without a corresponding weight penalty. This is the engineering reality behind the current trend: a one‑piece construction "increases stiffness by 20% compared to a previous bar‑and‑stem combination". What that means on the trail is sharper steering, quicker feedback, and a front end that goes precisely where you direct it, no lag, no vagueness.
For xc handlebars, this heightened precision is transformative. Modern XC courses are no longer smooth fire roads. They include technical rock gardens, off‑camber braking bumps, and steep chutes. Riders report that a truly stiff integrated front end "allows you to feel the trail more directly" and "builds confidence in corners." That confidence translates directly into speed.
Weight, Aerodynamics, and the Clean Cockpit Advantage
The weight savings of a well‑designed integrated bar are significant. By removing the material needed for overlapping clamps and a separate stem body, the RHB200 tips the scales at just 280 grams—impressively light for a full‑size cockpit. Riders upgrading from a mid‑range alloy bar and stem often save 50–100 grams right at the front of the bike. That’s weight that the fork doesn’t have to loft over obstacles and weight that your shoulders don’t have to manage over a multi‑lap race.
Integrated cockpits also clean up the front of the bike. Without a bulky stem faceplate protruding, the frontal area is reduced. This aerodynamic benefit may be marginal on a mountain bike, but in the wind‑exposed sections of a rolling XC course or during a crosswind, the reduction in turbulence is a free speed advantage. As one reviewer of integrated cockpits notes, integrated designs allow the bar and stem to act as "an aerodynamic extension of the frame, channeling airflow to improve efficiency and reduce resistance".
More practically, a clean front end means simpler mounting for lights, computers, and action cameras, with fewer cables snagging on brush or your gloves during a quick maneuver.
Feedback, Line Choice, and the XC Racing Advantage
Perhaps the most significant advantage of a high‑quality xc handlebars is the improvement in trail feedback. Riders transitioning from an older alloy setup often describe the sensation as "a direct pipeline to the trail." The one‑piece carbon construction transmits subtle changes in traction and terrain without the damping or deadening that can occur at the bar‑stem interface.
This feedback is critical for maintaining traction on loose climbs and for precisely placing the front wheel through rock gardens. One reviewer of a similar integrated bar noted that "it adequately maintains the same stiffness" as top‑tier aftermarket bars, while another described the upgrade as "completely exceeding expectations" with a "super lightweight and stiff" feel that made the bike feel "more alive".
For the serious racer, that sensation of being connected directly to the trail is worth the upgrade alone. A bar that keeps you feeling fresh and confident lap after lap is a bar that helps you place on the podium.
The RHB200: Integrated Performance for the Discerning Racer
The Trifox RHB200 is built for XC and aggressive trail use. Its T800 carbon fiber construction strikes the ideal balance between race‑ready stiffness and long‑ride compliance. The ‑17° stem rise and 9° backsweep place the rider in an efficient, forward‑leaning position that optimizes weight distribution for climbing and descending. This geometry is specifically dialed for riders who want to lay down power efficiently while maintaining the ability to maneuver through technical sections.
Available stem lengths from 80mm to 110mm and a cuttable 800mm width allow for precise fitment, accommodating a wide range of body types and riding styles. Weighing just 280g and constructed with a premium 3K carbon weave, the RHB200 is a direct competitor to integrated cockpits priced two or three times higher.
Riders who have installed the RHB200 report that the upgrade is immediately noticeable on the first ride: a lighter, stiffer, more confident front end. For the XC enthusiast who has already optimized wheels, tires, and suspension, the integrated cockpit is the next logical frontier. It’s a single upgrade that enhances control, reduces fatigue, and sharpens your connection to the trail—a combination that serious racers shouldn’t ignore.
Upgrading your cockpit is one of the most effective ways to transform how your road bike feels beneath you. When it comes to choosing between carbon fiber and aluminum handlebars, the debate has been ongoing for years—and for good reason. Both materials have passionate advocates, and the “right” answer depends on your riding style, budget, and performance priorities. So where do the weight savings really land, and what does that extra cost actually buy you? Let’s break it down.
The Weight Reality: How Much Lighter Is Carbon?
Let’s cut straight to the numbers. On average, carbon handlebars weigh about 20–40% less than their aluminum counterparts. That translates to a typical aluminum handlebar falling in the 300–400 gram range, while a carbon bar often comes in between 200–300 grams. For a real-world comparison, many brands show a weight saving of around 100 to 150 grams when switching from aluminum to carbon.
Does that sound small? Consider this: saving 100 grams at the handlebars—the highest point on your bike—has a more noticeable effect on handling and climbing feel than saving the same weight from a bottom bracket or wheelset. Every gram you remove from the front end sharpens steering response and makes the bike feel more alive when you pull out of the saddle. For competitive cyclists, that difference matters. For the rest of us? It depends on how much you value that “lighter in the hands” sensation.
Beyond Weight: Vibration Damping and Ride Quality
Weight savings are just the beginning. Where carbon truly shines is in its ability to absorb high-frequency road vibrations—the constant “buzz” that gradually fatigues your hands, wrists, and shoulders over long rides. Carbon fiber can be engineered through precise fiber lay-ups to strike an optimal balance between stiffness and compliance, meaning you get a bar that’s stiff enough for precise cornering yet forgiving enough to smooth out rough pavement.
Aluminum, by contrast, transmits more road chatter directly into your hands. While modern alloy bars have improved significantly, they still lack carbon’s natural vibration-damping properties. For endurance cyclists spending hours in the saddle, that extra compliance translates directly to less fatigue and more enjoyment.
Fatigue Life and Durability: The Surprising Truth
Here’s something that might surprise you: carbon handlebars actually have a superior fatigue life compared to aluminum. Lab testing has documented that carbon’s fatigue resistance is roughly five times better than aluminum’s. Aluminum and other metals don’t exhibit an endurance limit—meaning even small repeated loads will eventually cause failure after enough cycles. Carbon, on the other hand, can withstand millions of stress cycles without degradation, provided it remains undamaged.
That said, carbon’s Achilles’ heel is impact damage. A hard crash or an over-torqued stem clamp can compromise a carbon bar in ways that aren’t always visible to the naked eye. Aluminum tends to bend or show obvious deformation before failing, giving you a clear warning sign. If you’re a rider who crashes frequently or prefers the peace of mind that comes with a more impact-resistant material, aluminum remains a compelling choice.
The Cost Equation: What You’re Paying For
This is where the rubber meets the road—or rather, where your wallet meets the handlebars. Carbon bars typically range from $150 to $500, while quality aluminum bars can be found for $30 to $150. That’s a significant premium, and it’s fair to ask whether the performance benefits justify the price.
For competitive racers and serious enthusiasts who spend countless hours training, the answer is often yes. The combination of weight savings, vibration damping, and fatigue resistance creates a tangible performance advantage. But for recreational riders or those on a tighter budget, modern aluminum handlebars offer excellent value without sacrificing too much. Many pro teams actually prefer aluminum bars for racing—not because carbon is unsafe, but because aluminum offers a better cost-to-performance ratio when you’re equipping an entire fleet of bikes.
What About Modern Aluminum?
It’s worth noting that aluminum handlebars have come a long way. Advances in alloy manufacturing now allow brands to produce bars that are lighter, stiffer, and even more aerodynamic than ever before. You can now obtain many of the aerodynamic benefits that were previously only possible with carbon, using an alloy bar. For road and gravel racers on a budget, this means high-performance cockpits are more accessible than ever.
Where Carbon Still Rules
Despite aluminum’s progress, carbon remains the undisputed champion in three key areas: aerodynamic shaping, fine-tuned compliance, and absolute minimum weight. Carbon can be molded into complex aero profiles that would be impossible—or prohibitively expensive—to achieve with metal. This is especially relevant for aero-integrated designs, where every watt of drag matters.
If you’re looking to shave every possible gram while maximizing aerodynamic efficiency, carbon is the only answer. For cyclists who prioritize a refined, fatigue-reducing ride feel on long days in the saddle, carbon’s vibration-damping properties are worth the premium.
Meet the DHB1000: A New Standard in Carbon Road Bars
For riders ready to make the leap to carbon, the latest generation of integrated bars offers benefits that go far beyond simple weight reduction. The carbon road bars from Trifox represent everything carbon does best—lightweight construction, impeccable vibration damping, and a fully internal cable routing system that cleans up your cockpit and reduces aerodynamic drag. As an integrated one-piece design, it eliminates the traditional stem and faceplate interface, resulting in a stiffer, more responsive front end that transmits your inputs directly to the wheel. And with a sleek aero profile, every watt you produce goes forward, not sideways.
The Verdict
So, where do the weight savings—and the cost—really land? Carbon handlebars will save you roughly 100–150 grams compared to a quality aluminum bar, while offering superior vibration damping and exceptional fatigue resistance. You’ll pay a premium for those benefits, typically 2–4 times the cost of an equivalent alloy bar.
The choice comes down to your priorities: If you’re chasing every performance advantage, spending hours in the saddle, or simply love the feel of a premium cockpit, carbon handlebars road are worth every penny. If durability on a budget is your main concern, modern aluminum still delivers impressive performance at a fraction of the price. Either way, understanding where the real differences lie will help you make the right choice for your riding.
So you’ve bought a Trifox RHB600 carbon xc bars upgrade—and you’re staring at the box, wondering how not to turn that beautiful carbon cockpit into expensive scrap. Good news: integrated carbon bars aren’t as scary as they seem. You just need the right technique, a few essential tools and a little patience. This guide walks you through every step of installing your carbon fiber bar safely, without cracking it, crushing it or cutting too much off.
Before You Start: What You’ll Need
* Torque wrench (the single most important tool for carbon)
* Hex keys (4mm, 5mm)
* Carbon assembly paste (never grease!)
* Measuring tape or ruler
* Fine-tooth hacksaw with carbon blade
* Masking tape
* Fine-grit sandpaper (400 grit)
* Cable routing tool or safety wire (for internal routing)
* Safety glasses and soapy water (for cutting)
Step 1: Route the Cables First (Don’t Skip This)
The RHB600 is a full internal routing design. All brake hoses, derailleur cables and dropper housings run completely inside the bar and stem structure. That means you must route the cables before clamping anything.
Remove the port covers at the stem area and lever mounting points. Use a cable routing tool or a length of thin safety wire with a small hook bent at the end. Feed the wire from the stem entry port toward the lever exit port, attach the cable housing to the wire, then pull it through. Repeat for both sides. This step takes patience—but it’s far easier than trying to fish cables after the bar is clamped in place.
Tip: Use a few drops of isopropyl alcohol as lubricant to help housing slide through the internal channels.
Step 2: Check Bar Width Before Cutting
Most integrated bars come at a standard 800mm width. That’s wide for stability, but many riders prefer 760mm or 780mm for tighter singletrack. Before cutting, mount the bar loosely (without fully torquing) and sit on the bike. Feel whether your hands naturally fall slightly inside the grips. Remember: you can cut more off later, but you can’t add material back. Measure twice, cut once.
When you’re ready to cut: wrap masking tape around both sides at the cut mark to prevent carbon splintering. Use a fine-tooth hacksaw blade and keep the cut surface sprayed with soapy water to contain carbon dust (which is harmful to breathe). After cutting, smooth the raw edge with 400-grit sandpaper—never use a metal file on carbon.
Step 3: Apply Carbon Paste—Never Grease
Standard grease makes carbon surfaces slippery and risks over-torquing. Carbon assembly paste contains tiny particles that increase friction between components, allowing you to achieve a secure hold at lower torque. Apply a thin, even layer to the stem clamp area and the steerer tube contact points. Smooth with your finger. Don’t glob it on—a thin coat is all you need.
Step 4: Torque Correctly (This Is Non‑Negotiable)
The most common cause of carbon handlebar failure is over‑tightening. Use a calibrated torque wrench. General torque for carbon bar clamp bolts is 4–6 Nm, but always follow the manufacturer’s specific recommendation for your stem. Tighten the faceplate bolts in a cross pattern (X‑pattern), not all on one side first, to distribute pressure evenly. For control clamps (brake levers and shifters), use a lower torque—around 2–4 Nm. Overtightening these can crush the carbon tube.
If you don’t own a torque wrench, buy one before touching carbon components. It’s not optional.
Step 5: Final Check and Cable Trim
Once everything is torqued to spec, cycle the fork through its travel to ensure cables aren’t binding or pulling taut. Then trim excess housing at the lever and frame entry points, install end caps, and seal the internal routing ports with the included rubber plugs.
The Takeaway
Installing an RHB600 carbon xc bars is a step‑by‑step process that rewards patience. The key rules: route cables first, measure cuts carefully, use carbon paste, and always—always—use a torque wrench. Follow these steps and your carbon fiber bar will stay intact, silent and safe for thousands of trail miles. And if you’re unsure at any stage, a local bike shop can handle the installation for a small fee—still far cheaper than replacing a cracked carbon bar.


