


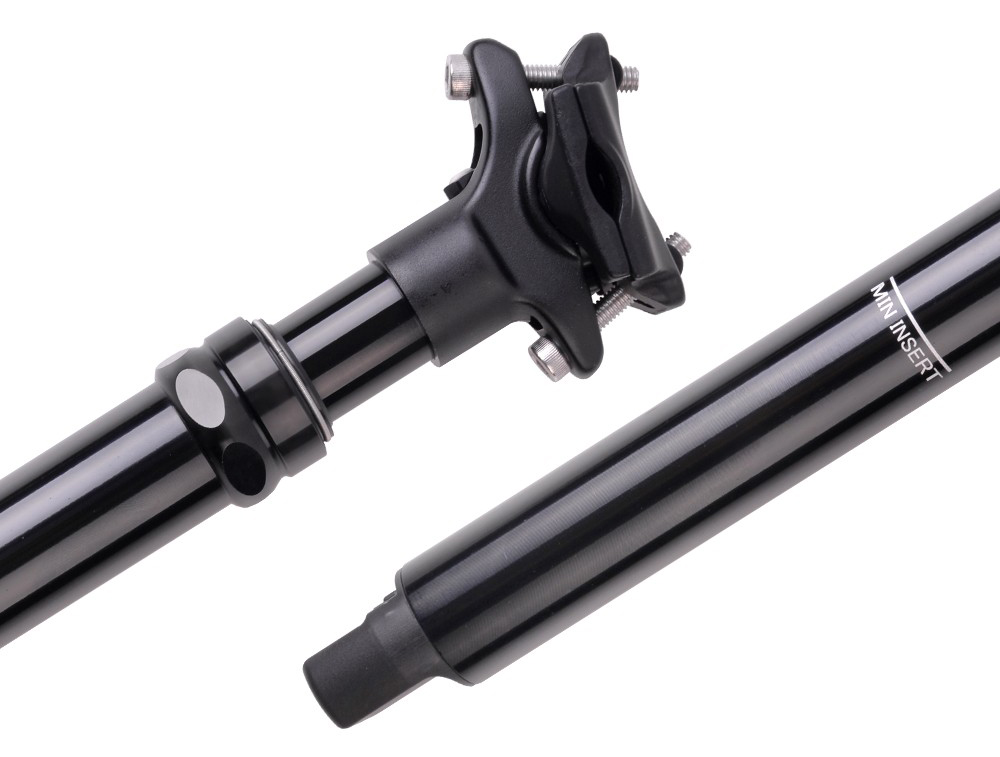
In the quest for optimal cycling performance, every component of a bike plays a crucial role. One often overlooked component that can significantly impact your ride is the seatpost. The choice between aluminum and carbon seatposts can make a marked difference, and a carbon seatpost with a 31.6mm diameter might just be the key to unlocking your bike's performance potential. A carbon seatpost is prized for its ability to reduce weight. When every gram counts, particularly in competitive biking or long-distance rides, a lighter bike can make a substantial difference in speed and endurance. Carbon fiber is renowned for its strength-to-weight ratio, meaning you get exceptional durability without the added bulk. This can enhance acceleration and climbing efficiency, offering a noticeable advantage for serious cyclists. Beyond weight reduction, a carbon seatpost offers superior vibration dampening compared to traditional aluminum. This is crucial for comfort, particularly on rough terrains or extended rides where constant vibrations can lead to fatigue. By absorbing road shocks and vibrations, a carbon seatpost ensures a smoother, more comfortable ride, allowing you to maintain higher speeds with less discomfort over time. The 31.6mm diameter is a popular choice in the cycling community due to its balance of strength and flexibility. This size is versatile, fitting a wide range of bike frames while offering robust support for the rider. It’s not just about fitting, though—the diameter also contributes to the seatpost’s ability to flex appropriately, enhancing comfort and control without compromising stability. A prime example of innovative seatpost technology is the Trifox AP316 Dropper Seatpost. While it is constructed from high-quality 7075 aluminum rather than carbon, it incorporates features that parallel the benefits of a carbon seatpost. The AP316 offers a 125mm travel range, which is adjustable via a remote, allowing for real-time customization of your ride height. This adaptability is vital for maintaining an optimal riding position across varying terrain, improving both comfort and performance. The AP316’s design includes an air suspension system, which further enhances ride comfort by minimizing the impact of bumps and jolts. This not only protects your joints but also allows for a more controlled and enjoyable ride. Its robust aluminum construction ensures durability, while its lightweight nature keeps your bike agile. Investing in a seatpost like the AP316, or a carbon equivalent, can significantly enhance your cycling experience. The ability to adjust your seat height on-the-fly means you can swiftly adapt to changing terrains, maintaining power and efficiency. Coupled with the comfort of reduced vibrations and weight, these attributes contribute to better endurance and less fatigue, allowing you to focus on the ride itself rather than the discomforts often associated with long or challenging routes. In conclusion, a carbon seatpost with a 31.6mm diameter offers compelling advantages for cyclists aiming to improve their performance. From weight savings and vibration dampening to enhanced ride comfort, the benefits are clear. Whether choosing a carbon model or a high-quality alternative like the Trifox AP316, upgrading your seatpost is a strategic investment in your biking prowess. For those serious about stepping up their cycling game, considering this upgrade is a practical step toward achieving your performance goals.
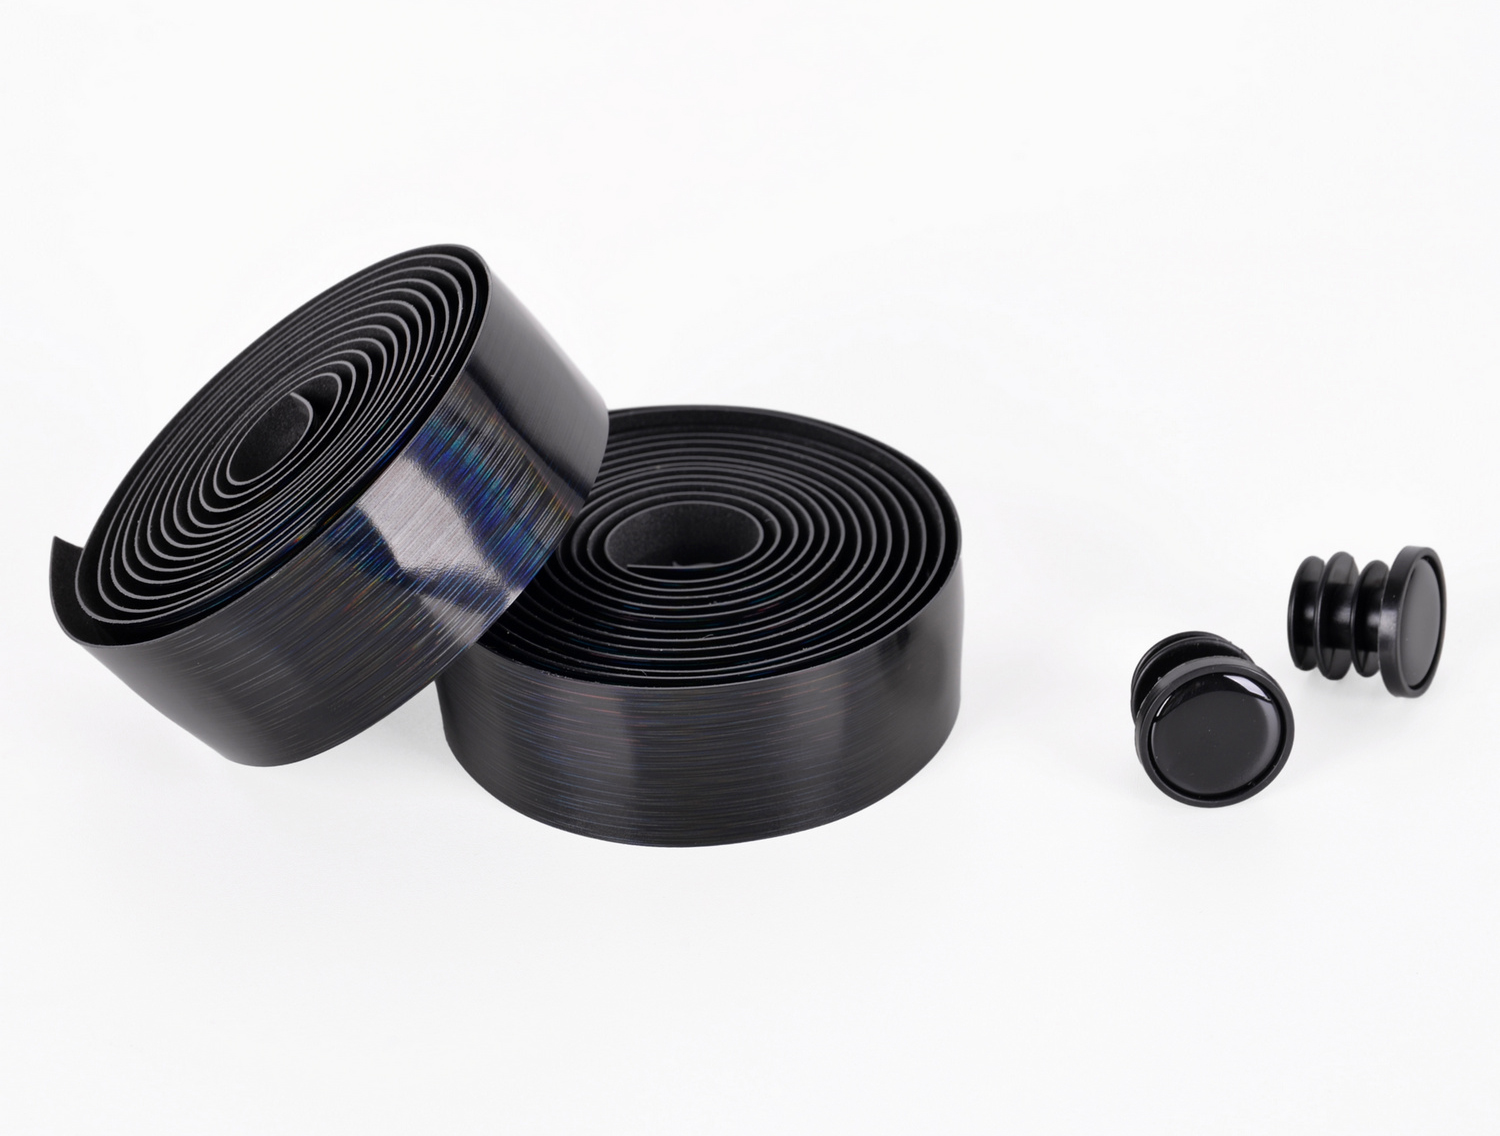
Cyclists often seek ways to enhance their performance and comfort, and taping aero bars is a simple yet impactful method to achieve this. Aero bars, used primarily by triathletes and time trialists, offer aerodynamic advantages by allowing cyclists to assume a more streamlined position. Taping these bars with high-quality handlebar tape, such as Trifox Bike's BHT100, further enhances grip, comfort, and aerodynamics, making it an essential practice for serious cyclists. One of the primary benefits of taping aero bars is improved grip. During long rides or competitive events, maintaining a secure hold on the bars is crucial, especially in adverse weather conditions. The BHT100 tape, made from EVA and PU leather, provides a textured surface that offers excellent grip, even when wet. This ensures that cyclists can maintain control and stability, which is vital for safety and performance. In addition to grip, comfort is significantly enhanced through taping. The padded nature of handlebar tape acts as a cushion against road vibrations, reducing hand fatigue and discomfort. This is particularly beneficial during long-distance rides or time trials where comfort can directly influence endurance and performance. Taping also contributes to the aerodynamics of the aero bars. By creating a smooth surface, tape minimizes air resistance, allowing cyclists to maintain their aerodynamic posture without interruptions. This subtle yet effective improvement can lead to time savings during races. Here’s a step-by-step guide on how to tape your aero bars effectively: 1. Preparation: Begin by cleaning the aero bars thoroughly to remove any dirt or grease. This ensures that the tape adheres properly. 2. Application: Start at the end of the aero bars, securing the tape with a small overlap. Stretch the tape slightly as you wrap it tightly around the bars, ensuring each wrap overlaps the previous one by half. This technique prevents gaps and ensures full coverage. 3. Finishing Touches: Once you reach the top of the bars, trim any excess tape and secure the end with the finishing tape provided. Ensure the tape is smooth and securely fastened to prevent unraveling during rides. Trifox Bike's BHT100 tape is an excellent choice for taping aero bars. Its durability and cushioning provide both comfort and performance enhancements. With easy installation and a reliable grip, it is designed to meet the demands of cyclists at any level. In conclusion, taping aero bars offers tangible benefits in terms of grip, comfort, and aerodynamics, making it a valuable practice for cyclists. By using high-quality tape like Trifox Bike's BHT100, riders can optimize their aero bars for superior performance and comfort, ensuring a more enjoyable and efficient cycling experience.
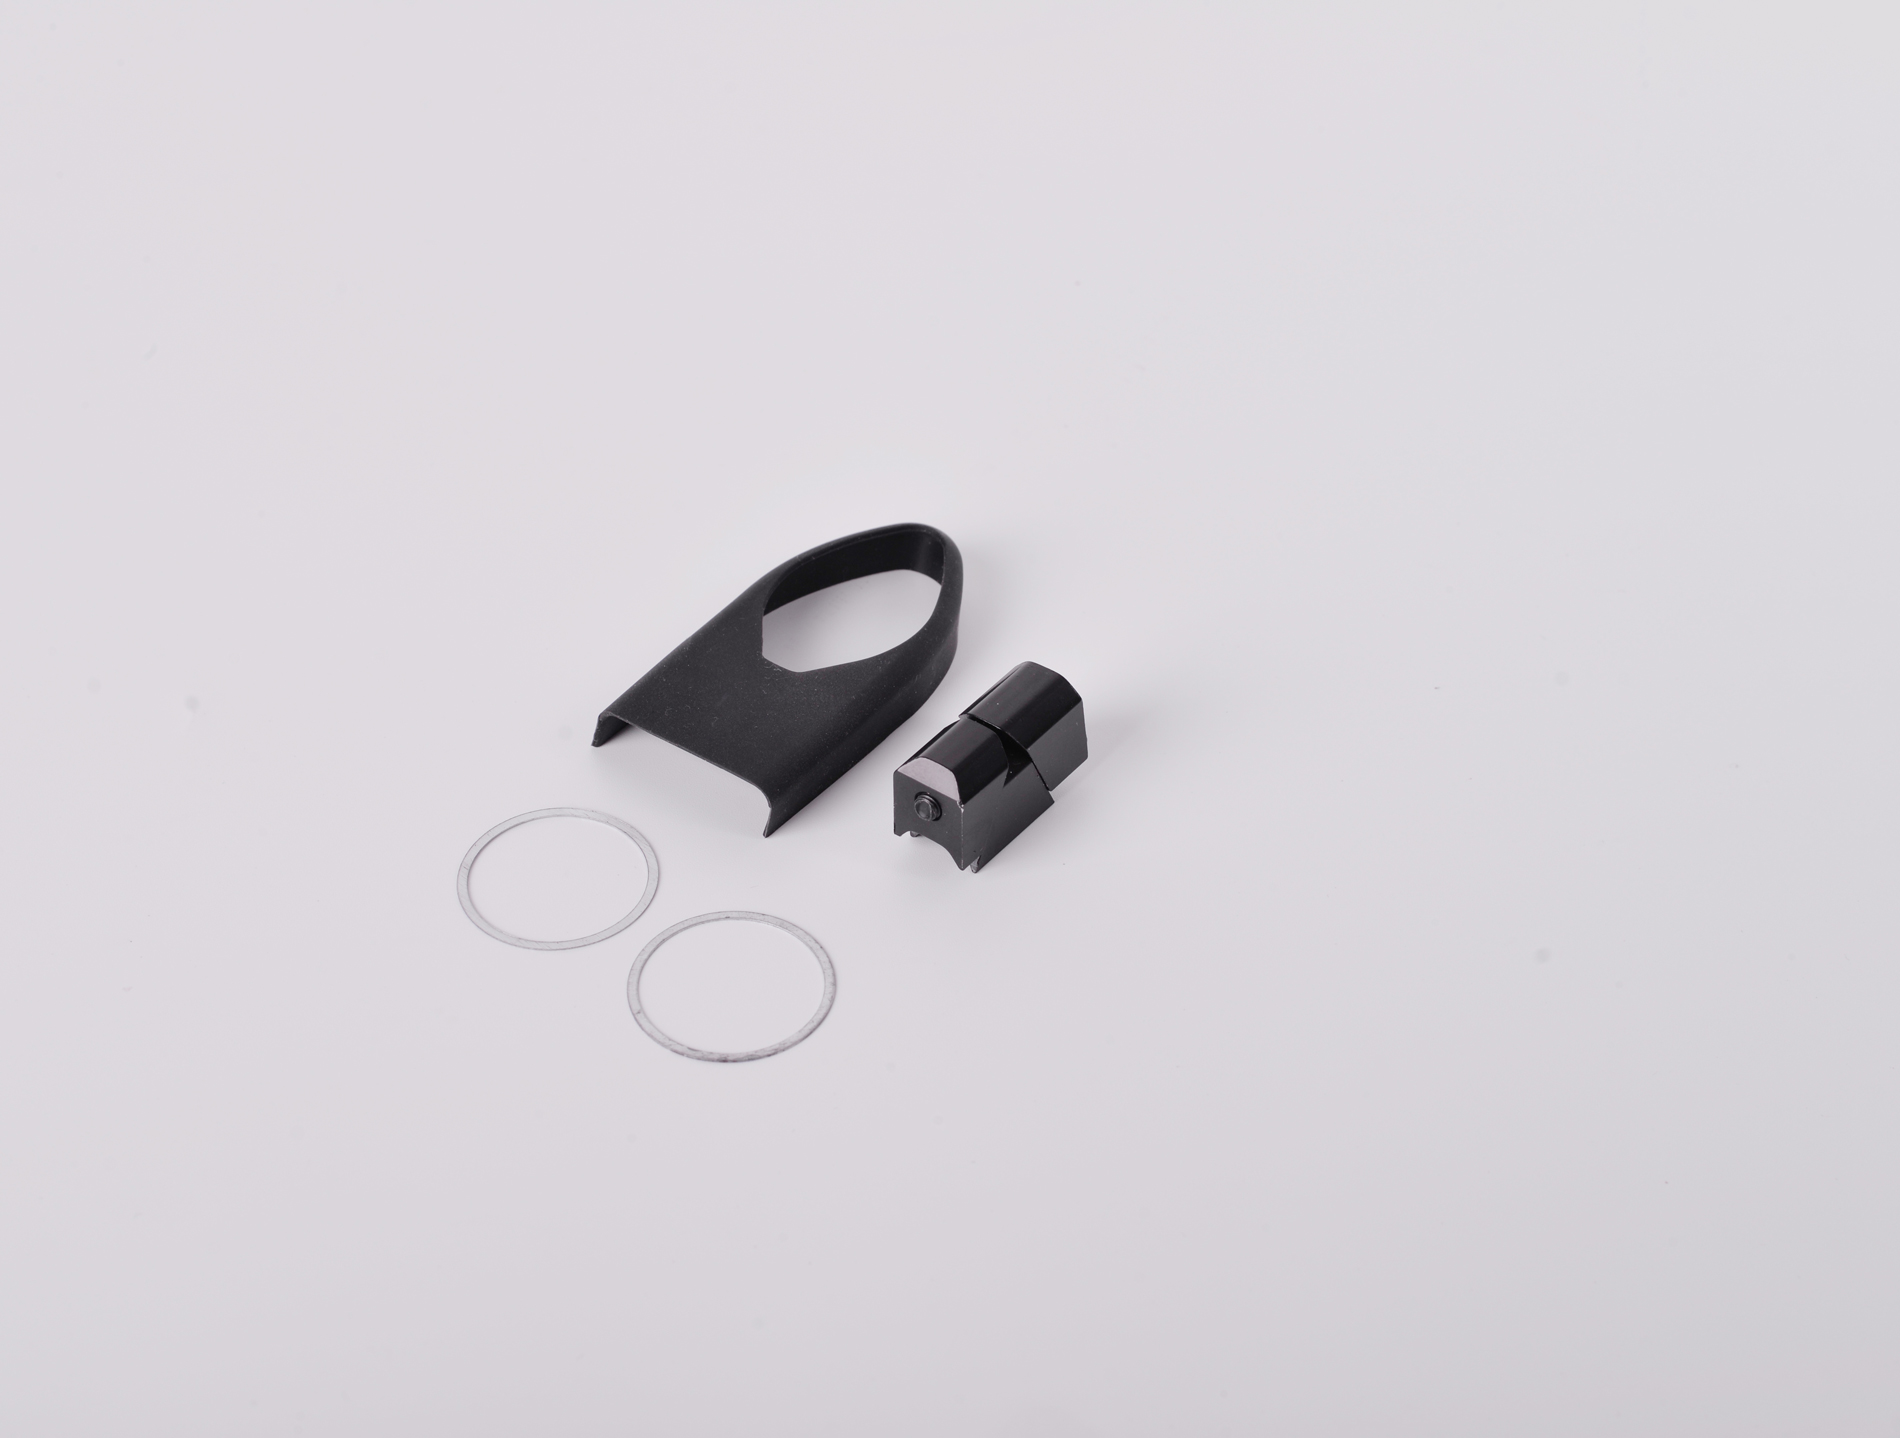
In the world of cycling, every component plays a vital role in enhancing the overall riding experience. One such component, often overlooked but equally important, is the quick release seatpost clamp. These clamps provide a range of benefits that can significantly improve convenience and versatility for cyclists. One of the primary advantages of quick release seatpost clamps is their ease of adjustment. Unlike traditional clamps that require tools to adjust, quick release clamps allow cyclists to change seat height effortlessly, without the need for any tools. This is particularly beneficial for riders who frequently switch between different terrains or cycling styles. For instance, transitioning from a steep hill climb to a flat road may necessitate a different saddle height for optimal comfort and performance. With a quick release clamp, these adjustments can be made swiftly and on the go. Convenience is another major benefit. For cyclists who share a bike with family or friends, the ability to quickly adjust the seatpost to fit different riders’ heights is invaluable. This feature ensures that everyone can ride comfortably, reducing the risk of discomfort or injury due to improper seat height. Versatility is also enhanced with quick release seatpost clamps. Whether you're commuting, racing, or mountain biking, the ability to adjust your seat quickly can adapt to varying demands and conditions. This flexibility can improve ride quality and efficiency, allowing you to maintain optimal posture and power output regardless of the scenario. However, while quick release seatpost clamps offer numerous benefits, there are potential drawbacks to consider. They might be less secure compared to traditional clamps, potentially leading to the seatpost slipping during intense rides. To mitigate this, it’s crucial to ensure that the clamp is properly tightened before setting off. Regular checks and maintenance can also help maintain its reliability and performance. Trifox Bike, renowned for its high-quality cycling components, offers a dependable quick release seatpost clamp that stands out for its durability and performance. Designed with precision engineering, Trifox’s clamp provides a secure fit while allowing for easy adjustments, making it a trusted choice for cyclists seeking both convenience and reliability. In conclusion, quick release seatpost clamps offer significant advantages in terms of ease of use, convenience, and adaptability. By allowing for rapid seat height adjustments, they enhance the cycling experience, making each ride more enjoyable and efficient. Trifox Bike’s offering in this category exemplifies these benefits, providing cyclists with a reliable and versatile solution.
Choosing and installing the right bike bracket is crucial for ensuring optimal performance and safety on any cycling adventure. The bike bracket, often referred to as the bottom bracket, is a critical component connecting the bike's crankset to its frame, allowing for smooth and efficient pedaling. Selecting the appropriate bracket not only enhances the cycling experience but also prolongs the life of your bike. When choosing a bike bracket, compatibility is key. The first step is to identify the type of bike frame and components you have. Different frames require specific bracket types, such as threaded or press-fit, and understanding your bike's specifications is essential. Always refer to your bike's manual or consult with the manufacturer to ensure compatibility. For example, Trifox Bike, known for their high-quality carbon bike frames, provides detailed guidelines on the suitable brackets for each of their models, ensuring a perfect fit and maximum performance. Once you have identified the right bracket, installation is the next step. Here's a step-by-step guide to help you through the process: 1. Gather Tools: Ensure you have the necessary tools, including a bottom bracket tool, torque wrench, and grease. 2. Remove the Crankset: Begin by removing the pedals and crankset from the bike frame. This may require a crank puller tool depending on your bike model. 3. Clean the Frame: Thoroughly clean the bottom bracket shell to remove any debris or old grease that could affect the installation process. 4. Install the Bracket: Apply a light layer of grease to the threads, if applicable. Use the bottom bracket tool to carefully screw in the bracket, ensuring it is tight but not overtightened, as this can damage the threads. 5. Reattach the Crankset: Once the bracket is securely in place, reattach the crankset by reversing the removal process. Ensure all components are tightly secured. Common mistakes to avoid include neglecting to check compatibility, insufficient cleaning of the bracket area, and over-tightening the bracket, which can lead to damage. With expertise in the field, Trifox Bike offers a range of compatible bike brackets designed to work seamlessly with their carbon frames. Their commitment to quality ensures that each component meets high performance standards, providing cyclists with a reliable and efficient riding experience. By following these tips and steps, cyclists can confidently choose and install the right bike bracket, enhancing their bike's performance and longevity.

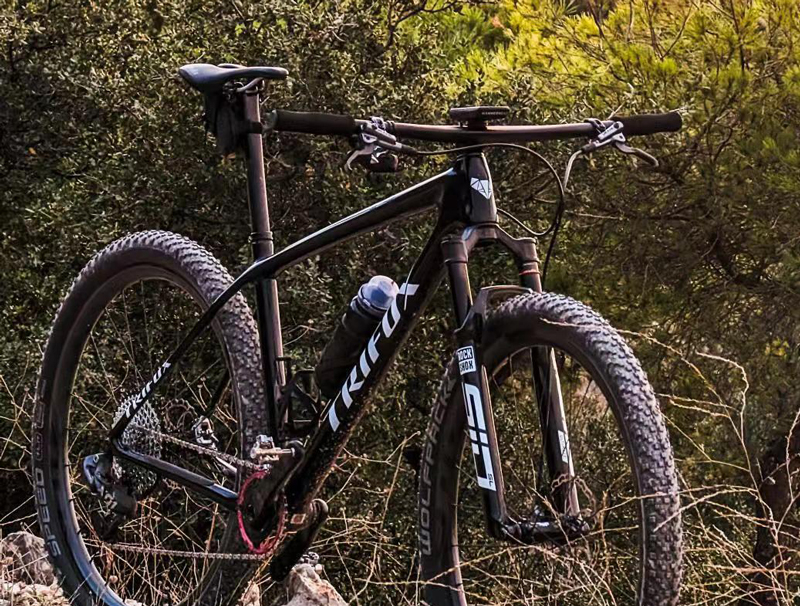
The world of cycling has evolved significantly, with advancements in technology bringing forth the era of fully carbon bicycles. These marvels of engineering offer a host of advantages that have revolutionized the cycling experience for both competitive cyclists and casual riders alike. One of the standout features of carbon bicycles is their incredibly lightweight nature. Made from carbon fiber, these bikes are significantly lighter than their aluminum or steel counterparts, allowing for easier handling and greater speed on the road. This reduction in weight translates into less effort required to pedal, making long rides more enjoyable and less taxing on the body. Durability is another key benefit of carbon bicycles. Despite being lightweight, carbon fiber provides a strong and resilient frame that can withstand the rigors of various terrains. This durability means that cyclists can tackle challenging trails with confidence, knowing their bike can handle the pressure without compromising structural integrity. Performance benefits are at the heart of why many cyclists opt for carbon bikes. The material's ability to dampen road vibrations leads to a smoother ride, reducing fatigue and enhancing comfort over long distances. This is particularly beneficial for road cyclists who aim to push their limits in terms of speed and endurance. In addition to personal advantages, using bicycles as a mode of transport offers significant environmental benefits. Bicycles are a zero-emission mode of transport, contributing to reduced carbon footprints and promoting a healthier planet. With increased awareness of environmental issues, choosing a bicycle over a car for short trips can make a tangible difference. Trifox Bike, a leader in the production of high-quality carbon bicycles, exemplifies the benefits of these innovative bikes. With a commitment to precision engineering and customer satisfaction, Trifox offers products that enhance the cycling experience through superior design and technology. Their dedication to quality and sustainability makes them a trusted choice for cyclists seeking the best in carbon bike performance. In summary, fully carbon bicycles offer unmatched advantages in terms of weight, durability, and performance, making them a worthwhile investment for any cycling enthusiast. Whether you're commuting to work or exploring new trails, a carbon bike transforms every ride into a more efficient and exhilarating journey.
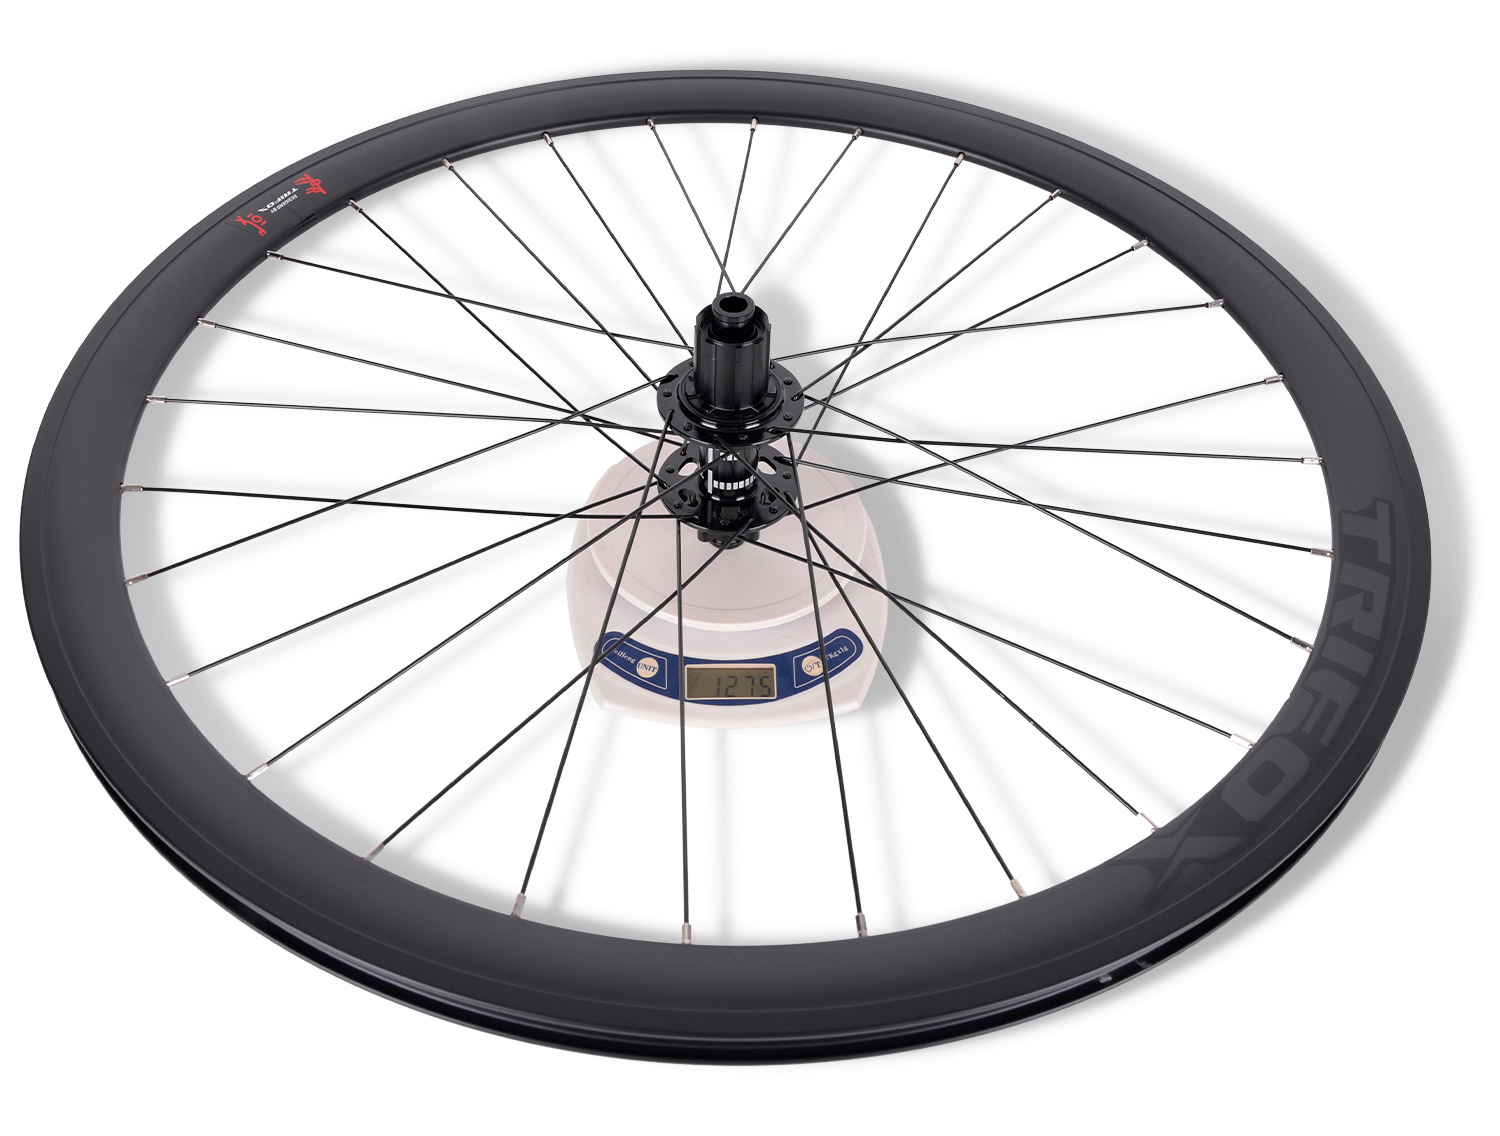
Upgrading your road bike's wheelset can significantly enhance your cycling performance, providing not only improved speed and efficiency but also better handling and ride quality. A well-chosen wheelset upgrade can be one of the most impactful modifications you make to your bike, transforming your riding experience. Benefits of Upgrading Your Wheelset: 1. Increased Speed and Efficiency: Lighter wheels reduce rotational weight, making it easier to accelerate and maintain speed. Aerodynamic wheelsets minimize air resistance, allowing for smoother, faster rides. 2. Enhanced Ride Quality: High-quality wheelsets offer better responsiveness and smoother handling. They can absorb road vibrations more effectively, leading to a more comfortable ride over long distances. 3. Improved Durability: Upgrading to a robust wheelset ensures greater reliability and longevity, especially crucial for riders tackling various terrains and conditions. Key Factors to Consider When Choosing a New Wheelset: 1. Material: Wheelsets are commonly made from carbon or alloy. Carbon wheels are lighter and more aerodynamic, ideal for competitive cyclists. Alloy wheels, such as those from TRIFOXBIKE, offer a great balance of performance and affordability, making them a favorite among many cyclists. 2. Rim Depth: Deeper rims provide aerodynamic benefits, making them suitable for flat terrains and time trials. However, they may be susceptible to crosswinds. Shallower rims are more versatile and handle better in varied conditions. 3. Spoke Count and Pattern: More spokes generally mean a stronger wheel, which is beneficial for heavier riders or rough terrain. The pattern and tension affect wheel strength and aerodynamics. 4. Compatibility: Ensure the new wheelset is compatible with your existing bike components, such as the cassette and brakes (rim or disc). Tips for Installation and Maintenance: 1. Professional Installation: Have your new wheelset installed by a professional or follow detailed instructions to ensure proper alignment and tension, which are critical for performance and safety. 2. Regular Maintenance: Keep your wheels clean and free of debris. Regularly inspect for any signs of wear or damage, and ensure spokes are properly tensioned. 3. Tire Pressure: Maintain optimal tire pressure for your new wheels to enhance performance and prevent flats. TRIFOXBIKE's alloy road wheels are an excellent example of a high-quality upgrade. Designed for reliability and performance, these wheels can elevate your cycling experience significantly. To explore TRIFOXBIKE's alloy road wheels and find the perfect fit for your cycling needs, visit their product page: TRIFOXBIKE Alloy Road Wheels. By carefully selecting and maintaining your upgraded wheelset, you can enjoy a substantial boost in your road biking performance, making every ride faster, smoother, and more enjoyable.

Maintaining MTB bike pedals is crucial for ensuring optimal trail performance and enhancing your overall mountain biking experience. As one of the most critical contact points between you and your bike, well-maintained pedals can significantly affect your ride's efficiency and safety. 1. Importance of Pedal Maintenance: Pedals endure a lot of stress during rides, from absorbing shocks over rough terrains to resisting dirt and moisture. Neglecting pedal maintenance can lead to inefficient power transfer, increased wear on components, and potentially hazardous riding conditions. Regular maintenance not only extends the lifespan of your pedals but also ensures smooth, reliable performance on the trails. 2. Steps for Cleaning and Lubricating Pedals: Cleaning: Begin by removing the pedals from the bike using a wrench. Gently clean the pedals with warm, soapy water and a brush to remove dirt and grime. Pay special attention to the pedal's body, axle, and cleat contact points. After cleaning, rinse thoroughly and dry with a soft cloth. Lubrication: Once clean, apply a suitable bicycle lubricant to the pedal's moving parts, particularly the bearings and any exposed metal surfaces. This helps reduce friction and protects against rust. Avoid over-lubricating, as excess oil can attract more dirt. 3. Checking Pedal Components for Wear and Tear: Axle Inspection: Check the pedal axles for any signs of bending or damage. A bent axle can lead to uneven pedaling and should be replaced immediately. Bearings: Spin the pedals to ensure the bearings are functioning smoothly. Listen for any grinding noises, which might indicate worn-out bearings needing replacement. Cleat and Platform Wear: Inspect cleats for wear, especially if you use clipless pedals. Ensure they engage and release smoothly. For platform pedals, check for worn-out grip surfaces that might affect traction. TRIFOXBIKE offers an impressive range of mountain bikes designed for durability and performance, making them an excellent choice for trail enthusiasts. Their bikes are engineered with high-quality components, ensuring that every ride is as smooth and efficient as possible. To explore TRIFOXBIKE's mountain bikes and elevate your trail experience, visit their product page: TRIFOXBIKE Mountain Bikes. Regular pedal maintenance is a simple yet effective way to enhance your mountain biking adventures, ensuring your pedals are always ready to tackle the toughest trails with confidence.
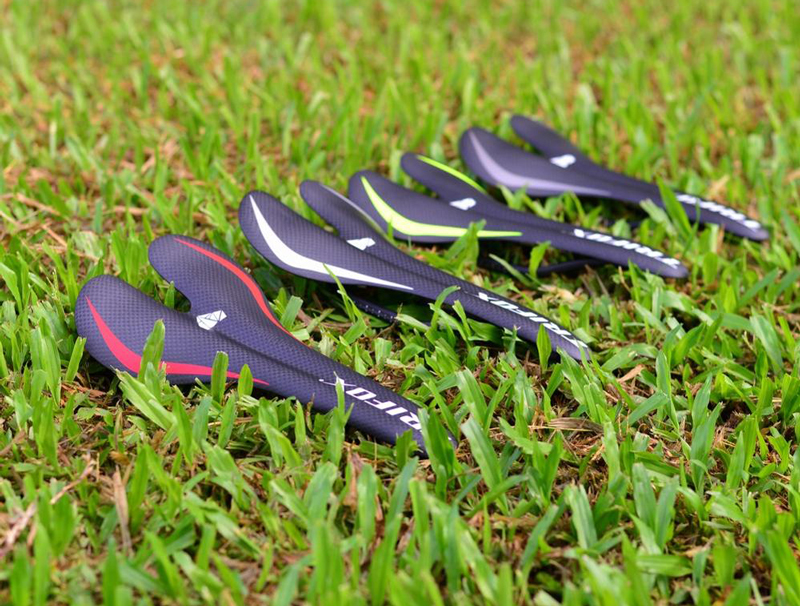
Selecting and adjusting your bicycle seat saddle is crucial for a comfortable and efficient ride, regardless of whether you're a casual cyclist or a competitive racer. A properly chosen and adjusted saddle can make a significant difference in your cycling experience by enhancing comfort and performance, preventing discomfort, and even minimizing the risk of injury. 1. Importance of Saddle Selection: Choosing the right saddle is about balancing comfort with performance. A saddle that matches your riding style and body anatomy can improve your pedaling efficiency and help you maintain a proper riding posture. The right saddle also alleviates pressure points, reducing the likelihood of numbness and discomfort during long rides. 2. Factors to Consider When Selecting a Saddle: Saddle Shape and Width: Consider the shape and width that best suits your anatomy. Wider saddles offer more support for casual riders, while narrower, elongated saddles tend to favor performance-oriented cyclists. Padding and Material: The level of padding and the material of the saddle affect comfort. Gel padding offers plush comfort, while foam provides a firm yet supportive ride. Carbon saddles, like those from TRIFOXBIKE, offer a lightweight option that balances support with performance benefits. Cut-out or Groove Design: Saddles with a cut-out or central groove help alleviate pressure on sensitive areas, enhancing comfort for long-distance riders. Riding Style: Your riding style—whether road cycling, mountain biking, or commuting—affects saddle choice. Road cyclists often prefer lightweight, minimalistic designs, while mountain bikers might opt for more robust, cushioned options. 3. Tips for Adjusting Your Saddle: Height Adjustment: Ensure the saddle height allows for a slight bend in the knee at the bottom of the pedal stroke. This promotes efficient power transfer and reduces strain on the knees. Fore and Aft Position: Adjust the saddle's horizontal position so that when the pedal is at 3 o'clock, your knee is directly over the pedal spindle. This balance aids in efficient pedaling and reduces muscle fatigue. Tilt Angle: A level saddle is generally best for most riders. However, slight adjustments can enhance comfort. A slight upward tilt may relieve pressure on the hands, while a downward tilt can ease lower back tension. TRIFOXBIKE offers an excellent example with their carbon bike saddle, designed for both comfort and performance. This saddle is crafted with lightweight carbon materials, offering a sleek design that enhances bike aesthetics and riding efficiency. To explore TRIFOXBIKE's saddle offerings, visit their product page: TRIFOXBIKE Carbon Bike Saddle. By carefully selecting and adjusting your bicycle saddle, you can transform your cycling experience, ensuring every ride is as comfortable and efficient as possible.

When it comes to upgrading your cycling components, a carbon seatpost is a fantastic choice for enhancing performance and comfort. Chinese manufacturers have become significant players in the cycling industry, offering high-quality carbon seatposts at competitive prices. Here's how to evaluate and choose the right Chinese carbon seatpost for your bike. 1. Benefits of Carbon Seatposts: Carbon seatposts are renowned for their lightweight properties, which significantly reduce the overall weight of your bike. This can enhance acceleration and climbing performance. Additionally, carbon's ability to absorb road vibrations results in a smoother and more comfortable ride, reducing fatigue on longer journeys. The flexibility of carbon also provides better shock absorption, which is particularly beneficial on rough terrains. 2. Key Factors to Consider: Weight and Strength: Look for a seatpost that balances weight with strength. While carbon is naturally lighter than aluminum, ensure the seatpost can withstand your weight and the demands of your cycling style. Diameter and Length: Ensure the seatpost's diameter matches your bike's seat tube and that the length is appropriate for your preferred saddle height. Clamp Design: A secure and easy-to-adjust clamp is crucial for maintaining saddle position and comfort. Look for designs that offer precise adjustments and a firm grip. Finish and Quality: Evaluate the quality of the carbon finish. A high-quality seatpost will have a uniform appearance without blemishes or imperfections that could compromise strength. 3. Tips for Choosing a Reliable Chinese Manufacturer: Reputation and Reviews: Research the manufacturer's reputation in the cycling community. Customer reviews and expert opinions can provide insights into the product's reliability and performance. Quality Assurance: Select manufacturers that offer quality assurance and adhere to international cycling standards. This ensures you're getting a product tested for safety and durability. Warranty and Support: A good manufacturer will provide a warranty and customer support, giving you confidence in your purchase. TRIFOXBIKE is an excellent example of a reliable Chinese manufacturer, renowned for their high-quality carbon seatposts. Their offerings are designed with precision, focusing on lightweight construction and durability to enhance cycling performance. With a range of sizes and designs, their seatposts cater to various cycling needs and preferences. To explore TRIFOXBIKE's range of seatposts and find the perfect match for your bike, visit their product page: TRIFOXBIKE Seatposts. By carefully evaluating your options and choosing a reputable manufacturer, you can enjoy the numerous benefits of a carbon seatpost, elevating your cycling experience to new heights.


