


Installing an alloy seat clamp on your bicycle might seem like a small task, but it’s one that plays a crucial role in ensuring a secure and comfortable ride. A properly installed seat clamp keeps your seat post stable, preventing slippage and enhancing your overall cycling experience. Here’s a step-by-step guide to help you install your new alloy seat clamp correctly.
1. Gather Your Tools
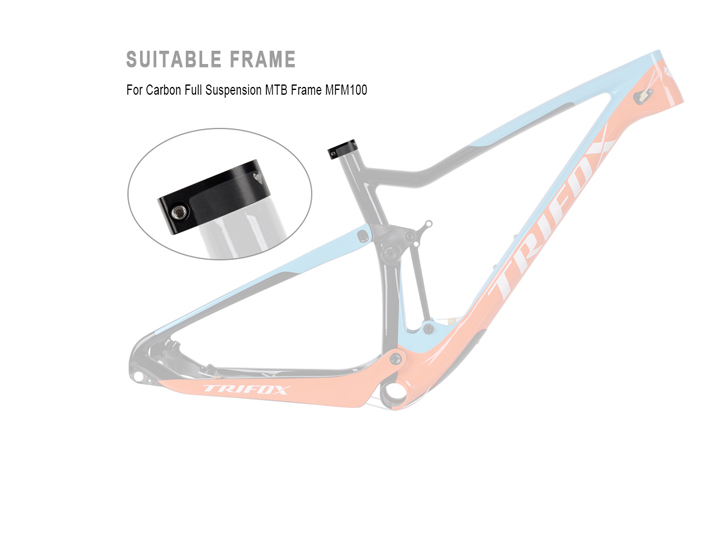
Before starting, make sure you have the necessary tools: an Allen wrench (typically 4mm or 5mm), grease, and a torque wrench if possible. You’ll also need your new alloy seat clamp, like the Trifox SC35, which is designed for durability and ease of use.
2. Remove the Old Seat Clamp
If you already have a seat clamp installed, start by loosening the bolt using the Allen wrench. Unscrew it completely and carefully remove the old clamp from the frame. Keep the bolt and any washers in a safe place as you may need them later.
3. Clean the Seat Tube
With the old clamp removed, clean the top of the seat tube where the new clamp will sit. Use a cloth to wipe away any dirt, grease, or debris. A clean surface ensures better grip and performance of the new clamp.
4. Apply Grease
Apply a small amount of grease around the inside of the new alloy seat clamp. This helps in smooth adjustment and prevents corrosion. Avoid over-greasing as it can attract dirt.
5. Install the New Clamp
Place the new Trifox SC35 seat clamp over the seat tube. Align it properly so that the bolt hole is positioned correctly. Insert the bolt through the clamp and begin to tighten it by hand. Make sure it's fitted evenly around the tube.
6. Adjust the Seat Post
Insert your seat post into the seat tube. Adjust it to your desired height. Ensure the saddle is level and the height aligns with your comfort and riding style.
7. Tighten the Clamp
Using the Allen wrench, tighten the bolt on the seat clamp. Use a torque wrench to achieve the recommended torque setting, usually marked on the clamp or provided by the manufacturer. Over-tightening can damage the clamp or frame, while under-tightening can cause slippage.
8. Check for Stability
Once the clamp is tightened, check the stability of the seat post. Try to move the seat side to side and up and down. If there’s no movement, your installation is successful.
9. Final Adjustments
Take a short test ride to ensure everything feels right. Make any minor adjustments to the seat height or angle as needed, and re-tighten the clamp if necessary.
Installing an alloy seat clamp, such as the Trifox SC35, is a straightforward process that can greatly enhance your bike’s performance and comfort. With proper installation, you'll ensure a stable and enjoyable ride every time you hit the road.
2024-07-16
Trifox
SHARE:


Comments
Recent Posts
1

1
1
1

1

1

1

1

1
1
1

1

1

1

1

1

1
1

1

1

1

1
1


