Installing and maintaining centerlock disc brakes on your bicycle is a pivotal skill that can enhance your riding experience by providing consistent stopping power and improved control under various conditions. Unlike traditional rim brakes, centerlock disc brakes offer superior performance, especially in wet and muddy conditions, making them a popular choice among both road cyclists and mountain bikers.
Understanding Centerlock Disc Brakes
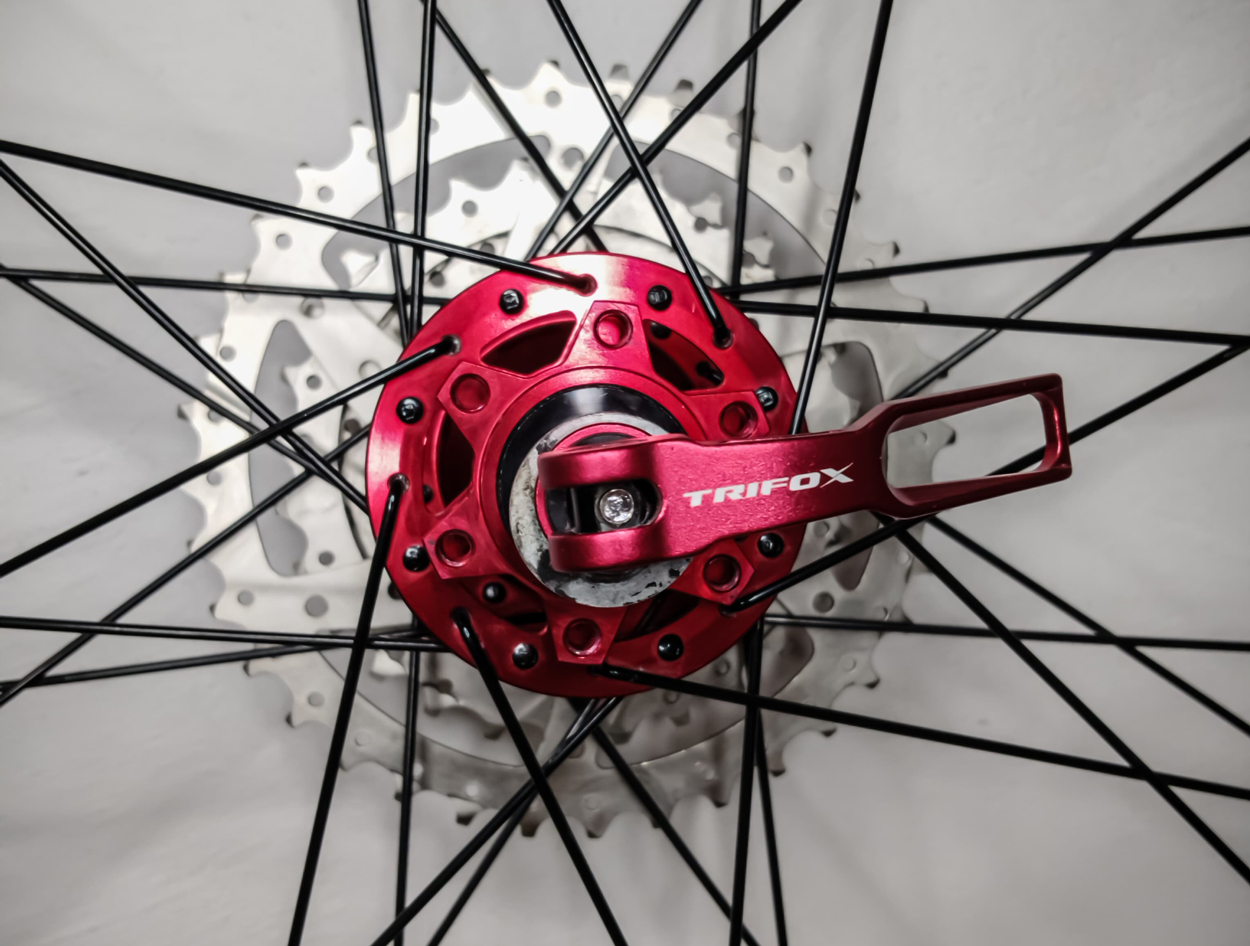
Centerlock disc brakes use a special mounting system developed by Shimano to attach the brake rotor to the hub. The system allows for quicker rotor swaps and a more reliable connection by using a splined interface and a lockring to secure the rotor in place. This design simplifies installation and maintenance while offering an aesthetically pleasing look.
Tools and Materials Needed
Before beginning the installation process, make sure you have the following tools and materials:
Centerlock-compatible rotor
Torque wrench
Lockring tool (specific to centerlock systems)
Isopropyl alcohol
Clean rag
Installation Process
Prepare the Hub: Start by removing the wheel from your bike. If your hub already has a rotor installed, remove the old rotor by loosening the lockring with the lockring tool. Clean the hub surface to ensure it's free of dirt and grease.
Install the Rotor: Take your new centerlock rotor and align its splines with those on the hub. Gently slide the rotor into place, ensuring it sits flush against the hub.
Secure the Rotor: Place the lockring onto the hub and tighten it by hand to ensure the rotor is properly seated. Then, using the lockring tool and a torque wrench, tighten the lockring to the manufacturer's recommended torque specification. This step is crucial to prevent the rotor from coming loose during rides.
Reinstall the Wheel: Once the rotor is securely fastened, reinstall the wheel on your bike. Make sure the wheel is correctly seated in the dropouts and the quick-release or thru-axle is tightly secured.
Check the Brake Caliper Alignment: Before riding, check that the brake caliper is correctly aligned so that the pads are evenly spaced around the rotor. If necessary, adjust the caliper position to avoid rubbing.
Maintenance Tips
Regular maintenance of your centerlock disc brakes will ensure they continue to perform optimally. Here are some tips to keep your brakes in top condition:
Clean the Rotors Regularly: Use isopropyl alcohol and a clean rag to wipe down your rotors periodically, especially after riding in wet or muddy conditions. This prevents buildup of debris and ensures consistent braking performance.
Inspect Brake Pads for Wear: Disc brake pads wear down over time and need to be replaced when they become too thin. Check pad thickness regularly and replace the pads if they are worn down to the manufacturer's recommended limit.
Bleed Hydraulic Brakes: If your disc brakes are hydraulic, they may require bleeding to remove air bubbles from the brake lines. This process varies by brake model, so consult your brake's documentation for specific instructions.
Listen for Noises: Squealing or grinding noises during braking can indicate dirty or misaligned rotors, contaminated brake pads, or other issues. Address any unusual sounds promptly to maintain brake performance and safety.
Tighten the Lockring Periodically: Check the tightness of the rotor lockring periodically, especially if you frequently swap rotors. Use a torque wrench to ensure it's tightened to the correct specification.
By following these installation and maintenance steps, you can enjoy the benefits of centerlock disc brakes and ensure your bicycle is safe and responsive, no matter where your rides take you. Whether you're a seasoned pro or new to the world of cycling, mastering the art of working with centerlock disc brakes is a valuable skill that will enhance your overall cycling experience.
2024-05-14
Trifox
SHARE:


Comments