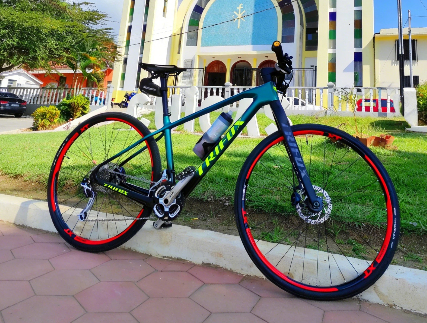
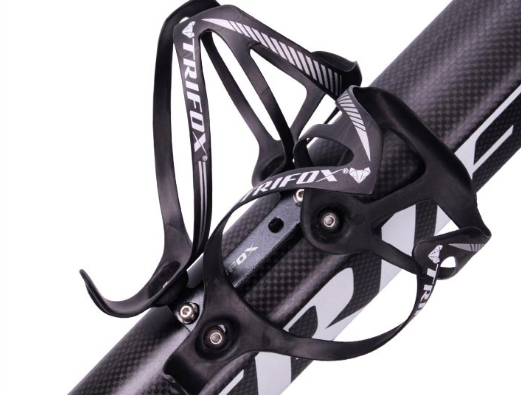
Staying hydrated while cycling is essential, and having a reliable bottle cage ensures that your water bottle is secure and easily accessible during your ride. An ultralight bottle cage not only holds your water bottle but also helps keep the weight of your bike as low as possible, which is crucial for performance-driven cyclists.
Why Choose an Ultralight Bottle Cage?
Before we dive into the installation process, it's worth understanding the benefits of choosing an ultralight bottle cage:
Weight Reduction: Every gram counts, especially for competitive riders. Ultralight bottle cages can weigh as little as 15-30 grams, compared to traditional cages that can weigh upwards of 50 grams;High Performance: Made from materials like carbon fiber or high-grade aluminum, ultralight cages offer durability and strength without compromising weight;Aesthetic Appeal: These cages often have sleek designs that add a touch of sophistication to your bike.
Tools and Materials Needed
Ultralight Bottle Cage: Ensure it’s compatible with your bike frame.Allen Wrench (usually 4mm or 5mm): To tighten the bolts;Bolts: Typically provided with the bottle cage; if not, standard M5 bolts will work;Threadlocker (optional): To prevent bolts from loosening over time due to vibration.
Step-by-Step Installation Guide
Step 1: Prepare Your Work Area
Find a clean, flat surface to work on, and gather all the necessary tools and materials. Make sure your bike is stable, either by using a bike stand or by leaning it securely against a wall.
Step 2: Locate the Mounting Holes
Most modern bikes come with pre-drilled holes on the down tube or seat tube designed specifically for mounting bottle cages. These holes are typically covered with small plastic plugs or bolts. If your bike doesn’t have these holes, you might need an adapter or specialized mounts that attach around the frame tubes.
Step 3: Clean the Frame
Before installing the bottle cage, clean the mounting area on your bike frame with a damp cloth to remove any dirt or debris. This ensures a secure fit and prevents potential damage to the frame.
Step 4: Remove Existing Bolts or Plugs
If your bike comes with pre-installed bolts or plastic plugs, use the Allen wrench to remove them. Keep these bolts handy, as you may need to use them to install the new bottle cage.
Step 5: Position the Bottle Cage
Align the holes of the ultralight bottle cage with the mounting holes on the bike frame. Make sure the cage is oriented correctly so that it holds the bottle securely and is easily accessible while riding.
Step 6: Insert and Tighten the Bolts
Insert the Bolts: With the cage aligned, insert the bolts through the holes in the cage and into the mounting holes on the frame. Start by hand-threading the bolts to avoid cross-threading;Apply Threadlocker (Optional): If you’re concerned about the bolts loosening over time, apply a small amount of threadlocker to the threads before fully tightening;Tighten the Bolts: Use the Allen wrench to tighten the bolts securely. Be careful not to overtighten, as this can strip the threads or damage the frame. A snug fit is sufficient.
Step 7: Check for Clearance
Once the bottle cage is installed, check to ensure there’s enough clearance between the cage and other components of your bike, such as the crank arms or front derailleur. Spin the pedals and move the handlebars to confirm there’s no interference.
Step 8: Test the Fit with a Water Bottle
Insert your water bottle into the cage to verify that it fits securely and can be easily removed and replaced while riding. The bottle should sit snugly in the cage without rattling or feeling loose.
Step 9: Final Inspection
Double-check that the bolts are tight and the cage is secure. Give the bottle cage a gentle tug to ensure it’s firmly attached to the frame. If everything looks good, you’re ready to hit the road or trail with your newly installed ultralight bottle cage.
Conclusion
Installing an ultralight bottle cage is a straightforward process that can be completed in just a few minutes with basic tools. Not only does it help in reducing the overall weight of your bike, but it also ensures you stay hydrated on your rides. By following this guide, you can easily add a functional and stylish accessory to your bike, enhancing both its performance and aesthetic appeal. Happy cycling!
2024-06-05
Trifox
SHARE:


Comments