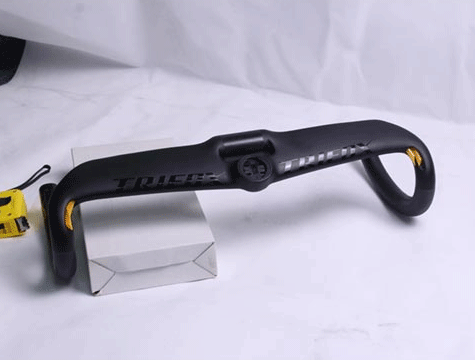
As a cyclist, have you ever felt like you’re working harder than you should be? Are you struggling to keep up with your cycling buddy, despite all the miles you’ve put in? If so, you might want to consider investing in a set of aerobars for your road bike. Aerobars are an accessory that can significantly improve the aerodynamics of your bike and help you go faster with less effort. In this blog post, we will take a closer look at the benefits of aerobars, as well as introduce you to one of our favorites on the market: The aerobars for Road Bike TC20AF. 1. What are Aerobars? Aerobars are accessories that attach to your road bike’s handlebars and extend out in front of you, allowing you to adopt a more aerodynamic riding position. By tucking in close to your bike, you reduce your body’s exposure to wind resistance, allowing you to move through the air with less drag. Aerobars consist of a set of extended bars, which attach to your bike’s existing handlebars, allowing you to lean on them comfortably. Some models also include a set of armrests, which further reduce the pressure on your hands and wrists when you’re in the aero position. 2. Benefits of Using Aerobars By using aerobars, you can achieve a more aerodynamic riding position, which can lead to several benefits, including increased speed, improved endurance, and reduced fatigue. When you are in the aero position, you are allowing your body to cut through the wind resistance more efficiently, which means that you’re using less energy to maintain your speed. Additionally, by reducing the pressure on your hands and wrists, aerobars can help to reduce fatigue, allowing you to ride for longer periods without discomfort. Finally, if you’re competing, aerobars can give you a competitive edge, allowing you to shave crucial seconds off your race time. 3. Features of the TC20AF Carbon Drop Bar One of our favorite aerobars on the market is the TC20AF Carbon Drop Bar. This aerobar is designed specifically for compact road bikes and features a unique aerofoil shape, which complements the latest aero road bikes. The tops are redesigned with smooth, aerodynamic curves and are constructed of TC20 full carbon fiber, which provides strength and stiffness while keeping weight to a minimum. The bar features internal cable routing for less drag, sleek aesthetics, and reliable setup of manual or electronic gear systems. The TC20AF also comes with a stopwatch bracket, which is perfectly compatible with Garmin and Bryton stopwatches. 4. How to Install Aerobars on Your Road Bike Installing aerobars on your road bike is a fairly straightforward process. You’ll need a few tools, including a hex key, pliers, and a torque wrench to get started. First, remove your bike’s existing handlebar tape and any attachments. Next, remove the existing stem bolt and replace the stem cap with the aerobar clamp. Attach the aerobars to the clamp and make any necessary adjustments to the length and angle. Finally, install the brake and shifter cables through the aerobar extensions, add any armrests or pads, and re-wrap your handlebars.、 If you’re looking to improve your cycling performance, aerobars are a great accessory to consider. They allow you to assume a more aerodynamic position while reducing fatigue and improving your endurance. The TC20AF Carbon Drop Bar is one of the best aerobars on the market, featuring internal cable routing and a stylish aerofoil design. Installation of aerobars is straightforward, but if you're not confident in doing it yourself, it’s best to take your bike to a professional. So what are you waiting for? Upgrade your road bike with a set of aerobars and take your cycling performance to the next level.
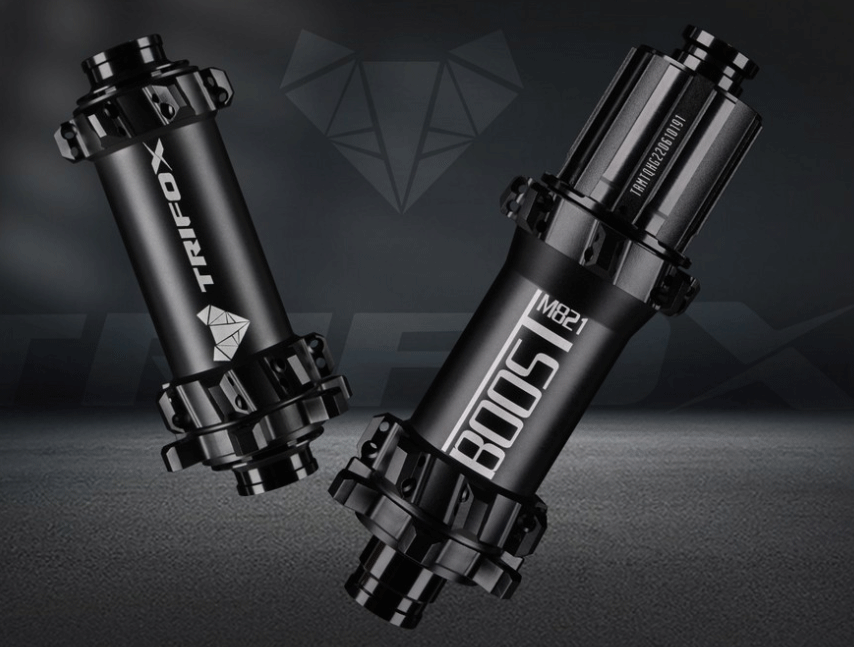
As a mountain biker or bicycle enthusiast, you may find yourself in a situation where you need to convert your bike's quick-release hub to a thru-axle. While this may seem like a daunting task, it is actually quite doable with the right tools and knowledge. The benefits of a thru-axle include increased stiffness, improved handling, and better alignment between your wheel and frame. So, if you're ready to make the switch, let's dive into how to convert a quick-release hub to a thru-axle. Step 1: Identify your Hub Specs Before you start the conversion process, you need to identify the specs of your hub. This includes the size and spacing of the hub, which will determine what kind of thru-axle you need. For example, some mountain bikes use hubs with a 135mm spacing and 9mm axle diameter. You'll need to find a thru-axle with the same specs in order for it to work with your bike. If you're not sure what specs you have, you can usually find this information through your bike's manufacturer or by measuring the hub yourself. Step 2: Remove the Quick Release The next step is to remove the quick release skewer from your bike. This can usually be done by unscrewing the end caps of your quick-release hub and gently pulling out the skewer. Make sure to keep any washers or spacers that may be attached to the skewer. Step 3: Install the Thru-Axle Now it's time to install your new thru-axle. Make sure it has the correct size and spacing for your hub, and determine the orientation of the threads. Some thru-axle designs have a lever or handle that allows you to tighten or loosen the axle by hand, while others require a tool. Follow the manufacturer's instructions for installation, being sure to grease the threads to prevent corrosion or seizing. Step 4: Adjust your Disc Brakes If you have disc brakes on your bike, you'll need to adjust the brake calipers to accommodate the new thru-axle. This may require loosening or removing the brake bolts and repositioning the caliper. Be sure to align the brake pads with the rotor correctly, and test the brakes thoroughly before riding. Step 5: Test Ride and Adjust After you've installed the thru-axle and adjusted your disc brakes, it's time to test ride your bike. Take it for a short spin around the block or a nearby trail, and check for any unusual noises or vibrations. If everything seems to be working well, continue to ride and make any necessary adjustments along the way. Conclusion: Converting your quick-release hub to a thru-axle may seem like a big undertaking, but it's actually a fairly simple process. By following these steps and using the right tools, you can improve the performance and handling of your bike with a few easy modifications. Remember to always consult the manufacturer's instructions and take your time to ensure a safe and successful conversion. Happy riding!
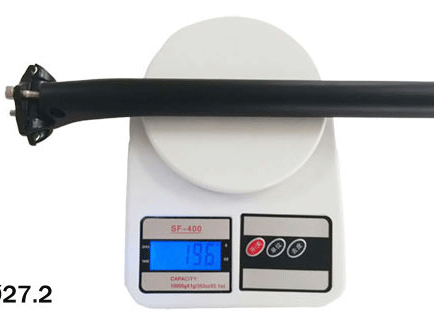
If you have been looking for the perfect seatpost for your mountain bike, the Trifox 400mm Carbon Layback MTB Seatpost CDS100 is worth considering. This seatpost offers enhanced comfort, durability, and lightness, making it perfect for all your mountain biking needs. 1. Carbon Layback Design - The Trifox 400mm Carbon Layback MTB Seatpost CDS100 boasts a carbon layback design that provides a full range of seat angle adjustment. This means you can easily adjust your seat angle to your preferred position, giving you maximum comfort and performance. 2. Lightweight - It has 27.2 seatpost, Weighing in at only 180g, this seatpost is incredibly lightweight. This means you can easily shave off some weight from your bike, which is essential for competitive mountain biking. The titanium screws add to its lightweight nature while also increasing durability. 3. Durability - The Trifox 400mm Carbon Layback MTB Seatpost CDS100 is made from high-quality carbon fiber, which is known for its durability and lightweight nature. This means that the seatpost can withstand the toughest of terrains and obstacles that you may encounter while mountain biking. 4. Easy to Install - The Trifox 400mm Carbon Layback MTB Seatpost CDS100 is easy to install, even if you are not an expert in bike maintenance. You can install it yourself or have a professional do it for you. 5. Value for Money - The Trifox 400mm Carbon Layback MTB Seatpost CDS100 is a great value for money. Its carbon layback design, lightweight, and durability make it a top choice for mountain bikers of all levels. In conclusion, the Trifox 400mm Carbon Layback MTB Seatpost CDS100 is an excellent seatpost that offers comfort, durability, and performance for mountain bikers looking to enhance their riding experience. Its carbon layback design, lightweight nature, durability, and ease of installation make it an excellent value for money. So, if you are looking for a seatpost that can withstand the toughest terrains and provide comfort and performance, the Trifox 400mm Carbon Layback MTB Seatpost CDS100 is definitely worth considering
As technology evolves, different bike components have also evolved. One of the most vital components of every bike is the hub, which is where the wheel is connected to the bike's frame. The hub has two types - freehub and freewheel. Although they both function similarly, there are essential differences between these two components that every cyclist should know. Firstly, let's start by defining what a freehub is. A freehub is a modern hub design where the freewheel mechanism is built into the hub body. The Freehub mechanism consists of a ratchet mechanism that allows the cassette to rotate in only one direction while being held in place by the circular locking ring. The result of this mechanism is a more reliable and more efficient transmission system compared to freewheels. It also enables fast and straightforward cassette swapping, allowing riders to change gears more efficiently to adapt to various terrain and riding conditions. On the other hand, a freewheel is a bicycle hub that has a ratcheting mechanism that's contained within. Compared to the Freehub, a freewheel can only accommodate a freewheel where the cogs and ratcheting mechanism are all part of one unit. When you remove a freewheel, you need to replace the whole unit. Freewheels were popularly used on road bikes and mostly used on bikes from the 1970s to the 1990s. They were replaced by the Freehub that provides smoother and more efficient power transfer. Another significant difference between Freehub and Freewheel is the location of the hub bearings. In a Freehub, the bearings are located within the hub body, which means that any time that they require service, they can easily be accessed and adjusted. On the other hand, the bearings of a freewheel are situated inside the freewheel unit itself, making it more challenging to extract and replace. Freewheels are less efficient and less reliable compared to the Freehub. It is also essential to note the compatibility of both Freehub and Freewheel. Freehubs allow for compatibility with cassettes of up to 11 speeds, which is quite impressive compared to freewheels, which only allow for cassettes with a maximum of seven speeds. The Freehub's larger diameter also makes it stiffer, making it a more durable hub system. Lastly, the sound of freehubs and freewheels differ. Freehubs tend to make a quieter and softer sound compared to freewheels, which tend to make a distinct clicking sound when freewheeling or coasting. Some cyclists like to hear that clicking sound since it's a sign that the rear wheel is moving. In summary, while both Freehub and Freewheel function to connect the wheel to the bike frame, they have significant differences. In terms of efficiency, reliability, and convenience, the Freehub takes the crown. It is more efficient, reliable, sturdier, and more compatible with various cassette speeds compared to the Freewheel. Therefore, if you're in the market for the best wheel hub for your bike, it's essential to consider the advantages and disadvantages of both Freehub and Freewheel before making a decision.
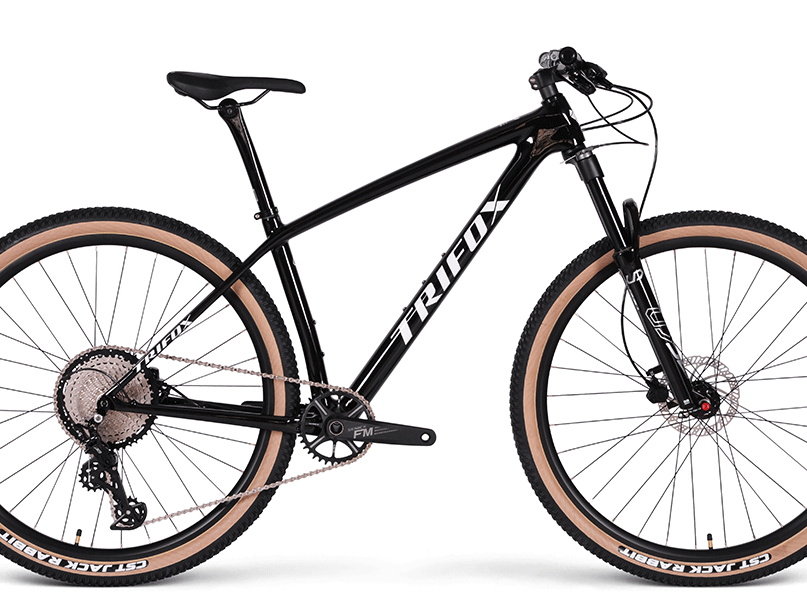
Choosing the perfect mountain bike frame size can be tricky, especially if you’re buying your first bike online. However, getting the right size is crucial since it can ensure a comfortable, efficient, and safe ride. In this guide, we’ll show you how to measure mountain bike frame size so you can find the perfect fit for your Ultra Light Carbon Hardtail MTB SDY20 bike. Step 1: Determine Your Height To start measuring your mountain bike frame size, you need to determine your height first. Stand against a wall without shoes on and measure from the floor to the top of your head. This measurement is your height. Step 2: Calculate Your Inseam Length Your inseam length is the distance from your crotch to the floor. Stand against a wall, place a book between your legs, and measure the distance from the top of the book to the floor. This measurement is your inseam length. Step 3: Use a Frame Size Chart Once you have your height and inseam length measurements, use a mountain bike frame size chart to determine the right frame size for you. Generally, you should look for a frame size that’s between 1 to 4 inches shorter than your inseam length. For example, if your inseam length is 29 inches, a frame size of 15” to 18” should be a good fit. Step 4: Test Ride Different Sizes While the frame size chart can give you a good estimate, the best way to find the perfect fit for your UL Carbon Hardtail MTB SDY20 bike is to test ride different sizes. Most bike shops allow demo rides, so take advantage of these opportunities. When testing different sizes, make sure you adjust the saddle height, handlebar position, and pedals to mimic your riding position. Step 5: Consider Your Riding Style Finally, when measuring your mountain bike frame size, consider your riding style. For example, if you’re a downhill rider, you may want a bike with a longer top tube and shorter stem. If you’re a cross-country rider, you may want a bike with a shorter wheelbase and longer stem. Make sure you choose a frame size that’s suitable for your riding style. Getting the right mountain bike frame size is essential for a comfortable and safe ride. By following the steps we've outlined in this guide, you should be able to find the perfect fit for your Ultra Light Carbon Hardtail MTB SDY20 bike. Remember, the best way to determine the right size is to test ride different sizes and consider your riding style. Happy riding!
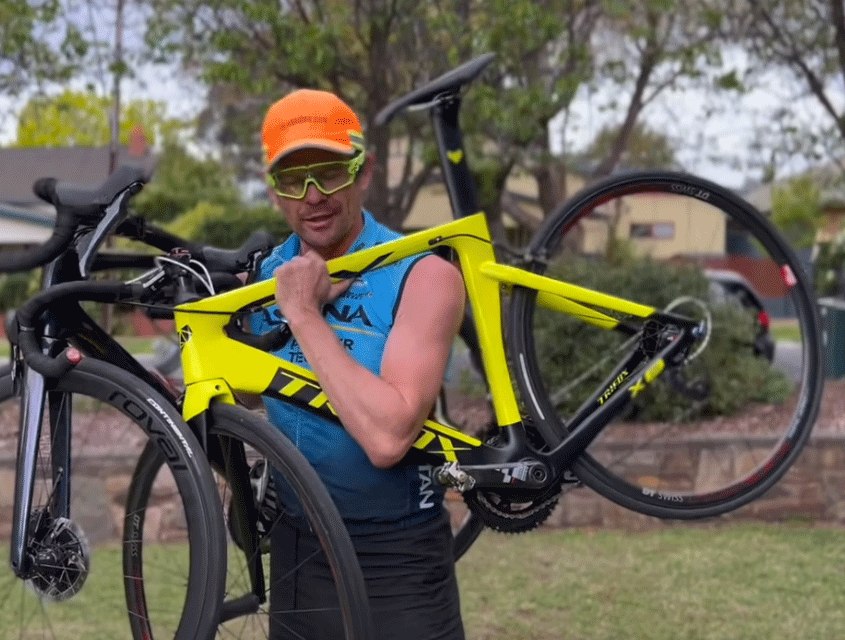
Investing in a road bike is a great way to stay active and explore the great outdoors. But with so many bike frame sizes available, figuring out which one is best for you can be a daunting task. 1. Measure Your Inseam The first step in choosing the right frame size for your road bike is to measure your inseam. This is the distance between the floor and your pelvic bone, measured with your feet shoulder-width apart. Once you've measured your inseam, you can use a sizing chart to determine the appropriate frame size. The AERO Carbon Road Bike Frameset X8TA comes in sizes ranging from 49cm to 58cm, with a chart that recommends frame sizes based on inseam measurements. 2. Consider Your Riding Style Your preferred riding style can also influence the ideal frame size for your road bike. For instance, if you plan on racing, you might prefer a smaller frame size for a more aggressive, aerodynamic riding position. On the other hand, if you plan on using your bike primarily for commuting or touring, you might prefer a slightly larger frame for a more comfortable, upright position. The AERO Carbon Road Bike Frameset X8TA is designed with aerodynamics in mind, with a seat tube angle of 74.5 degrees and a head tube angle of 72 degrees, making it a great choice for racing or aggressive riders. 3. Pay Attention to Standover Height Another important factor to consider when choosing a road bike frame size is standover height. This is the distance between the top tube of the bike frame and the ground. Ideally, when you straddle your bike, there should be at least one inch of clearance between your body and the top tube. The AERO Carbon Road Bike Frameset X8TA has a standover height of 77.8cm to 81.4cm, depending on the size of the frame. 4. Seek Professional Help While sizing charts and online guides can be helpful in selecting a road bike frame size, it's always a good idea to seek professional help when making your final decision. Visit your local bike shop and get a professional fitting to ensure that you’re making an informed decision. They can take into account your inseam, riding style, and other factors to recommend the perfect frame size for you. 5. Test Ride and Adjust Lastly, don't be afraid to test ride and make adjustments to your new bike. You might find that even with the perfect frame size, you prefer a slightly different handlebar height or saddle position. Take your time to get comfortable on your new bike, and make any necessary adjustments to ensure that you have the best riding experience possible. Conclusion: Choosing the right frame size for your road bike is essential to ensure a comfortable and enjoyable ride. By measuring your inseam, considering your riding style, paying attention to standover height, seeking professional help, and test riding and making adjustments, you can find the perfect fit for you. With the 700C AERO Carbon Road Bike Frameset X8TA, you have a high-quality option with varying sizes to fit most riders. Take the time and effort to find the right frame size, and you'll be sure to enjoy many miles of cycling fun.
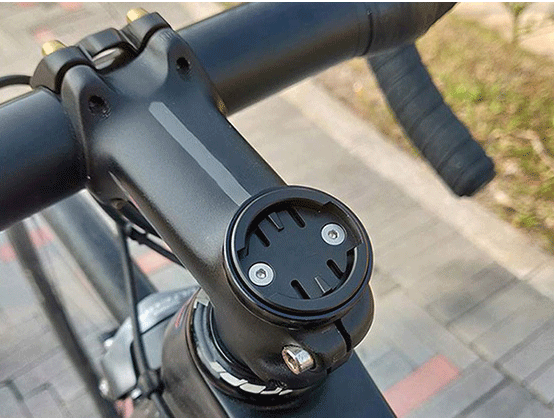
Biking is one of the most loved and healthy sports of recent times. It keeps you fit, provides excellent cardiovascular exercise, and helps in maintaining body weight. With the advancement of technology, biking has become even more fun and easier. The Bike Stem Top Cap Computer Mount STH100 is one such technological advancement that has made the life of bikers comfortable and convenient. The Aerobar Computer Mount is a kind of computer mount that is attached to the center of the aerobar. The center spot offers better visibility while biking, making it easier for bikers to read the stats and control the bike. The Aerobar Computer Mount has become a must-have accessory for all those serious bikers who love to keep track of their stats while biking. It is much convenient to look down at the monitor than to look sideways. It makes for a safer riding experience. Bike Stem Top Cap Computer Mount STH100 is the perfect solution for installing any computer mount on your bike stem. While most bikers find it challenging to find an ideal position for the computer mount on their bikes, the Bike Stem Top Cap Computer Mount STH100 offers a solution to this problem. It is designed for bikers who want to keep track of their riding data without any hassle. It allows bikers to mount the computer mount right in front of them and read all the details while biking. The durability of the Aerobar Computer Mount is another reason why bikers prefer it over other mounts. It is designed with high-quality materials and can withstand both harsh weather conditions and accidental falls. So even if you are riding on rough terrain, you don't have to worry about the mount falling off or getting damaged. The Aerobar Computer Mount is water-resistant, which makes it a reliable option for bikers who like to ride in the rain. In conclusion, the Aerobar Computer Mount is a significant addition to your bike gear if you are serious about biking. It offers a convenient way to monitor your stats, is durable and reliable, and adds an extra layer of safety while biking. Bike Stem Top Cap Computer Mount STH100 is the perfect add-on to this amazing Aerobar Computer Mount that allows you to mount it in the right position for comfortable and hassle-free bike rides. So, if you want to make your biking experience memorable and meaningful, make sure to grab an Aerobar Computer Mount today!
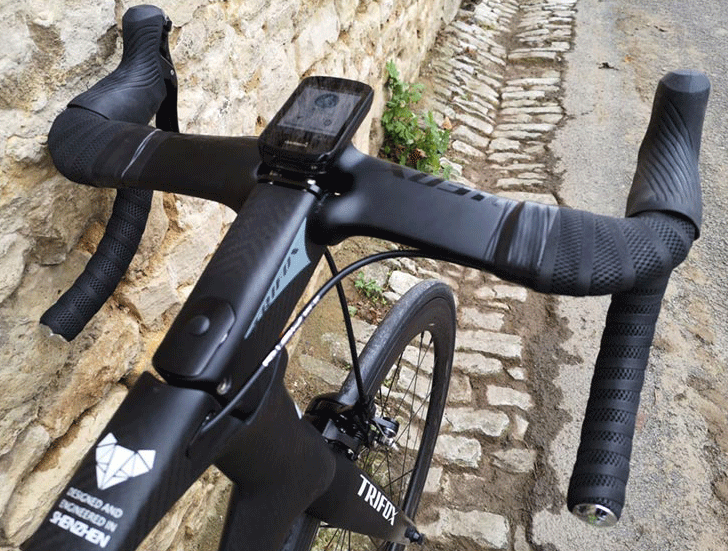
If you're a cyclist who is always seeking the latest and greatest technology to improve your ride, then you're in luck! The 31.8mm AERO Carbon Drop Bar TC20AF is a fantastic option for those looking to upgrade their road bike. It has an aerofoil shape and internal cable routing, making it both stylish and efficient. First and foremost, let's talk about the design of this drop bar. The tops have a unique aerofoil shape that complements the latest aero road bikes on the market. This design is not only visually appealing but also serves a practical purpose. By reducing the surface area that's exposed to the wind while riding, airflow over the bike is improved. This means less drag and more speed. The drops of this bar are also ergonomically shaped, providing a comfortable grip for riders. One of the most significant advantages of the 31.8mm AERO Carbon Drop Bar TC20AF is the internal cable routing. This is a significant improvement over traditional drop bars, where cables protrude from the bar and increase drag. With internal cable routing, the setup looks more streamlined, and clean. Plus, it can accommodate both manual or electronic gear systems. The routing is easy to install and ensures a reliable and long-lasting system. Another notable feature of this drop bar is the stopwatch bracket that is included with purchase. The bracket is adjustable to ensure it will fit a variety of devices, and it's situated in a convenient location near the stem. This is a great feature for cyclists who are training for races or just interested in tracking their performance. When it comes to the dimensions of the 31.8mm AERO Carbon Drop Bar TC20AF, it has a reach of 80mm and a drop of 125mm. The bar's width is also customizable, ranging from 380mm to 440mm. So riders can choose the perfect dimensions that suit their needs and preferences. Plus, with the bar's lightweight carbon construction, it keeps the overall weight of the bike low, which is always an advantage. In conclusion, the 31.8mm AERO Carbon Drop Bar TC20AF is a fantastic option for anyone looking to upgrade their road bike's drop bar. With aerofoil shape tops, internal cable routing, and a stopwatch bracket that's compatible with popular devices, this drop bar offers a stylish and efficient solution. Plus, the customization options and lightweight carbon construction make it a practical choice for cyclists of all levels. So, if you're in the market for a new drop bar, we highly recommend considering the 31.8mm AERO Carbon Drop Bar TC20AF for your next upgrade.
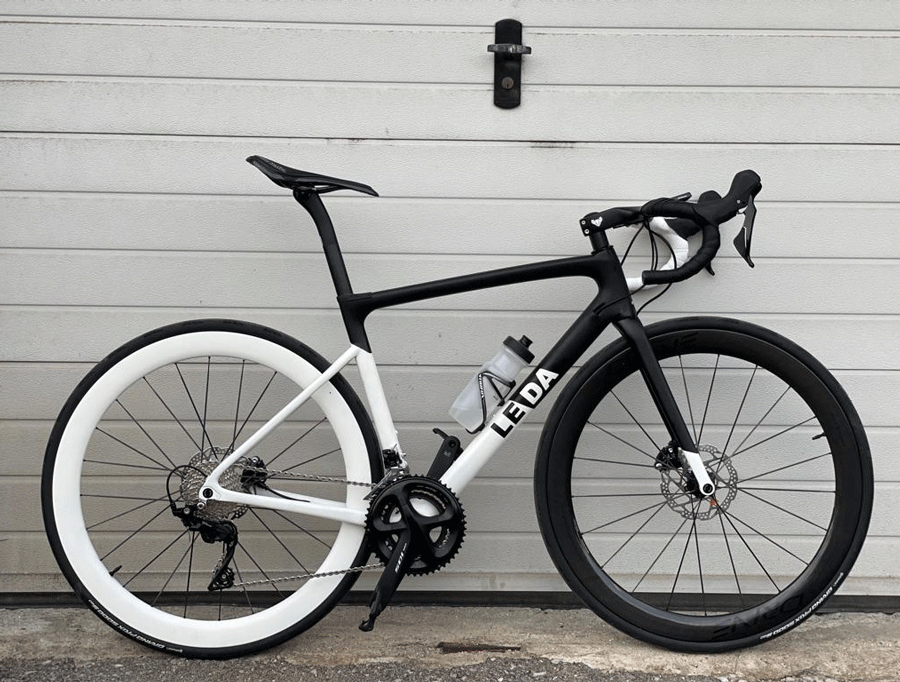
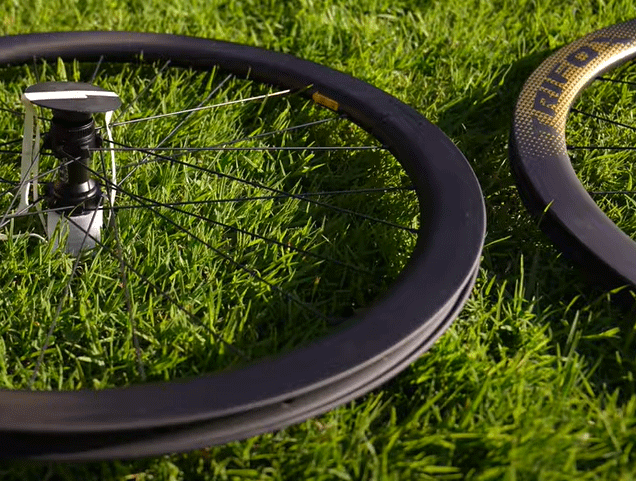
Are you in search of quality mountain bike wheels that provide excellent grip, traction, and speed? Look no further than the 27.5 mountain bike wheels. These wheels offer impressive performance, unbeatable stability, and power to tackle even the toughest terrains. 1. Smoother Rolling There's no denying that 27.5-inch wheels are significantly better in terms of smoothness than 26-inch bikes. Moreover, 27.5 wheels are sturdier than the larger 29-inch options. An added advantage is that these wheels can run lower tire pressures if you prefer to ride with more cushion. Therefore, if you're searching for a stable and comfortable ride that can absorb shocks and improve your experience, 27.5-inch tires make the perfect choice. 2. Improved Control Mountain biking is all about control, and that's precisely what a 27.5-inch tire provides, better grip and control. In comparison to 29ers, 27.5 wheels are easier to navigate and control through tight turns and narrow trails, providing you with superior control, giving you peace of mind as you tackle rugged terrain. 3. Enhance Speed and Acceleration When it comes to speed and acceleration, 27.5 bikes hit the perfect sweet spot. The wheels' weight is neither too heavy compared to 29ers nor too light compared to 26-inch bikes, making the ride smooth and efficient. As a result, you can achieve higher speeds while navigating more technical sections effortlessly and reach a top-speed that was not possible on a 26-inch bike. 4. A Perfect Blend of Efficiency and Comfort Opting for 27.5 wheels gives you the perfect balance of comfort and efficiency while riding. 27.5-inch wheels require less effort to push compared to their 26-inch counterparts, while providing the added benefit of increased stability on the trails. Not to forget that the reduction in rolling resistance offered by the 27.5 tires translates to increased efficiency over longer rides. 5. Suitability for All Levels of Riders The 27.5 wheel format is ideal for every rider out there, ranging from those just starting to intermediate and advanced level riders. The smaller wheel diameter of 27.5 makes them more responsive and easier to maneuver, allowing newer riders to easily control the bike. At the same time, 27.5 wheels provide more performance potential to expert riders looking for speed and precise handling on the most challenging and demanding of terrain. Conclusion: The 27.5 mountain bike wheels are perfect for those looking for an excellent ride that provides the best of both worlds-performance and comfort. The 27.5 tires offer the benefits of both their larger and smaller counterparts, making them suitable for all levels of riders. With this wheel format, you are sure to achieve an unmatched performance, speed, and control on every ride.


