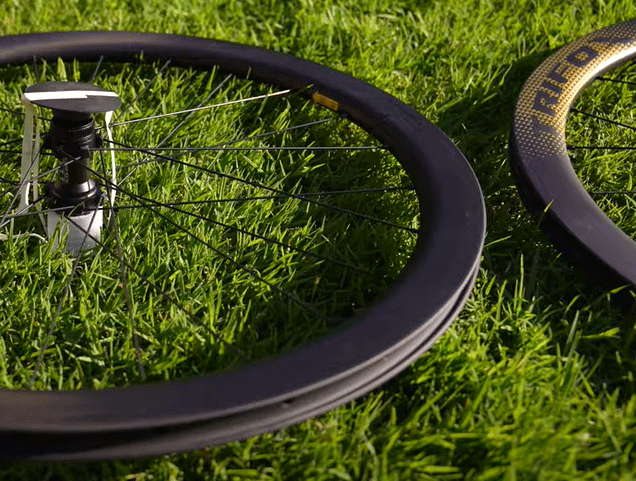
As technology evolves, different bike components have also evolved. One of the most vital components of every bike is the hub, which is where the wheel is connected to the bike's frame. The hub has two types - freehub and freewheel. Although they both function similarly, there are essential differences between these two components that every cyclist should know. Firstly, let's start by defining what a freehub is. A freehub is a modern hub design where the freewheel mechanism is built into the hub body. The Freehub mechanism consists of a ratchet mechanism that allows the cassette to rotate in only one direction while being held in place by the circular locking ring. The result of this mechanism is a more reliable and more efficient transmission system compared to freewheels. It also enables fast and straightforward cassette swapping, allowing riders to change gears more efficiently to adapt to various terrain and riding conditions. On the other hand, a freewheel is a bicycle hub that has a ratcheting mechanism that's contained within. Compared to the Freehub, a freewheel can only accommodate a freewheel where the cogs and ratcheting mechanism are all part of one unit. When you remove a freewheel, you need to replace the whole unit. Freewheels were popularly used on road bikes and mostly used on bikes from the 1970s to the 1990s. They were replaced by the Freehub that provides smoother and more efficient power transfer. Another significant difference between Freehub and Freewheel is the location of the hub bearings. In a Freehub, the bearings are located within the hub body, which means that any time that they require service, they can easily be accessed and adjusted. On the other hand, the bearings of a freewheel are situated inside the freewheel unit itself, making it more challenging to extract and replace. Freewheels are less efficient and less reliable compared to the Freehub. It is also essential to note the compatibility of both Freehub and Freewheel. Freehubs allow for compatibility with cassettes of up to 11 speeds, which is quite impressive compared to freewheels, which only allow for cassettes with a maximum of seven speeds. The Freehub's larger diameter also makes it stiffer, making it a more durable hub system. Lastly, the sound of freehubs and freewheels differ. Freehubs tend to make a quieter and softer sound compared to freewheels, which tend to make a distinct clicking sound when freewheeling or coasting. Some cyclists like to hear that clicking sound since it's a sign that the rear wheel is moving. In summary, while both Freehub and Freewheel function to connect the wheel to the bike frame, they have significant differences. In terms of efficiency, reliability, and convenience, the Freehub takes the crown. It is more efficient, reliable, sturdier, and more compatible with various cassette speeds compared to the Freewheel. Therefore, if you're in the market for the best wheel hub for your bike, it's essential to consider the advantages and disadvantages of both Freehub and Freewheel before making a decision.
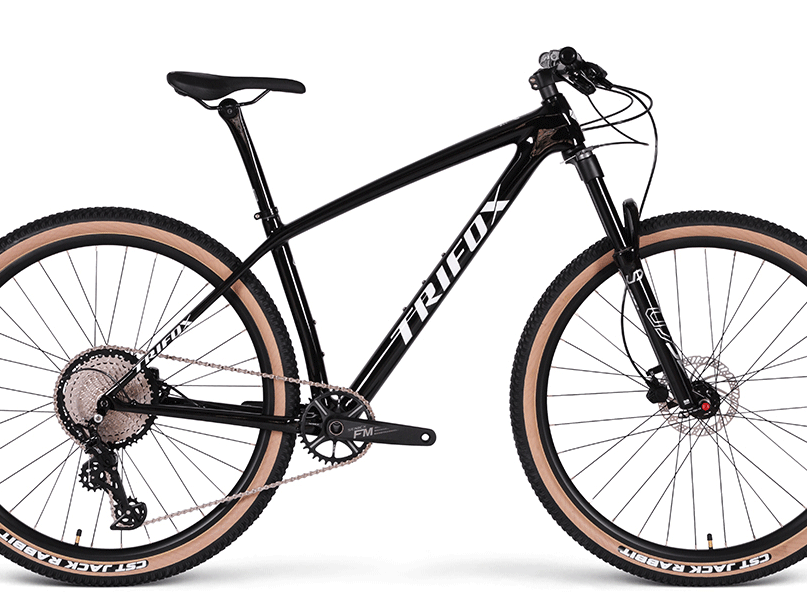
Choosing the perfect mountain bike frame size can be tricky, especially if you’re buying your first bike online. However, getting the right size is crucial since it can ensure a comfortable, efficient, and safe ride. In this guide, we’ll show you how to measure mountain bike frame size so you can find the perfect fit for your Ultra Light Carbon Hardtail MTB SDY20 bike. Step 1: Determine Your Height To start measuring your mountain bike frame size, you need to determine your height first. Stand against a wall without shoes on and measure from the floor to the top of your head. This measurement is your height. Step 2: Calculate Your Inseam Length Your inseam length is the distance from your crotch to the floor. Stand against a wall, place a book between your legs, and measure the distance from the top of the book to the floor. This measurement is your inseam length. Step 3: Use a Frame Size Chart Once you have your height and inseam length measurements, use a mountain bike frame size chart to determine the right frame size for you. Generally, you should look for a frame size that’s between 1 to 4 inches shorter than your inseam length. For example, if your inseam length is 29 inches, a frame size of 15” to 18” should be a good fit. Step 4: Test Ride Different Sizes While the frame size chart can give you a good estimate, the best way to find the perfect fit for your UL Carbon Hardtail MTB SDY20 bike is to test ride different sizes. Most bike shops allow demo rides, so take advantage of these opportunities. When testing different sizes, make sure you adjust the saddle height, handlebar position, and pedals to mimic your riding position. Step 5: Consider Your Riding Style Finally, when measuring your mountain bike frame size, consider your riding style. For example, if you’re a downhill rider, you may want a bike with a longer top tube and shorter stem. If you’re a cross-country rider, you may want a bike with a shorter wheelbase and longer stem. Make sure you choose a frame size that’s suitable for your riding style. Getting the right mountain bike frame size is essential for a comfortable and safe ride. By following the steps we've outlined in this guide, you should be able to find the perfect fit for your Ultra Light Carbon Hardtail MTB SDY20 bike. Remember, the best way to determine the right size is to test ride different sizes and consider your riding style. Happy riding!
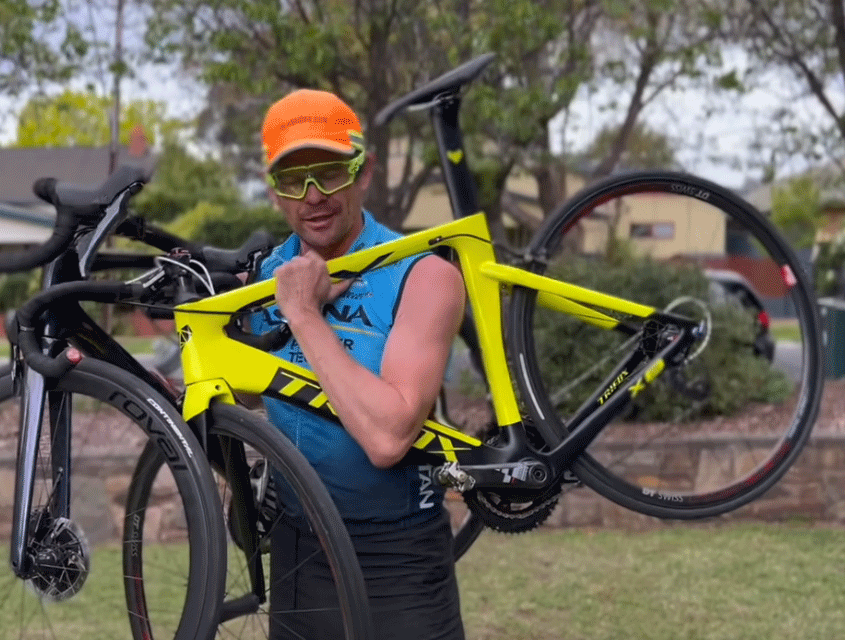
Investing in a road bike is a great way to stay active and explore the great outdoors. But with so many bike frame sizes available, figuring out which one is best for you can be a daunting task. 1. Measure Your Inseam The first step in choosing the right frame size for your road bike is to measure your inseam. This is the distance between the floor and your pelvic bone, measured with your feet shoulder-width apart. Once you've measured your inseam, you can use a sizing chart to determine the appropriate frame size. The AERO Carbon Road Bike Frameset X8TA comes in sizes ranging from 49cm to 58cm, with a chart that recommends frame sizes based on inseam measurements. 2. Consider Your Riding Style Your preferred riding style can also influence the ideal frame size for your road bike. For instance, if you plan on racing, you might prefer a smaller frame size for a more aggressive, aerodynamic riding position. On the other hand, if you plan on using your bike primarily for commuting or touring, you might prefer a slightly larger frame for a more comfortable, upright position. The AERO Carbon Road Bike Frameset X8TA is designed with aerodynamics in mind, with a seat tube angle of 74.5 degrees and a head tube angle of 72 degrees, making it a great choice for racing or aggressive riders. 3. Pay Attention to Standover Height Another important factor to consider when choosing a road bike frame size is standover height. This is the distance between the top tube of the bike frame and the ground. Ideally, when you straddle your bike, there should be at least one inch of clearance between your body and the top tube. The AERO Carbon Road Bike Frameset X8TA has a standover height of 77.8cm to 81.4cm, depending on the size of the frame. 4. Seek Professional Help While sizing charts and online guides can be helpful in selecting a road bike frame size, it's always a good idea to seek professional help when making your final decision. Visit your local bike shop and get a professional fitting to ensure that you’re making an informed decision. They can take into account your inseam, riding style, and other factors to recommend the perfect frame size for you. 5. Test Ride and Adjust Lastly, don't be afraid to test ride and make adjustments to your new bike. You might find that even with the perfect frame size, you prefer a slightly different handlebar height or saddle position. Take your time to get comfortable on your new bike, and make any necessary adjustments to ensure that you have the best riding experience possible. Conclusion: Choosing the right frame size for your road bike is essential to ensure a comfortable and enjoyable ride. By measuring your inseam, considering your riding style, paying attention to standover height, seeking professional help, and test riding and making adjustments, you can find the perfect fit for you. With the 700C AERO Carbon Road Bike Frameset X8TA, you have a high-quality option with varying sizes to fit most riders. Take the time and effort to find the right frame size, and you'll be sure to enjoy many miles of cycling fun.
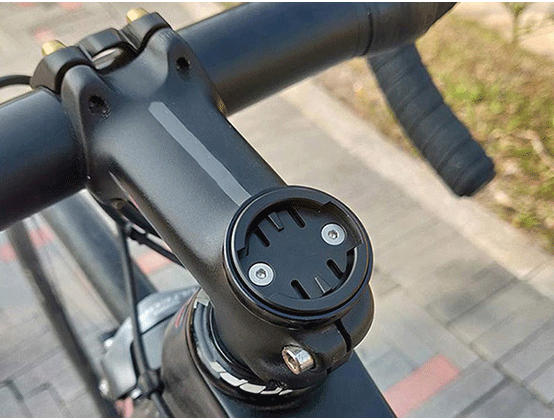
Biking is one of the most loved and healthy sports of recent times. It keeps you fit, provides excellent cardiovascular exercise, and helps in maintaining body weight. With the advancement of technology, biking has become even more fun and easier. The Bike Stem Top Cap Computer Mount STH100 is one such technological advancement that has made the life of bikers comfortable and convenient. The Aerobar Computer Mount is a kind of computer mount that is attached to the center of the aerobar. The center spot offers better visibility while biking, making it easier for bikers to read the stats and control the bike. The Aerobar Computer Mount has become a must-have accessory for all those serious bikers who love to keep track of their stats while biking. It is much convenient to look down at the monitor than to look sideways. It makes for a safer riding experience. Bike Stem Top Cap Computer Mount STH100 is the perfect solution for installing any computer mount on your bike stem. While most bikers find it challenging to find an ideal position for the computer mount on their bikes, the Bike Stem Top Cap Computer Mount STH100 offers a solution to this problem. It is designed for bikers who want to keep track of their riding data without any hassle. It allows bikers to mount the computer mount right in front of them and read all the details while biking. The durability of the Aerobar Computer Mount is another reason why bikers prefer it over other mounts. It is designed with high-quality materials and can withstand both harsh weather conditions and accidental falls. So even if you are riding on rough terrain, you don't have to worry about the mount falling off or getting damaged. The Aerobar Computer Mount is water-resistant, which makes it a reliable option for bikers who like to ride in the rain. In conclusion, the Aerobar Computer Mount is a significant addition to your bike gear if you are serious about biking. It offers a convenient way to monitor your stats, is durable and reliable, and adds an extra layer of safety while biking. Bike Stem Top Cap Computer Mount STH100 is the perfect add-on to this amazing Aerobar Computer Mount that allows you to mount it in the right position for comfortable and hassle-free bike rides. So, if you want to make your biking experience memorable and meaningful, make sure to grab an Aerobar Computer Mount today!
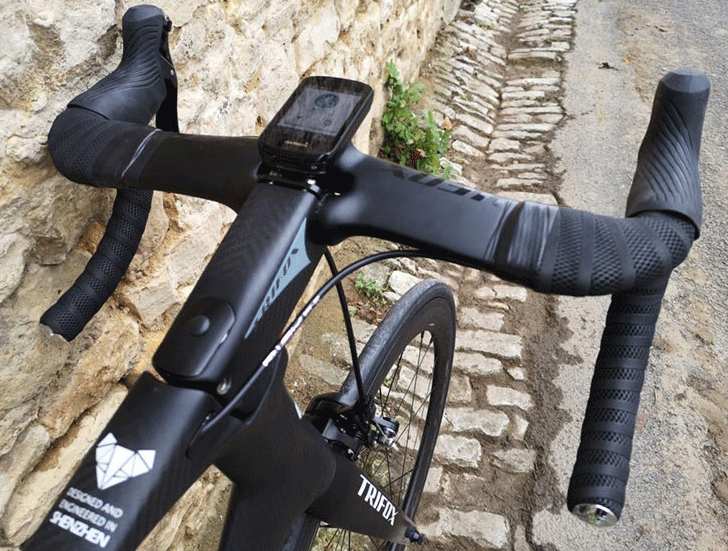
If you're a cyclist who is always seeking the latest and greatest technology to improve your ride, then you're in luck! The 31.8mm AERO Carbon Drop Bar TC20AF is a fantastic option for those looking to upgrade their road bike. It has an aerofoil shape and internal cable routing, making it both stylish and efficient. First and foremost, let's talk about the design of this drop bar. The tops have a unique aerofoil shape that complements the latest aero road bikes on the market. This design is not only visually appealing but also serves a practical purpose. By reducing the surface area that's exposed to the wind while riding, airflow over the bike is improved. This means less drag and more speed. The drops of this bar are also ergonomically shaped, providing a comfortable grip for riders. One of the most significant advantages of the 31.8mm AERO Carbon Drop Bar TC20AF is the internal cable routing. This is a significant improvement over traditional drop bars, where cables protrude from the bar and increase drag. With internal cable routing, the setup looks more streamlined, and clean. Plus, it can accommodate both manual or electronic gear systems. The routing is easy to install and ensures a reliable and long-lasting system. Another notable feature of this drop bar is the stopwatch bracket that is included with purchase. The bracket is adjustable to ensure it will fit a variety of devices, and it's situated in a convenient location near the stem. This is a great feature for cyclists who are training for races or just interested in tracking their performance. When it comes to the dimensions of the 31.8mm AERO Carbon Drop Bar TC20AF, it has a reach of 80mm and a drop of 125mm. The bar's width is also customizable, ranging from 380mm to 440mm. So riders can choose the perfect dimensions that suit their needs and preferences. Plus, with the bar's lightweight carbon construction, it keeps the overall weight of the bike low, which is always an advantage. In conclusion, the 31.8mm AERO Carbon Drop Bar TC20AF is a fantastic option for anyone looking to upgrade their road bike's drop bar. With aerofoil shape tops, internal cable routing, and a stopwatch bracket that's compatible with popular devices, this drop bar offers a stylish and efficient solution. Plus, the customization options and lightweight carbon construction make it a practical choice for cyclists of all levels. So, if you're in the market for a new drop bar, we highly recommend considering the 31.8mm AERO Carbon Drop Bar TC20AF for your next upgrade.
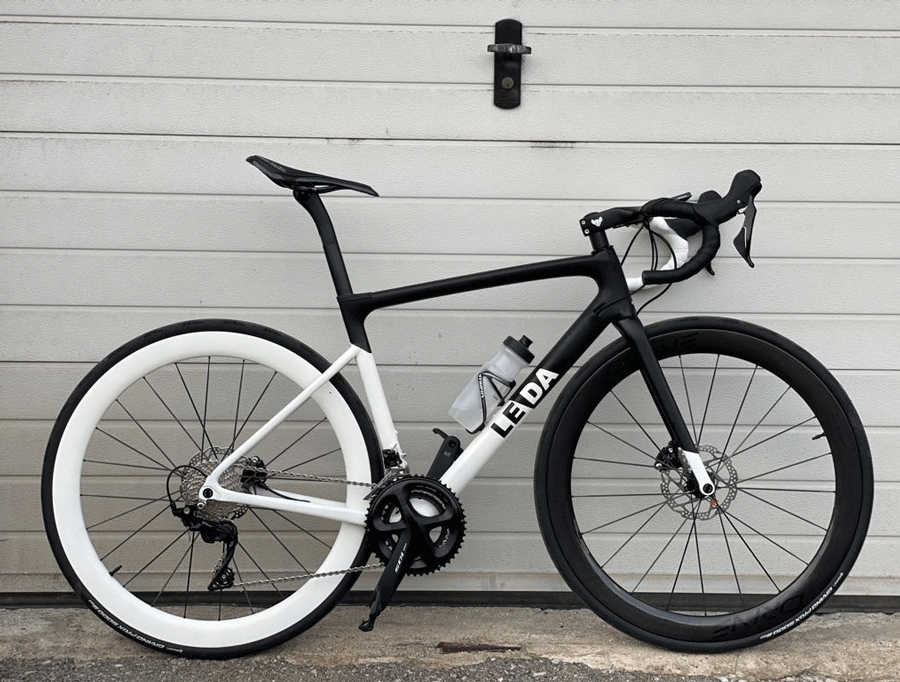
Are you in search of quality mountain bike wheels that provide excellent grip, traction, and speed? Look no further than the 27.5 mountain bike wheels. These wheels offer impressive performance, unbeatable stability, and power to tackle even the toughest terrains. 1. Smoother Rolling There's no denying that 27.5-inch wheels are significantly better in terms of smoothness than 26-inch bikes. Moreover, 27.5 wheels are sturdier than the larger 29-inch options. An added advantage is that these wheels can run lower tire pressures if you prefer to ride with more cushion. Therefore, if you're searching for a stable and comfortable ride that can absorb shocks and improve your experience, 27.5-inch tires make the perfect choice. 2. Improved Control Mountain biking is all about control, and that's precisely what a 27.5-inch tire provides, better grip and control. In comparison to 29ers, 27.5 wheels are easier to navigate and control through tight turns and narrow trails, providing you with superior control, giving you peace of mind as you tackle rugged terrain. 3. Enhance Speed and Acceleration When it comes to speed and acceleration, 27.5 bikes hit the perfect sweet spot. The wheels' weight is neither too heavy compared to 29ers nor too light compared to 26-inch bikes, making the ride smooth and efficient. As a result, you can achieve higher speeds while navigating more technical sections effortlessly and reach a top-speed that was not possible on a 26-inch bike. 4. A Perfect Blend of Efficiency and Comfort Opting for 27.5 wheels gives you the perfect balance of comfort and efficiency while riding. 27.5-inch wheels require less effort to push compared to their 26-inch counterparts, while providing the added benefit of increased stability on the trails. Not to forget that the reduction in rolling resistance offered by the 27.5 tires translates to increased efficiency over longer rides. 5. Suitability for All Levels of Riders The 27.5 wheel format is ideal for every rider out there, ranging from those just starting to intermediate and advanced level riders. The smaller wheel diameter of 27.5 makes them more responsive and easier to maneuver, allowing newer riders to easily control the bike. At the same time, 27.5 wheels provide more performance potential to expert riders looking for speed and precise handling on the most challenging and demanding of terrain. Conclusion: The 27.5 mountain bike wheels are perfect for those looking for an excellent ride that provides the best of both worlds-performance and comfort. The 27.5 tires offer the benefits of both their larger and smaller counterparts, making them suitable for all levels of riders. With this wheel format, you are sure to achieve an unmatched performance, speed, and control on every ride.
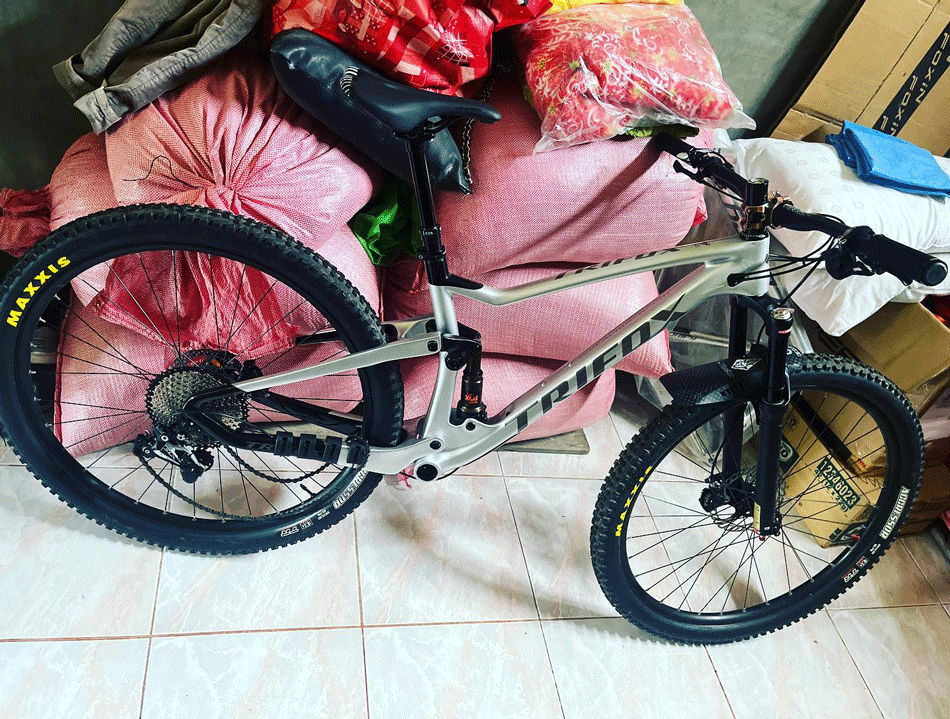
Mountain biking has become an increasingly popular activity for those who love adventure and the great outdoors. A bike is an essential component for this sport; it must be of good quality and should also fit well. 1. Lightweight and Durable: Carbon frames are a popular choice for mountain bike frames due to their weight advantage and ability to withstand the physical challenges of mountain biking. This 29er Carbon Hardtail MTB Frame is no exception, thanks to its lightweight design and the use of high-quality carbon fiber, which makes it sturdy and durable. 2. Ideal Size for Small Riders: A vital component of any bike frame is fit. The SDY20 Carbon Hardtail MTB Frame is an excellent choice for small frame mountain bikes as it has a very efficient design and snug fit. The bike’s design, combined with its lightweight construction, makes it suitable for riders of any age or skill level. 3. Improved Control: Small frame bikes are generally easier to control and maneuver than larger ones. The SDY20 Carbon Hardtail MTB Frame adds to this feature, delivering increased control and grip when riding off-road. Its compact design also makes the bike easier to keep balanced during fast and challenging descents. 4. Increased Speed: Lightweight carbon fiber construction allows for faster speeds, better acceleration, and less effort when peddling. These are not only essential in competitions, but also during leisure riding. The SDY20 Carbon Hardtail MTB Frame supports small riders who want to enjoy a fast and efficient bike that's perfect for their size. 5. Versatile: The SDY20 Carbon Hardtail MTB Frame is an excellent choice for both beginners and experienced riders. It comes with an adjustable seat post and accommodates various types of wheels to meet different riding styles and needs. The frame is easy to assemble and disassemble, making it easy to transport and store. Conclusion: Finding the perfect fit for a small frame mountain bike is essential to fully enjoy your ride. The SDY20 Ultra Light 29er Carbon Hardtail MTB Frame is an excellent choice for small riders, thanks to its durability, lightweight design, improved control, speed, and versatility. It’s the ideal frame for anyone who wants to enjoy a fast, efficient, and exhilarating ride in the great outdoors. Invest in the SDY20 frame and experience the thrill of mountain biking like never before.
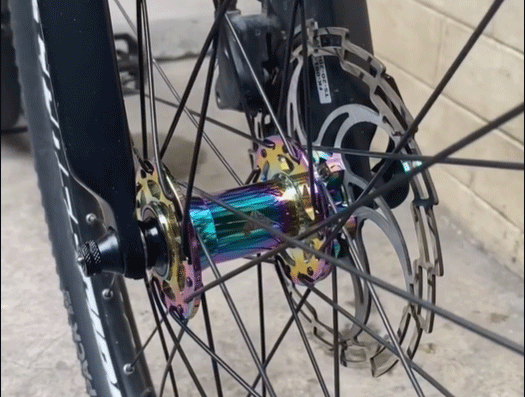
When it comes to mountain biking, choosing the right hub is critical to the performance of your bike. The hub flange spacing is something that might be overlooked, but it's an essential factor when selecting the right hub for your mountain bike. To begin, what is hub flange spacing? The hub flange spacing refers to the distance between the two flanges on a hub. The distance between the flanges affects the tension of the spokes and the lateral stiffness of the wheel. The wider the hub flange spacing, the more the spoke tension will be reduced, making the wheel less stiff. In contrast, if the hub flange spacing is narrower, the spoke tension will be higher, making the wheel stiffer. Hub flange spacing affects wheel strength, and the right spacing will ensure the longevity and durability of your wheels. The Trifox Bike Hub M827 for MTB offers an ideal hub flange spacing. It features a 110mm front hub flange spacing and a 148mm rear hub flange spacing. The wider hub flange spacing provides greater lateral stiffness of the wheel, resulting in better control and stability during your mountain biking activities. This ensures that your bike can handle demanding terrain, steep inclines, and challenging conditions. The Trifox Bike Hub M827 With a lightweight design and durability, this hub is perfect for mountain biking. The alloy construction ensures that the hub can handle the impact of rough terrain, providing a secure and stable foundation for your wheelset. You can rest assured that the hub will be able to handle the demands of your mountain biking adventures. Another essential factor when selecting the right hub for your MTB is the hub's engagement system. The Trifox Bike Hub M827 features a high-engagement system with 72 points of engagement, providing a rapid and responsive engagement experience. This means you can take on steep climbs with ease, as the hub connects directly to the drivetrain, ensuring maximum power and control. In summary, the hub flange spacing is an important consideration when selecting the right hub for your mountain biking activities. The Trifox Bike Hub M827 for MTB offers an ideal hub flange spacing, high-engagement system, durability, and lightweight design. These features ensure that you have the best experience and performance during your mountain biking adventures. Choose the Trifox Bike Hub M827 for MTB if you're looking for a robust, high-performing, and reliable mountain
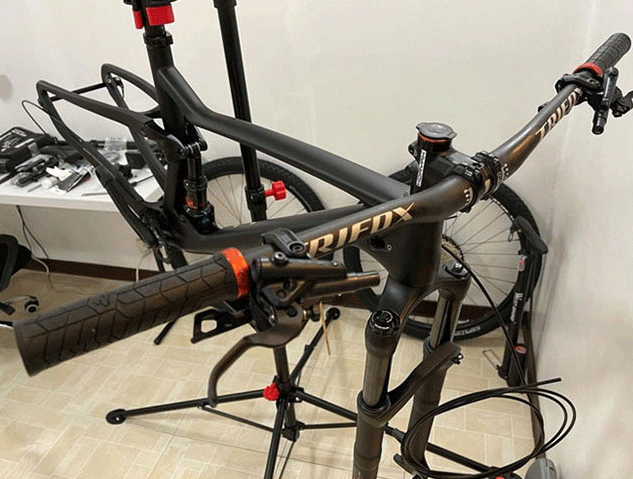
Mountain biking is an adventure sport that is cherished by many adrenaline seekers around the world. It demands strength, endurance, and technique while exploring new trails and terrains. And having the right equipment is essential for a safe and enjoyable ride. The Trifox 31.8 mm Carbon Riser Handlebar RHB300 is a game-changer in the world of mountain biking. 1. Light and Strong: The most notable feature of the Trifox 31.8mm Carbon Riser Handlebar RHB300 is its lightweight and strength. Made with T800 carbon fiber, it weighs only 230 grams, making it one of the lightest handlebars available in the market. But don't let the weight fool you; it can handle the toughest of terrains. it can absorb high impacts and reduce hand fatigue, providing a comfortable ride. 2. Incredible Stability: The handlebar's unique design and the use of high-quality material provide excellent stability on the trail. It has a 9-degree backsweep, a 6-degree upsweep, and a 31.8mm clamp diameter that helps maintain an ergonomic riding position. The handlebar's center bulge enhances stiffness and precise control on technical rides, while the 780mm width enables riders to maximize leverage and control in challenging terrain. 3. Stylish and Versatile: Trifox 31.8mm Carbon Riser Handlebar RHB300 is sleek, stylish, and versatile. It has a matte finish with smooth contours that add an aesthetic appeal to your bike. The handlebar comes in two colors, black and green, making it easy to match with your bike frame. Its compatibility with most mountain bikes, thanks to the standard 31.8mm diameter clamp, makes it accessible to all riders. 4. Easy Installation: The Trifox 31.8 mm Carbon Riser Handlebar RHB300 is easy to install. It comes with comprehensive instructions that guide you through the installation process. Additionally, it has markings on the handlebar that make customization and positioning easy. And with its lightweight, you will experience a noticeable improvement in the handling of your bike. 5. Affordable and Durable: Despite its exceptional features and quality, the Trifox 31.8mm Carbon Riser Handlebar RHB300 is very affordable. It is a great investment that will enhance your mountain biking experience without breaking the bank. And with its durability and resistance to harsh weather conditions, you will enjoy long-lasting use. Conclusion: In conclusion, the Trifox 31.8 mm Carbon Riser Handlebar RHB300 is a game-changer that every mountain biker needs to consider. Its lightweight, strength, stability, style, versatility, and affordability make it an excellent investment for a comfortable, enjoyable, and safe ride. So if you want to take your mountain biking experience to the next level, don't hesitate to try this fantastic handlebar, and you won't regret it.


