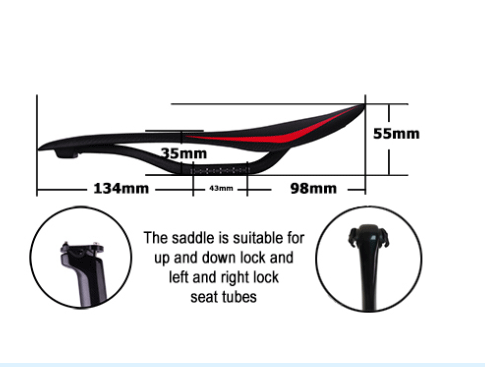
To outsiders, people who often ride bicycles usually have high saddles, but such a height is necessary in actual riding. Of course, this height may be an optical illusion. Bike design makes saddle look taller Newer road bikes often have tighter geometry, which means the top tube of the bike is sloping more downward. Such a compact body allows more of the seat post to be exposed on the top tube, making it look taller than older bikes. The handlebars of road bikes are particularly low. If there are two bicycles with the same height seat, the lower handlebar will obviously give people the illusion of a higher seat. The seats of ordinary riders look relatively high, which is largely a visual illusion. Similarly, the saddles of professional riders look higher, often because their handlebars are lower and their bodies are more compact. After all, the height of the saddle is determined by the length of the rider's legs. Two people with the same leg length will set the saddle height to the same height, while a bicycle with lower handlebars will appear to have a taller saddle. Bike seat height is important Your legs are weaker when your knees are bent, and stronger when they're almost straight. A lower bike saddle allows you to pedal with very bent knees, making riding at the same speed appear more strenuous. And a taller saddle (within reason) keeps your legs in a stronger, more comfortable range. Just like a squat, the further you go down, the more your legs will bend and the more tired you will feel. Shoes and pedals will also affect the seat height Riders with shoes and pedals have bikes that look taller. Because the cleats of lock shoes are often under the forefoot, connected to the lock pedal and fixed together. Recreational riders generally have the cleats positioned a little further back than the cleats of their shoes, which also causes the saddle of a rider with pedals to look a little higher. NOTE: For actual riding, you should keep the ball of your foot over the center of the pedal, even if you are not pedaling with shoes. Set the correct saddle height There are various professional and advanced technologies that can do a complete simulation test for you and customize a completely fitting height (accurate to the millimeter). As an ordinary person, there is no need at all, simple settings will do. When you get on the bike, place the balls of your back feet on the pedals and ride slowly. If your knees are fully straight and you still have some pressure on the pedals, then this height is almost the right height. If your knees are still bent, raise the saddle to adjust. If your heels aren't pressing into the pedals, or you have to tilt your butt to stay pedaled, lower the saddle a little. Many people are worried about bicycles. The seat is too high and their feet cannot touch the ground when parking. Therefore, when actually riding, if you want to park, you can park on the curb on the side of the road, or leave the bicycle to sit (standing after sitting for a long time can still Relieving the pressure on soft tissue) Standing parking is the safe and reliable way to park.
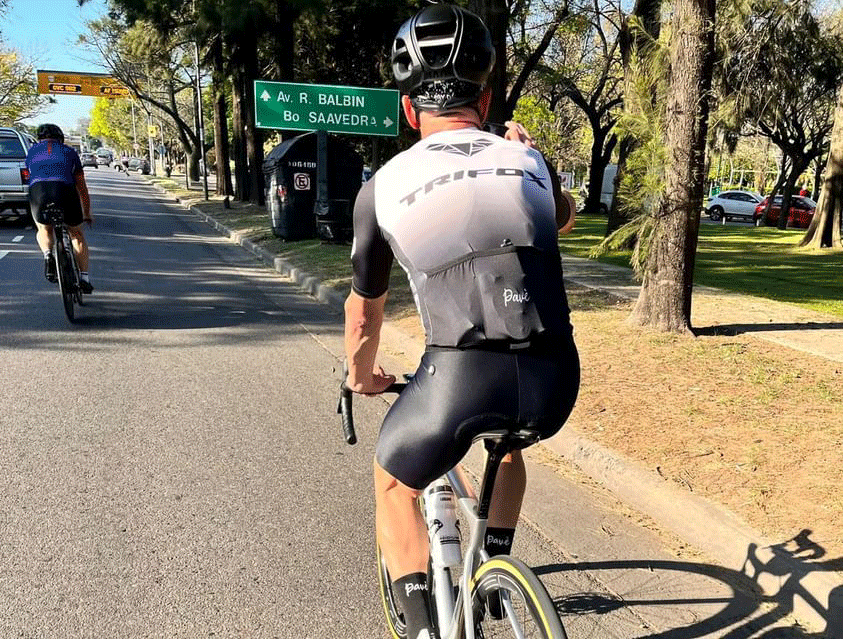
1. Promote cardiopulmonary health. Cycling, like running, is a very typical aerobic exercise. The biggest benefit of aerobic exercise is that it can enhance cardiopulmonary function. And during cycling, we need to breathe evenly to ensure the intake of oxygen. Increase lung capacity. Therefore, cycling is a good form of exercise to promote cardiorespiratory fitness. 2. Reduce the incidence of cardiovascular and cerebrovascular diseases. Cycling for a long time can increase the amount of hemoglobin in the body, improve the body's resistance, resist aging, improve the work efficiency of the cerebral cortex, and reduce the incidence of cardiovascular and cerebrovascular diseases. 3. Lose weight and relieve stress. Losing weight should be an eternal topic that we pursue. Because we sit in the office for a long time, cannot exercise, and face the computer for a long time, our shoulders and necks are sore, making each of us feel exhausted after work. Cycling can effectively alleviate this problem. Regular cycling is not only a good way to lose weight, but also because when riding, we need to look up at the road ahead, so that the cervical spine problems of those of us with bowed heads can also be effectively alleviated. Long-term persistence can not only achieve the effect of weight loss, but also relieve our tense muscles and relieve fatigue. 4. Shape muscles. Cycling can not only lose weight, but also improve and shape muscles, especially the lower body, calves, thighs and buttocks. 5. Relax your mind. Cycling is one of the few sports that allows you to free your mind while engaging in activities. When we are mentally exhausted or depressed, riding a bicycle on a beautiful road can relieve our entire depressed mood. Therefore, regular cycling is beneficial to reducing psychological stress and preventing depression. 6. Prevent high blood pressure. Cycling can prevent high blood pressure. Exercise can speed up blood circulation and reduce blood vessel pressure. It can also prevent hardening of blood vessels and achieve the purpose of lowering blood pressure. 7. Low-carbon and environmentally friendly, cycling can effectively reduce the use of bicycles, reduce exhaust emissions, alleviate air pollution, and at the same time reduce the use of cars, making roads less congested and smoother. 8. Increase oxygen intake. Cycling aerobic exercise can absorb enough oxygen and is an effective exercise to burn accumulated fat. 9. Anti-aging. We can find that cycling is a whole-body exercise. Both hands must hold the handlebars, and the feet must alternately pedal to move forward. The eyes must look ahead and the surrounding environment. Therefore, during the riding process, not only the body is exercised, but also the whole body is exercised. It improves coordination and trains people's reaction speed, so it can prevent aging. 10. Time freedom. As long as we want to ride, we can do it on the way to and from get off work, on weekends, etc., without having to worry about queues at the gym.
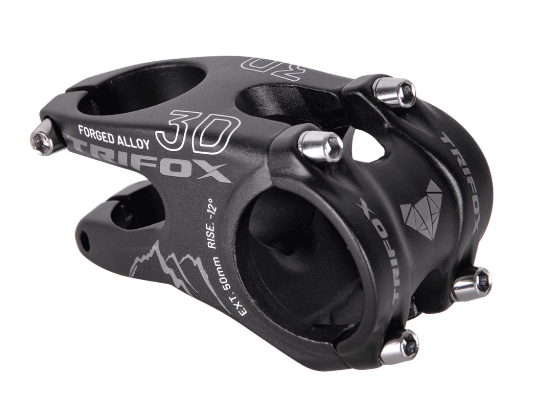
As a cyclist, the handlebar stem is an essential component of your bike. It connects the handlebars to the bike's steerer tube, allowing you to steer and control your ride. Whether you're an experienced cyclist or a newbie, upgrading your handlebar stem can make a significant difference in your rides' comfort and performance. 1. Lightweight and Durable This handlebar stem is made of 6061 T6 aluminum alloy, making it lightweight and strong. It weighs only 124g, making it an excellent option for riders who want to reduce weight and increase riding performance. Moreover, it's durable and offers excellent rigidity, ensuring that you'll always be in control of your ride. The stem has a 35mm handlebar clamp diameter and a 28.6mm steerer tube diameter, making it compatible with most mountain bikes. 2. Easy to Install One of the standout features of this handlebar stem is how easy it is to install. It comes with four screws that attach the handlebar to the stem, making the installation process easy and straightforward. This means that you won't need any professional help to install it and spend less time fiddling with your bike and more time riding it. 3. Better Performance The Lightweight 35mm Mountain Alloy Handlebar Stem ABS200 is perfect for off-road riding. It's stiff enough for uphill climbs and rough terrain yet has enough flex to absorb vibrations and impacts, providing a smoother ride and reducing rider fatigue. The stem's bolt-on faceplate design ensures the handlebars are secure and won't slip, even in the most challenging of conditions. This stem will provide you with better handling, control, and comfort on your rides. 4. Stylish Option The ABS200 stem has a sleek and minimalist design, adding style to your bike. It's available in black, gold, and red colors, providing you with the option to choose the color that best suits your bike's aesthetics. Its clean design complements most mountain bikes, giving your ride a unique and sophisticated look. 5. Affordability One of the standout features of this handlebar stem is its affordable price. With its high-quality materials and excellent functionality, it's an excellent option for riders who want to upgrade their ride without breaking the bank. It's an affordable investment in your ride's comfort and performance, making it an essential component of your mountain bike. Conclusion: Investing in a high-quality handlebar stem can make a significant difference in your ride's comfort and performance. The Lightweight 35mm Mountain Alloy Handlebar Stem ABS200 from Trifoxbike is the perfect handlebar stem for any rider, whether you're a newbie or an experienced cyclist. It's lightweight, durable, easy to install, and has an elegant and sleek design. Moreover, it's an affordable option, allowing you to upgrade your ride without spending a fortune. Upgrade your ride today with the best handlebar stem – the Lightweight 35mm Mountain Alloy Handlebar Stem ABS200!
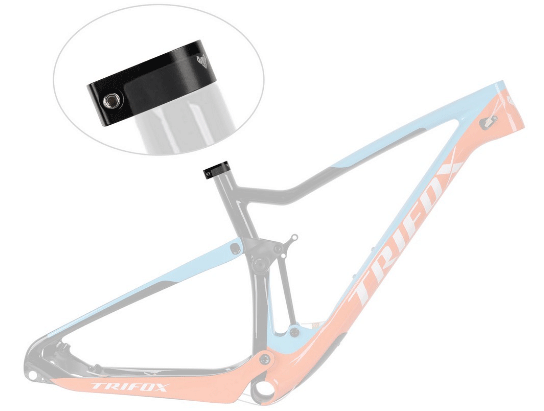
1. Durability: The MTB seatpost clamp SC35 is made from durable materials, including aluminum or steel. These materials are designed to withstand the vibrations and stresses of cycling, making them long-lasting and reliable. You can be sure that your seatpost will remain firmly in place throughout your ride, giving you a comfortable and stable experience. The durability of the MTB seatpost clamp SC35 makes it an excellent choice for trail riders, mountain bikers, and all other cyclists looking for a reliable seatpost clamp that can endure any challenge. 2. Easy to Install and Adjust: If you're like most riders, you don't want to spend hours fiddling around with your bike's components. Luckily, the MTB seatpost clamp SC35 is easy to install and adjust. The bolt or quick-release mechanism allows you to tighten or loosen the clamp easily, giving you complete control over your seatpost height and angle. Adjusting your seatpost has never been easier, making the MTB seatpost clamp SC35 a top choice for cyclists who love to fine-tune their bike's components for optimal performance. 3. Streamlined Design: The MTB seatpost clamp SC35's sleek design not only looks great, but it is also practical. Its streamlined profile reduces the overall weight of your bike, making it an excellent option for riders who want to cut down on weight without sacrificing durability or comfort. The seatpost clamp fits seamlessly with your bike's design, giving it a professional and polished appearance. 4. Compatibility: The MTB seatpost clamp SC35 is universally compatible with most bike frames, making it an excellent choice for every cyclist. Whether you ride a mountain bike, road bike, or hybrid bike, you'll be able to use the MTB seatpost clamp SC35 without any problem. This compatibility feature makes it an ideal product for those who have multiple bikes and want a versatile seatpost clamp that works with all. 5. Enhanced Performance: The MTB seatpost clamp SC35 is engineered to enhance your performance. The stable and secure seatpost allows you to ride with confidence, knowing that your seating position is optimized for maximum power and comfort. The clamp's stability reduces the chance of your seatpost shifting as you ride, giving you a more efficient transfer of energy to your pedals. These enhancements can be the difference between winning and losing, making the MTB seatpost clamp SC35 a top choice for competitive riders. Conclusion: The MTB seatpost clamp SC35 is undoubtedly the finest cycle seat clamp of 2023. Its durability, easy installation and adjustment, streamlined design, and compatibility make it stand out as an excellent choice for all riders. Whether you're a professional or casual rider, you can't go wrong with the MTB seatpost clamp SC35. It's a game-changer, and it will undoubtedly elevate your riding experience. Invest in the MTB seatpost clamp SC35 today, and you'll never go back to your old seatpost clamp again.
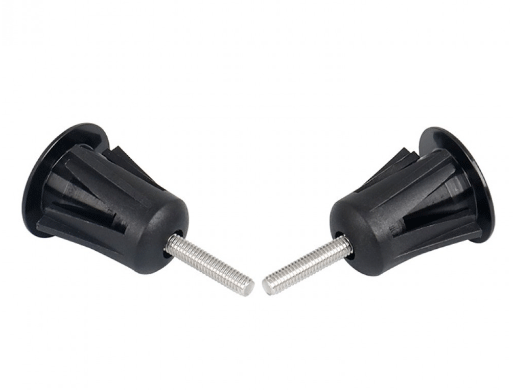
1. Superior Quality and Build Trifox Bike handlebar end stoppers boast premium quality and durability. Made of high-quality alloy material and CNC machined, these end caps are sturdy enough to secure your handlebar weights to prevent rattling and loosening during a ride. Furthermore, the ends are oxidized to create an elegant and durable finish, ensuring they serve you for years. 2. Uncomplicated Installation Trifox Bike handlebar end stoppers are an easy and convenient accessory to install. You can easily insert them into the handlebar ends without using any tools or adhesives. Their unique design ensures that they fit tubes with an inner diameter of 17-23mm, and once installed, they stay firmly in place. 3. Added Safety End stoppers are a crucial safety feature, especially if you have open-ended handlebars. They prevent your hand from sliding off the handlebar accidentally, thus preventing accidents that result from losing control of the bike. With Trifox Bike handlebar end stoppers, you're assured of enhanced security, even when riding on bumpy and rough terrain. 4. Lightweight Design Trifox Bike handlebar end stoppers have a minimalist design, which makes them lightweight. At just 24grams/pair, your bike's overall weight won't be affected by these end stoppers. Even better, their lightweight design reduces unnecessary weight around your handlebar, making your bike more aerodynamic. 5. Cost-effective Trifox Bike handlebar end stoppers are a cost-effective solution to an essential safety requirement in your cycling journey. They offer an affordable option to secure your handlebar's weights, preventing rattling that can lead to annoying noise during a ride. You can cycle confidently and smoothly with these simple accessories. Conclusion: Trifox Bike handlebar end stoppers are tiny, but their contribution to your cycling experience is significant. They provide enhanced safety, comfort, and stability to your bike's handlebar. Their high-quality build, lightweight, uncomplicated installation, and cost-effectiveness makes them a perfect addition to your bike. So, if you're looking to enhance your ride's security and comfort, visit Trifox Bike today and purchase handlebar end stoppers that'll never let you down.
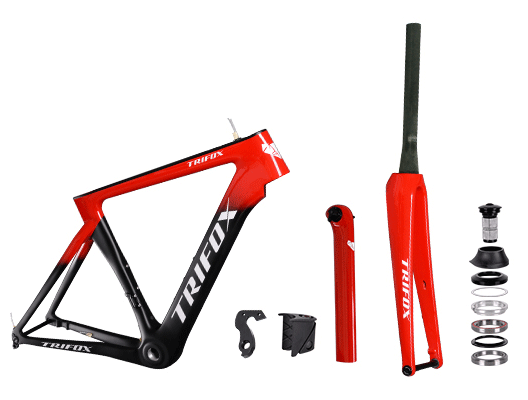
1. Understand Your Body Measurements To start, you need to understand your body measurements to determine the perfect fit for your 56cm road bike frame. Body measurements you need to know are your inseam and your reach. Your inseam is the distance between the floor and your crotch, while your reach is the distance between your fingertips when you stretch your arms out wide. You can use a tape measure to measure these data, then use an online bike fit calculator or visit a professional bike fitter to determine the ideal size for your 56cm road bike frame. 2. Consider Your Riding Style and Terrain Secondly, consider your riding style and the kind of terrain you'll be cycling on. If you're planning to use your road bike for long distance touring or leisurely rides, you'll want a more comfortable and stable frame that offers a relaxed geometry. On the other hand, if you're a competitive cyclist who participates in races and time trials, you'll want a more aggressive frame that has a steeper geometry, which allows for better aerodynamics and faster speeds. 3. Look for the Right Materials The material of the frame affects the overall riding experience, comfort, durability, and cost of the bike. Aluminum frames are the most affordable, lightweight, and stiff, but they can be uncomfortable and transmit more road vibrations. Carbon fiber frames are the most expensive, lightweight, and comfortable, and can dampen vibrations, but they're not as durable and can crack or splinter if damaged. Steel frames are the most comfortable, durable, and affordable, but they're also the heaviest and have more flex, which can affect performance. 4. Check the Frame's Components Before buying your 56cm road bike frame, make sure to check its components, such as the bottom bracket, headset, dropouts, and forks. The bottom bracket is where the crankset and pedals attach to the frame, and it affects the stiffness and power transfer of the bike. The headset connects the fork and the handlebars and affects the steering and handling of the bike. The dropouts hold the rear axle and affect the wheel alignment and spacing. The fork holds the front wheel and affects the comfort, handling, and weight distribution of the bike. 5. Test the Frame Before Purchasing Although you can find many high-quality 56cm road bike frames online, it's important to test the frame before committing to the purchase. A test ride can help you feel the bike's geometry, stiffness, comfort, handling, and overall performance. You can try different riding positions, shift the gears, brake, and corner to see how the bike responds. If possible, also consider getting a professional bike fit to fine-tune the frame's size and fit to your unique body type and riding style. Conclusion: Choosing the perfect fit for your 56cm road bike frame requires considering your body measurements, riding style, terrain, materials, components, and testing the frame. Don't rush the decision and take the time to research, try out different frames, and seek professional advice if needed. A well-fitted road bike frame can provide you with countless hours of enjoyment, fitness, and adventure. Happy cycling!
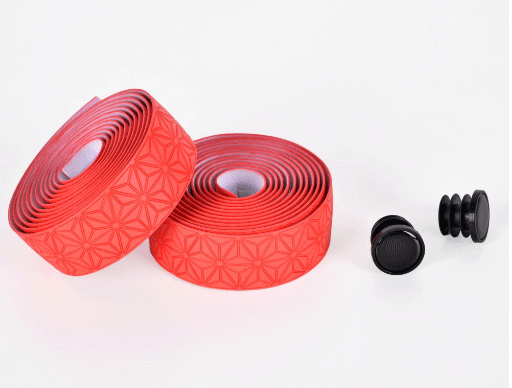
Do you want to upgrade your road bike with the best bar tape of 2023? Look no further than the Cycling Tape BHT10 from Trifox Bike. This amazing product combines comfort, durability, and style in one package, making it perfect for serious cyclists who demand the best. What makes the Cycling Tape BHT10 stand out from other bar tapes on the market? Let's take a closer look: 1. Comfort: The BHT10 is made of high-quality EVA foam, which provides excellent shock absorption and reduces hand fatigue on long rides. The tape is also designed with a non-slip surface that provides a secure grip, even when your hands are sweaty. 2. Durability: The BHT10 is engineered to last, even under the toughest conditions. Its tough, weather-resistant construction ensures that it won't wear out or fade quickly, even after years of use. 3. Style: The BHT10 comes in a range of eye-catching colors and patterns, so you can customize your bike to match your personal style. Whether you prefer classic black or bold neon, there's a BHT10 tape that's perfect for you. 4. Easy Installation: The BHT10 is easy to install, thanks to its self-adhesive backing. Simply wrap it around your handlebars and you're good to go. Plus, the tape is easy to clean and maintain, so you can keep your bike looking great for years to come. 5. Value: Best of all, the BHT10 is an excellent value for its price. You don't have to spend hundreds of dollars to get a high-quality bar tape that meets all your needs. The BHT10 delivers premium performance at an affordable price. Conclusion: No matter what your cycling goals are, you'll be glad you upgraded to the Cycling Tape BHT10 from Trifox Bike. With its unbeatable combination of comfort, durability, style, easy installation, and value, this tape is the ultimate choice for serious cyclists who demand the best. Get yours today and take your road bike to the next level!
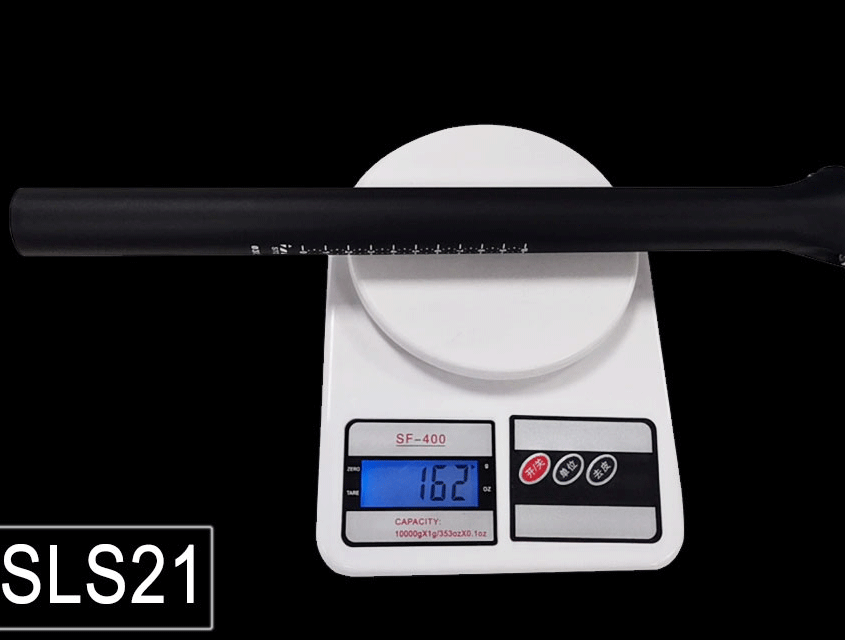
Every cyclist knows the importance of having a comfortable saddle and a good suspension seatpost. Suspension seatposts provide a smoother ride by absorbing road vibrations and impact shocks. However, adding a suspension seatpost to your bike can also add some extra weight that may impact your overall performance. That is why Trifox Bike has developed the Super Lightweight Straight Carbon Seatpost SLS21, the lightest suspension seatpost of 2023. The Super Lightweight Straight Carbon Seatpost SLS21 is designed for both road and off-road biking, providing excellent suspension performance while maintaining lightness and rigidity. This suspension seatpost is available in two diameters (27.2 mm and 31.6 mm), making it compatible with most bike frames. It is made of high-quality carbon fiber, providing strength and durability while minimizing weight. The Super Lightweight Straight Carbon Seatpost SLS21 is incredibly light, weighing only 210 grams (7.4 oz) for the 27.2 mm diameter and 220 grams (7.8 oz) for the 31.6 mm diameter. This means that you can experience the benefits of suspension without adding significant weight to your bike. The Super Lightweight Straight Carbon Seatpost SLS21 also features a unique two-bolt seat clamp design that ensures a secure and easy-to-adjust saddle position. The seat clamp is made of high-strength aluminum alloy, providing durability and corrosion resistance. The Super Lightweight Straight Carbon Seatpost SLS21 is an excellent option for both competitive and recreational cyclists. Its lightweight design ensures that you can ride faster and farther, while the suspension maintains a comfortable and smooth ride. Whether you are riding on paved roads or bumpy trails, this suspension seatpost will provide the support and comfort that you need. Overall, the Super Lightweight Straight Carbon Seatpost SLS21 is an outstanding addition to any cyclist's bike. Its lightweight design, excellent suspension performance, and easy-to-adjust seat clamp make it a must-have for anyone who wants to improve their overall cycling experience. The Super Lightweight Straight Carbon Seatpost SLS21 is undoubtedly the lightest suspension seatpost of 2023, and we highly recommend it to anyone who wants to take their cycling experience to the next level. So, what are you waiting for? Get your hands on this fantastic suspension seatpost today!
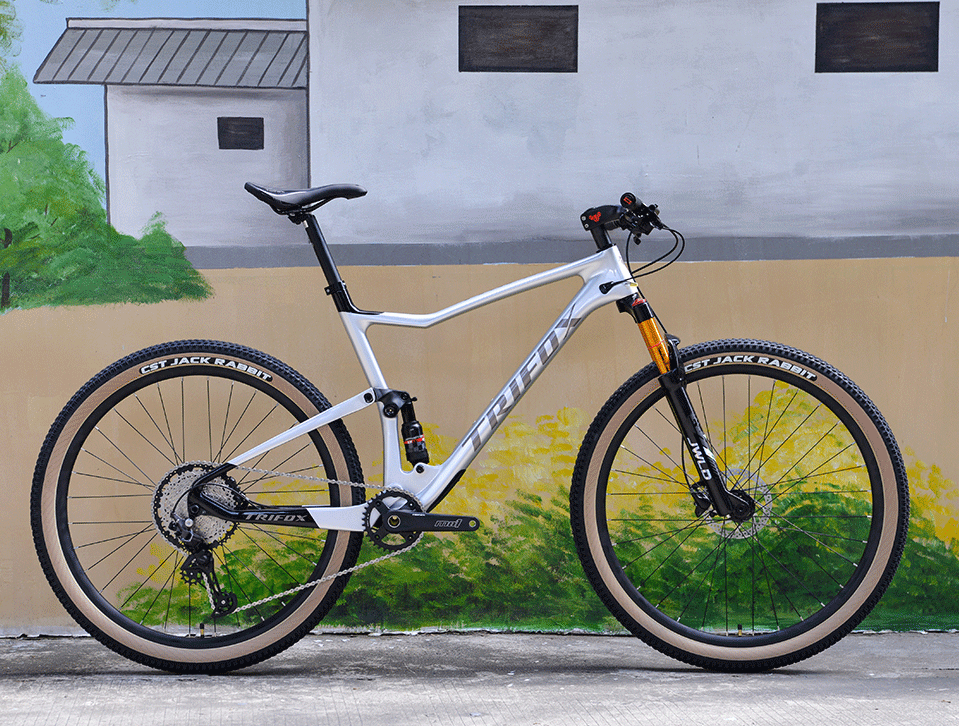
Are you a mountain biking enthusiast? If you are, you’ll know that nothing quite beats the adrenaline rush that comes with cycling on rocky, uneven terrain, with breathtaking views all around. But when it comes to mountain biking, having the right bike can make all the difference. With constant advancements in bike technology, having a full-suspension mountain bike can greatly improve your experience. In this blog post, we’ll be taking a close look at the 2023 full suspension mountain bikes, and one bike in particular, the 29er Carbon Full Pioneer Bicycle from Trifox Bike. 1. What are full suspension mountain bikes? Full suspension mountain bikes are built to tackle challenging trails and terrains by having both front and rear suspension systems. The front suspension allows for handling the impact of obstacles on the front wheel, while the rear suspension reduces the shock and bounces from the rear wheel. The suspension absorbs the impact of rocks, roots, or dips on the trail, keeping you smoother over rough terrain and providing better control and traction. 2. What are the benefits of owning a full suspension mountain bike? The benefits of owning a full suspension bike are numerous. You’ll have improved control, and will feel more confident when confronted with tough, technical terrain. Full suspension minimizes the risk of injuries compared to a hardtail mountain bike because you have better control and grip on rough terrain. Additionally, full suspension absorbs vibration, providing a more comfortable ride. 3. What features make the 29er Carbon Full Pioneer Bicycle stand out? The 29er Carbon Full Pioneer Bicycle is built to handle all terrain conditions confidently. Its carbon frame and fork have increased stiffness to weight ratio, and improved vibration damping abilities. This means that it can easily handle tough terrains like the rocky mountains or sandy trails, without compromising on speed or performance. Its 2.35 Nobby Nic tires make it perfect for both durability and maximum rolling speed. 4. What should you look for when buying a full suspension bike? Before making a purchase, you should always consider your budget, riding style and trails you’ll be riding on. The full suspension MTB market can be competitive, and it can be challenging to choose the right bike for yourself. Some factors to consider include the type of terrain, frame material, suspension travel, wheel size, and brakes. You should also take the bike for a test ride before purchasing to ensure it fits correctly, comfortably and delivers the performance you need. 5. Conclusion In conclusion, the 2023 full suspension mountain bikes have pushed the boundaries of what we’ve come to expect. The 29er Carbon Full Pioneer Bicycle is the perfect example of technology advancements in the full suspension bike world. By investing in this kind of bike, you’ll experience the joys of mountain biking in a more comfortable, safe and exhilarating way. Remember when deciding on which full suspension bike to invest in, take your time, compare different bikes and consult experts within the bike industry. In the end, whichever bike you choose should provide an excellent ride, making mountain biking more enjoyable and exciting than ever before


