


The question of how many gears a road bike “should” have doesn’t have a one-size-fits-all answer. From vintage 5-speed setups to modern 12-speed electronic groupsets, gear counts have evolved dramatically. The right number depends on your riding style, terrain, and budget. Let’s break down the factors to help you find your ideal setup.
The Evolution of Speed
Road bikes once topped out at 10 speeds, but today’s drivetrains offer up to 12 or even 13 cogs. More gears mean smaller jumps between ratios, letting you maintain optimal cadence (pedaling rhythm) on rolling terrain or long climbs. However, more isn’t always better—complexity, weight, and cost increase with each added cog.
Key Considerations
1. Rider Needs: Competitive cyclists often prefer 11- or 12-speed systems for seamless shifting under load. Casual riders or commuters might prioritize simplicity with 8-10 speeds.
2. Terrain: Hilly routes demand wider gear ranges. A compact chainset paired with an 11-34T cassette (common in 11-speed setups) offers climbing ease without sacrificing top-end speed.
3. Maintenance: More gears mean tighter tolerances. A 9- or 10-speed drivetrain is easier to adjust and cheaper to replace.
The Sweet Spot: 11-Speed Dominance
For most road riders, 11-speed strikes a balance. It provides ample range (e.g., 11-30T or 11-34T cassettes) and smooth transitions between gears. Brands like Shimano 105, SRAM Rival, and Campagnolo Centaur offer reliable mid-tier 11-speed groupsets that blend performance and affordability.
When Less is More
Beginners or budget-conscious riders might opt for 8-10 speeds. These systems are robust, cost-effective, and sufficient for flat to moderate terrain. Plus, wider gear spacing can reduce shifting frequency, which is less mentally taxing on long rides.
Cutting-Edge: 12-Speed and Beyond
High-end 12-speed groupsets (Shimano Dura-Ace, SRAM Red) cater to racers and tech enthusiasts. Hyper-precise shifting and expanded gear ranges maximize efficiency, but they come at a premium price—and not all frames/wheels are compatible.
Trifox's Approach: Versatility Meets Value
Trifox road bikes, offer customizable builds to match your gear preferences. Whether you prioritize the crispness of 11-speed Shimano or the simplicity of a 9-speed commuter setup, their ultralight carbon frames adapt to your needs without compromising durability.
Final Shift
Your ideal gear count hinges on where and how you ride. More speeds deliver precision, but simplicity has its perks. Test different setups if possible, and remember: the best drivetrain is the one that keeps you pedaling—and smiling—mile after mile.
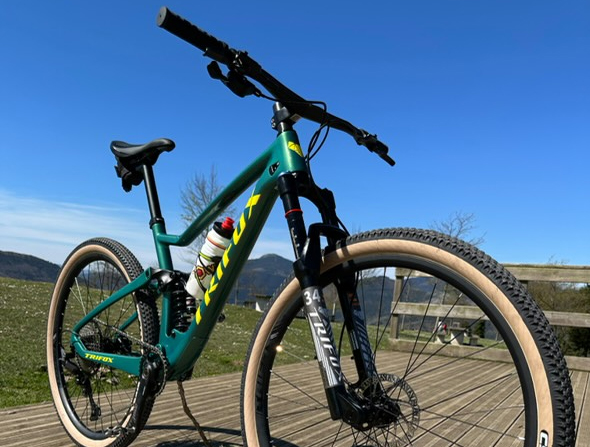
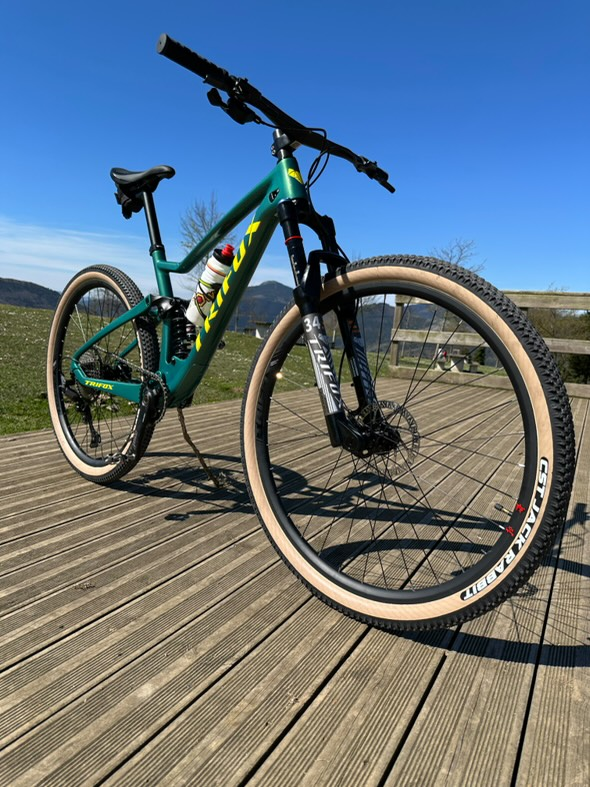
When it comes to mountain biking, finding the right balance between cost and performance can feel like a never-ending quest. Enter the 29er alloy hardtail frame—a design that promises the ruggedness needed for aggressive trails without breaking the bank. But does it live up to the hype?
THE CASE FOR ALLOY: AFFORDABILITY MEETS PERFORMANCE
Carbon fiber often steals the spotlight for its featherweight appeal, but alloy frames like the MK7 offer a compelling alternative. Aluminum provides a robust foundation at a fraction of the cost, making it ideal for riders who prioritize value.
The MK7's ultralight construction shaves weight without compromising strength, bridging the gap between budget-friendly and high-performance. For beginners or seasoned riders watching their wallets, alloy delivers resilience where carbon might falter—think rock strikes, crashes, or rough trail abuse.
TRAIL-READY TOUGHNESS: BUILT TO LAST
Durability is where alloy truly shines. The MK7’s hydroformed tubing reinforces critical stress points, ensuring the frame withstands repeated punishment from roots, drops, and technical climbs. Pair this with the modern 148mm Boost rear spacing, which increases wheel stiffness and compatibility with wider hubs, and you’ve got a setup that combats flex during hard cornering and accelerates efficiently. This isn’t a frame that coddles; it’s built to push limits, making it a reliable partner for everything from flowy singletrack to gnarly descents.
29ER WHEELS: THE TRAIL-SMOOTHING ADVANTAGE
The 29-inch wheels paired with this hardtail design are a game-changer. Their larger diameter rolls over obstacles with ease, maintaining momentum on climbs and reducing fatigue over long rides. While hardtails lack rear suspension, the MK7’s rigid rear triangle ensures direct power transfer, letting you tackle climbs with urgency. The 29er’s stability also complements the frame’s durability, creating a bike that feels planted and predictable when the trail gets rowdy.
HARDTAIL SIMPLICITY: LESS MAINTENANCE, MORE RIDING
Hardtails eliminate the complexity (and cost) of rear suspension, offering a lighter, more responsive ride. The MK7 leans into this ethos, with a clean design that’s easier to maintain and repair. Fewer moving parts mean fewer headaches—perfect for riders who want to spend less time tuning and more time riding.
VERDICT: THE BEST OF BOTH WORLDS?
So, is a 29er alloy hardtail frame the perfect blend of affordability and durability? For most riders, the answer leans yes. The Trifox MK7 exemplifies this balance, offering a lightweight yet tough platform that thrives on diverse terrain. It's a smart choice for those seeking a capable, low-maintenance bike that won't empty their wallet.
In the world of mountain biking, agility reigns supreme. Whether carving through singletrack or tackling technical descents, responsiveness and control define your ride.
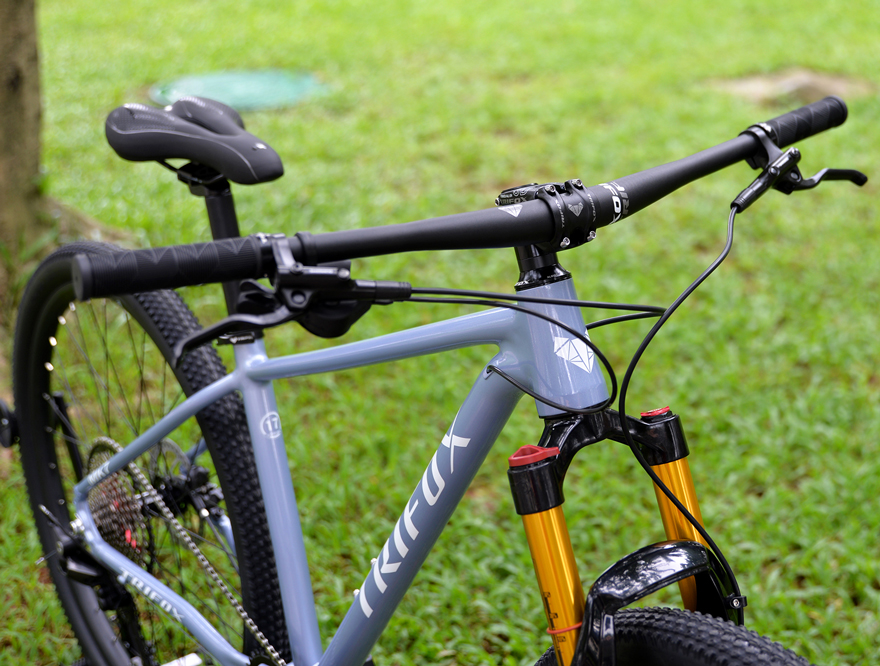
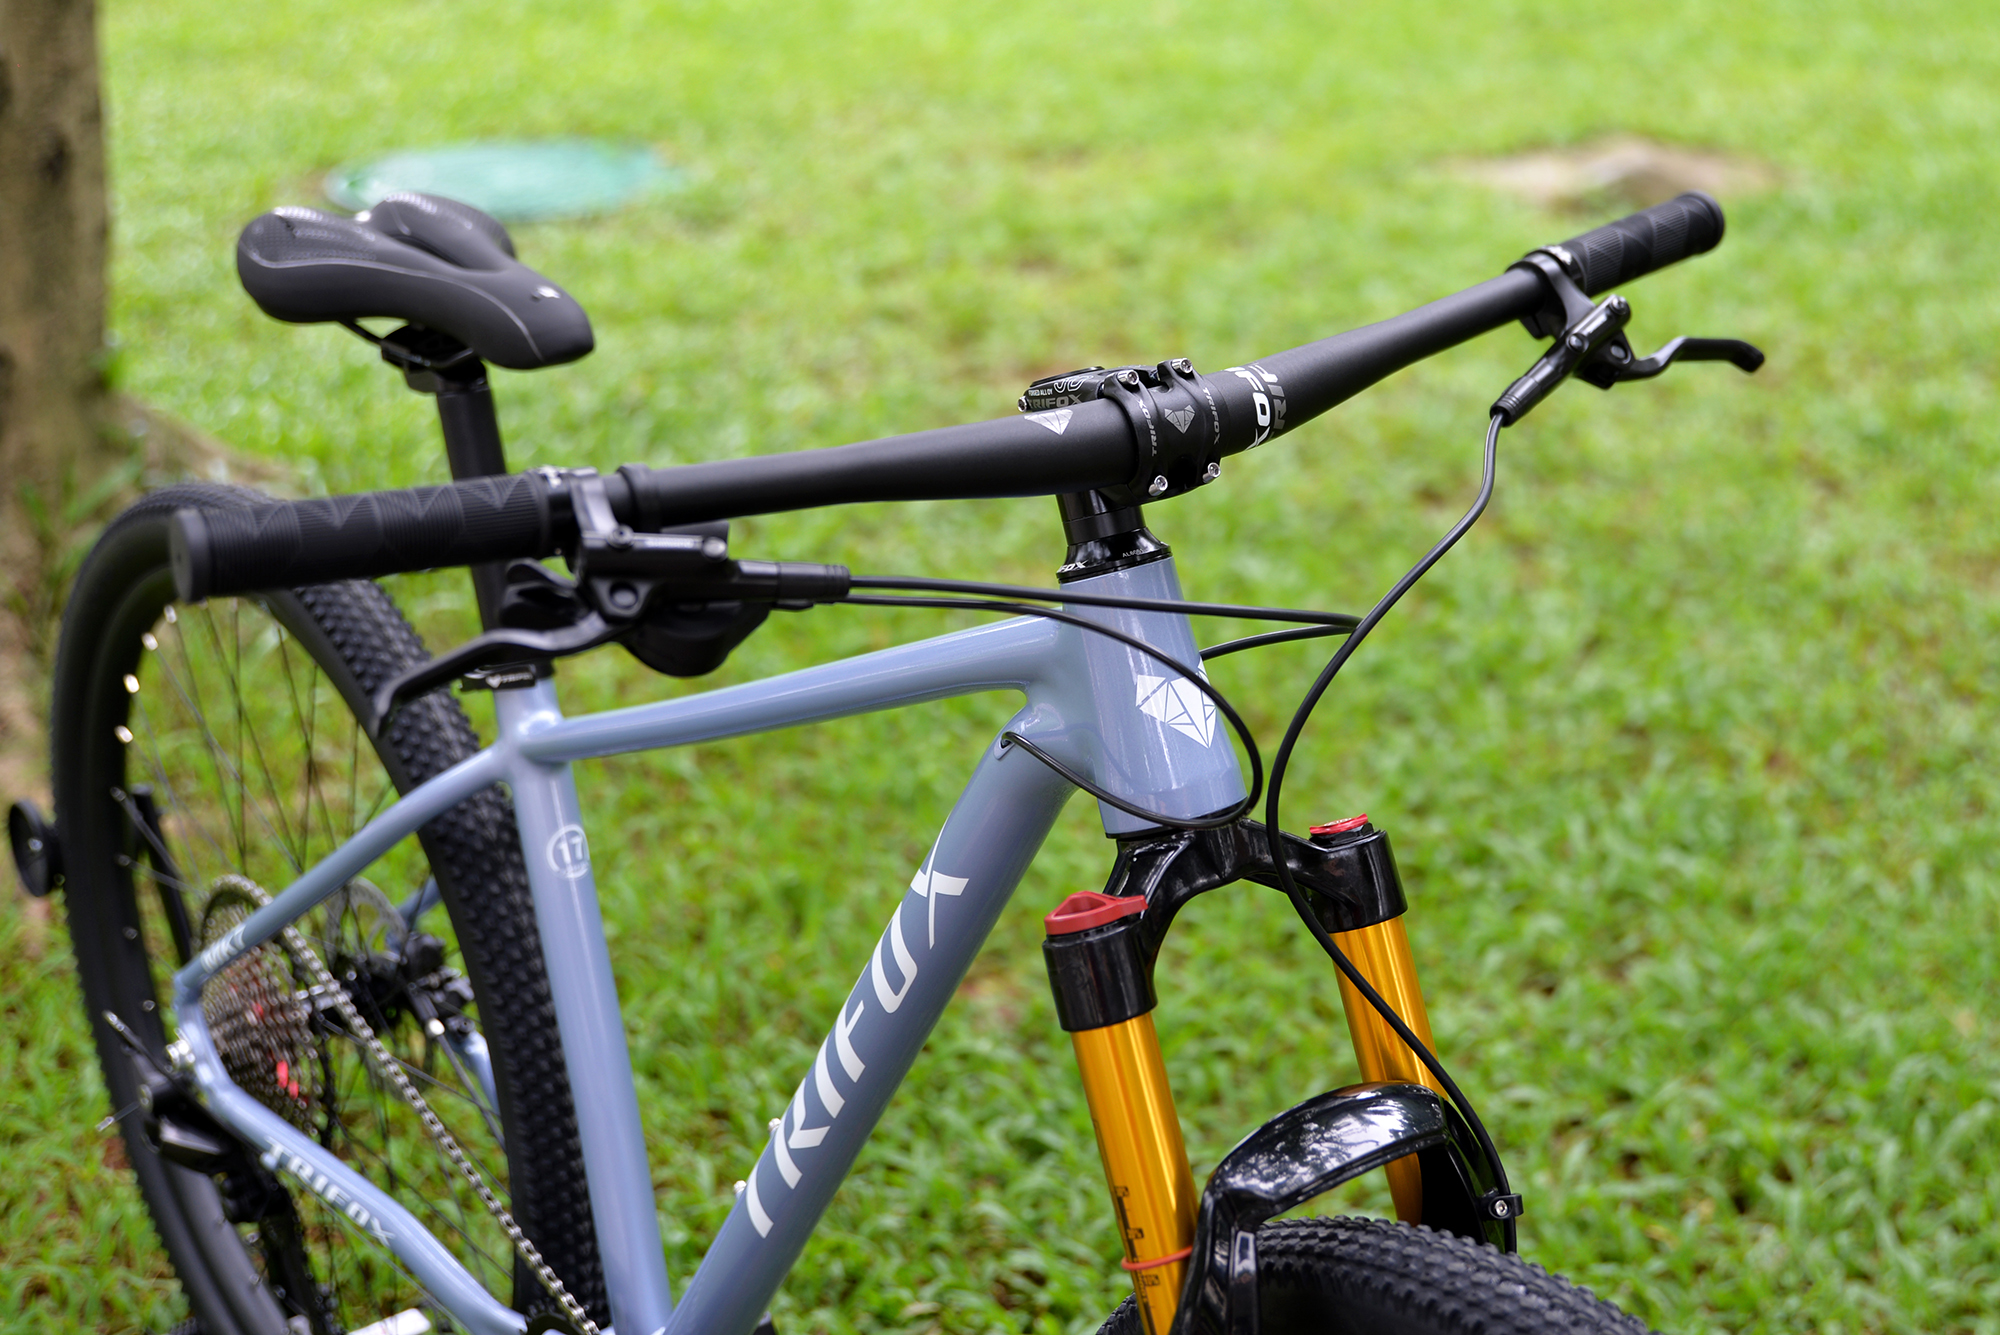
The secret to unlocking next-level off-road performance lies in two innovations: an ultralight carbon MTB frame and a Boost fork. Together, they create a synergy that elevates speed, precision, and confidence on any trail.
Ultralight Carbon Frame: The Backbone of Speed
Carbon fiber's magic lies in its strength-to-weight ratio. Trifox’s SDY20 frame exemplifies this, shedding grams without sacrificing durability. A lighter bike accelerates faster, climbs easier, and flicks through tight turns effortlessly. Carbon’s natural vibration damping also enhances comfort, reducing fatigue on long rides. But the real win is stiffness—optimal torsional rigidity ensures every watt of power translates to forward motion, while compliant seatstays absorb trail chatter for better traction.
Boost Fork: Precision Meets Stability
The Boost standard (110mm front axle spacing) isn’t just a buzzword—it’s a game-changer. Wider hub spacing increases wheel stiffness, preventing flex during hard cornering or rock strikes. This means sharper steering response and unwavering control in loose terrain. Paired with a lightweight carbon frame, the Boost fork ensures your front wheel tracks true, boosting confidence on steep descents and technical climbs.
The Dynamic Duo
Combine the SDY20's featherlight frame with a Boost fork, and agility reaches new heights. The frame's nimble character complements the fork’s stability, creating a bike that’s both quick and composed. Tight switchbacks? Effortless. Rocky descents? Unshakable. This pairing reduces rider fatigue, letting you push harder for longer.
For riders seeking an edge, Trifox’s SDY20 merges cutting-edge materials and smart engineering. It's not just about weight or stiffness—it’s how these elements harmonize to redefine off-road agility.
Mountain biking thrives on adrenaline, but as trails get gnarlier, your hardtail might struggle. So, when is it time to switch to a full suspension bike?
1. Your Terrain Demands It
If you’re tackling rocky descents, root-covered paths, or technical drops, a full suspension bike absorbs shocks better, keeping you in control. TrifoxBike’s designs, like the Trifox Full Suspension MTB, feature optimized rear travel to smooth out rough trails, reducing fatigue and improving traction.
2. Your Riding Style Gets Aggressive
Downhill shredders, jump enthusiasts, and enduro racers benefit from dual suspension. The added stability at high speeds and landings protects your body and bike. TrifoxBike’s frames balance lightweight durability with responsive suspension, ideal for pushing limits.
3. You Ride Frequently
Regular riders logging long hours need comfort. Full suspension reduces joint strain, letting you ride longer. TrifoxBike integrates ergonomic designs without sacrificing efficiency, making their bikes a smart choice for daily adventurers.
4. Your Skills Outgrow Your Bike
Advanced riders tackling steeper lines or faster corners need bikes that match their progression. Full suspension offers confidence to tackle technical features. TrifoxBike’s models support skill growth with precision handling and adjustable setups.
5. Budget Allows for Investment
While pricier than hardtails, TrifoxBike delivers high-value builds with premium components like air shocks and durable pivots. If your riding justifies the cost, it’s a worthy upgrade.
6. You Prioritize Traction
Wet, loose, or uneven terrain demands grip. Full suspension maintains tire contact, enhancing control. Pair this with TrifoxBike’s grippy tire compatibility, and you’ve got a trail-eating machine.
7. Maintenance Doesn’t Intimidate You
Full suspension requires more upkeep, but TrifoxBike’s reliable seals and accessible pivot points simplify care, ensuring longevity.
Upgrade if your trails, style, or ambition demand more. TrifoxBike’s full suspension range blends performance and value, ready to elevate your ride.
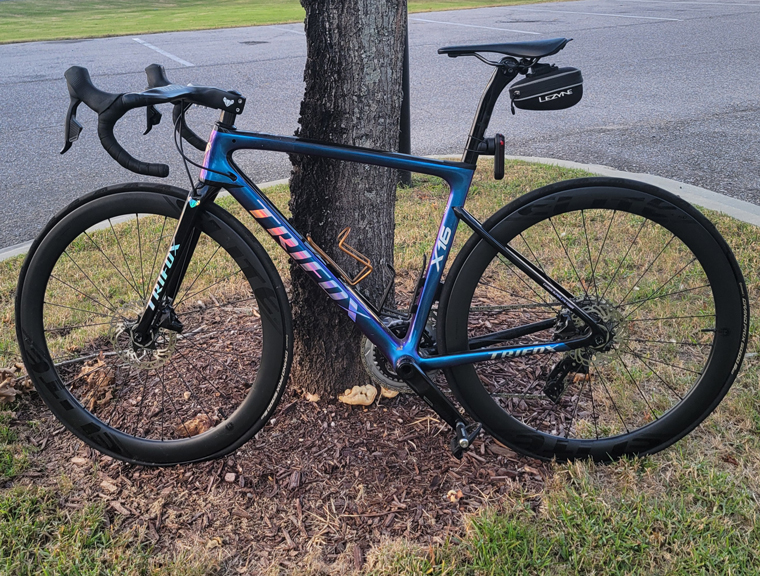
The cycling world is evolving, and disc brakes are now the gold standard for road bikes. Once reserved for mountain bikes, this technology has revolutionized road cycling, offering unparalleled performance and safety.
1. All-Weather Reliability
Disc brakes excel in diverse conditions. Unlike rim brakes, which lose grip in rain or mud, disc rotors provide consistent stopping power. This reliability boosts confidence on wet descents or gritty roads, making them a must-have for commuters and racers alike.
2. Wider Tire Compatibility
Modern road bikes prioritize comfort and speed, embracing wider tires (28mm+). Disc brakes eliminate rim wear, allowing frames like Trifox’s carbon models to accommodate larger tires without compromising clearance. The result? A smoother ride and improved traction.
3. Precision Control
Disc brakes offer superior modulation, letting riders fine-tune braking force. This precision prevents skidding and reduces fatigue on long rides, enhancing safety during technical maneuvers or crowded group rides.
4. Aerodynamic Advantage
Disc-specific frames, such as Trifox’s carbon road bike frames, streamline brake integration. Without rim calipers, designers optimize tube shapes for aerodynamics, cutting through wind with minimal drag—ideal for speed seekers.
5. Long-Term Durability
Disc systems reduce rim stress, prolonging wheel life. Paired with robust carbon frames, cyclists enjoy lighter, sturdier builds that withstand rigorous use, from climbs to sprints.

Disc brakes aren't a trend—they’re the future. As cyclists demand versatility and performance, brands like Trifox Bike deliver with disc-ready carbon frames that merge innovation and agility. Ready to upgrade? Explore Trifox’s cutting-edge options here and join the revolution.
Upgrading from traditional V-brakes to disc brakes is a common question among cyclists seeking better stopping power and control. The answer? Yes, but it depends on your bike’s compatibility and budget. Let’s break down the process, costs, and whether it’s worth the effort.
Key Considerations
1. Frame & Fork Compatibility: Disc brakes require mounts (IS or Post Mount) on your frame and fork. If your bike lacks these, conversion isn’t feasible without costly adapters or replacements.
2. Wheel Compatibility: Disc brakes need hubs with rotor mounts. Your current wheels may not support this, necessitating a new wheelset.
3. Brake Levers: V-brakes use long-pull levers, while mechanical disc brakes (cable-actuated) are compatible. Hydraulic discs require dedicated levers, often meaning a new groupset.
4. Cost: Expect to spend 200
200–500+ for quality disc brakes, rotors, wheels, and labor if DIY isn’t an option.
Steps to Convert
1. Check Compatibility: Inspect your frame, fork, and wheels for disc mounts. No mounts? Consider a new fork/wheelset or stick with V-brakes.
2. Choose Brake Type:
Mechanical Discs: Affordable, easier to install, and compatible with existing levers.
Hydraulic Discs: Superior performance but require new levers and bleeding tools.
3. Upgrade Wheels: Invest in disc-ready hubs. Trifox’s lightweight carbon wheels, for example, offer durability and compatibility for smooth upgrades.
4. Install Brakes & Rotors: Attach calipers, secure rotors, and adjust pad alignment. Test thoroughly before hitting trails!
When Is It Worth It?
- Performance Needs: Disc brakes excel in wet/muddy conditions and on steep descents. If your rides demand reliability, upgrade.
- Future-Proofing: Converting lets you use modern components if you plan to keep the bike long-term.
- Frame Quality: High-end frames justify the cost; cheaper bikes may not.
Alternatives
- Hybrid Systems: Semi-hydraulic (e.g., TRP HY/RD) combines cable levers with hydraulic calipers for a middle-ground solution.
- Optimize V-Brakes: High-quality pads (e.g., Kool-Stop) and compressionless housing can improve existing V-brake performance.
Swapping V-brakes to discs is possible but not always practical. If your frame supports it and you crave all-weather reliability, the upgrade is transformative. For casual riders or incompatible bikes, stick with tuned V-brakes or consider a new disc-equipped bike. Either way, prioritize safety and compatibility—because confident braking is the foundation of every great ride.
The age-old debate between hardtail (front suspension only) and full-suspension mountain bikes boils down to one question: What kind of rider are you? Let’s dissect the pros, cons, and ideal use cases for both setups to help you decide—and explore how brands like Trifox cater to diverse preferences.
Hardtail (Without Rear Suspension)
Pros:
- Lightweight: Fewer parts mean easier climbing and faster acceleration.
- Lower Cost: Affordable to buy and maintain (no rear shock or pivot bearings).
- Efficiency: Direct power transfer makes pedaling feel responsive, ideal for smooth trails or XC racing.
- Simplicity: Less maintenance and easier DIY repairs.
Cons:
- Rough Ride: Rear impacts are absorbed solely by your legs, leading to fatigue on technical terrain.
- Traction Limits: Less control on loose or rocky descents.
Full-Suspension

Pros:
- Comfort & Control: Rear shocks smooth out bumps, reducing fatigue and improving grip on chunky trails.
- Versatility: Confidently tackle downhill, enduro, or all-day adventures.
- Speed: Maintain momentum through rough sections.
Cons:
- Weight & Cost: Heavier frame and higher upfront/maintenance costs.
- Complexity: More moving parts mean more potential for mechanical issues.
Who Should Ride What?
- Choose a Hardtail If: You prioritize budget-friendly efficiency, ride smoother trails, or love climbing. Models like Trifox’s hardtails excel here, blending lightweight frames with trail-ready geometry.
- Choose Full-Suspension If: You crave technical descents, endurance rides, or park laps. Trifox’s full-suspension bikes offer balanced travel and durability for aggressive terrain.
Key Considerations
1. Terrain: Rocks, roots, and drops? Full-suspension shines. Pavement or flow trails? Save weight with a hardtail.
2. Budget: Hardtails cost less upfront and long-term.
3. Skill Level: Beginners may appreciate a hardtail’s simplicity; advanced riders often leverage full-squish capabilities.
There's no “better” option—only what's better for you. Hardtails reward efficiency and simplicity, while full-suspension bikes unlock technical prowess and comfort. Test both if possible, and consider Trifox’s range to match your riding style. Whether you're chasing KOMs or sending drops, the right suspension setup ensures every ride feels like freedom.
A full-suspension mountain bike is a significant investment, and riders often wonder: How long will it last? While there’s no one-size-fits-all answer, factors like usage, maintenance, and component quality play key roles. Let’s dive into durability expectations and how to maximize your bike’s lifespan—with a nod to robust options like Trifox’s full-suspension models.
Lifespan Factors
1. Frame Construction: High-quality aluminum or carbon frames (like Trifox’s) can last 5–10+ years with proper care. Stress cracks or impact damage are rare but possible in extreme conditions.
2. Suspension Components: Rear shocks and fork seals require regular servicing (annually or every 100–200 ride hours). Neglect can lead to leaks or degraded performance in 2–4 years.
3. Drivetrain & Bearings: Chains, cassettes, and pivot bearings wear fastest. Replace chains every 500–1,000 miles and pivot bearings every 1–2 years, depending on riding intensity.
4. Wheels: Rims and hubs endure constant abuse. Quality wheelsets last 3–5 years, but hard impacts or poor maintenance can shorten this.
Maintenance Matters Most
Regular cleaning, lubrication, and timely part replacements are critical. For example:
- Clean suspension stanchions after muddy rides to prevent seal damage.
- Grease pivot bolts and bearings annually to combat corrosion.
- Check torque specs on frame bolts to avoid stress fractures.
Signs It's Time to Retire Your Bike
- Frame Damage: Cracks, dents, or creaking noises signal structural failure.
- Irreparable Suspension: If rebuild kits can’t fix a soggy shock or fork, replacement is cheaper than constant repairs.
- Outdated Standards: Older bikes may lack compatibility with modern components (e.g., thru-axles, 1x drivetrains), making upgrades impractical.
Trifox Full-Suspension Bikes: Built to Endure
Models like those from Trifox prioritize durability with premium carbon frames, reliable suspension linkages, and modern geometry. Their designs balance lightweight performance with trail-tough resilience, ensuring longevity for riders who maintain their bikes diligently.
Maximizing Your Bike's Life
- Ride Within Limits: Avoid overly aggressive terrain if your bike isn’t built for it.
- Store Indoors: Protect against rust and UV damage.
- Upgrade Strategically: Swap worn parts before they compromise other components.

A well-maintained full-suspension bike can last a decade or more, but its “usable life” depends on how hard you ride and how proactively you care for it. Brands like Trifox offer frames engineered to endure, making them a smart choice for riders seeking longevity.
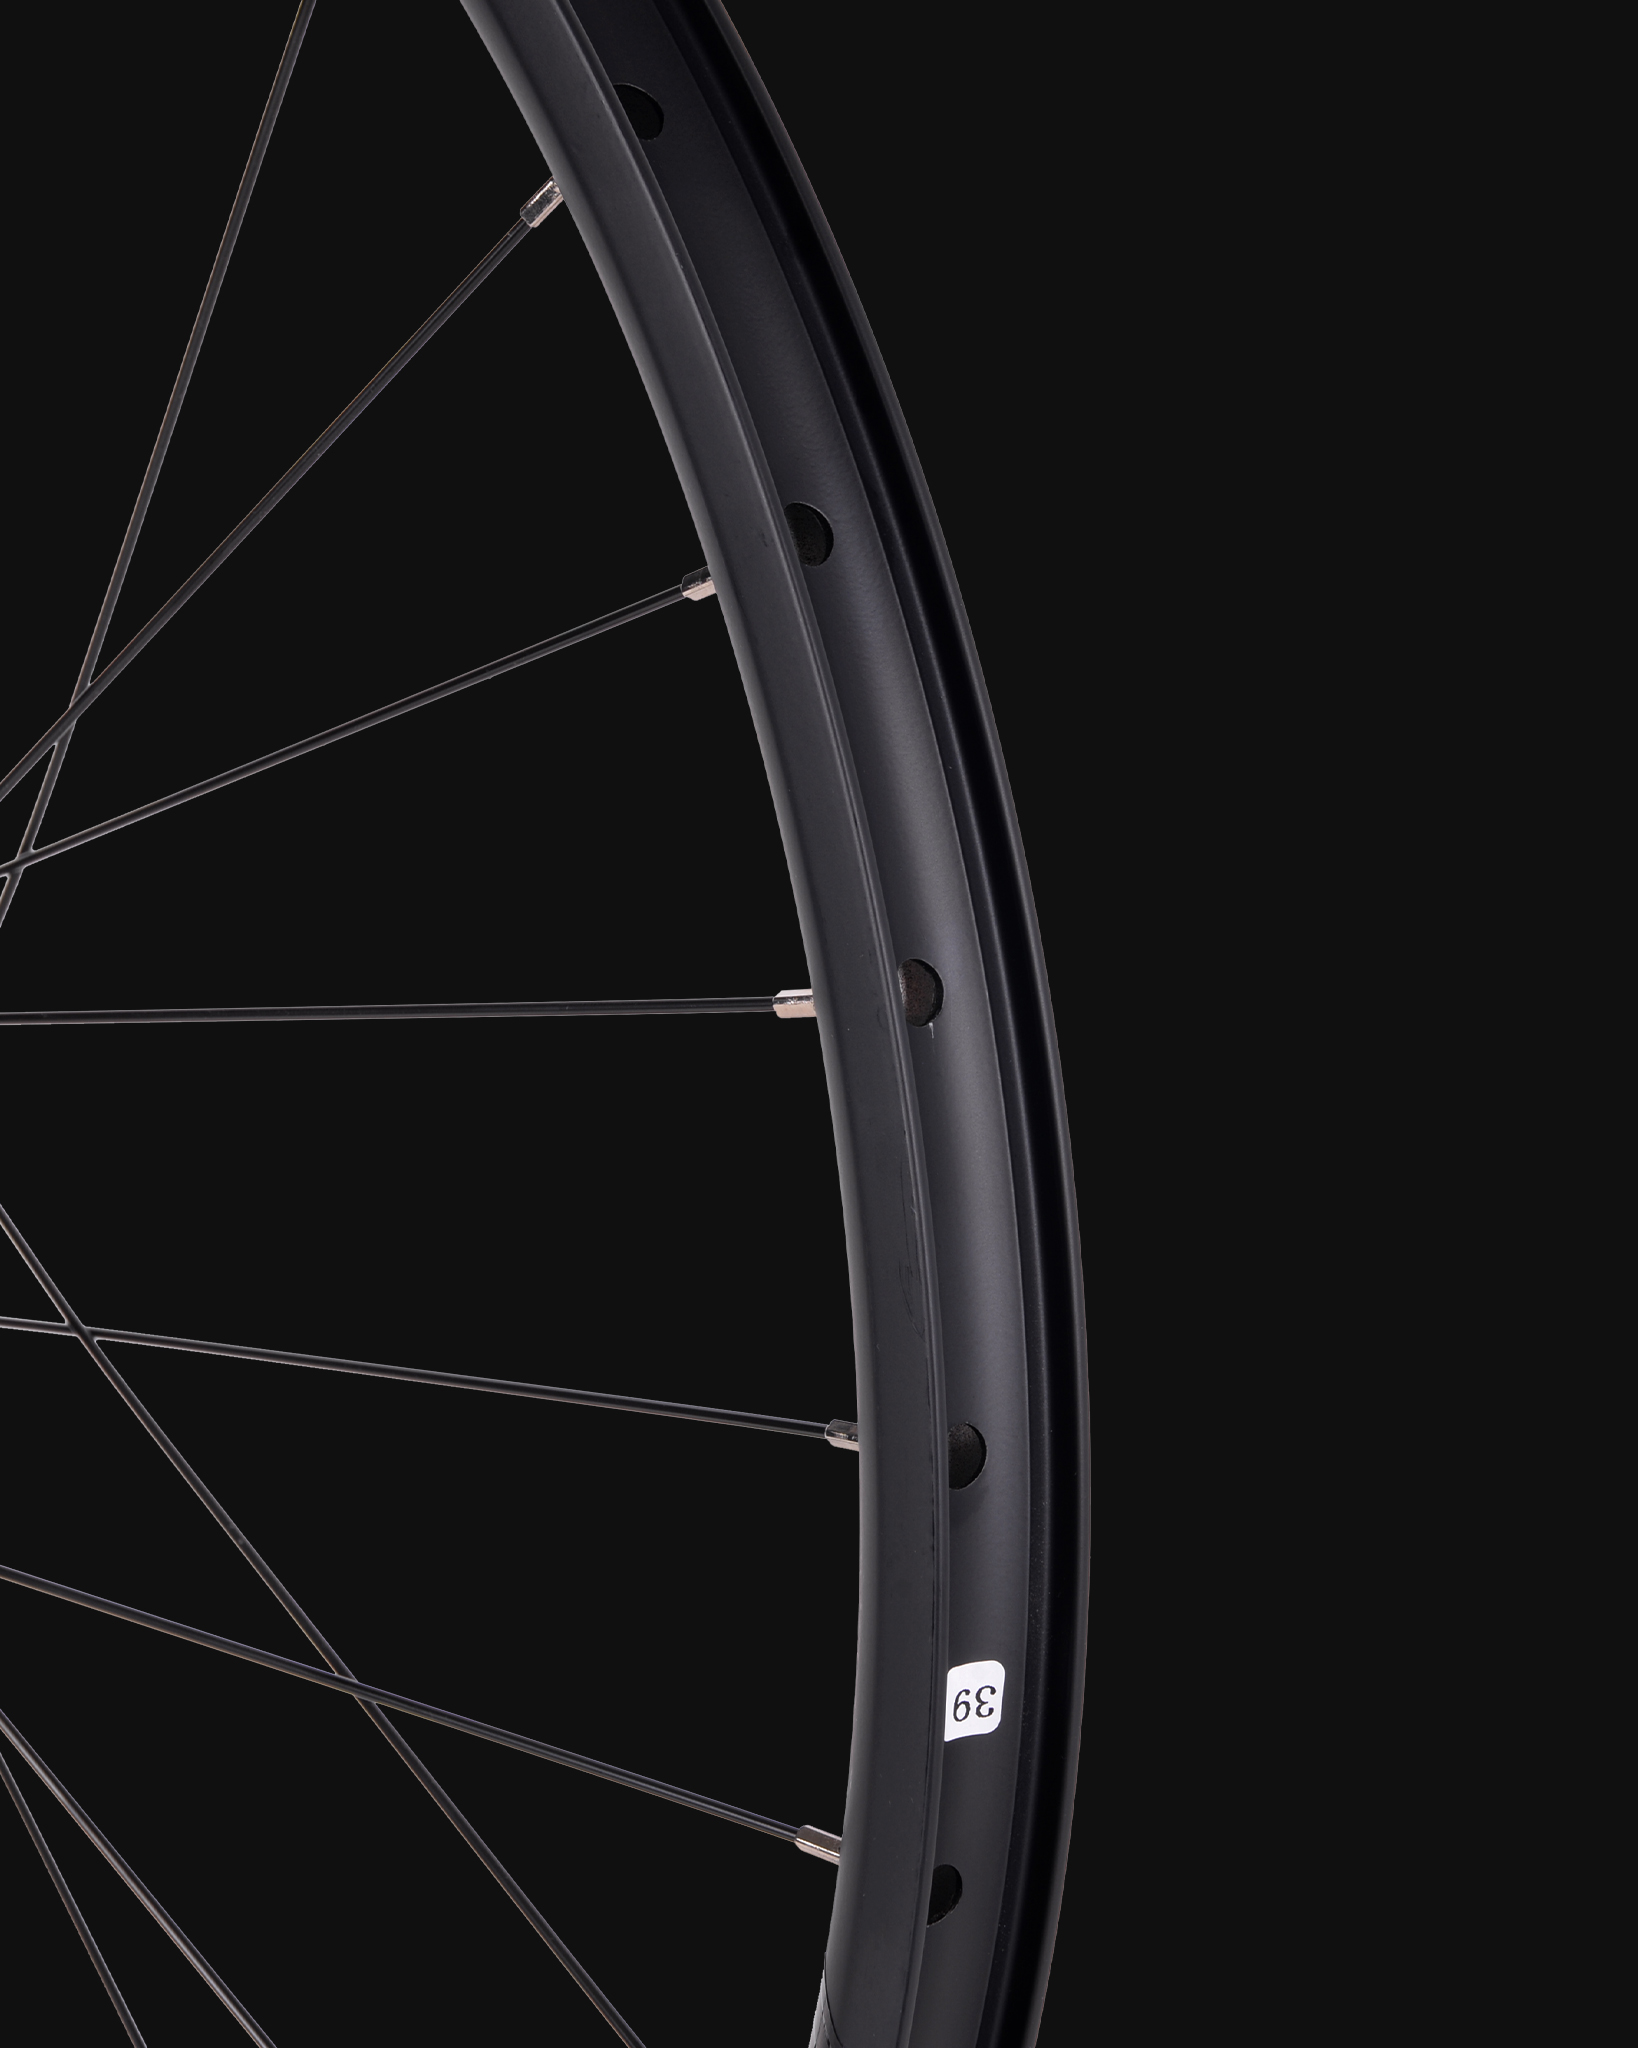
Choosing the right mountain bike wheel size—26", 27.5", or 29"—can feel overwhelming, but understanding their strengths will help you pick the perfect match for your riding style.
26-Inch Wheels: The Classic Choice
Once the standard, 26" wheels are nimble and lightweight, offering quick acceleration and agility for technical trails or dirt jumps. They’re favored by freeriders and those prioritizing maneuverability over speed. However, they’ve lost ground to larger sizes due to reduced rollover capability on rough terrain.
27.5-Inch Wheels: The Balanced Performer
27.5" (650B) wheels strike a middle ground. They roll faster than 26" wheels, tackle obstacles more smoothly, and remain agile enough for tight corners and playful riding. This size suits trail and enduro riders who want versatility—ideal for everything from climbs to descents.
29-Inch Wheels: Speed & Stability
29ers dominate cross-country and endurance riding. Their larger diameter rolls over roots and rocks effortlessly, maintaining momentum on climbs and rough descents. While less nimble in tight spaces, they’re faster on flow trails and favored by taller riders seeking stability.
Mixed Wheel Sizes: The “Mullet” Setup
Some riders mix a 29" front wheel (for stability) with a 27.5" rear (for agility). This hybrid boosts confidence on descents while keeping the rear end lively—popular in downhill and enduro disciplines.
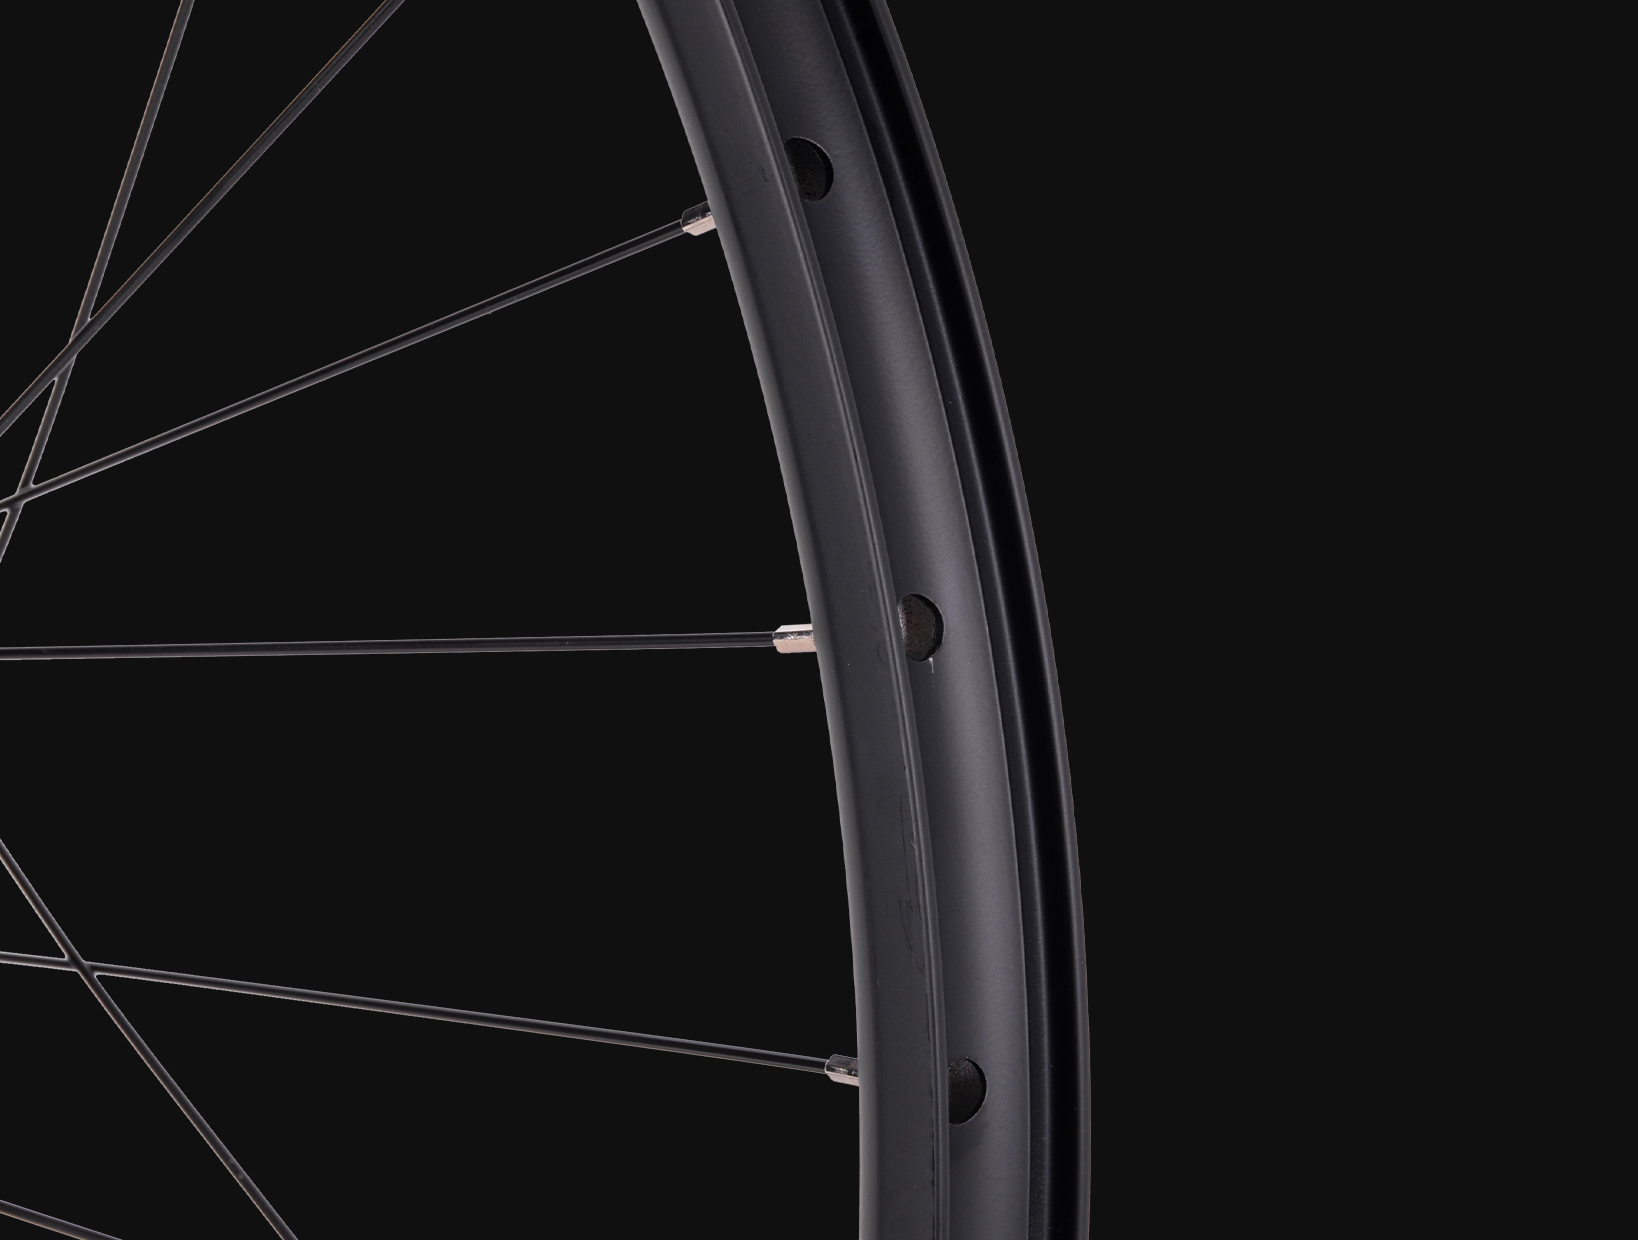
Trifox MTB Wheels: Built for Choice
Whether you prioritize speed, agility, or adaptability, Trifox’s MTB wheels offer robust carbon options across sizes. Their 29" models excel in efficiency, while 27.5" wheels cater to technical riders. Lightweight yet durable, they’re designed to enhance your preferred riding style.
Who Should Ride What?
26": Jumpers, dirt riders, or those on older frames.
27.5": Trail/enduro riders seeking a playful, all-rounder feel.
29": XC racers, endurance riders, or anyone prioritizing speed and stability.
There's no universal “best” wheel size—it depends on your terrain, height, and riding goals. Test different sizes if possible, and consider Trifox’s high-performance wheels to optimize your setup. Whether you’re carving singletrack or racing uphill, the right wheels elevate every ride.


