Selecting the ideal bicycle tire width is not merely a matter of aesthetics; it's a crucial decision that affects comfort, speed, grip, and overall ride quality. With the range of options available today, cyclists can tailor their bikes to suit specific terrains, riding styles, and personal preferences.
Understanding Tire Width
Bicycle tires come in a wide variety of widths, typically ranging from narrow road tires at about 23mm to wide mountain biking tires up to 2.5 inches or more. Each width serves different riding conditions and offers a distinct set of advantages and trade-offs.
Consider Your Riding Discipline
Road Biking: Traditional wisdom favored narrower tires for road biking, under the assumption that they reduced rolling resistance. However, recent studies and professional practice have shifted towards slightly wider tires, such as 25mm or 28mm, for road use. These offer a better grip and more comfort without significantly increasing resistance, making them a superior choice for most road riders.
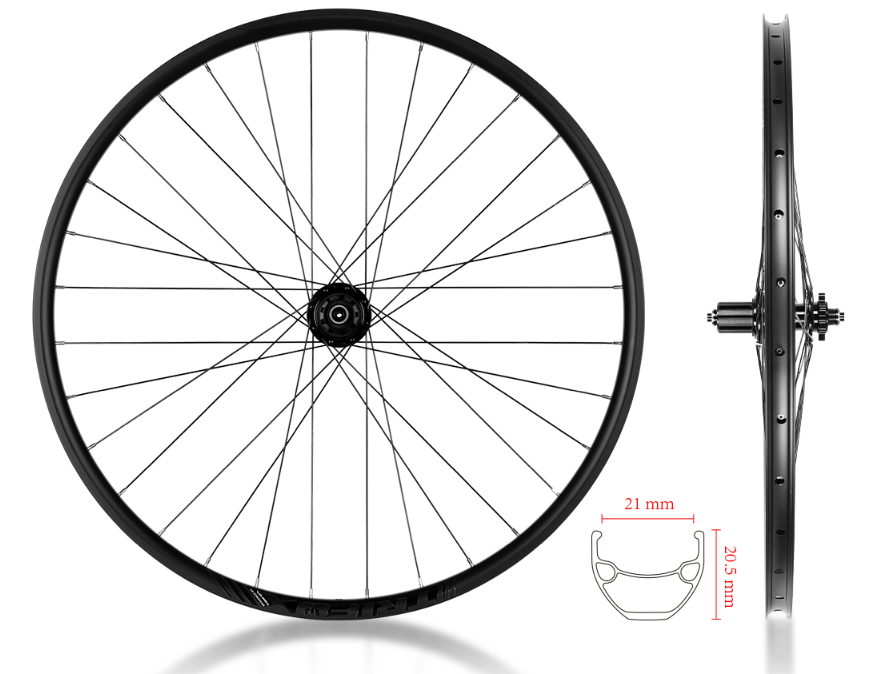
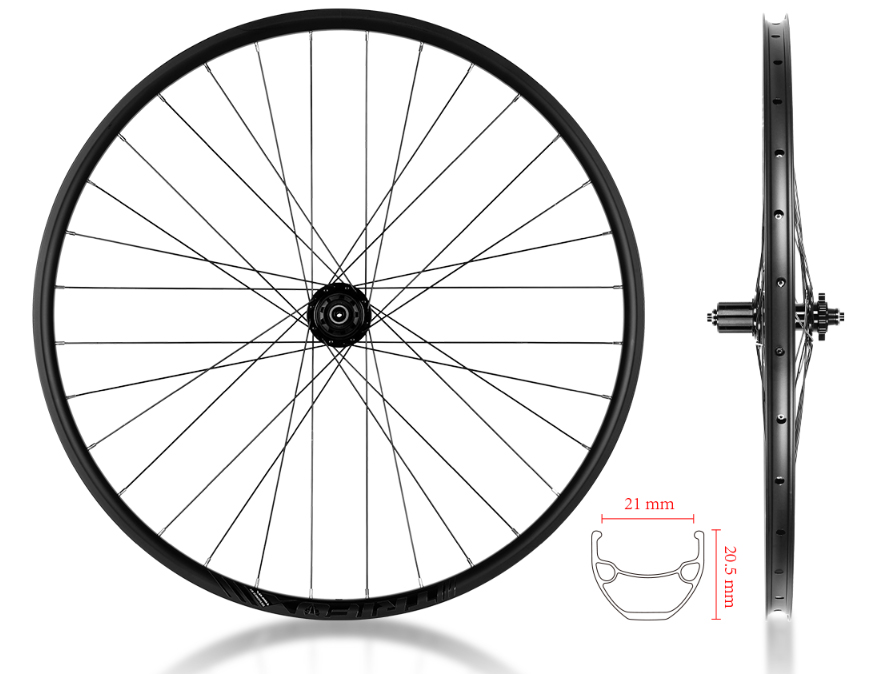
Mountain Biking: Tire width is critical for mountain biking due to the varied and often challenging terrain. Wider tires, around 2.1 to 2.6 inches, provide increased traction and stability, essential for navigating rocky trails and loose surfaces. The exact width within this range depends on the specific conditions you ride in – with rougher, more technical trails calling for wider tires.
Gravel and Touring: For gravel and touring bikes, where riders encounter a mix of terrains, tire widths from 35mm to 45mm are common. These widths offer a compromise between speed and comfort on uneven surfaces, providing enough cushioning for long rides while still maintaining reasonable efficiency on paved roads.
Assess Your Weight and Riding Style
Heavier riders or those who carry additional gear on their bikes might benefit from slightly wider tires, which can better support the extra weight. Similarly, if you prioritize comfort over speed—perhaps for leisurely rides or long distances—wider tires can offer more cushioning against road vibrations. Conversely, if speed and agility are your main goals, sticking to the narrower end of the spectrum suitable for your discipline might be best.
Terrain and Conditions
The surfaces you ride on most frequently should heavily influence your tire width choice. Smooth, well-maintained roads allow for narrower tires, while rough or unpaved paths demand wider tires for better grip and puncture resistance. Additionally, consider weather conditions; wider tires can provide more stability and confidence in wet or slippery conditions.
Bike Compatibility
Before settling on a tire width, ensure your bike frame and fork have enough clearance to accommodate it. This is particularly important if you plan to increase tire width significantly. Check the manufacturer's specifications for maximum tire clearance and remember that adding mudguards or fenders will require additional space.
Rolling Resistance vs. Comfort
While it's been suggested that narrower tires offer lower rolling resistance, recent research shows that at the same pressure, wider tires can actually have less rolling resistance due to their shorter contact patch. However, wider tires are often run at lower pressures for increased comfort, which can increase rolling resistance. It's about finding the right balance for your needs.
A higher volume tire (wider) allows you to run lower pressures, which can absorb road irregularities better, leading to a smoother, more comfortable ride. If you're racing or always riding on smooth tarmac, minimal rolling resistance might be your priority. For endurance rides, adventure cycling, or commutes, comfort could take precedence.
Experiment and Personal Preference
Ultimately, the ideal tire width is a deeply personal choice that can vary widely among cyclists. What feels right for one person might not suit another, depending on individual preferences for comfort, speed, handling, and the type of cycling they enjoy most. If possible, experiment with different tire widths to find what works best for you. Many riders find that a slight increase in width from what they're used to leads to a significantly more enjoyable riding experience.
Conclusion
Determining the ideal bicycle tire width requires a thoughtful consideration of your riding style, the terrains you frequent, your weight, and the specific conditions under which you ride. By understanding the implications of tire width on performance and comfort, you can make an informed decision that enhances your cycling experience.
Whether you're gliding over smooth asphalt, tackling rugged mountain trails, or exploring gravel paths, the right tire width can make all the difference. Remember, cycling is about enjoyment and exploration, so choose a tire that will maximize those feelings on every ride.
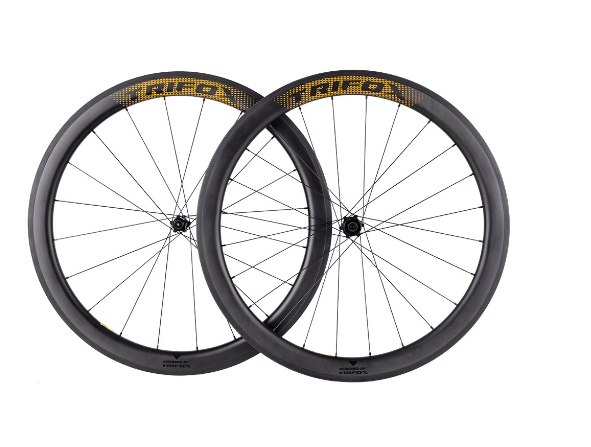
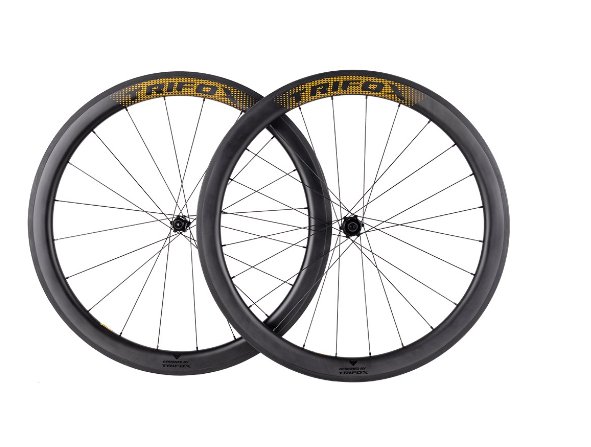
Selecting the best aero rim brake wheelset can drastically transform your cycling experience, providing unparalleled speed and efficiency. Whether you're training for a race, participating in group rides, or simply aiming to improve your personal bests, the right aero wheelset is a crucial component.
Understanding Aero Rim Brake Wheelsets
Aero rim brake wheelsets are designed with aerodynamics at the forefront, featuring rims with a profile shape that reduces air resistance. This design allows cyclists to maintain higher speeds with less effort, especially in straight-line riding conditions. While the benefits of aero wheels are most pronounced at speeds over 20mph, even moderate-speed riders can enjoy the advantages of reduced drag and improved performance.
Material Matters: Carbon vs. Aluminum
The material of the wheelset plays a significant role in its performance, weight, and durability. Carbon fiber is the preferred choice for aero wheelsets due to its strength-to-weight ratio and ability to be molded into aerodynamic shapes. Carbon wheels are typically lighter and stiffer, providing a noticeable performance upgrade, especially on climbs and during acceleration. However, they often come at a higher price point.
Aluminum wheelsets, while generally heavier and less aerodynamic than carbon, offer a more cost-effective solution with great durability. For those on a budget or riders who prioritize longevity over the ultimate in speed, aluminum aero wheels can still provide a noticeable efficiency boost.
Rim Depth: Finding the Sweet Spot
Rim depth is a key factor in the aerodynamics of a wheelset. Deeper rims reduce drag by smoothing airflow over the wheel, but they can also increase weight and susceptibility to crosswinds. A mid-depth rim of around 40-50mm strikes a good balance for most riders, offering significant aerodynamic benefits without undue handling challenges.
However, the optimal rim depth also depends on your typical riding conditions and personal preferences. Riders frequently encountering strong winds may opt for shallower rims for better control, while those focused on flat time trials or triathlons might benefit from even deeper rims.
Spoke Count and Pattern
The number and pattern of spokes on a wheel affect both aerodynamics and stiffness. Fewer spokes reduce drag but can compromise wheel stiffness and durability. Most aero wheelsets find a balance with spoke counts lower than traditional wheels, paired with patterns designed to maintain structural integrity.
Bladed spokes, which have a flattened profile, further reduce air resistance and are a common feature on high-quality aero wheelsets. Assess your weight and riding style to ensure the chosen spoke design can adequately support you without sacrificing performance.
Compatibility and Brake Type
When selecting an aero rim brake wheelset, ensure it is compatible with your bike’s braking system. Although disc brakes are gaining popularity, many riders still prefer the simplicity and weight advantages of rim brakes. Check that the wheelset’s brake track is suitable for your brake type (carbon-specific brake pads for carbon rims, for example) and that the hub is compatible with your drivetrain.
Hub Quality and Bearings
Hubs, the central part of the wheel where the spokes meet, play a crucial role in rolling efficiency. High-quality hubs with smooth, durable bearings can significantly reduce rolling resistance, contributing to a faster and more efficient ride. Look for reputable manufacturers and consider options like ceramic bearings for the ultimate in low-friction performance.
Conclusion
Choosing the right aero rim brake wheelset involves balancing factors such as material, rim depth, spoke configuration, compatibility, and hubs. By carefully considering these elements, you can select a wheelset that not only enhances your bike's aesthetics but significantly improves your speed and efficiency on the road. Remember, the best aero wheelset is one that aligns with your riding style, goals, and conditions, propelling you to new heights of cycling performance.
Finding a high-quality and affordable carbon wheelset for your road bike can transform your riding experience, offering a perfect blend of performance, durability, and style without breaking the bank. Carbon wheels are coveted for their stiffness, light weight, and aerodynamic advantages, but their high cost has often put them out of reach for many cyclists.
However, brands like Trifox are changing the game, offering carbon wheelsets that don’t compromise on quality for cost. This guide will walk you through how to find a carbon wheelset that elevates your road biking without emptying your wallet.
The Appeal of Carbon Wheelsets
Carbon wheelsets are the go-to choice for serious cyclists and professionals alike due to several key benefits:
Weight Reduction: Carbon is significantly lighter than aluminum, which can reduce the overall weight of the bike, making it easier to handle and quicker to accelerate.
Increased Stiffness: A stiffer wheel offers better power transfer from the rider to the road, improving efficiency and speed.
Aerodynamic Efficiency: Well-designed carbon wheels can reduce air resistance, allowing for faster speeds with less effort.
Improved Ride Quality: Carbon can be engineered to offer vibration damping, which smooths out road vibrations, improving comfort on long rides.
Finding High-Quality, Affordable Carbon Wheels
1. Research and Reviews
Start your search by researching various brands and models. Look for reviews from both professionals and everyday riders to get a sense of performance, durability, and after-sales service. Trifox's range of carbon road bike wheels, for instance, receives high marks for quality and value, making them a great starting point.
2. Understand the Specifications
Not all carbon wheels are created equal. Pay attention to the rim depth, as it affects aerodynamics and handling. Deeper rims (50mm and above) are more aerodynamic but can be harder to handle in windy conditions. Also, consider the rim width; wider rims can accommodate larger tires, which are becoming more popular for road bikes due to improved comfort and lower rolling resistance.
3. Hub Quality
The hub is the heart of the wheel, and its quality can greatly affect performance and longevity. Look for wheels with reputable hub brands or those with positive reviews regarding smoothness and durability. Trifox wheels, for example, come equipped with durable and efficient hubs that promise long-term performance.
4. Weight Limit
Check the manufacturer’s weight limit for the wheelset. Ensuring that the wheels can comfortably support your weight is crucial for safety and longevity.
5. Brake Compatibility
Make sure the wheelset is compatible with your bike’s brake system. With the growing popularity of disc brakes, many carbon wheels are now designed specifically for disc brake systems, though there are still high-quality options available for traditional rim brakes.
6. Warranty and After-Sales Service
A good warranty can give you peace of mind, especially when purchasing online. Look for brands that stand behind their products with a solid warranty and responsive customer service. Trifox, for example, offers excellent after-sales support, ensuring that any issues you might encounter are promptly addressed.
Installation and Maintenance Tips
Once you’ve selected your carbon wheelset, proper installation and regular maintenance are key to getting the most out of your investment:
Professional Installation: If you’re not experienced in installing wheels, consider having them installed by a professional. This ensures that everything is set up correctly and safely.
Regular Inspection: Regularly inspect your wheels for any signs of wear, such as cracks or de-lamination. Early detection of potential issues can prevent accidents and costly repairs.
Clean Regularly: Keep your wheels clean from dirt and grime, which can degrade carbon over time. Use a soft cloth and mild soap, avoiding harsh chemicals.
Conclusion
Upgrading to a carbon wheelset doesn’t have to be prohibitively expensive. With careful research and consideration of the factors outlined above, you can find a high-quality and affordable carbon wheelset that fits your road biking needs. Trifox offers an impressive range of carbon road bike wheels that strike an excellent balance between quality, performance, and price, making them a fantastic option for cyclists looking to make the switch to carbon.
Remember, the right wheelset not only improves your ride quality but can also boost your bike's aesthetics and overall value.
Selecting the perfect cyclocross wheelset with rim brakes for competitive racing is a critical decision that can dramatically influence your performance, comfort, and results on the course. Cyclocross challenges riders with a unique blend of varied terrain, tight corners, steep hills, and obstacles that demand both skillful riding and top-notch equipment.
In this context, your wheelset is not just part of your bike; it's part of your competitive edge. The Trifox WT17 Carbon Wheelset emerges as a standout choice for riders seeking to elevate their cyclocross racing experience. Here’s how to make an informed selection tailored to the demanding nature of cyclocross racing.
Understanding Wheelset Specifications
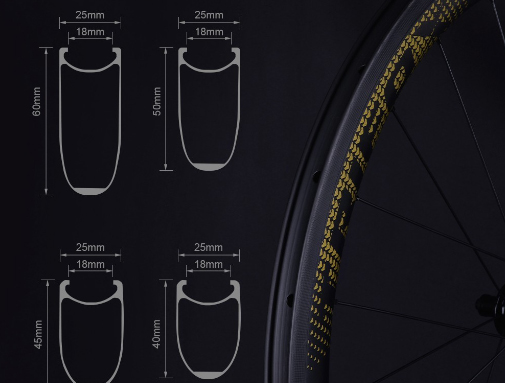
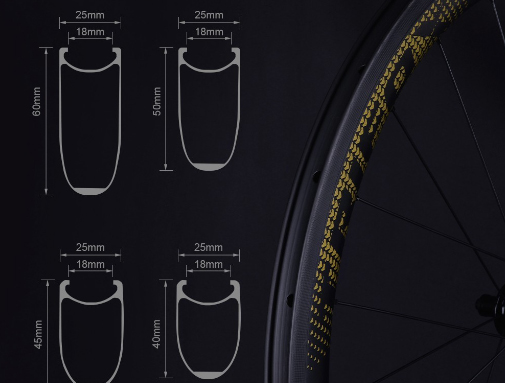
The Trifox WT17 Carbon Wheelset, built from 100% ultra-lightweight carbon fiber with a UD matte finish, presents an optimal blend of durability, aerodynamics, and lightweight performance. Its 25mm outer width and 18mm inner width are compatible with 700 x 25C clincher tires, offering versatility for various cyclocross conditions. When choosing a cyclocross wheelset, consider these essential specifications for competitive racing:
Material and Construction: Carbon fiber, due to its strength-to-weight ratio and vibration-damping properties, offers significant advantages over aluminum, especially in rough cyclocross courses where weight savings and comfort are crucial.
Width and Tire Compatibility: A wider rim can accommodate broader cyclocross tires, providing better traction and control on mixed surfaces. The compatibility of the Trifox WT17 with 700 x 25C tires ensures you can select tires that best match race conditions and personal preference.
Rim Depth: While the Trifox WT17 comes in 45mm, 50mm, and 60mm depth options, consider how rim depth affects performance. Deeper rims offer aerodynamic benefits on faster, more open courses, while shallower rims may perform better in windy conditions or on courses with frequent turns and accelerations.
Performance Features for Cyclocross
Rim Brake Compatibility: For cyclists sticking with the reliability and simplicity of rim brakes, the Trifox WT17’s compatibility ensures optimal braking performance, even in the gritty and wet conditions often encountered in cyclocross.
Spoke Configuration: The straight-pull Pillar spokes and nipple design—20 holes in the front wheel and 24 in the rear—balance weight savings with the resilience needed to tackle rough cyclocross terrains without sacrificing structural integrity.
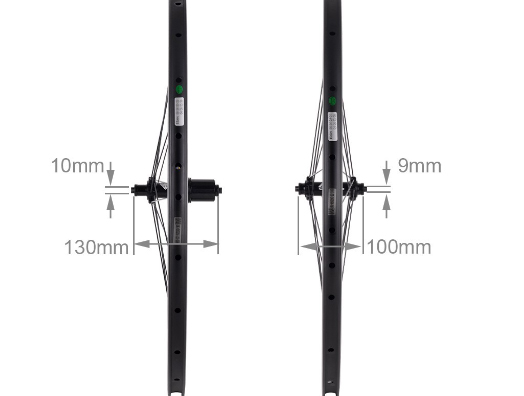
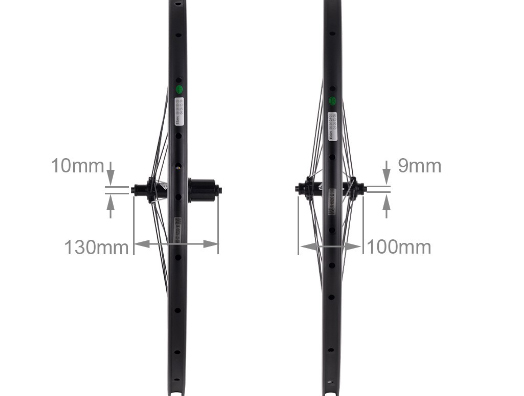
Hub Quality: The Trifox T17 aluminum alloy hubs, coupled with high-quality LLU contact hub bearings (two in the front hub and four in the rear), ensure smooth rolling and durability through muddy courses and power washings. The quick-release design facilitates easy wheel removal for cleaning and transportation.
Making the Selection
When choosing a cyclocross wheelset like the Trifox WT17, consider the following steps to guide your decision:
Evaluate Your Needs: Reflect on your specific requirements based on racing experience, course characteristics, and personal preferences.Research and Compare: Investigate various wheelsets, focusing on those designed specifically for cyclocross and rim brake systems. Compare their features, benefits, and limitations.
Consider the Conditions: Anticipate the typical conditions of your cyclocross races. A versatile wheelset that performs well across a range of conditions can be a valuable asset.
Budget and Value: Balance cost with the performance benefits. While higher-end wheelsets like the Trifox WT17 offer significant advantages, ensure they align with your budget and racing goals.
Conclusion
Choosing the right cyclocross wheelset, such as the Trifox WT17 Carbon Wheelset, involves careful consideration of various factors—from material and rim width to depth and brake compatibility.
By focusing on a wheelset tailored to the unique demands of cyclocross racing, you can secure a competitive advantage that supports your racing ambitions. With its blend of lightweight performance, durability, and versatility, the Trifox WT17 represents an excellent choice for racers committed to achieving their best on the cyclocross course.
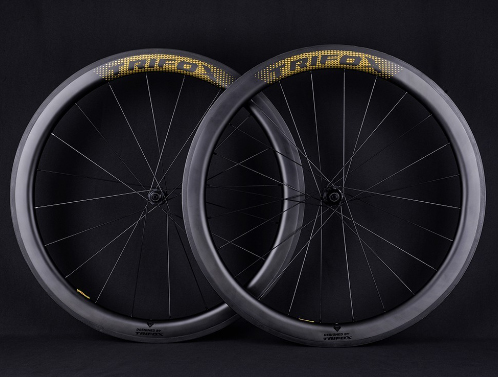
Choosing the best 700c tubeless rim brake wheelset for your road bike is a critical decision that can significantly impact your riding experience. Whether you're a competitive racer, an avid enthusiast, or someone who enjoys leisurely rides on the weekend, the right wheelset can enhance performance, comfort, and enjoyment. Tubeless technology, combined with the traditional reliability of rim brakes, offers a combination that many cyclists find irresistible.
Understanding the Basics
Before diving into the selection process, it's essential to understand what makes a 700c tubeless rim brake wheelset stand out:
700c Wheels: The term "700c" refers to the diameter of the wheels, which is standard for most road bikes. This size strikes a balance between speed, efficiency, and handling.
Tubeless Technology: Tubeless wheels allow you to ride without inner tubes. This setup reduces weight, allows lower tire pressures for improved comfort and traction, and decreases the risk of punctures.
Rim Brakes: Rim brakes provide stopping power through brake pads pressing against the rims of the wheels. They are lightweight, easy to maintain, and offer consistent performance in dry conditions.
Why Go Tubeless?
The benefits of going tubeless include reduced weight, improved ride quality, and fewer flat tires. Without a tube, you eliminate the risk of pinch flats and can run lower tire pressures, which increases traction and absorbs road vibrations. Plus, the sealant used in tubeless setups can quickly seal small punctures, keeping you rolling without interruption.
Selecting Your Wheelset
When choosing a 700c tubeless rim brake wheelset for your road bike, consider the following factors:
1. Rim Material
Aluminum: Offers a great balance of strength, weight, and affordability. Ideal for everyday riding and training.
Carbon Fiber: Lighter and stiffer than aluminum, carbon wheels can improve acceleration and climbing. They're preferred for racing and high-performance riding but come at a higher cost.
2. Rim Width and Depth
Width: A wider rim supports wider tires, which can offer better traction and comfort. Make sure the rim width is compatible with your frame and brake setup.
Depth: Deeper rims are more aerodynamic but can be affected by crosswinds. Shallow rims are lighter and offer more stability in windy conditions.
3. Tubeless Compatibility
Ensure the wheelset is explicitly designed for tubeless use. This means it should have a rim bed without spoke holes (or covered by a rim strip) and a specific bead lock design to securely hold the tire without an inner tube.
4. Brake Surface
For rim brake wheelsets, the quality of the brake surface is crucial. Look for wheels with durable, heat-resistant brake tracks to ensure reliable braking performance and longevity.
5. Hub Quality
Hubs play a significant role in the overall performance of the wheelset. High-quality hubs offer smoother rolling, better durability, and easier maintenance. Consider wheelsets with sealed bearing hubs for the best experience.
6. Weight
Lighter wheels accelerate faster and make climbing easier. However, the lightest option isn't always the best choice. Balance weight with other factors like durability and aerodynamic performance based on your specific riding needs.
7. Brand Reputation and Warranty
Choose a wheelset from a reputable brand known for quality and reliability. Additionally, consider the warranty and customer service support, as these can be invaluable if you encounter any issues.
Installing Your New Wheelset
Once you've selected your 700c tubeless rim brake wheelset, proper installation is key to enjoying the benefits. Here's a quick guide:
Prepare the Wheels: If not pre-installed, apply the tubeless rim tape snugly, covering all spoke holes. Install the tubeless valve stem.
Mount the Tires: Apply a thin layer of tubeless sealant on the inside of the tire before mounting it on the rim. Ensure the tire bead is seated correctly.
Inflate the Tires: Inflate the tires to pop the bead into place. You'll often hear a series of "pops" as the tire seats properly.
Adjust the Brakes: With the new wheels installed, you may need to adjust your rim brakes to accommodate the width and profile of the new rims.
Conclusion
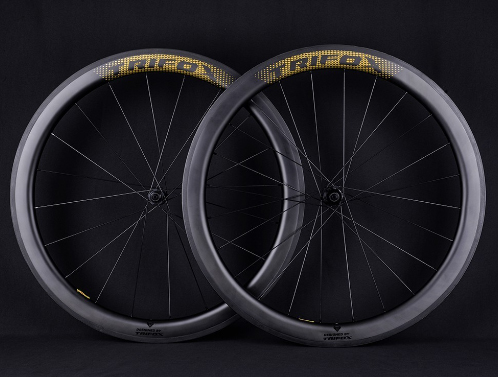
Choosing the best 700c tubeless rim brake wheelset for your road bike involves considering various factors, including material, rim dimensions, tubeless compatibility, and overall quality. By carefully selecting a wheelset that matches your riding style and needs, you can significantly enhance your cycling experience. Remember, the right wheelset not only improves performance but also boosts your enjoyment of the sport, making every ride more enjoyable and rewarding.
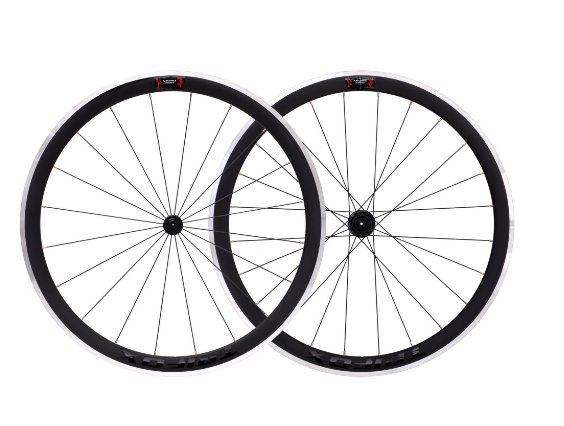
Upgrading your bike with a new wheelset is one of the most impactful changes you can make, significantly improving performance, weight, and aesthetics. This is especially true for bikes equipped with rim brakes, where the choice of wheels plays a crucial role in braking efficiency and overall riding experience.
Understanding Wheelset Upgrades
A wheelset upgrade involves replacing your bike's current front and rear wheels with a new set. This can lead to improvements in speed, handling, and comfort. For bikes with rim brakes, the new wheels must be compatible with this braking system, meaning they need to have a brake track suitable for the brake pads to clamp onto.
Why Upgrade?
Weight Reduction: Lighter wheels reduce the rotational mass, making it easier to accelerate and climb.
Increased Rigidity: A stiffer wheelset offers better power transfer from your pedaling effort to the road.
Improved Aerodynamics: Some wheelsets are designed to cut through the air more efficiently, which can help you ride faster with less effort.
Enhanced Durability: High-quality wheels can better withstand the rigors of road or trail riding, potentially offering longer life and better reliability.
Selecting Your New Wheelset
When choosing a new wheelset for a bike with rim brakes, consider the following factors:
Brake Compatibility: Ensure the wheels are designed for rim brakes. The braking surface must be smooth and durable to work effectively with your brake pads.
Rim Material: Common materials include aluminum, which offers a good balance of weight, cost, and performance, and carbon fiber, which is lighter and stiffer but usually more expensive.
Wheel Size: Match the wheel diameter to your current setup (common sizes include 700c for road bikes and 29" or 27.5" for mountain bikes) to ensure compatibility with your bike frame and tires.
Rim Width: Wider rims can accommodate wider tires, which may offer better traction and comfort. Make sure the width is compatible with your bike frame and brake setup.
Hub Compatibility: Check that the wheel hubs are compatible with your bike's axle dimensions and, if applicable, your drivetrain's cassette.
Installing Your New Wheelset
Once you've selected your new wheelset, installation is the next step. While professional installation is recommended if you're unsure, many cyclists find this to be a manageable DIY project.
Remove Old Wheels: Open the rim brake calipers to release tension (this might involve lifting a small lever or unscrewing a bolt, depending on your brake model). Then, release the quick-release lever or unscrew the thru-axle to remove the wheels.
Transfer Components: If your new wheelset doesn't come with a cassette (for the rear wheel) or rotors (if using disc brakes), you'll need to transfer these from your old wheels. You'll also need to move your tires over unless you're upgrading those as well.
Install New Wheels: Insert the new wheels into the frame, ensuring they're seated correctly in the dropouts. Tighten the quick-release lever or thru-axle securely.
Adjust Brakes: With the new wheels in place, you may need to adjust your rim brakes to ensure they properly contact the new wheels' braking surface. This typically involves adjusting the brake pads' height and alignment, as well as the tension in the brake cables.
Final Checks and Adjustments
Before taking your upgraded bike for a spin, perform a few final checks:
Spin each wheel to ensure it rotates smoothly and doesn't rub against the brake pads.
Check the brake function by squeezing the levers; the brakes should engage firmly and evenly.
Make sure all bolts, including those on the brake calipers and the wheels' quick-release levers or thru-axles, are tightened to the manufacturer's specifications.
Conclusion
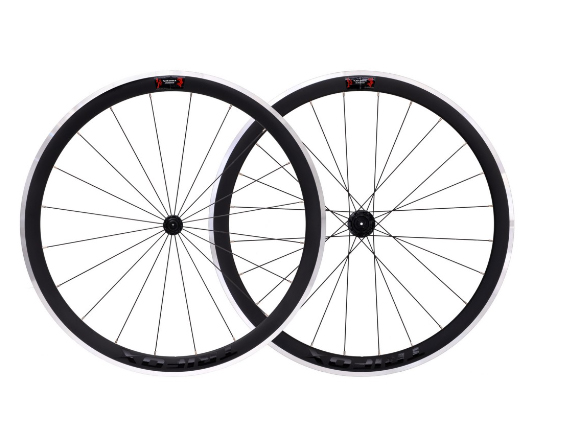
Upgrading your bike with a new wheelset designed for rim brakes can transform your riding experience, offering benefits in weight, performance, and aesthetics. By carefully selecting a wheelset that meets your needs and ensuring proper installation, you can enjoy the enhanced performance and renewed pleasure in your rides. Remember, while the process can be straightforward, don't hesitate to seek professional assistance if you're unsure about any steps. Happy riding!
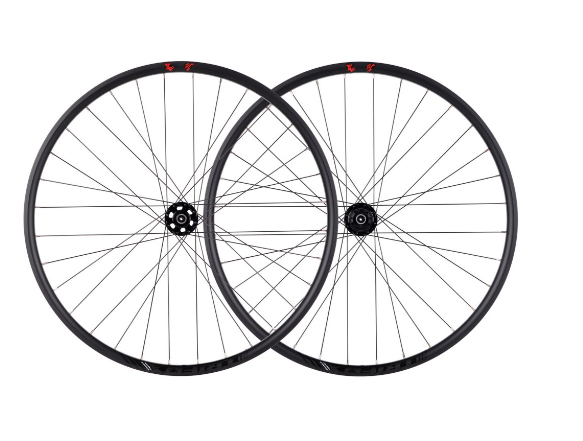
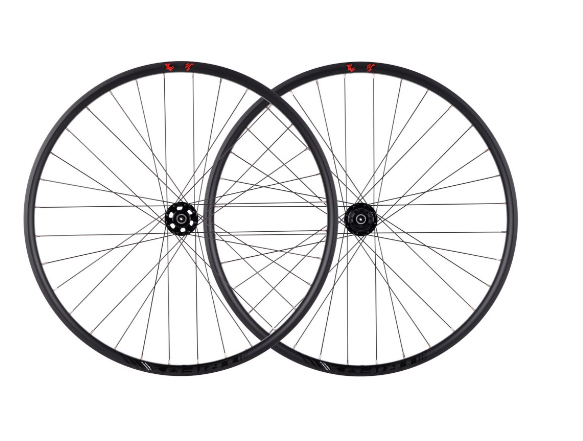
Lacing your own bike wheels is a rewarding project that can enhance the durability and performance of your ride. One popular method for lacing wheels is the "2 Cross" (2X) pattern. This technique involves crossing each spoke over two others on its way from the hub to the rim, striking a balance between strength and flexibility.
Understanding the Components
Before we dive into the lacing process, it's important to familiarize yourself with the components involved:
- Hub: The central part of the wheel that rotates around the axle.
- Rim: The outer circular part of the wheel.
- Spokes: The rods connecting the hub to the rim.
- Nipples: The threaded receivers attached to the rim that hold the spokes in place.
Preparing Your Workspace
Ensure you have a clean, well-lit workspace with enough room to comfortably work on your wheel. Organize your spokes and nipples so they're easily accessible.
Step 1: Inserting the First Set of Spokes
Begin by inserting a spoke into every other hole in the hub, making sure they're all facing the same direction. Next, thread these spokes through holes in the rim. The first spoke should be attached to a hole just to the right of the valve hole for ease of access and symmetry. As you insert the spokes, attach the nipples loosely to hold them in place but do not tighten them yet.
Step 2: Adding the Second Set of Spokes
Now, flip the wheel over to work on the opposite side of the hub. Insert the next set of spokes into every other hole on the hub, ensuring they alternate with the first set you installed. These spokes will also go into every other hole on the rim, but you'll need to start one hole over from your original starting point to ensure the proper alignment for the 2 Cross pattern.
Step 3: Lacing the Cross Pattern
This step is where the 2 Cross pattern comes to life. Take a spoke from the side of the hub you're currently working on and cross it over two spokes already attached to the rim, then insert it into the next available hole in the rim. It's crucial to maintain consistency in the crossing pattern to ensure the wheel's strength and balance.
Step 4: Completing the Wheel
Continue the process until all spokes are inserted. Remember, each spoke should cross over two others before being secured to the rim. Once all spokes are in place and loosely secured with nipples, you can begin the process of tightening and truing the wheel.
Tightening and Truing
Tightening and truing the wheel are critical steps in ensuring your wheel is durable, strong, and rides smoothly. Begin by gradually tightening each nipple evenly around the wheel. Use a truing stand if available, or you can true the wheel by eye, adjusting for any lateral (side-to-side) or radial (up-and-down) movement. The goal is to eliminate wobbles while ensuring the wheel remains centered.
Tips for Success
- Be Patient: Wheel lacing is a meticulous process that shouldn't be rushed. Take your time to ensure each spoke is correctly placed and tensioned.
- Check Your Work: Regularly check your progress to ensure the spokes are correctly crossing and the wheel is taking shape as expected.
- Even Tension: Maintaining even tension across all spokes is crucial for the wheel's durability and performance. Uneven tension can lead to wheel instability and premature failure.
Final Thoughts
Lacing your wheels using the 2 Cross method is a great way to customize your bike and improve its durability. While the process may seem daunting at first, with patience and practice, you'll be able to lace your wheels like a pro. Remember, the key to a successful wheel build is precision and attention to detail.
By following this guide, you'll not only gain a deeper understanding of how your bike works but also enjoy the satisfaction of riding on wheels you've built yourself. Whether you're a seasoned cyclist looking to upgrade your ride or a hobbyist looking to expand your skills, wheel lacing is a valuable skill to have in your cycling repertoire.
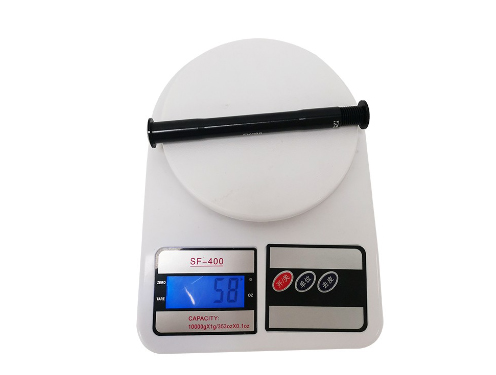
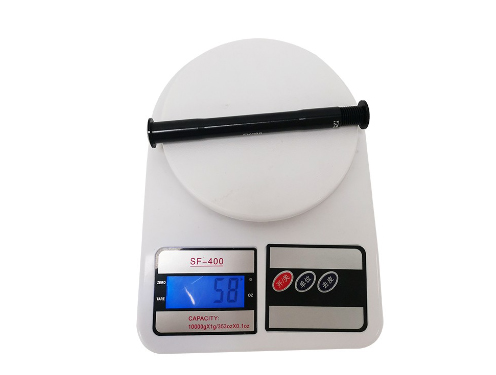
In the world of cycling, the smallest components often make the most significant difference in performance and safety. One such component is the thru-axle skewer, a critical piece of hardware that secures your wheels to your bike, ensuring stability, improving performance, and enhancing rider safety.
Understanding Thru-Axle Skewers
Thru-axle skewers are an evolution from the traditional quick-release system, offering a more robust and reliable method for securing bike wheels. Unlike quick releases, which clamp onto the bike frame using a cam mechanism, thru-axles thread directly into the bike frame or fork. This design significantly improves wheel stiffness and bike handling, especially in demanding conditions like mountain biking or road racing.
Benefits of Upgrading to a Thru-Axle Skewer
Enhanced Stability and Control: The rigidity provided by a thru-axle skewer reduces flex in the wheel, allowing for more precise control over rough terrain or during high-speed descents.
Improved Safety: Thru-axles offer a more secure connection between the wheel and the bike frame, reducing the risk of the wheel becoming dislodged during a ride.
Better Performance: The added stiffness helps to transfer power more efficiently from the rider to the wheels, improving acceleration and climbing performance.
Compatibility with Modern Disc Brakes: Thru-axles ensure that wheels are precisely aligned, which is crucial for the optimal performance of disc brake systems.
Choosing the Right Thru-Axle Skewer
When shopping for a thru-axle skewer, consider the following factors:
Compatibility: Ensure that the skewer is compatible with your bike's frame and fork dimensions. The Trifox Alloy Front Thru Axle Skewer, for example, is designed for boost forks, a common specification for modern mountain bikes.
Material: Look for lightweight yet durable materials. The Trifox skewer is made from high-quality alloy, offering an excellent balance of strength and weight reduction.
Ease of Use: Choose a skewer that can be easily installed and removed without requiring excessive force or tools. This is particularly important for cyclists who travel with their bikes or those who might need to remove wheels frequently for maintenance.
Installing Your Thru-Axle Skewer
Step 1: If replacing an existing skewer, first remove the old axle by unscrewing it from the frame or fork.
Step 2: Insert the new thru-axle skewer through the hub of the wheel. Align the wheel within the dropouts of the fork or frame.
Step 3: Thread the skewer into the receiving end of the dropout. Ensure it is threaded straight to avoid cross-threading.
Step 4: Tighten the skewer according to the manufacturer's recommended torque settings. For the Trifox Alloy Front Thru Axle, a snug fit that allows the lever to close firmly without excessive force is ideal.
Step 5: Perform a safety check by ensuring the wheel is securely attached and does not wobble or shift within the dropouts.
Upgrading to a high-quality thru-axle skewer, like the Trifox Alloy Front Thru Axle Skewer for Boost Fork, is a straightforward yet effective way to enhance your bike's performance and safety. By choosing the right skewer for your bike and ensuring it's properly installed, you can enjoy increased stability, improved control, and a better overall riding experience. Whether you're a competitive racer or a weekend warrior, investing in the right components can make all the difference in your cycling adventures.
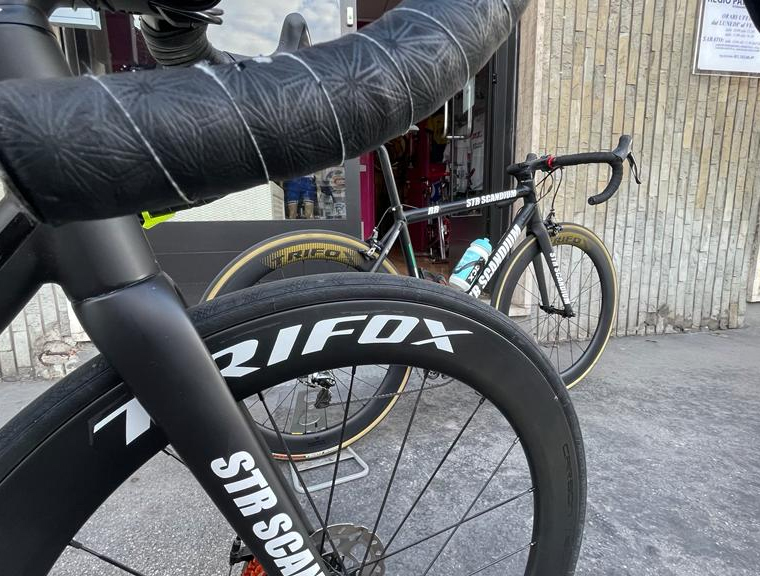
When it comes to optimizing your cycling experience, selecting the right bike wheels is paramount. Not only do they significantly influence your bike's overall performance and handling, but they also play a crucial role in ride comfort and speed. Among the multitude of options available in the market, carbon fiber wheels stand out for their exceptional balance of strength, lightweight, and aerodynamics, making them a preferred choice for both competitive cyclists and recreational riders alike.
Why Choose Carbon Fiber Wheels?
Carbon fiber wheels offer a unique set of benefits that distinguish them from their alloy counterparts. Firstly, their lightweight nature allows for quicker acceleration and easier climbing, which can be a game-changer on hilly terrains or when racing against the clock. Moreover, the stiffness of carbon fiber ensures efficient power transfer, allowing you to get the most out of every pedal stroke. Additionally, the material's ability to absorb road vibrations improves ride comfort, providing a smoother experience over rough surfaces.
The Varieties of Carbon Road Bike Wheels
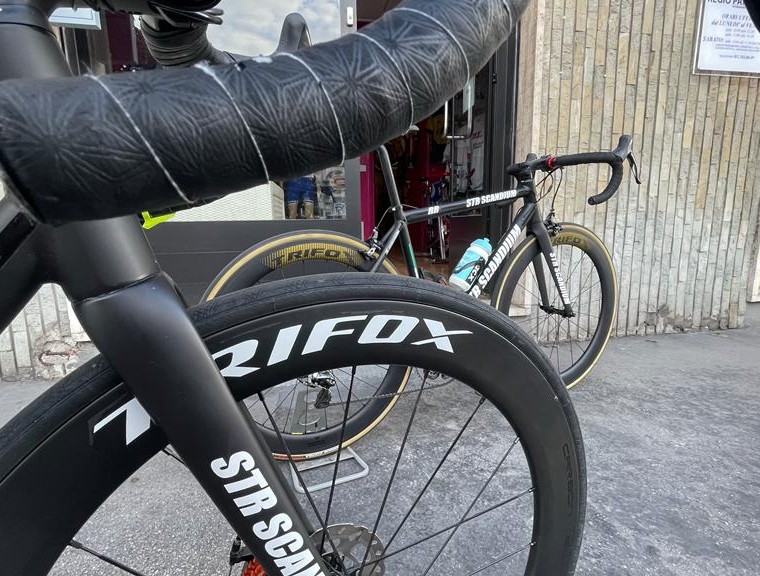
Among the plethora of carbon wheel options, models like WT11, WT17, and WT18 have garnered attention for their superior design and performance characteristics. These wheels are crafted to meet the demands of diverse riding conditions, from flat, speedy stretches to winding mountain roads.
- WT11: Ideal for riders seeking an all-around performance boost, these wheels offer a balanced profile that excels in various conditions, from racing to long-distance rides.- WT17: With a focus on aerodynamics, the WT17 model is perfect for cyclists aiming to reduce drag and improve speed on flat terrains and time trials.- WT18: Designed for climbers, the WT18 wheels feature a lightweight construction that makes ascents more manageable and responsive.
Features to Consider
When selecting the best carbon wheels for your ride, consider the following features to ensure they align with your cycling goals and preferences:
- Rim Depth: A deeper rim cuts through the air more efficiently, offering aerodynamic advantages on flat roads. Conversely, shallower rims are lighter and more versatile, better suited for climbing and variable conditions.- Brake Compatibility: Ensure the wheels are compatible with your bike's braking system—whether traditional rim brakes or modern disc brakes.-Wheelset Weight: Lighter wheels accelerate faster and make climbing easier. However, weight should be balanced with other factors like durability and stiffness.- Durability and Maintenance: High-quality carbon wheels are built to last, but it's essential to consider the ease of maintenance and availability of replacement parts like spokes and hubs.
Enhancing Your Ride with the Right Choice
Upgrading to carbon fiber wheels can transform your cycling experience, offering improvements in speed, efficiency, and comfort. Whether you're a competitive racer looking to shave seconds off your time or a weekend warrior seeking a more enjoyable ride, there's a carbon wheelset tailored to your needs.
Moreover, reputable suppliers often provide additional benefits such as free shipping for orders over a certain value, secure payment methods, and customer support services, making the purchasing process as smooth as possible. It's also worth noting that for customers in specific regions, customs duties might be included, removing potential hassles and additional costs.
Conclusion
In conclusion, investing in the right set of wheels is crucial for any cyclist looking to enhance their ride. Carbon fiber wheels, with their blend of lightweight, strength, and aerodynamic properties, offer a significant upgrade over traditional materials. By considering factors such as rim depth, brake compatibility, and wheelset weight, cyclists can find the perfect wheels to match their riding style and objectives. With the right wheels, your bike will not only perform better but also bring you more enjoyment and satisfaction on every ride.


