Mountain biking is a thrilling adventure sport that demands high-performance bikes to take on challenging terrain. When it comes to choosing the right mountain bike, there are many factors to consider, such as the frame, suspension, speed, and braking system. Currently, the trend is shifting towards disc brake bikes due to their superior stopping power and durability.
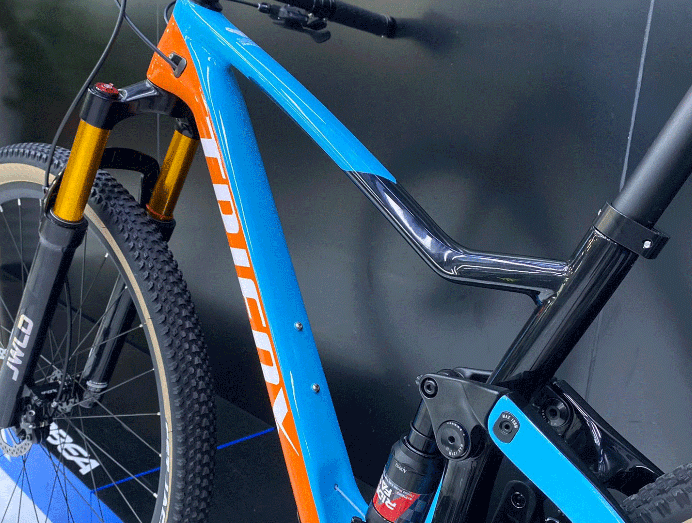
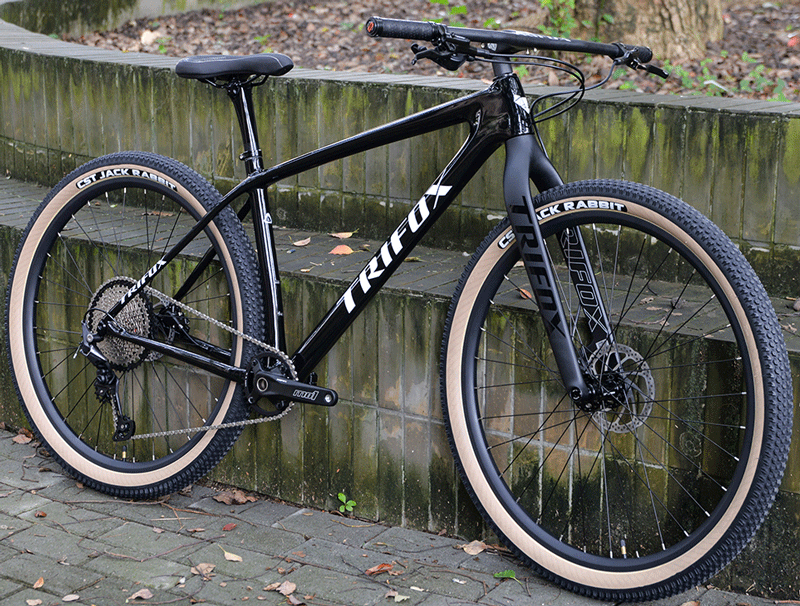
One of the best options in the market is Trifox Carbon Fiber Mountain PIONEER Bicycle, equipped with the latest technology, including high-quality disc brakes. Let's see why the Trifox Carbon Fiber Mountain PIONEER Bicycle is the best choice for disc brake mountain bikes.
1. Superior Stopping Power:
One of the major advantages of disc brakes is their superior stopping power compared to rim brakes. Disc brakes use calipers to grip a rotor instead of pressing against a rim, which increases the mechanical advantage and stopping power. Trifox Carbon Fiber Mountain PIONEER Bicycle has hydraulic disc brakes from Shimano, a leading brand in the biking industry. These brakes are easy to operate and offer responsive stopping power in all weather conditions.
2. Easy to Control:
Disc brakes offer better control and modulation than rim brakes. The rider can apply brakes with greater precision and finesse, enabling them to maintain speed and stability on challenging terrain. In contrast, rim brakes can overheat, warp, or fail in wet conditions. Trifox Carbon Fiber Mountain PIONEER Bicycle's Shimano hydraulic disc brakes provide excellent control, allowing riders to navigate steep descents confidently.
3. Low Maintenance:
Disc brakes are low maintenance compared to rim brakes. Rim brakes require frequent adjustment, replacement, and servicing due to wear and tear caused by road debris and weather conditions. Disc brakes, on the other hand, are self-adjusting and require minimal maintenance. They also offer consistent braking performance over a broader range of temperatures and terrain. Trifox Carbon Fiber Mountain PIONEER Bicycle's Shimano hydraulic disc brakes are durable and require little maintenance.
4. Durability:
Disc brakes offer exceptional durability compared to rim brakes. Rim brakes can wear down the sidewalls of the rim, leading to rim failure, especially on long descents. Disc brakes, on the other hand, don't wear out the rims, reducing the risk of rim failure. Trifox Carbon Fiber Mountain PIONEER Bicycle's Shimano hydraulic disc brakes are built to last, ensuring that riders can enjoy smooth and responsive stopping power for years to come.
5. Optimal Performance:
Disc brakes offer optimal performance on challenging terrain due to their superior stopping power and control. Trifox Carbon Fiber Mountain PIONEER Bicycle is built with a full suspension carbon frame that provides exceptional shock absorption, allowing riders to maintain speed and stability on the most challenging terrains. Along with the Shimano hydraulic disc brakes, the bike's SHIMANO M6100 12speeds and strong shock absorption make the Trifox Carbon Fiber Mountain PIONEER Bicycle the best choice for disc brake mountain bikes in the market.
Conclusion:
The Trifox Carbon Fiber Mountain PIONEER Bicycle is an exceptional mountain bike that offers superior performance and durability, especially in challenging terrains. Equipped with Shimano hydraulic disc brakes, the bike provides exceptional stopping power, control, and low maintenance. Along with the full suspension carbon frame, Shimano 12speeds, and strong shock absorption, the bike offers optimal performance for mountain bikers of all skill levels.
When it comes to choosing the best disc brake mountain bike, the Trifox Carbon Fiber Mountain PIONEER Bicycle is the perfect choice for those seeking adventure and high-performance biking.

Mountain biking is an exciting sport that offers a unique blend of adrenaline rush and adventure. With the right equipment, it can be an excellent way to explore the outdoors, challenge yourself, and improve your fitness. And one of the essential components of your mountain bike is the handlebar. The handlebar is responsible for your control, stability, and comfort while you ride. If you're wondering which handlebars are best for mountain biking, then look no further than the Trifox carbon mountain bike handlebar.

1. Carbon Fiber Construction:
Trifox uses high-quality carbon fiber to construct these handlebars, making them incredibly strong and durable while remaining light. This construction ensures excellent shock absorption, allowing you to ride comfortably on even the toughest trails. Plus, the handlebars' carbon fiber material makes them resistant to corrosion and weathering, making them ideal for outdoor use.
2. Wide and Ergonomic Design:
The Trifox carbon mountain bike handlebars have a wide and ergonomic design that provides ample space for your hands to grip comfortably. The handlebars measure 780mm in width, making them suitable for riders of all sizes. This design feature also ensures that you can maintain the right posture while riding, reducing the strain on your wrists and arms.
3. Easy Adjustment:
The handlebars come with markings that make it easy to adjust them to your preferred angles. This feature ensures that you can set the handlebars to your specific riding style and comfort. The adjustable angle option also makes it easier for you to control the bike while riding, making the experience more enjoyable.
4. Lightweight and Aesthetically Pleasing:
Notably, these handlebars have a sleek and modern look, perfect for any mountain bike. They are lightweight, weighing only 170g, which minimizes the bike's overall weight, helping you ride more smoothly. Additionally, the handlebars have a glossy finish that gives them an aesthetically pleasing look that complements your bike.
5. High-Quality and Affordable:
Lastly, the Trifox carbon mountain bike handlebars are an excellent option because they are affordable without sacrificing quality. The handlebars offer high performance while being cost-effective. Therefore, with these handlebars, you can get the best of both worlds - affordability and quality.
Your handlebars play a significant role in your overall mountain biking experience. And, as we've seen above, Trifox carbon mountain bike handlebars have everything you need to make your next adventure an unforgettable experience. The carbon fiber construction, ergonomic design, easy adjustment, lightweight property, and affordability make them some of the best handlebars rightly deserving to be on your bike. They are perfect for anyone looking for maximum control, comfort, and durability on the trails.
So what are you waiting for? Get yourself a pair of Trifox carbon mountain bike handlebars and ride off into the mountains with confidence.

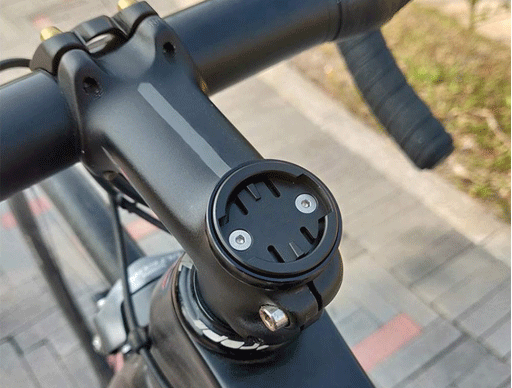
Riding a bike is not only a great exercise but also a fun recreational activity. For serious cyclists, a bike computer is essential to monitor progress, track performance, and track routes. However, having the bike computer in your pocket or handlebar bag when riding is inconvenient, uncomfortable, and increases the risk of dropping and damaging the device. That is why many cyclists opt for a bike computer mount.
In this blog post, we will discuss the advantages and disadvantages of using a bike computer mount to help you decide whether it is worth investing in one.
Advantages of using a bike computer mount
1. Improved visibility and comfort: One of the most significant benefits of using a bike computer mount is that it improves visibility and comfort while riding. A bike computer mount allows you to glance down at the device easily, without having to take your hands off the handlebars or look away from the road. This not only helps you stay more focused on the road, but it also reduces the risk of accidents.
2. Accurate data tracking: Another advantage of using a bike computer mount is that it provides accurate data tracking. Without a mount, the device may move around in your pocket or bag, resulting in inaccurate tracking. A bike computer mount, on the other hand, fixes the device in place and ensures consistent and accurate data.
3. Track performance and measure progress: A bike computer mount can help you track your performance and measure progress. With features like GPS, heart rate monitoring, and cadence tracking, you can monitor your stats and make adjustments to improve your performance and reach your fitness goals.
Disadvantages of using a bike computer mount
1. More expensive: The primary disadvantage of using a bike computer mount is that it is more expensive than other mounting options, such as a handlebar bag or pocket clip. Depending on the brand and model, a bike computer mount can cost anywhere from $10 to $50 or more.
2. Possible damage to the bike: Another disadvantage of using a bike computer mount is that it can cause damage to the bike if not installed correctly. If the mount is too tight or too loose, it can damage the handlebars, stem, or bolt threads. Additionally, the weight of the device can cause stress on the mount, causing it to wear out quickly.
3. Hindrance while riding: Lastly, a bike computer mount can be a hindrance while riding if it is not positioned correctly. If the device is too close to your hands or too far away, it can cause discomfort or make it difficult to see the road ahead. It is essential to position the mount accurately for optimal visibility and comfort.
In conclusion, using a bike computer mount has several benefits, including improved visibility and comfort, accurate data tracking, and the ability to track performance and measure progress. However, there are also a few disadvantages to consider, such as the more expensive cost, possible damage to the bike, and hindrance while riding.
Ultimately, whether or not a bike computer mount is worth the investment depends on your personal preferences and needs. If you are a serious cyclist and want to optimize your performance, a bike computer mount may be a wise investment. However, if you ride casually and prefer a more affordable or low-maintenance option, there are other mounting options to consider. Whatever your choice, always remember to enjoy the ride and stay safe!
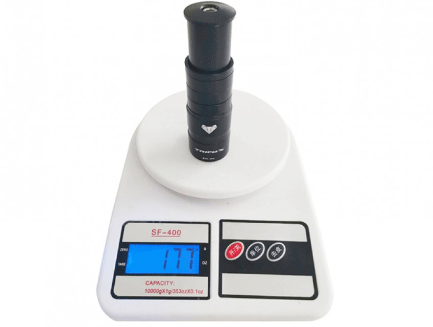
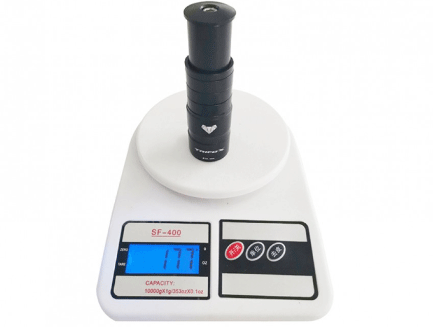
Bicycling has been a popular sport and means of transportation for centuries. However, with different types of bicycles and riding styles, you need to ensure that your ride is comfortable, stable, and efficient. One way to achieve this is by getting a stem extender, an accessory designed to raise your handlebars. You may be hesitant to invest in one, but with the benefits it offers, it's worth considering.
1. Improves Comfort and Ergonomics
If you've ever experienced neck, shoulder, or back pain during or after a ride, then you understand the importance of proper positioning on a bike. With a stem extender, you can raise the handlebars to a suitable height, ensuring that you don't experience discomfort. Additionally, a higher handlebar position will help you maintain a more upright posture, preventing you from experiencing numbness in the hands and fingers.
2. Enhances Control and Stability
When you ride your bike in a relaxed position, you can maneuver your bike with ease, allowing you to take on different terrains. With a stem extender, you can achieve a relaxed and comfortable posture, enabling you to ride with control and stability. You'll be able to ride longer distances without experiencing strain on your back, neck, or shoulders.
3. Versatility and Customization
A stem extender gives you versatility when it comes to adjusting the height of the handlebars. You can adjust it to suit your riding style, preferences, and body type, ensuring that you ride in a comfortable and controlled position. Additionally, with a stem extender, you can play around with different handlebar styles, such as drop bars or bullhorns, which can enhance your grip and control on the bike.
4. Cost-effective Solution
Getting a bike customized to your needs or purchasing a new bike with customized features can be expensive. However, with a stem extender, you can achieve the same customization on your current bike, saving you money in the long run. A stem extender is easy to install and does not require any modifications to your current bike, making it an affordable solution to optimize your riding experience.
5. Suitable for Different Bikes and Riding Styles
Stem extenders come in different sizes and styles, making them suitable for different types of bikes, such as road bikes, hybrid bikes, mountain bikes, and BMX bikes. Whether you're a commuter, a leisure rider, or a professional cyclist, a stem extender can enhance your comfort, control, and performance on the bike.
Conclusion:
Investing in a stem extender is a cost-effective and versatile way to enhance your bicycle's performance and your riding experience. With the improved comfort, control, and ergonomics that come with a stem extender, you can ride longer and enjoy your ride more. So why not consider getting one for your bicycle today?
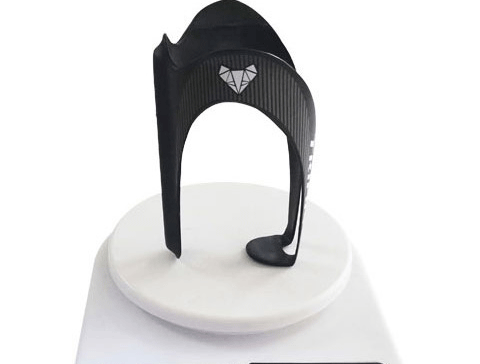
Roaming around on your bicycle during summer can be a refreshing and fulfilling activity. But, with the summer heat, it becomes essential to stay hydrated and have enough water while cycling. Fortunately, technology has brought a solution to this problem in the form of bicycle bottle cages.These cages are an essential accessory, and in this blog post, we will explore what makes them so important.
1. Convenience and Accessibility:
One of the primary reasons to invest in bicycle bottle cages is convenience. It allows you to carry the water bottle with you rather than trying to hold it in your hand or shoving it in your pocket. It’s important to stay hydrated during a long ride, and bike bottle cages make it easy to carry a reliable source of hydration. It also enables you to drink water at any point during your ride. This convenience is why bottle cages have become one of the essential bicycle accessories.
2. Better Control and Safety:
With bottle cages, you can keep your hands on the handlebars, providing better control and balance on the bike. Being free of having to carry or hold the water bottle, you can focus more on safe cycling practices to reduce the risk of accidents. You can also eliminate the risk of losing a bottle or accidentally dropping it on the road, which can be a safety hazard.
3. Versatlity and Durability:
Bottle cages are mainly made of steel, plastic, or carbon fiber, which makes them durable even in the most extreme weather conditions. These cages can hold not only water bottles but any other drink bottles or food items as well. The versatility of bottle cages makes them suitable for any cyclist, whether you are a professional or a beginner.
4. Fits on Most bicycles:
Bottle cages come in a range of sizes, shapes, and designs, and fit on most bikes, from the road bikes to mountain bikes. Multiple cages can also be fit on one bike to carry multiple bottles. They provide a variety of mounting options so one can install them on the frame, handlebars or even the saddle. Bottle cages are easy to install and affordable, making it an easy to acquire accessory for every cyclist.
5. Style and Look:
Bottles cages are not just a functional accessory; they also add to the bike's styling and aesthetics. They come in a range of colors and designs, which allows you to personalize and customize your bike. You can choose the color that blends with your bike's framework or even match it to your cycling apparel.
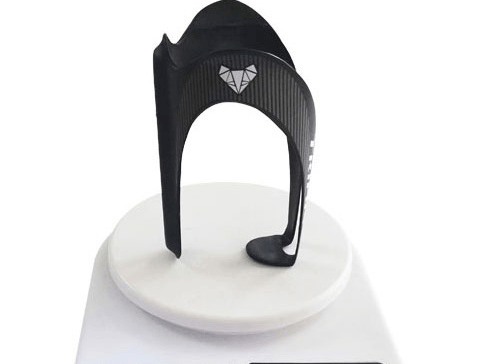
In conclusion, bicycle bottle cages make for an essential accessory for every cyclist. Their primary function of providing easy access to hydration ensures they play a crucial role in the cyclist's overall performance. With better control, safety, durability, versatility, and style, bottle cages provide an all-round solution to a cyclist's comfort and performance.
Their easy installation and affordability make them a must-have bike accessory. Whether you are a beginner or an experienced cyclist, investing in a bicycle bottle cage is an excellent decision. Stay hydrated while enjoying the refreshing ride on your bicycle.
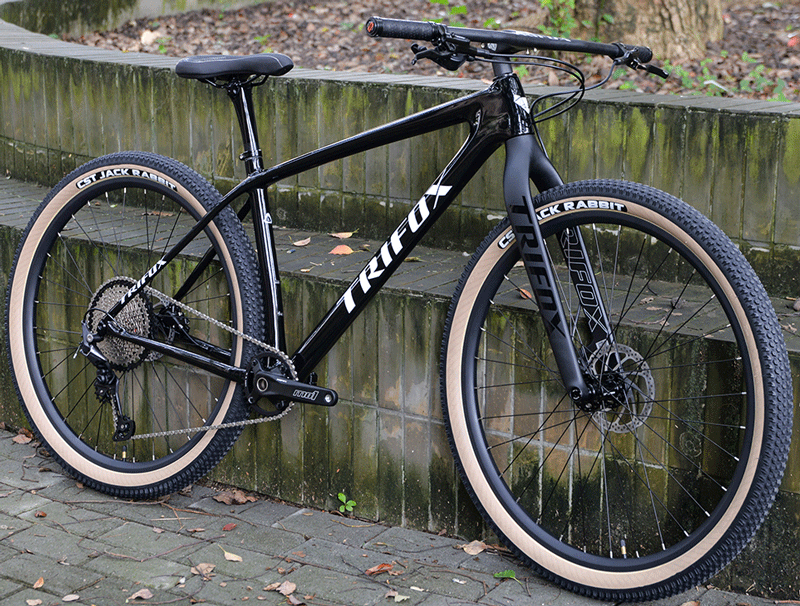
Mountain biking is an exhilarating and challenging outdoor activity that requires the right equipment to tackle the unpredictable terrain. A 29er mountain bike fork is a critical component that provides stability, control, and comfort to riders. It is designed to absorb shocks, vibrations, and impacts, and ensure smooth and safe riding. With plenty of options available in the market, choosing the right fork can be overwhelming.
1. QMK100 Carbon Fork
The QMK100 Carbon Fork is a popular choice among mountain bikers who want a lightweight and durable option with a tapered 1-1/8 to 1-1/2 inches head tube. It has an import carbon construction that makes it sturdy and reliable for challenging surfaces. The fork is also suitable for tires that measure up to 29er * 2.1 inches, so you can tackle different trail types.
2. QMK200 Carbon Fork
The QMK200 Carbon Fork is an excellent option for mountain biking frames that feature a straight head tube. It is engineered to match most mountain bike frames, guaranteeing compatibility and performance. The fork is also designed to fit tires up to 29er * 2.1 inches, so you can enjoy smooth and comfortable rides on different terrains.
3. TMK100 Carbon Fork Disc Brake
The TMK100 Carbon Fork Disc Brake offers reliable stopping power, thanks to its quick-release dropout style. The fork is compatible with disc brakes, ensuring greater control and confidence when riding on different terrains. It has a vertical tube diameter of 28.6mm and weighs 600g, making it a lightweight and practical option for mountain biking enthusiasts.
4. TMK200 Carbon Boost Fork
The TMK200 Carbon Boost Fork is an excellent choice for riders who want a versatile and modern option. It is designed to fit tires up to 29er * 3.0 inches, making it great for handling more challenging surfaces. The fork is compatible with disc brakes that use 160/180mm rotors, guaranteeing reliable stopping power. It also has a fork rake/offset of 45mm for enhanced handling and control.
Conclusion:
Choosing the right 29er mountain bike fork is key to enjoying a seamless ride on different surfaces. As highlighted, the QMK100, QMK200, TMK100, and TMK200 Carbon Forks are top options that combine design, compatibility, and performance.
Ultimately, consider your riding style, budget, and personal preferences when selecting the best 29er mountain bike fork for your adventures. With the right fork, you'll have greater control, stability, and confidence when tackling the trails.
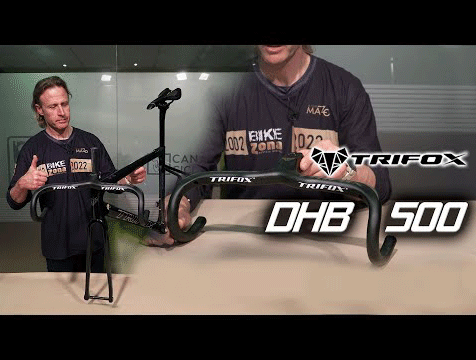
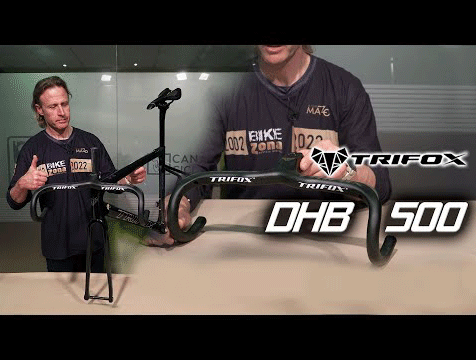
Have you ever thought of enhancing your cycling experience? Well, if your answer is yes, then you may need to take a look at the advantages of upgrading your bike handlebars. The Trifox Drop Butterfly Handlebar, DHB500, is a perfect solution to revolutionize your cycling experience.
In this blog post, we will discuss the features of the Trifox Drop Butterfly Handlebar, how it can improve your ride, and why it is an excellent investment for all cyclists out there.
1. Improved Comfort and Stability:
The Drop bar DHB500 has a unique design that allows riders to rest their hands in different positions as they ride. This handlebar provides the flexibility that riders need to adjust their hand positions on the bike easily. The butterfly shape of the handlebar ensures an increase in comfort and stability during long rides, reducing the likelihood of getting hand fatigue. This design also helps reduce wrist pain, allowing you to cycle for longer distances.
2. Increased Aerodynamics:
The Trifox Drop bar DHB500 comes with an aerodynamic design that decreases wind resistance while riding. You do not need to have an aerodynamic bike to appreciate the benefits of a butterfly handlebar. This design makes a significant difference in how fast you can cycle compared to traditional handlebars. It also enhances your bike's performance, providing you with faster, smoother cycling experience, especially over long distances.
3. Light-Weight Construction:
The Trifox Drop bar DHB500 is light in weight, so you don't have to layer your bike's components with heavy parts. The construction is entirely made of lightweight carbon materials, which means it puts less stress on your bike's entire weight. This feature improves the bike's overall handling and ensures an easy installation during the upgrade process. The light-weight construction makes it easier to handle the bike, making it more enjoyable to ride, even on difficult terrains.
4. Aesthetic Appeal:
The Trifox Drop bar DHB500 adds a touch of style to any bike. It comes in various sizes and shapes, allowing you to choose one that suits your needs and preferences. The handlebars come in sleek modern designs and color schemes. It is an excellent investment for cyclists who not only want to better their riding experience but also enjoy a beautiful and unique design.
5. Durable and Long-Lasting:
Investing in a Trifox Drop bar DHB500 is a wise choice. The construction is made of carbon that is durable and long-lasting. Carbon materials are known for their durability, and the Trifox Drop Butterfly Handlebar is no exception. You do not have to worry about your handlebar losing its quality or shape over time. This investment can serve you for a long time, enhancing your riding experience throughout this duration.
Conclusion:
In conclusion, adding a Trifox Drop Butterfly Handlebar to your bike will revolutionize your cycling experience, making it more enjoyable, stable, and comfortable. The handlebar's design makes it aerodynamic, lightweight, long-lasting, and aesthetically appealing, making it an excellent investment. An upgrade to a Trifox Handlebar is the perfect way to enjoy a better cycling experience.

As a cycling enthusiast, you know how important it is to stay hydrated during your ride. However, carrying a water bottle can be inconvenient and even dangerous if it isn't securely attached to your bike. That's where the Trifox Carbon Bottle Cage comes in. It's a lightweight, sturdy, and versatile accessory that can help you keep your water bottle within easy reach and prevent it from bouncing around on rough terrain.
1. Lightweight and Durable Design
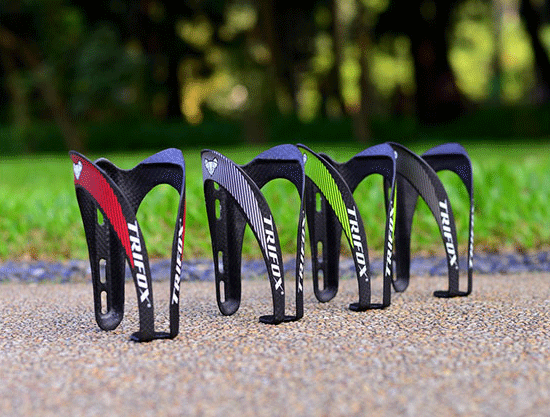
One of the most significant advantages of the Trifox Carbon Bottle Cage is that it's incredibly lightweight. The thick version CBC100 weighs only 28g ± 2g, while the AERO thin version CBC200 weighs only 20g± 2g. It's made of carbon fiber material, which makes it not only super lightweight but also highly durable. You won't have to worry about it breaking or deforming even when you're cycling through rough terrain.
2. Suitable for Various Bikes
The Trifox Carbon Bottle Cage is versatile in its design, making it suitable for a wide range of bicycles. Whether you have a mountain bike or a folding bike, the Trifox Carbon Bottle Cage will fit perfectly. Apart from this, it has a sturdy structure that can prevent damage or deformation during your ride. Plus, it's effortless to install, taking only a couple of minutes to mount to your bike.
3. Multiple Color Options
Apart from a sturdy design, the Trifox Carbon Bottle Cage also comes in multiple color options. The AERO thin version CBC200 comes in red, silver, yellow, and gray. This feature allows you to match your water bottle cage with your bike or add a pop of color to it.
4. Prevent Water Bottle Slippage
The Trifox Carbon Bottle Cage has excellent retention capability, ensuring your water bottle stays in place throughout your ride. There are multiple bottles that fit this cage, and the unique design ensures a tight and snug fit. This feature prevents your bottle from falling even when you're negotiating sharp turns or riding at breakneck speed.
Conclusion:
If you're looking for a perfect accessory for your bike that can make your ride more enjoyable, look no further than the Trifox Carbon Bottle Cage. Its lightweight, durable, versatile, and retention features make it a must-have item for all serious cyclists. You can choose from various color options and enjoy the added benefit of money-back guarantee. Don't wait any longer- invest in the Trifox Carbon Bottle Cage today and get ready for a ride like no other.
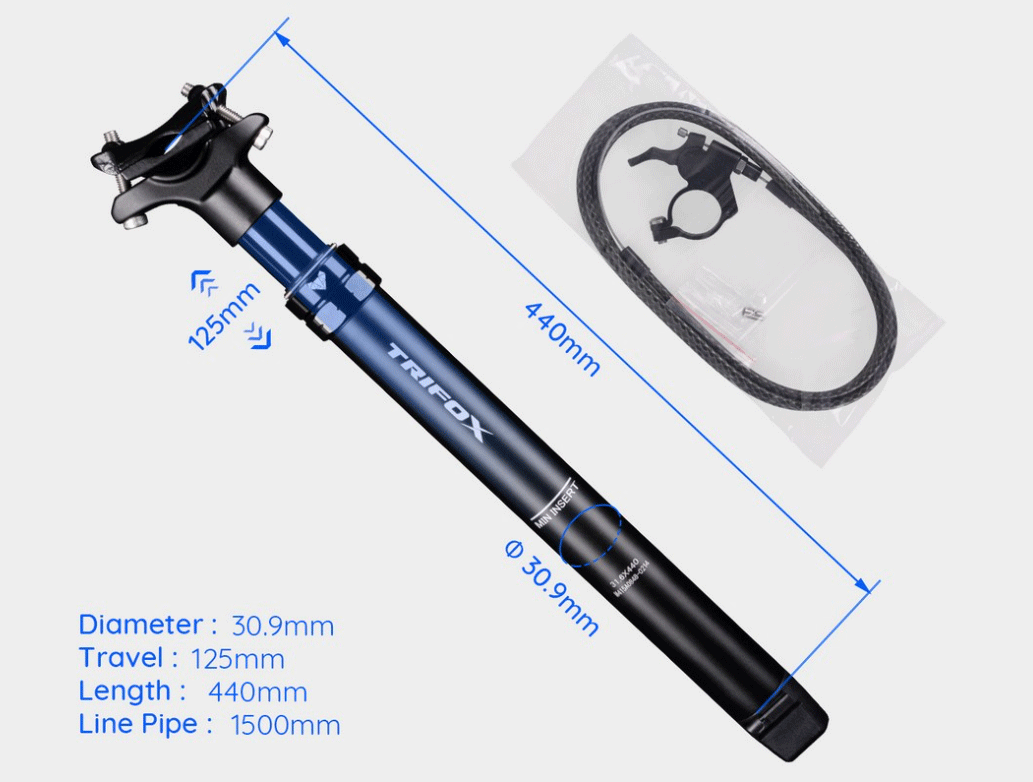
Biking is enjoyed by many individuals for various reasons. Some do it for exercise, while others do it for leisure and relaxation. Whatever your reason is, one thing's for sure - the smoother your ride, the better. This smooth experience can be achieved with the help of the right equipment such as the Trifox AIR Bike Dropper Seatpost AP309. In this blog post, we'll explore everything you need to know about this product, its features, benefits, and how it can help you achieve the perfect ride.
The Trifox AIR Bike Dropper Seatpost AP309 is a dropper seatpost that is made of high-quality AL7075 material, making it sturdy and durable. It has a length of 440mm with a 125mm travel, and a Linelength of 500mm, which ensures maximum efficiency and optimal positioning. It has a pipe diameter of 30.9, making it suitable for most bike frames.
One of the unique features of this Trifox product is its wiring option, which includes Upper Routing (APS309), Center Routing (APM309), and Bottom Routing (APD309). This allows you to choose the best option that suits your bike frame and wiring preferences. Moreover, it has a Stainless screw and a UD Matte finish that adds a touch of sophistication to your bike. It also comes in black color, which is a popular color choice for most bike enthusiasts.
Another great benefit of the Trifox AIR Bike Dropper Seatpost AP309 is its weight. It only weighs 783g/831g/807g (depending on the wiring option), making it easy to carry and maneuver. This is perfect for individuals who like to take their bikes out on challenging trails. The Trifox AIR Bike Dropper Seatpost AP309 also has a dropper tube seatpost style, perfect for those who want to achieve the perfect ride.
Prospective buyers of the Trifox AIR Bike Dropper Seatpost AP309 will also appreciate its easy installation process. The seatpost comes with clear installation instructions that make it easy for anyone, regardless of their experience level, to install it with ease.
Finally, the most significant benefit you'll get with this Trifox product is its ability to make your biking experience smooth and enjoyable. The dropper tube seatpost style and 125mm travel ensure that you can adjust your seat height quickly and efficiently, providing a comfortable ride. You'll appreciate the improved maneuverability and stability, making it easier to navigate those challenging trails.
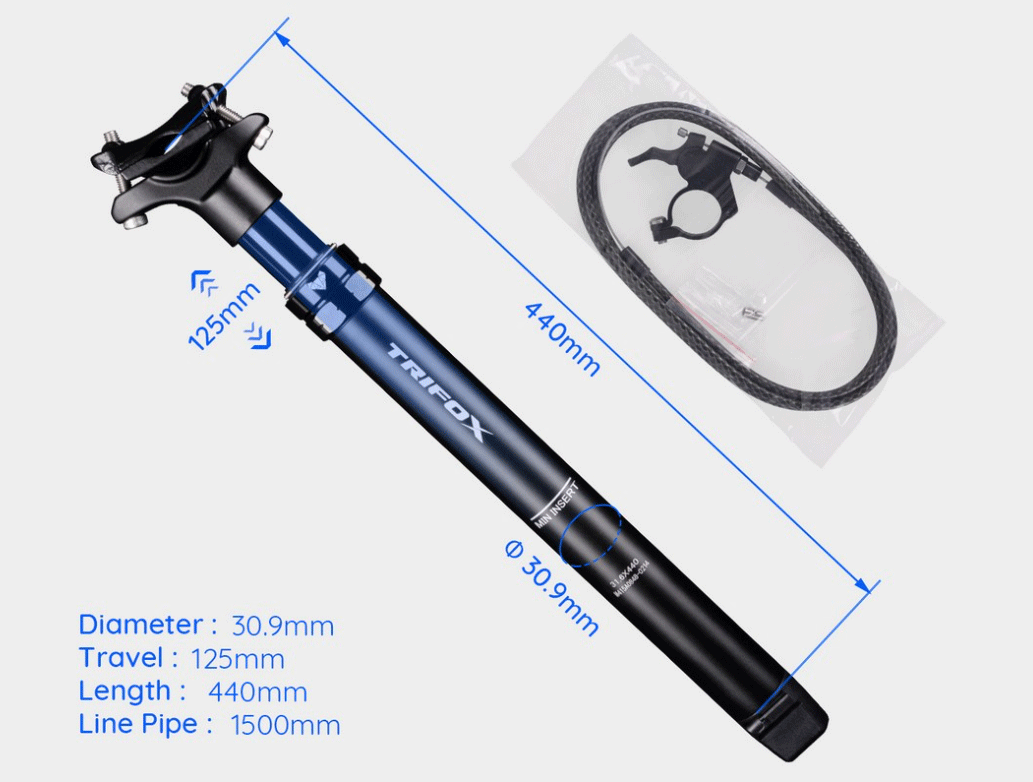
In conclusion, the Trifox AIR Bike Dropper Seatpost AP309 is an excellent addition to any biker's equipment. It is durable, easy to install, lightweight, has multiple wiring options, and offers an excellent riding experience. You'll appreciate the improved maneuverability and stability, making it easier to navigate those challenging trails. With the Trifox AIR Bike Dropper Seatpost AP309, you can enjoy a smooth and comfortable ride every time.


