When choosing a road bike, speed enthusiasts and competitive cyclists often consider performance models that offer a balance of speed, efficiency, and comfort. Among these options, the 10-speed aero road bike stands out as a popular choice for those looking to maximize performance without breaking the bank. But how does a 10-speed aero road bike compare to other high-performance models? Let’s take a closer look at its features, advantages, and limitations to help you decide if it’s the right fit for your cycling needs.
1. The Gear Advantage: 10-Speed vs. Other Configurations
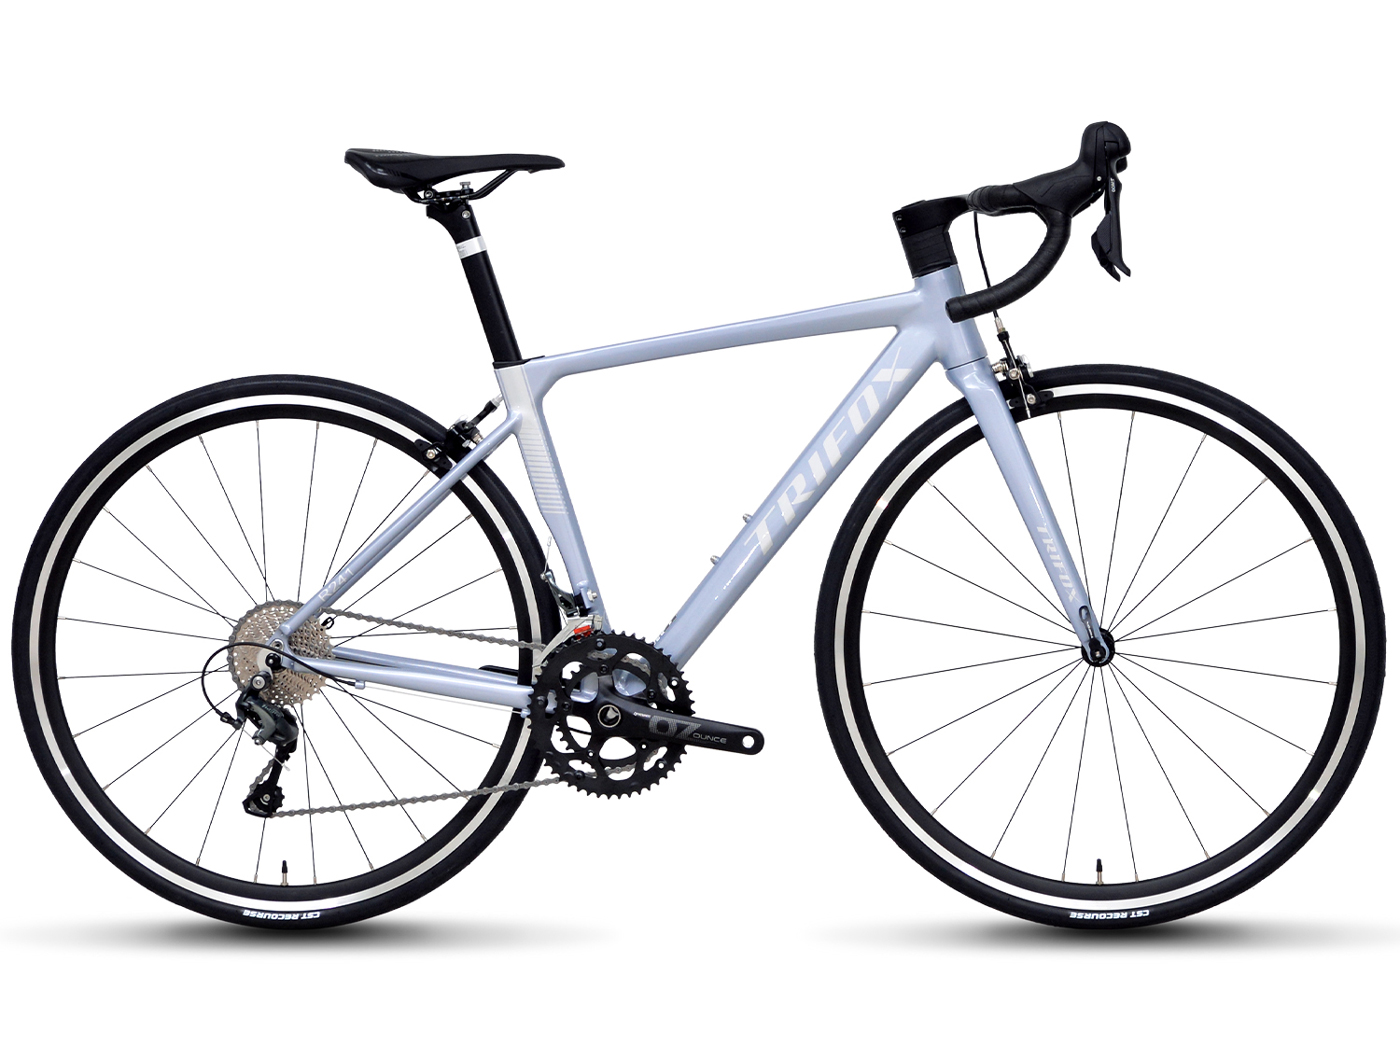
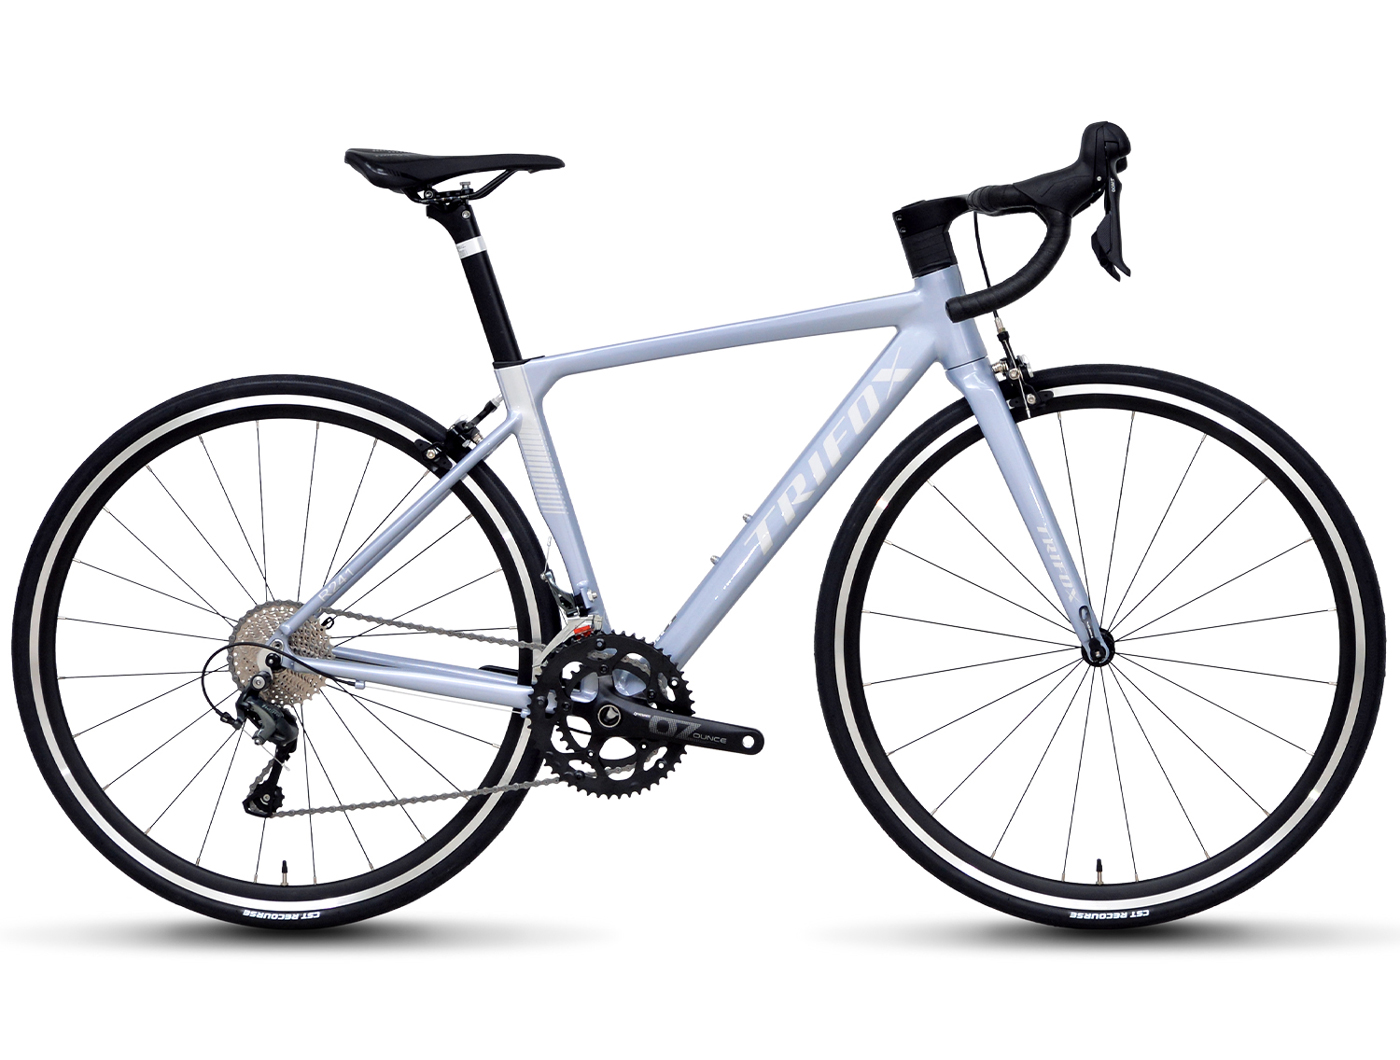
A 10-speed drivetrain, like the Shimano Tiagra R4700 found on the Trifox 2024 C-Brake Road Bike, offers a solid combination of reliability and performance. While 11- and 12-speed systems provide more gears, the 10-speed configuration strikes a balance that appeals to many riders.
The main advantage of a 10-speed setup is its simplicity. With fewer gears, the system is easier to maintain and less prone to wear and tear. This makes it an excellent choice for riders who want performance without the added complexity of higher-speed drivetrains. While it may not have the micro-adjustments of an 11-speed system, a 10-speed drivetrain still provides sufficient range for most terrains, from flat stretches to moderate climbs.
2. Aerodynamics: A Key to Speed
The defining feature of any aero road bike is its frame design, optimized to reduce drag and increase speed. The Trifox 2024 model, for instance, features an ultralight aluminum frame, which combines aerodynamic shaping with durability and lightweight performance. Compared to non-aero models, an aero bike allows riders to maintain higher speeds with less effort, particularly on flat and rolling terrains.
While other performance bikes may focus on weight reduction for climbing or versatility for all-road conditions, aero road bikes are specifically tailored for speed. This makes them ideal for riders who prioritize fast sprints, time trials, and efficient power transfer on smoother roads.
3. Weight and Materials
The Trifox 2024 10-speed road bike utilizes an aluminum frame, which strikes a balance between weight, strength, and affordability. While carbon fiber frames found in higher-end models may be lighter, aluminum remains a competitive choice for cyclists who want durability without significantly increasing the bike’s overall weight.
In comparison to heavier steel-framed bikes or more affordable entry-level options, the ultralight aluminum frame ensures that the bike feels agile and responsive, especially during accelerations and climbs.
4. Braking Systems: Caliper vs. Disc
This 10-speed aero road bike is equipped with C-brakes (caliper brakes), which offer reliable stopping power on dry roads and are lighter than disc brakes. While disc brakes are increasingly popular on higher-end models for their superior performance in wet conditions, caliper brakes remain a favorite for road cyclists seeking to minimize weight and maintain the classic road bike aesthetic.
For performance-focused riders who primarily cycle in dry conditions, the weight savings and streamlined design of C-brakes can be a significant advantage.
5. Cost-to-Performance Ratio
One of the standout features of a 10-speed aero road bike is its affordability compared to 11- or 12-speed models. While higher-end bikes may offer marginal gains in gear range and weight reduction, the cost difference is often significant. A 10-speed aero road bike like the Trifox 2024 delivers excellent performance for speed enthusiasts without the premium price tag, making it an attractive option for cyclists who want competitive features on a budget.
Conclusion
A 10-speed aero road bike strikes an impressive balance between performance, simplicity, and cost-effectiveness. While it may not have the gear range or ultralight materials of higher-end models, its aerodynamic design, lightweight aluminum frame, and reliable Shimano drivetrain make it a strong contender for speed-focused cyclists. Whether you’re looking to improve your average speed, tackle local races, or enjoy high-performance rides, the 10-speed aero road bike offers plenty of value and versatility for a wide range of riders.
When it comes to competitive cycling, every second counts, and every gram saved can make a noticeable difference in performance. This is why the lightest road bike often becomes the top choice for elite athletes. But what exactly makes these feather-light bicycles so popular among competitive cyclists?
1. Speed and Efficiency
One of the most significant advantages of a lightweight road bike is the enhanced speed and efficiency it offers. In competitive cycling, particularly in races involving steep climbs or time trials, the ability to accelerate quickly and maintain momentum is essential. Lighter bikes require less effort to propel forward, especially uphill. This means that cyclists can conserve energy during long rides and still maintain high speeds.
While aero frames and gearing systems certainly play their roles, a light bike can be the difference between winning and losing when every fraction of a second counts. A lighter frame reduces the overall weight the cyclist needs to carry, making it easier to achieve faster lap times and quicker accelerations, especially when combined with an optimal riding position.
2. Improved Handling
Handling is another critical factor in competitive cycling. Lighter bikes offer more responsive handling, especially during sharp turns or when navigating through technical courses. When the bike’s frame is lighter, it requires less force to move it in the desired direction, leading to quicker adjustments and greater precision. This responsiveness can be particularly valuable in races that include tight corners or winding paths where every maneuver counts.
Additionally, lighter bikes often have better overall balance, making it easier to maintain control in various riding conditions, from fast descents to technical ascents.
3. Climbing Performance
Climbing is one area where the weight of the bike can make the most noticeable difference. Competitive cyclists, particularly those in events like the Tour de France or the Giro d'Italia, often face long, grueling ascents. The lighter the bike, the less weight the rider needs to push uphill, which can translate into better climbing performance.
A road bike that is designed with weight-saving materials, such as carbon fiber or high-end aluminum, allows a cyclist to exert less energy during climbs, giving them a competitive edge over riders with heavier bikes. This advantage becomes even more pronounced during sustained climbs, where maintaining speed while managing energy is crucial.
4. Comfort and Fatigue Reduction
While speed and efficiency are essential, the lighter weight of a road bike can also contribute to improved comfort over long distances. Lighter bikes often use materials that are not only strong but also engineered to absorb road vibrations and shocks better than heavier counterparts. This means less fatigue over time, even on rougher terrains.
Reducing fatigue is vital for maintaining high performance throughout a race, especially in multi-stage events. With less energy wasted on dealing with discomfort, cyclists can focus on pacing themselves and conserving their strength for critical moments.
5. Technological Advancements in Materials
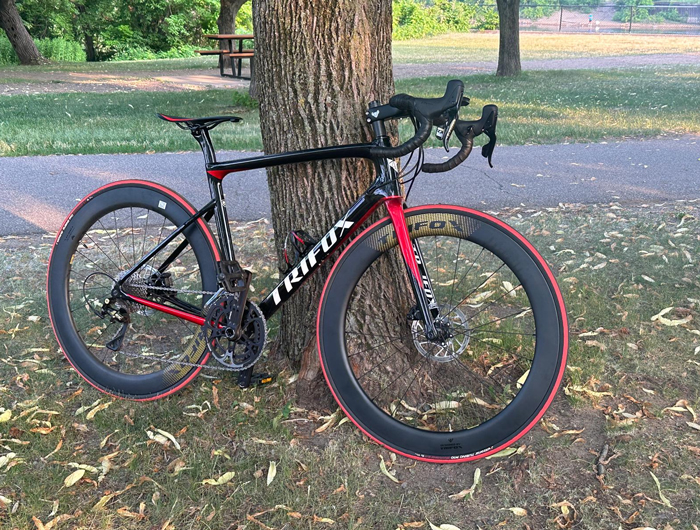
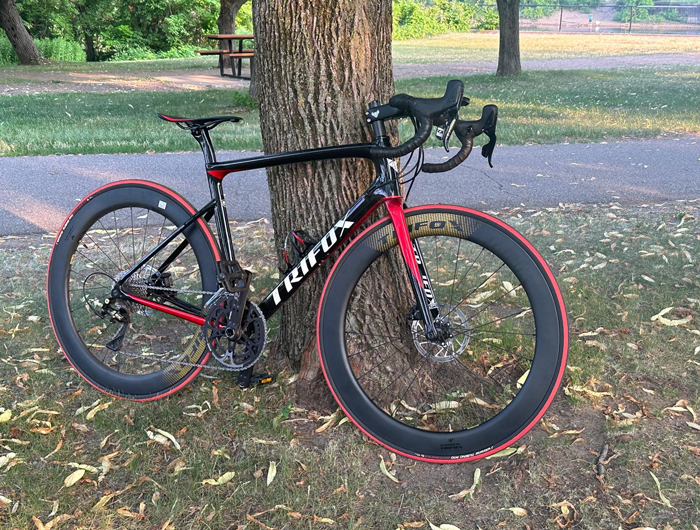
Today’s lightest road bikes are built using advanced materials that provide strength without the added weight. Carbon fiber, for example, is incredibly light yet extremely durable, offering the perfect balance of stiffness and flexibility. Many premium road bikes incorporate these materials in their frame, fork, and wheels, making them more aerodynamic while minimizing weight.
Bike manufacturers, such as **Trifox**, are pushing the limits of design, creating bikes that combine cutting-edge materials with performance-oriented geometry. The result is a new generation of road bikes that are not only lighter but also stronger and more responsive than ever before.
Conclusion
The lightest road bike isn’t just about shedding grams for the sake of weight—it’s about optimizing performance. Lighter bikes enhance speed, improve handling, and boost climbing capabilities, making them an essential choice for competitive cyclists. As technology advances and materials improve, these bikes are only becoming more specialized, allowing cyclists to achieve peak performance in every race. For any competitive cyclist looking to gain an edge, investing in a lightweight road bike is not just a choice, but a strategic move toward success.
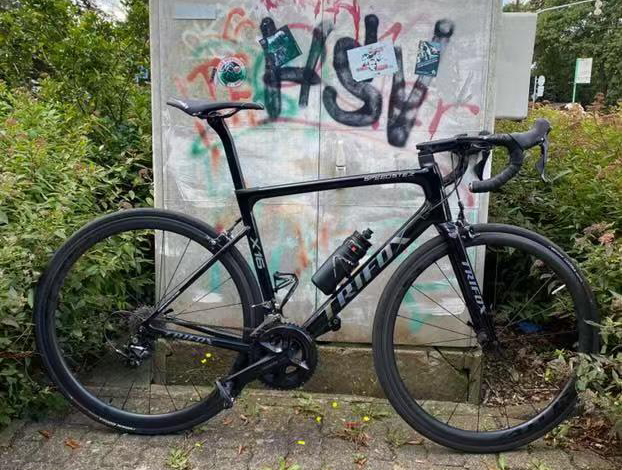
For cyclists, achieving optimal speed and efficiency is often the ultimate goal. Whether you're a competitive racer or an avid long-distance rider, every detail of your bike can contribute to your performance.
Among these details, the aero bike frame stands out as a critical component in enhancing cycling efficiency. With advancements in design and materials, such as the Trifox carbon road bike frames, cyclists can now experience remarkable improvements in speed and reduced drag, transforming their riding experience.
An aero bike frame is specifically designed to minimize air resistance, which is one of the primary forces working against a cyclist. By reducing drag, these frames allow cyclists to maintain higher speeds with less effort, directly translating to improved performance, especially over long distances and in competitive settings. The aerodynamic shape of the frame, with its sleek lines and strategically positioned tubes, cuts through the air more efficiently than traditional frames.
The Trifox carbon road bike frames epitomize this aerodynamic advantage. Constructed using high-quality carbon fiber, they offer both strength and lightness, which are essential for speed and agility. Carbon fiber is recognized for its superior strength-to-weight ratio, allowing frames to remain robust while being significantly lighter than their aluminum or steel counterparts. This reduction in weight means cyclists can accelerate faster, maintain momentum with less fatigue, and climb hills more effortlessly.
Moreover, the frame geometry plays a vital role in cycling efficiency. The angles and dimensions of an aero frame are meticulously crafted to optimize the rider's position, aligning the body in a way that reduces frontal air exposure. For instance, the Trifox frames are designed to promote an aggressive riding posture that is aerodynamic yet comfortable for long rides. This geometry not only aids in reducing drag but also enhances the rider's power transfer, ensuring that every pedal stroke is efficiently converted into forward motion.
The incorporation of advanced materials and precise frame geometry in aero bike frames also contributes significantly to stability and handling. At high speeds, maintaining control is crucial, and the stiffness provided by carbon fiber ensures that the bike responds promptly and predictably to the rider's input. Whether navigating sharp corners in a race or enduring long straight stretches on a time trial, an aero frame offers the confidence and control needed to maximize performance.
In competitive cycling, where every second counts, the benefits of an aero frame become even more pronounced. Reduced drag means that cyclists can save precious energy, which can be the difference between winning and losing in a tightly contested race. For long-distance riders, the energy savings afforded by an aero frame translate to less fatigue and greater endurance, allowing them to complete rides faster and with less physical toll.
Ultimately, the integration of an aero bike frame can significantly enhance a cyclist's efficiency by optimizing speed, reducing drag, and improving overall performance. The Trifox carbon road bike frames exemplify these benefits through their innovative design and state-of-the-art construction. Whether you're aiming for a personal best in a race or seeking a more enjoyable and efficient ride over long distances, an aero bike frame can be the key to unlocking your full cycling potential.
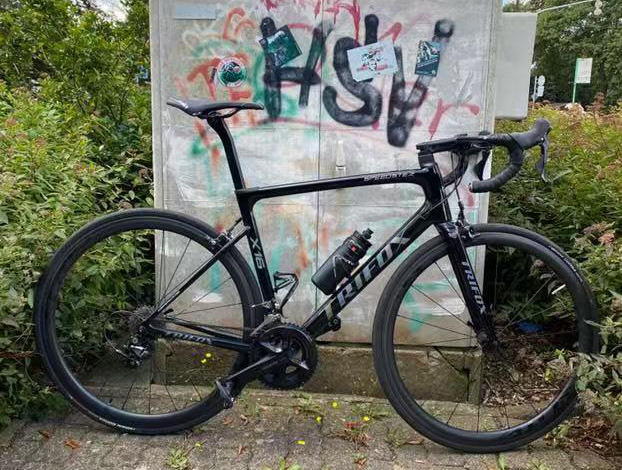
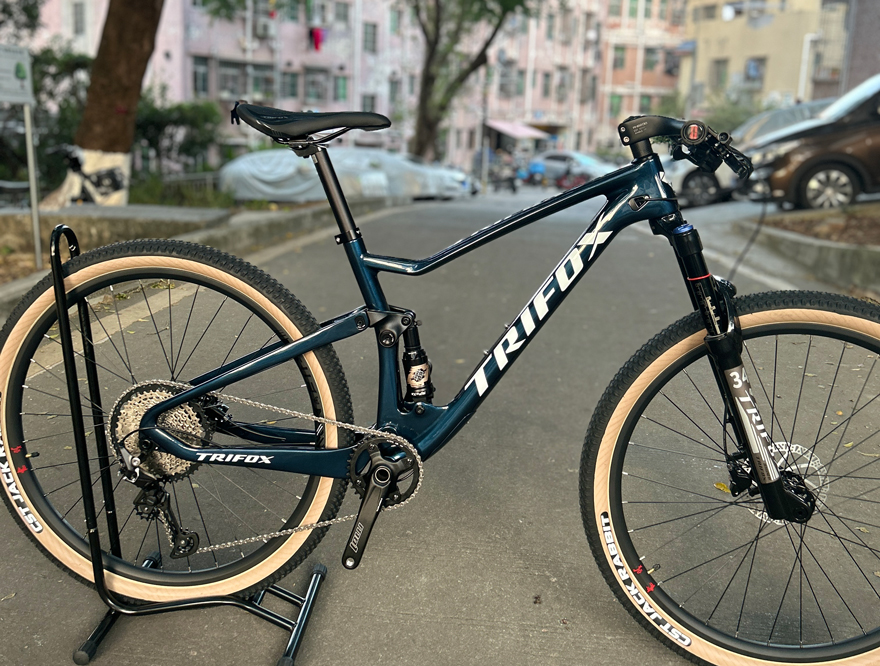
Cross country mountain biking embodies the spirit of adventure, offering riders the thrill of navigating rugged terrains with speed and precision. For those who crave the adrenaline rush that comes with conquering steep climbs and technical descents, cross country mountain bikes are the ultimate companion.
These bikes are meticulously designed to deliver a perfect blend of performance, comfort, and control, making them ideal for adventurous riders. Among the notable examples in this category is the TRIFOXBIKE PIONEER, a cross country mountain bike that epitomizes the pinnacle of modern bike engineering.
A key feature that sets the TRIFOXBIKE PIONEER apart is its carbon fiber frame. Carbon fiber is heralded for its superior strength-to-weight ratio, providing a lightweight yet robust structure that enhances a bike's agility and speed. For cross country enthusiasts, this translates to less fatigue during prolonged rides and an ability to swiftly maneuver through tight trails and demanding terrains.
The TRIFOXBIKE PIONEER's carbon frame not only boosts speed but also absorbs vibrations and shocks, offering a smoother and more comfortable ride.
Equipped with dual suspension, the TRIFOXBIKE PIONEER ensures that riders maintain stability and control even on the roughest paths. The suspension system, featuring 120mm of travel, is adept at absorbing shocks from obstacles like rocks and roots, granting riders a seamless and confidence-inspiring experience. This is particularly beneficial for those who relish tackling unpredictable and challenging trails. The dual suspension also improves traction, allowing riders to maintain their momentum and speed without being derailed by uneven ground.
Adding to the bike's remarkable specs is the SHIMANO M6100 groupset, known for its precision and reliability. This advanced componentry offers smooth and rapid gear shifting, critical for maintaining control and efficiency during intense rides.
Whether you're climbing steep hills or descending fast slopes, the SHIMANO M6100 ensures that your gearing is always optimized for the task at hand, enhancing both performance and rider safety.
Furthermore, the TRIFOXBIKE PIONEER is designed with adaptability in mind. Its geometry can be subtly adjusted to suit various riding styles and terrains, ensuring that each rider can tailor their bike to their specific needs. This adaptability is crucial for adventurous riders who may encounter a wide range of environmental conditions and trail types on their journeys.
The lightweight nature of the bike, courtesy of its carbon fiber construction, also plays a significant role in its appeal. By minimizing weight, the TRIFOXBIKE PIONEER allows for quicker accelerations and more nimble handling, which are essential for cross country racing and exploration. This reduction in weight does not come at the expense of durability, as the bike is crafted to withstand the challenges of rugged trails.
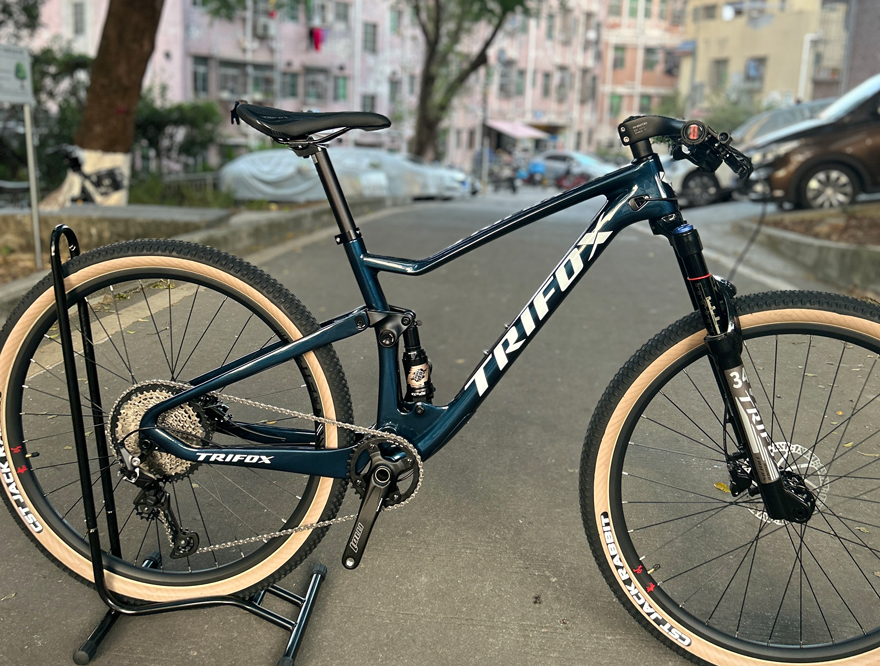
In conclusion, cross country mountain bikes like the TRIFOXBIKE PIONEER are ideal for adventurous riders due to their innovative design and advanced features. The combination of a carbon fiber frame, dual suspension, and a state-of-the-art groupset like the SHIMANO M6100, all work harmoniously to provide an unparalleled biking experience.
These elements ensure that riders can tackle diverse terrains with ease, maintain high levels of comfort and control, and push their limits on every ride. For those who seek adventure in the great outdoors, a cross country mountain bike is not just a mode of transport, but a gateway to new experiences and thrills.
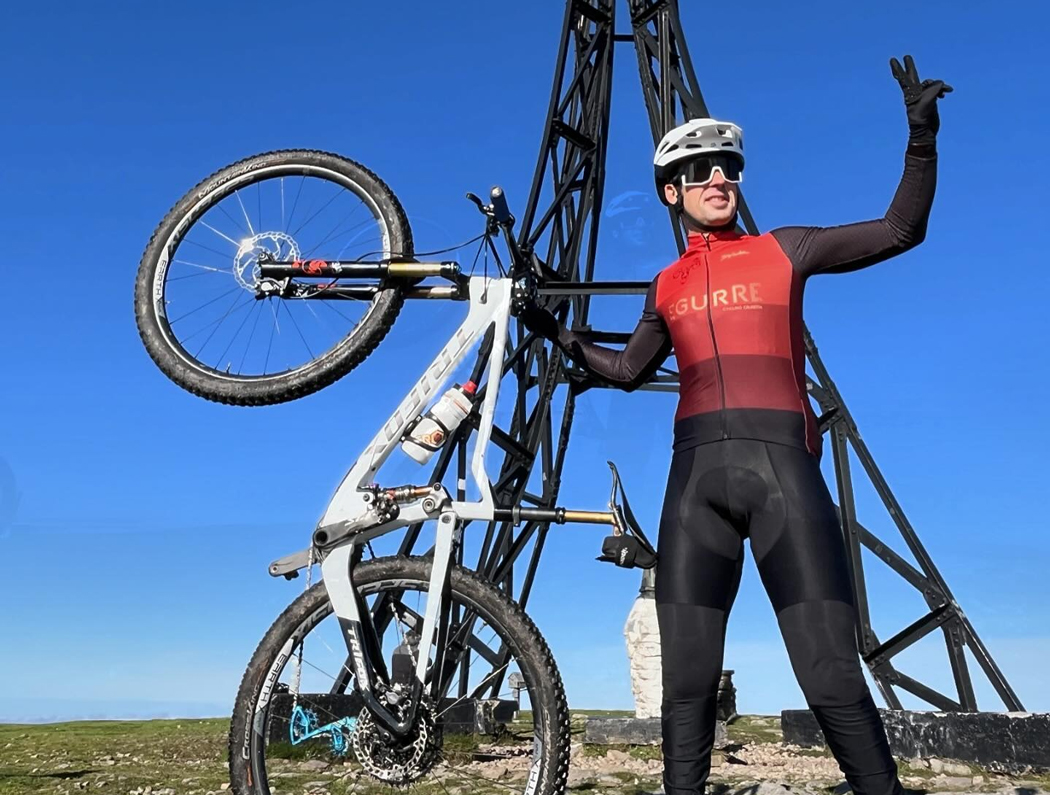
Choosing the right full suspension bike can transform your off-road biking experience, offering enhanced comfort, control, and performance. Full suspension bikes are designed to handle rough terrains by absorbing shocks from both the front and rear, making them ideal for trail and mountain biking. Here’s a comprehensive guide to help you choose the perfect full suspension bike, using insights from Trifox Bike's MFM100 full suspension carbon MTB frame.
Understanding the Benefits of Full Suspension Bikes
Full suspension bikes provide the advantage of dual shock absorption, which significantly reduces rider fatigue and enhances traction on uneven terrains. This dual suspension system allows for better handling and control, especially on descents and technical trails. The added comfort and control make full suspension bikes a popular choice for both competitive riders and casual adventurers.
Key Features of the MFM100 Frame
The Trifox MFM100 frame exemplifies what to look for in a high-performance full suspension bike:
1. Material and Weight: Made from T800 carbon fiber, the MFM100 frame is ultra-lightweight while maintaining strength and durability. Weighing just over 2kg, it provides a great balance for speed and endurance.
2. Boost Design: With a 148 x 12mm spacing, it enhances the rear wheel's strength and stiffness, accommodating up to 2.35" tires for better traction and stability.
3. Geometry and Suspension: The frame features a 68.5° head tube angle and a customizable rear shock mount, allowing riders to fine-tune their setup for optimal performance and comfort.
4. Internal Cable Routing: This feature offers a sleek, uncluttered look while protecting cables from the elements, contributing to the bike's overall aesthetic and aerodynamics.
Steps to Choose the Right Full Suspension Bike
1. Determine Your Riding Style: Consider the type of terrain you plan to tackle. Trail bikes are versatile and suitable for various conditions, while downhill bikes are optimized for steep descents.
2. Choose the Right Frame Material: Carbon fiber frames like the MFM100 are preferred for their lightweight and strong construction, which enhances handling and speed.
3. Consider Suspension Type and Travel: Look for bikes with adjustable suspension to tailor your ride based on the trail conditions. The MFM100 offers travel options of 100mm to 115mm, providing flexibility for different terrains.
4. Evaluate Bike Geometry: Geometry affects handling and comfort. A longer wheelbase and slack head angle offer stability on descents, while a steeper seat tube angle improves climbing efficiency.
5. Assess Component Quality: Pay attention to the quality of components, such as the drivetrain, brakes, and wheels. High-quality components like those offered by Trifox ensure reliability and performance.
6. Test Ride If Possible: If you have the opportunity, test ride different models to feel the differences in handling and comfort. This can provide invaluable insight into what fits your style and preferences.
Tips for Making the Right Choice
- Budget Considerations: Determine your budget beforehand and focus on finding the best quality within that range. Trifox offers competitive pricing on high-performance frames like the MFM100.
- Future Upgrade Potential: Consider a bike that allows for easy component upgrades. This flexibility can help you improve performance as your skills advance.
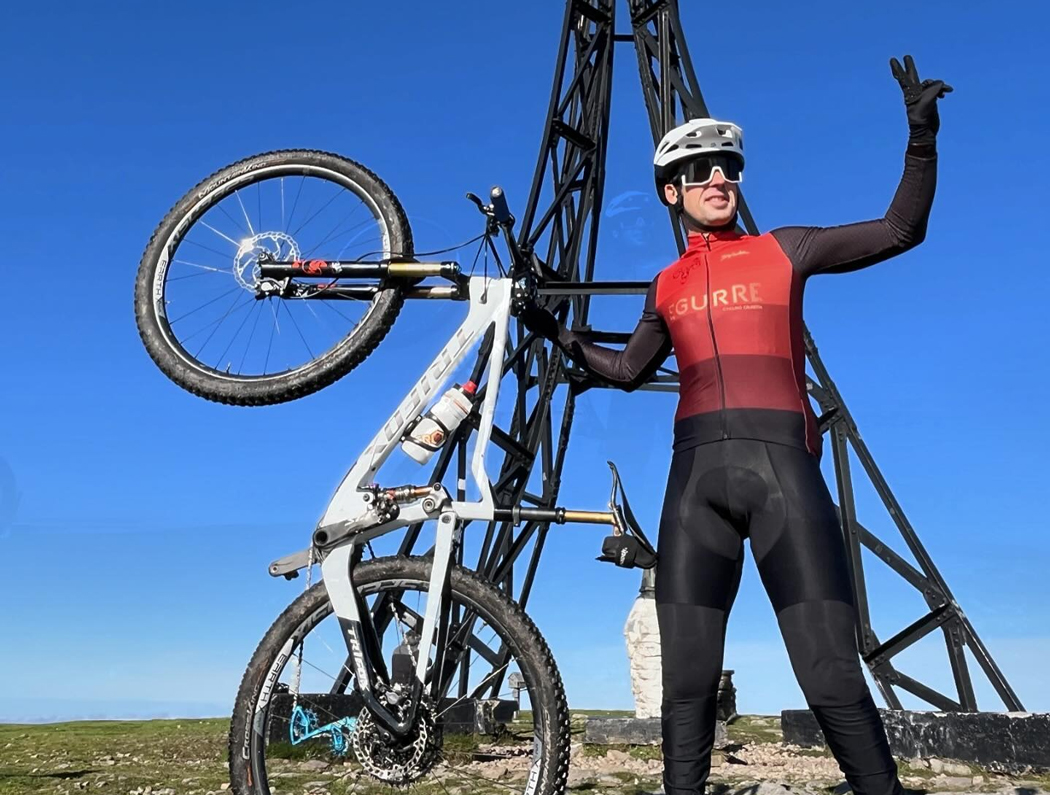
In conclusion, selecting the right full suspension bike involves understanding your needs, evaluating technical specifications, and making informed decisions based on your riding style and goals. The Trifox MFM100 frame is an excellent example of a high-quality option that caters to various biking needs, making it a strong contender for anyone looking to enhance their off-road adventures. By following these steps, you can find a bike that delivers both excitement and comfort on every ride.
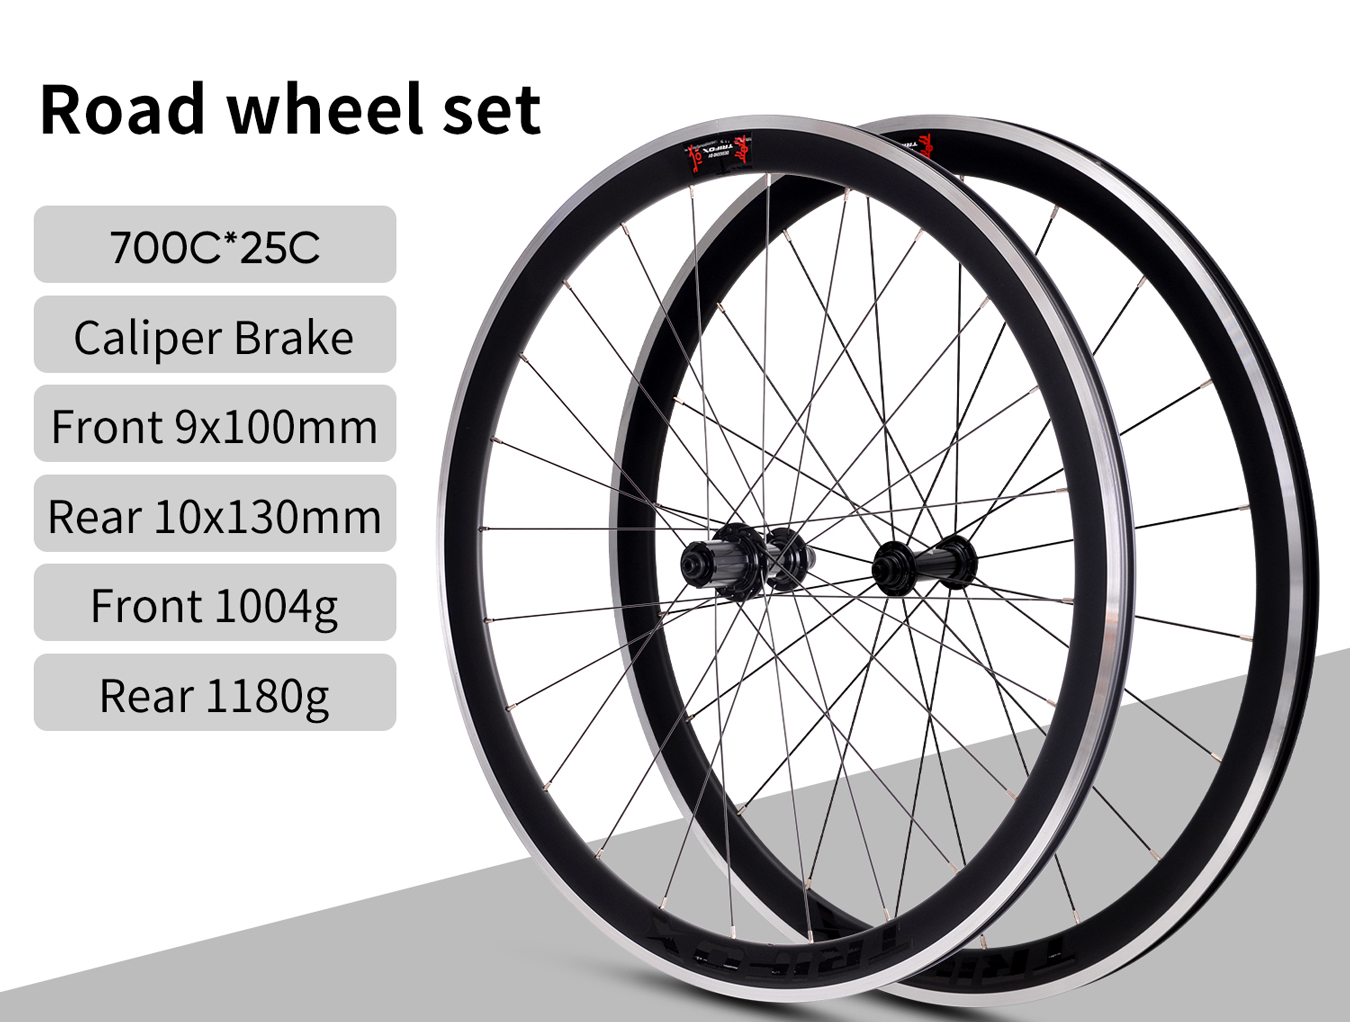
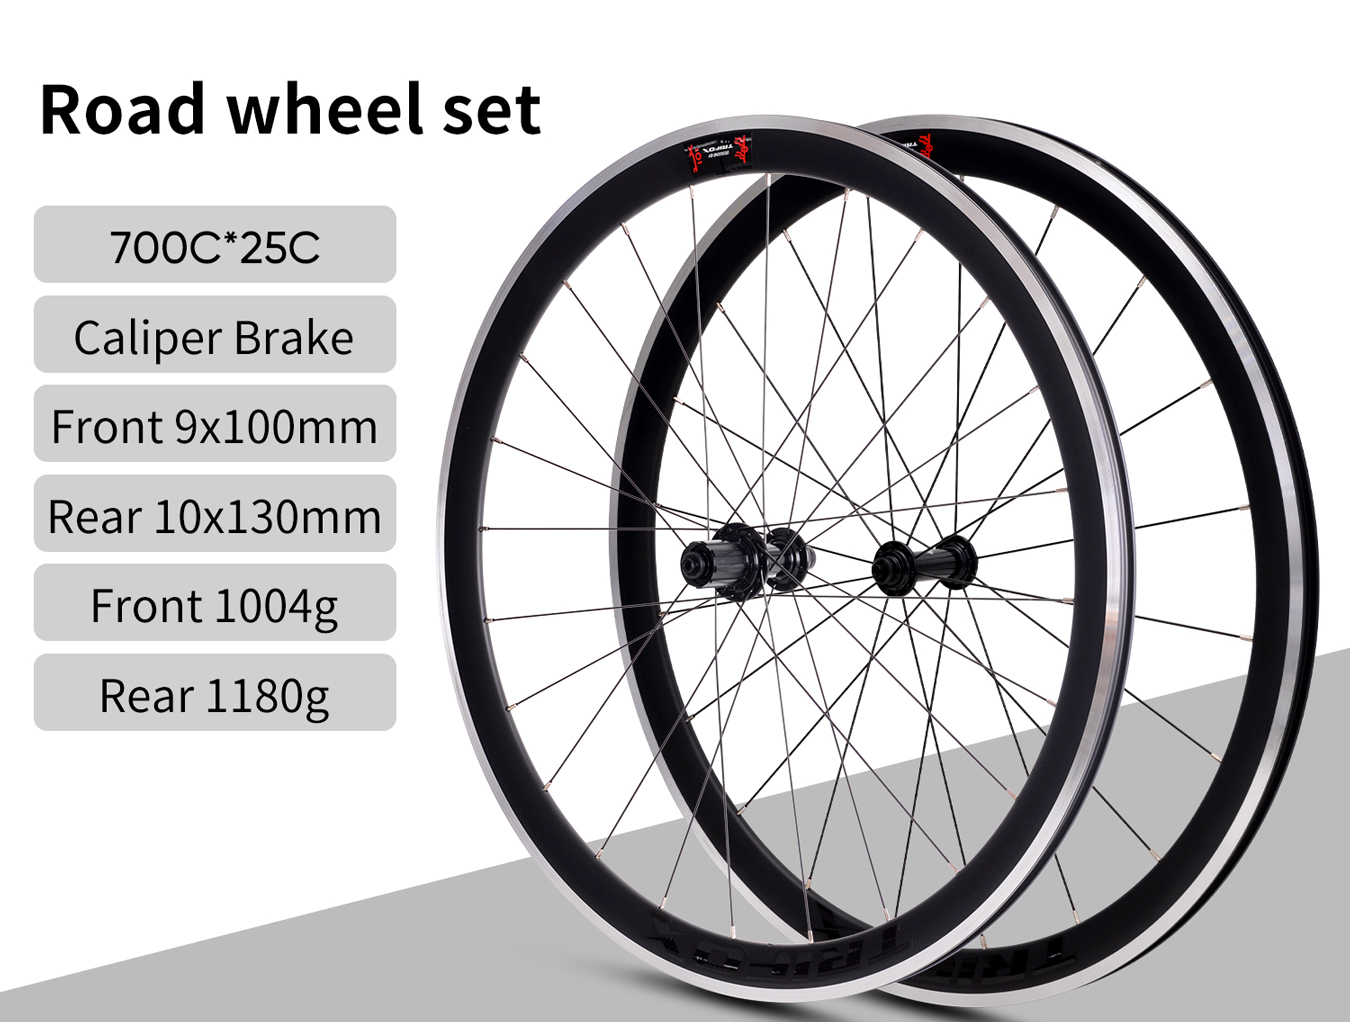
Cycling enthusiasts know that upgrading to a set of high-quality wheels can make a significant difference in performance and ride quality. Whether you're racing or simply seeking a smoother ride, carbon road bike wheels offer unparalleled benefits. But where can you find the best place to buy these wheels without breaking the bank? Look no further than Trifox Bike.
The Appeal of Carbon Road Bike Wheels
Carbon fiber wheels are prized for their lightweight structure and aerodynamic design, which help reduce drag and increase speed. Their material properties provide exceptional rigidity, allowing for precise handling and improved power transfer during climbs and sprints. Additionally, carbon wheels absorb vibrations better than their alloy counterparts, ensuring a more comfortable ride over long distances.
Why Choose Trifox Bike for Your Wheel Upgrade?
Trifox Bike is a standout choice for those seeking affordable yet high-quality carbon road bike wheels. As a prominent Chinese manufacturer, Trifox offers a range of wheelsets that cater to different cycling needs:
1. Diverse Options: Trifox provides carbon road wheels suitable for both disc brake and V brake systems. Whether you're upgrading a racing bike or a touring setup, their selection ensures compatibility with your existing gear.
2. Competitive Pricing: With discounts reaching up to 46%, Trifox Bike makes carbon wheels more accessible. For instance, the Carbon Road Bike Wheels WT18 is available for $429, down from $799, offering substantial savings.
3. Quality and Reliability: Reviews from satisfied customers highlight the durability and performance of Trifox wheels. Constructed with precision and tested for quality, these wheels promise to deliver on both performance and longevity.
4. Customer Support and Convenience: Trifox provides free shipping on orders over $50, ensuring your new wheels arrive quickly and without extra cost. Their 24/7 live chat support is available to address any inquiries or issues, enhancing the buying experience.
What to Look for When Buying Bike Wheels
When selecting the perfect set of wheels, consider the following factors to ensure you're getting the best value:
- Weight: Lighter wheels can significantly enhance acceleration and climbing efficiency. Consider the weight of the wheelset in relation to your cycling goals.
- Brake Compatibility: Ensure the wheelset is compatible with your bike's braking system, whether it's disc or V brakes.
- Aerodynamics: For those focused on speed, wheels with a deep rim profile can reduce air resistance and improve performance.
- Durability: Check reviews and specifications to confirm that the wheels can withstand your typical riding conditions, whether it's smooth tarmac or rougher paths.
- Warranty and Support: A solid warranty and responsive customer support are crucial for peace of mind, especially when investing in premium components.
Conclusion
Finding the best place to buy bike wheels involves balancing quality, performance, and cost. Trifox Bike provides an excellent solution for cyclists looking to upgrade their road bike wheels without overspending. By focusing on essential features like weight, brake compatibility, and customer reviews, you can confidently select a wheelset that enhances your cycling experience. Whether you're a competitive racer or a weekend rider, Trifox Bike offers a compelling combination of affordability and quality that's hard to beat.

When it comes to cycling, carbon road bikes are the gold standard for those seeking a lightweight, durable, and performance-driven experience. However, finding an affordable option without compromising quality can be challenging. Fortunately, brands like Trifox Bike offer a compelling solution with their range of carbon road bike frames.
The Appeal of Carbon Road Bikes
Carbon fiber bikes are renowned for their strength-to-weight ratio, providing a smooth and efficient ride. The material's ability to absorb road vibrations enhances comfort, making long rides more enjoyable. Additionally, the flexibility in design allows manufacturers to optimize aerodynamics and stiffness where it's needed most, translating to better performance on the road.
Trifox Bike: A Budget-Friendly Option
Trifox Bike stands out as a budget-friendly manufacturer offering high-quality carbon road bike frames. Their frames are available in various styles, including AERO style, lightweight style, and both quick-release and thru-axle disc brake options. This variety ensures that you can find a frame that matches your riding style and preferences.
Affordable Pricing and Discounts
One of the most appealing aspects of Trifox Bike's offerings is the affordability. With discounts ranging up to 59%, you can purchase a carbon road bike frame for as low as $399. For instance, the Carbon Road Bike Frame X8QR is available at a significant markdown, making it an attractive option for cost-conscious buyers. Such competitive pricing ensures you get the best value for your investment.
Features to Look For
When purchasing a cheap carbon road bike, it's crucial to consider several factors to ensure quality and performance:
1. Frame Weight and Material: Opt for a lightweight frame that offers durability and strength without adding unnecessary weight.
2. Aerodynamics: Consider frames with aerodynamic designs, particularly if speed is a priority in your rides.
3. Brake Compatibility: Choose between quick-release V brake and thru-axle disc brake styles based on your braking preference and terrain.
4. Customer Reviews: Checking reviews can provide insights into the frame's performance and reliability.
5. Warranty and Support: Ensure the manufacturer offers a solid warranty and customer support, giving you peace of mind in your purchase.
Why Choose Trifox Bike?
Trifox Bike not only offers affordable carbon frames but also provides a comprehensive online shopping experience. They offer free shipping on orders over $50, ensuring that your purchase arrives quickly and without additional cost. Moreover, their 24/7 live chat support means you can get assistance whenever needed. With secure payment options, purchasing from Trifox is both safe and convenient.

Conclusion
Finding the best cheap carbon road bike involves balancing cost with features and quality. Trifox Bike's range of carbon road bike frames presents an excellent option for those seeking performance without breaking the bank. By focusing on essential features like weight, aerodynamics, and customer reviews, you can ensure you select a bike that offers both value for money and a superior riding experience. Whether you're upgrading your current bike or buying your first carbon frame, Trifox Bike provides an accessible entry point into the world of high-performance cycling.
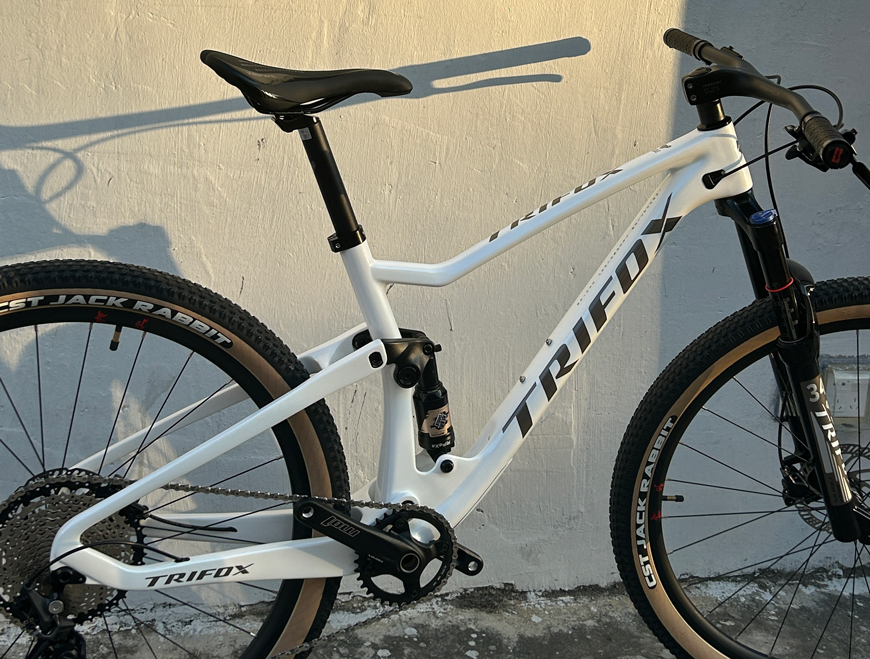
In the rapidly evolving world of mountain biking, the best MTB bikes of 2024 are pushing the boundaries of design and technology, offering riders unparalleled performance and experience on the trails. Emerging trends showcase bikes that are not only lighter and faster but also more durable and versatile, catering to a wide range of riding styles and terrains.
Innovative Use of Carbon Materials
One of the standout features of 2024’s best mountain bikes is the extensive use of carbon fiber. Known for its incredible strength-to-weight ratio, carbon fiber allows for the creation of frames that are both lightweight and robust. This material is a game-changer in the MTB world, providing riders with bikes that can handle rugged trails and steep climbs with ease. Trifox Bike’s carbon mountain bikes, such as the Pioneer and M2, exemplify this trend, offering frames that are not only aesthetically pleasing but also performance-optimized.
Advanced Suspension Systems
The latest mountain bikes boast highly sophisticated suspension systems that significantly enhance comfort and control. Full suspension bikes, like those offered by Trifox, help absorb shocks from rough terrain, allowing for smoother rides and better traction. This technology is crucial for riders tackling technical trails, as it maintains stability and maximizes power transfer, ensuring that every pedal stroke counts. Whether you’re a downhill enthusiast or a cross-country racer, the improved suspension in 2024 models makes navigating challenging paths a breeze.
Cutting-Edge Technology and Components
Modern MTB bikes are also incorporating advanced technology to optimize rider performance. From electronic shifting systems that provide precise gear changes to smart sensors that monitor bike metrics, these innovations offer an edge to tech-savvy cyclists. Trifox’s high-end models are equipped with such features, enabling riders to fine-tune their rides and push their limits safely and efficiently.
Versatility and Customization
The best mountain bikes of 2024 are designed to cater to a broad spectrum of riders and conditions. Whether you’re an adrenaline junkie seeking downhill thrills or a leisure rider exploring scenic trails, there’s a bike tailored for your needs. Trifox offers a range of customization options, allowing cyclists to choose components that match their riding style and preferences. This versatility ensures that every rider can find a bike that feels like a natural extension of themselves, enhancing their overall experience.
Performance-Driven Design
A focus on aerodynamic and ergonomic design is another hallmark of top MTB bikes this year. Streamlined frames and components reduce drag, while ergonomic adjustments improve rider comfort, particularly on long rides. The Pioneer model, for example, emphasizes both speed and stability, making it a preferred choice for competitive riders. Meanwhile, the M2 model offers a balance of power and agility, suitable for those who enjoy a mix of terrains.
Eco-Friendly Manufacturing
Sustainability has become a significant consideration in the manufacturing of 2024’s best mountain bikes. Brands like Trifox are adopting eco-friendly production practices, using recyclable materials and reducing waste. This commitment not only benefits the environment but also appeals to the growing number of environmentally conscious consumers.
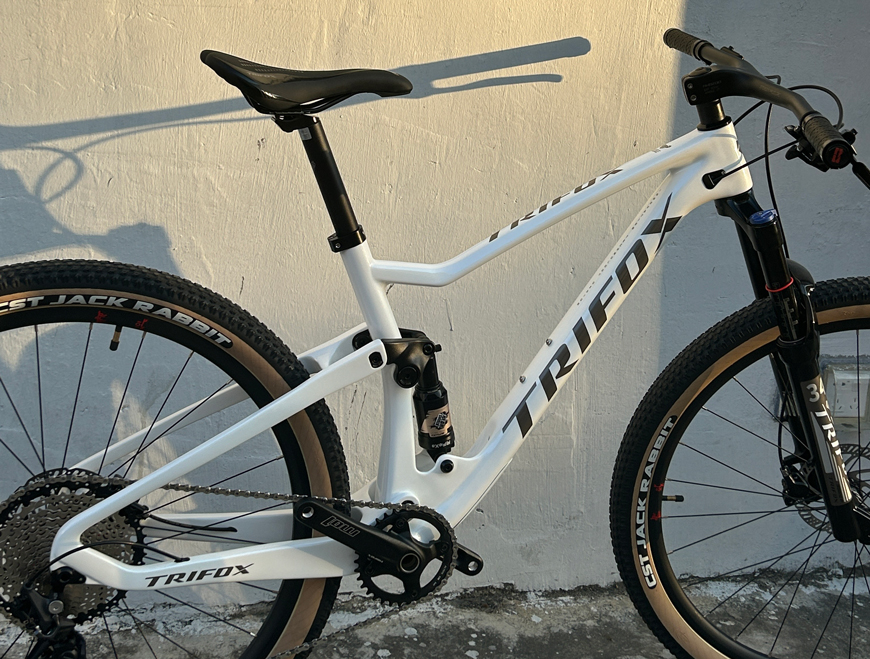
In conclusion, the best MTB bikes of 2024 stand out due to their innovative use of materials, advanced technology, and thoughtful design. By incorporating cutting-edge features and eco-friendly practices, these bikes offer an enhanced riding experience that meets the demands of modern cyclists. Whether you’re drawn to the sleek design of the Pioneer or the versatile performance of the M2, Trifox’s offerings provide excellent examples of what to expect in this exciting new era of mountain biking.
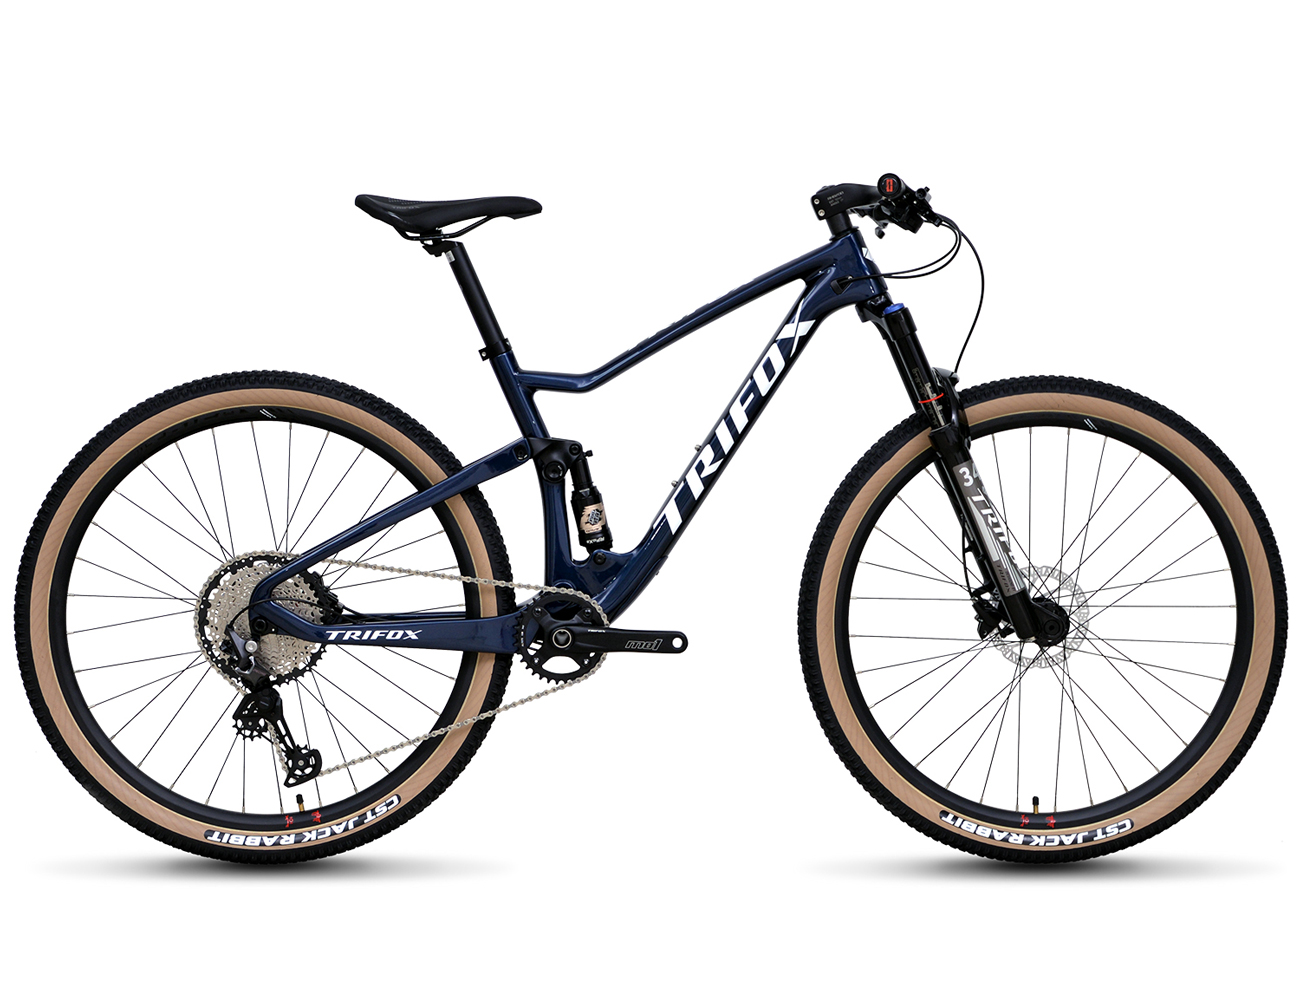
Downhill mountain biking is an adrenaline-pumping sport that challenges your skills, bravery, and ability to adapt to rapidly changing terrains. Whether you're a seasoned rider or a newbie eager to tackle the slopes, mastering downhill MTB requires the right techniques and equipment.
1. Mastering Body Positioning
Your body position is crucial in maintaining balance and control during downhill rides. Follow these tips to improve your stance:
- Stay Centered: Keep your body weight centered over the bike. This helps maintain traction and stability.
- Lower Your Center of Gravity: Bend your knees and elbows to lower your center of gravity. This posture improves balance and allows you to absorb shocks from the terrain.
- Look Ahead: Focus on the trail ahead rather than the immediate ground. This anticipatory gaze helps you prepare for obstacles and take smoother lines.
2. Effective Braking Techniques
Proper braking techniques are essential for maintaining control and speed on descents:
- Use Both Brakes: Apply both front and rear brakes smoothly and evenly. The front brake provides more stopping power, but relying too much on it can cause you to lose balance.
- Feather the Brakes: Use a gentle, pulsing braking motion instead of a hard squeeze. This minimizes skidding and maintains traction.
- Brake Before Turns: Reduce your speed before entering turns, allowing you to navigate through them with more stability.
3. Choosing the Right Gear
Selecting the appropriate gear setup enhances your control and performance:
- Lower Gears for Steep Descents: Use lower gears to maintain a steady and controlled speed on steep sections.
- Gear Switching: Familiarize yourself with your gear shifters to make seamless transitions as the terrain changes.
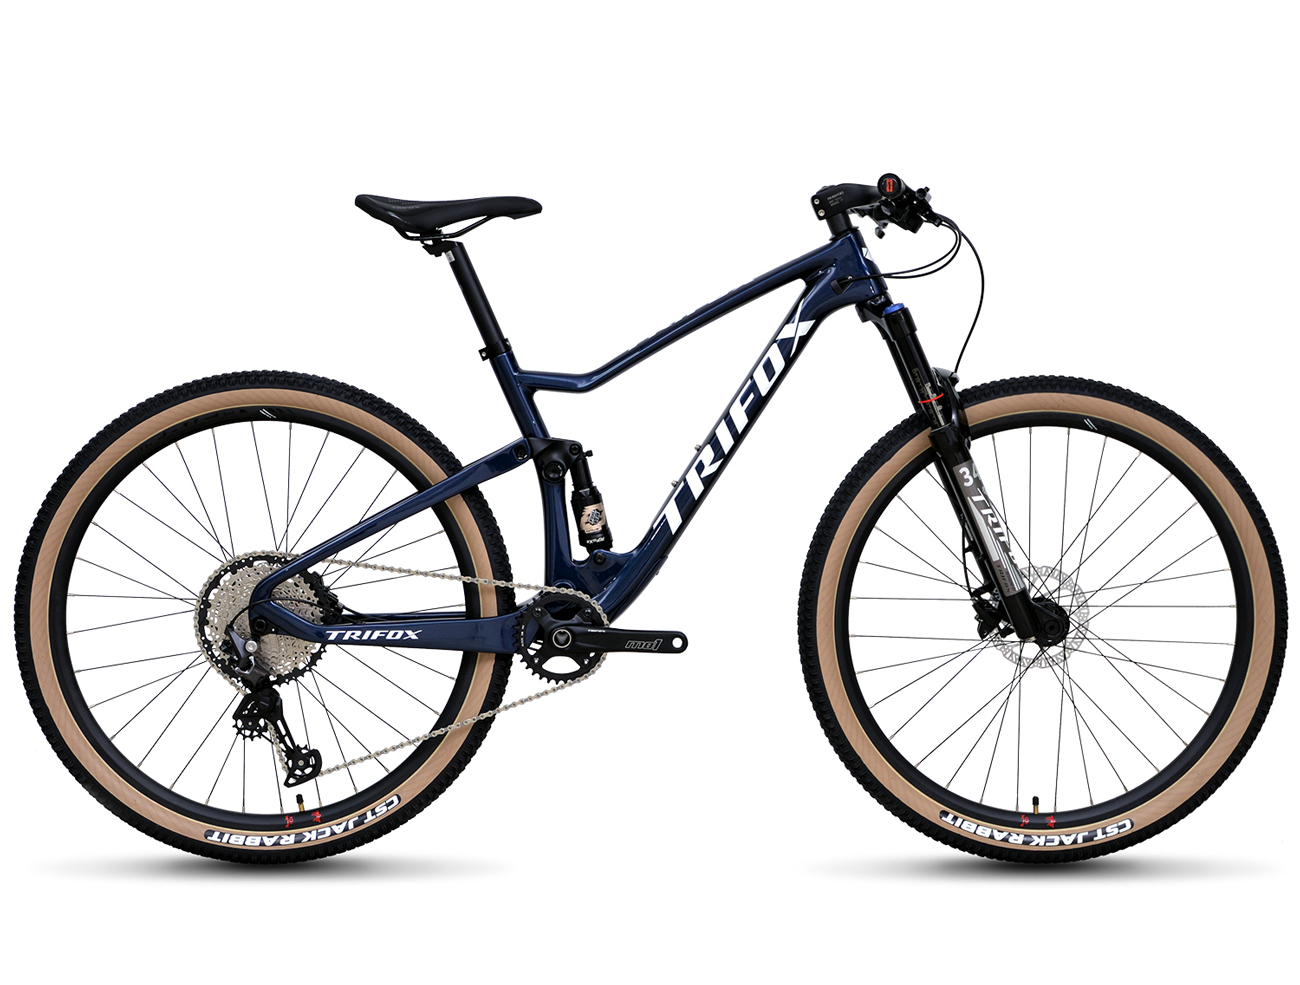
4. The Advantage of a Full Suspension Carbon MTB Frame
Investing in a quality frame, such as the Trifox MFM100 full suspension carbon MTB frame, can significantly enhance your downhill experience:
- Superior Shock Absorption: The MFM100's dual suspension system absorbs impact, reducing rider fatigue and providing a smoother ride over rugged terrain.
- Strength and Lightweight: Made from T800 carbon fiber, the frame offers an excellent balance between strength and weight, allowing for agile maneuvers and increased speed.
- Boost Technology: With 148 x 12mm spacing, the frame supports wider hub flanges, resulting in a stronger rear wheel for improved stability during descents.
5. Mental Preparation and Confidence Building
Downhill MTB is as much a mental challenge as it is physical. Boost your confidence with these tips:
- Start Small: Begin with less challenging trails and gradually progress to more difficult descents as your skills improve.
- Visualize Success: Picture yourself navigating the trail successfully, focusing on smooth lines and controlled movements.
- Positive Mindset: Embrace mistakes as learning opportunities and maintain a positive outlook on your progress.
6. Safety First
Always prioritize safety on the trail:
- Wear Protective Gear: Equip yourself with a helmet, gloves, knee pads, and elbow pads to protect against falls.
- Trail Awareness: Familiarize yourself with trail routes and conditions before heading out.
Conclusion
Conquering downhill MTB requires practice, the right techniques, and reliable equipment. By mastering body positioning, braking, and gear usage, and leveraging the capabilities of a full suspension frame like the Trifox MFM100, you can tackle thrilling descents with confidence. Embrace the thrill of the ride, and remember, every descent is an opportunity to refine your skills and enjoy the exhilarating freedom of the trail. Happy riding!


