


As a mountain biker or bicycle enthusiast, you may find yourself in a situation where you need to convert your bike's quick-release hub to a thru-axle. While this may seem like a daunting task, it is actually quite doable with the right tools and knowledge. The benefits of a thru-axle include increased stiffness, improved handling, and better alignment between your wheel and frame.
So, if you're ready to make the switch, let's dive into how to convert a quick-release hub to a thru-axle.
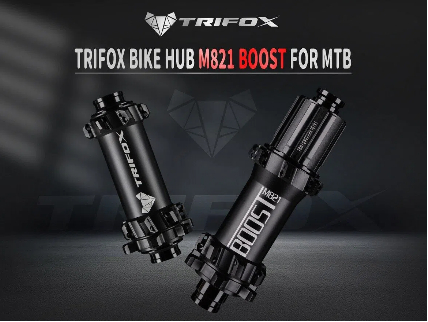
Step 1: Identify your Hub Specs
Before you start the conversion process, you need to identify the specs of your hub. This includes the size and spacing of the hub, which will determine what kind of thru-axle you need. For example, some mountain bikes use hubs with a 135mm spacing and 9mm axle diameter. You'll need to find a thru-axle with the same specs in order for it to work with your bike. If you're not sure what specs you have, you can usually find this information through your bike's manufacturer or by measuring the hub yourself.
Step 2: Remove the Quick Release
The next step is to remove the quick release skewer from your bike. This can usually be done by unscrewing the end caps of your quick-release hub and gently pulling out the skewer. Make sure to keep any washers or spacers that may be attached to the skewer.
Step 3: Install the Thru-Axle
Now it's time to install your new thru-axle. Make sure it has the correct size and spacing for your hub, and determine the orientation of the threads. Some thru-axle designs have a lever or handle that allows you to tighten or loosen the axle by hand, while others require a tool. Follow the manufacturer's instructions for installation, being sure to grease the threads to prevent corrosion or seizing.
Step 4: Adjust your Disc Brakes
If you have disc brakes on your bike, you'll need to adjust the brake calipers to accommodate the new thru-axle. This may require loosening or removing the brake bolts and repositioning the caliper. Be sure to align the brake pads with the rotor correctly, and test the brakes thoroughly before riding.
Step 5: Test Ride and Adjust
After you've installed the thru-axle and adjusted your disc brakes, it's time to test ride your bike. Take it for a short spin around the block or a nearby trail, and check for any unusual noises or vibrations. If everything seems to be working well, continue to ride and make any necessary adjustments along the way.
Conclusion:
Converting your quick-release hub to a thru-axle may seem like a big undertaking, but it's actually a fairly simple process. By following these steps and using the right tools, you can improve the performance and handling of your bike with a few easy modifications. Remember to always consult the manufacturer's instructions and take your time to ensure a safe and successful conversion. Happy riding!
2023-08-02
Trifox
SHARE:


Comments
Recent Posts
1

1
1
1
1
1
1
1
1
1
1
1

1

1
1
1

1
1
1

1
1

1
1


