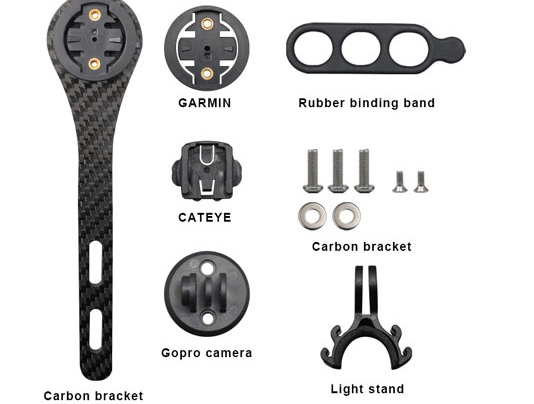
As a cyclist, having the right gear is essential to ensure a safe and comfortable ride. One of the most important pieces of equipment is the bike computer, which helps track your speed, distance, and other important metrics. However, finding the perfect mount for your bike can be a challenge. Enter the Trifox Carbon Handlebar Computer Mount SBH100 – a game-changing accessory that has set a new standard for cycling enthusiasts everywhere. In this blog post, we will explore the benefits of this state-of-the-art bike computer mount. Firstly, let's consider the design of the Trifox Carbon Handlebar Computer Mount SBH100. Made with 3K carbon fiber weave, this mount is not only visually appealing but also incredibly durable. The material used in the construction of this mount makes it resistant to impact and wear and tear caused by environmental factors. Hence, it is built to last long and stand up to tough riding conditions. Another important feature of the Trifox Carbon Handlebar Computer Mount SBH100 is its compatibility with several bike models and computers. This mount is perfect for the Garmin, viGPSPORT, Blackbird, Cat Eye, and Bryton computer models, making it convenient for riders who use any of these computer brands. The mount fits valve diameters of approximately 28.6mm / 1.1 inches, making it suitable for most bikes and handlebars. The Trifox Carbon Handlebar Computer Mount SBH100 is designed to be both lightweight and easy to install, making it the perfect accessory for avid cyclists. The mount comes with an easy-to-use locking system that ensures the computer stays in place even while biking on rough terrain. Its aerodynamic design helps to reduce wind resistance and drag, which ultimately enhances the riding experience. The Trifox Carbon Handlebar Computer Mount SBH100 is not only functional but also stylish. You can now upgrade your bike’s aesthetics with this sleek and sophisticated mount. It has a modern design that blends seamlessly with your bike's handlebars. The mount’s appearance enhances the overall look of your bike while providing an effective platform to mount your computer. In conclusion, the Trifox Carbon Handlebar Computer Mount SBH100 is the ultimate bike accessory that every cyclist needs. It is a perfect combination of durability, compatibility, convenience, and style – something that every rider longs for. The mount is perfect for those who prioritize ease of installation and want a sturdy, reliable mount that can withstand rough riding conditions. Upgrade your bike’s accessory game with the state-of-the-art Trifox Carbon Handlebar Computer Mount SBH100 today!
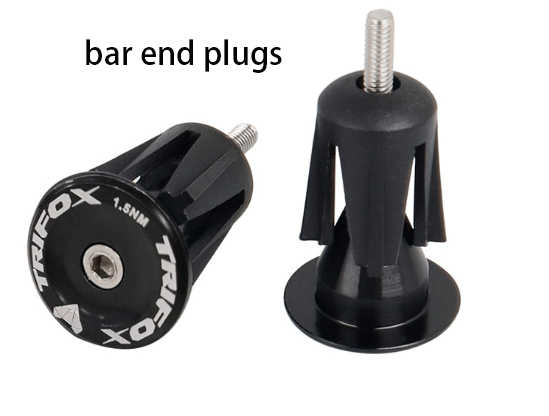
Cycling is a great hobby, but safety should always be a top priority. An essential part of a bike is its handlebar, and when it comes to handlebars, the ends are often overlooked. However, having secure end stoppers can make a significant difference in ensuring a safe ride. In this blog post, we will discuss the Trifox Bicycle Handlebar End Stoppers HES100 and how they can help enhance your cycling experience. Material: The Trifox Bicycle Handlebar End Stoppers HES100 are primarily made of aluminum alloy and PP plastic. This material combination gives the stoppers the perfect mix of durability and strength. Weight: One of the significant advantages of the Trifox handlebar end stoppers is their lightweight, coming in at only 24g per pair. This means you can enjoy a safe and secure ride without adding any extra weight to your bike. Best Use: The Trifox Bicycle Handlebar End Stoppers HES100 fits tube inner diameters of 17-23mm. This makes them a versatile product that can fit most handlebars, providing a secure and firm mount. Color: The end stoppers come in the timeless and classic black color, which will match any type of bike. Features: The Trifox Bicycle Handlebar End Stoppers HES100 comes with an expansion PP base, to ensure a sturdy mount. Moreover, the mainframe is built of alloy and CNC-machined, which gives additional strength and durability. These features help to provide a secure fit, ensuring that the end stoppers will stay in place, keeping you safe and secure. Installation: Installing the Trifox Bicycle Handlebar End Stoppers HES100 is an easy task. The stoppers come with clear instructions for easy and convenient installation, making it a hassle-free process. Conclusion: In conclusion, the Trifox Bicycle Handlebar End Stoppers HES100 is a must-have product for all cyclists. They offer safety, durability, and easy installation all in one package. The use of lightweight material means you get all the benefits of a sturdy product without having to worry about the added weight to your bike. Investing in the Trifox Bicycle Handlebar End Stoppers HES100 will enhance your cycling experience, making it safe and secure, so you can enjoy every ride with peace of mind.
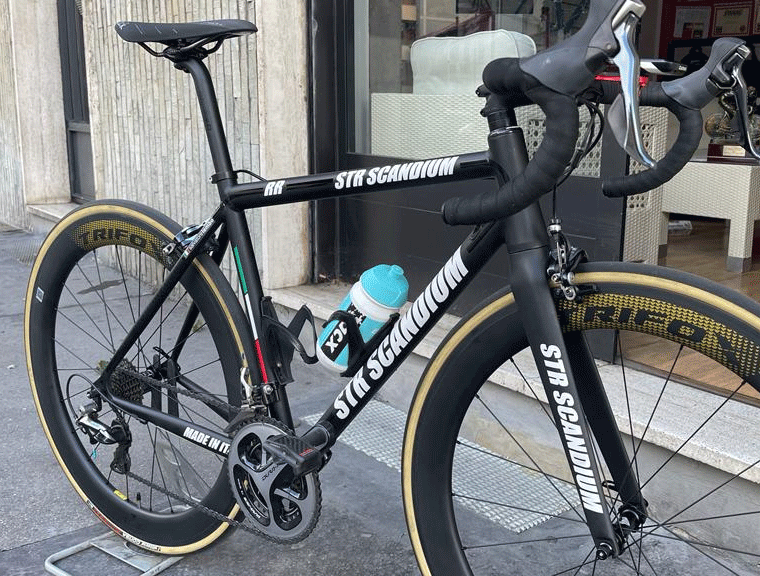
When it comes to bike wheels, there are a lot of options out there. The market can be overwhelming and it’s hard to tell which brands are worth your investment. When it comes to Chinese wheels, Trifox stands out for their commitment to quality and affordable prices. Trifox offers three main carbon road bike wheel models: WT11, WT17, and WT18. All three models are designed for a high-performance riding experience, but why are they considered the best Chinese wheels on the market? Let’s take a closer look. Trifox Carbon Road Bike Wheels WT11 Trifox’s WT11 model is made of 100% Carbon Fiber Toray T800, making it one of the lightest carbon wheels on the market. It’s designed with a versatile hub and a disc brake center lock for optimized stopping power. The WT11 model also features high-performance sealed bearings, which ensure long-lasting durability and easy maintenance. Trifox Carbon Road Bike Rim Wheels WT17 For those looking for a more wallet-friendly option, the WT17 model from Trifox is a great choice. Made of ultra-lightweight carbon fiber, the WT17 model is compatible with Shimano 8/9/10/11 speed and SRAMXDR12 speed. It’s also designed for easy and simple maintenance without tools, meaning you won’t need any special equipment to keep your wheels in top condition. Trifox Carbon Rim Brake Wheelset WT18 Lastly, the Trifox WT18 is designed for rim brakes. This model is compatible with both Shimano and SRAM drivetrains and features high-quality LLU contact bearings, ensuring a smooth and responsive riding experience. The quick-release freehub enables tool-free disassembly and installation, making maintenance a breeze. The combination of advanced materials and thoughtful design makes Trifox’s WT18 model a great choice for any rider looking for a reliable and durable set of wheels. Conclusion: Overall, Trifox offers a variety of great Chinese wheel options for riders looking for high-quality wheels at an affordable price. Their commitment to lightweight carbon fiber, advanced materials, and thoughtful design ensures a great riding experience every time. Whether you choose the ultra-lightweight WT17, the versatile WT11, or the reliable WT18, you can rest assured knowing you’ve made a great investment in your cycling journey.
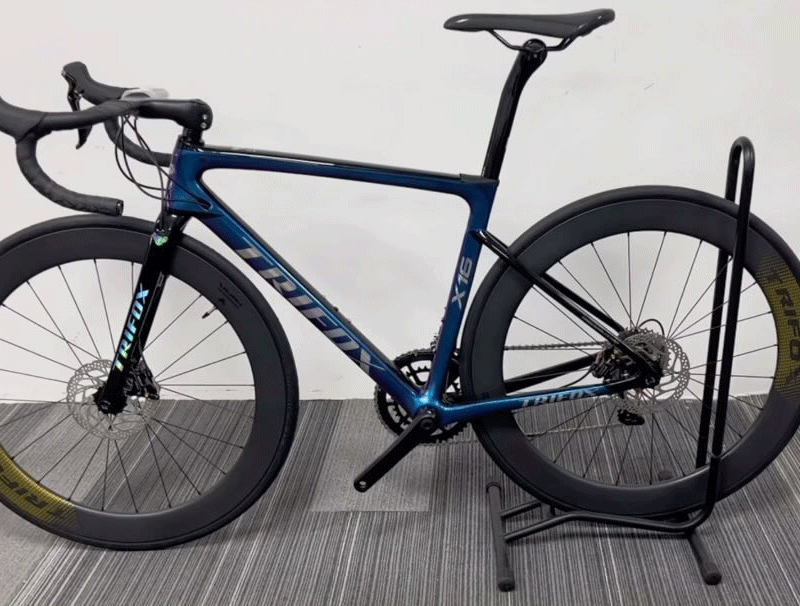
Are you a cyclist who is passionate about speed and efficiency? Do you dream of riding a bike with the lightest cheap road bike carbon frame? If you answered yes, then you need to check out the Trifox Carbon Fiber X16QR Road Bike Frame. This high-performance frame is designed to meet the needs of cyclists who crave speed and precision. In this blog post, we will take a closer look at the X16QR and its technical specifications. The X16QR is constructed from high-quality T800 Full Carbon Fiber material, which is known for its strength, lightness, and vibration-absorbing properties. This lightweight carbon road bike frameset is perfect for serious cyclists who are seeking a competitive edge. The Frame O.L.D is Front: φ9x100 mm; Rear: φ10x130 mm, allowing for compatibility with a wide range of cycling components. Additionally, it accommodates up to 700c wheels, with tire widths ranging from 25mm, which enhances its maneuverability even further. One of the key benefits of the X16QR is its minimal weight, which is just 840g for the frame with the fork. This feature enhances the speed and maneuverability of the bike, allowing cyclists to make quick directional changes with ease. Furthermore, the X16QR is V-brake compatible, with Quick Release Dropout, allowing for easy installation and removal of wheels and other components. The road bike frameset X16QR is perfect for beginners and advanced cyclists alike. The X16QR has a sleek and modern design that is sure to turn heads wherever you ride. With its precise measurements, this lightweight carbon road bike frameset offers optimal performance and speed. It is designed to provide stability and efficiency, and you will notice the difference as soon as you hit the road. Conclusion: The Trifox Carbon Fiber X16QR Road Bike Frame is the perfect choice for cyclists seeking speed, efficiency, and precision. With its lightweight construction, high-quality materials, and versatile compatibility, this road bike frame is suitable for riders of all levels. The X16QR is designed to meet the needs of serious cyclists who crave an edge in competition and who want to improve their overall performance. If you are looking for a road bike frame that is lightweight, durable, and efficient, the X16QR is your ideal choice.
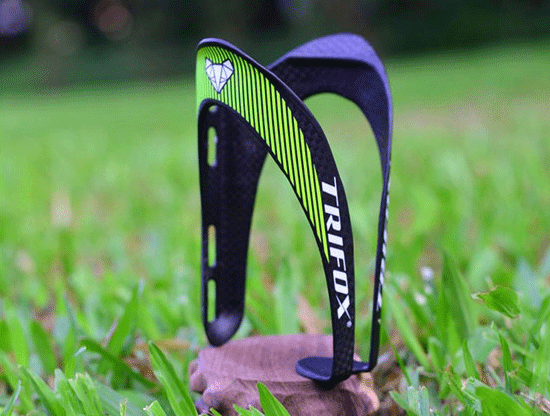
Are you in search of a reliable and durable water bottle holder for cycling? Look no further than the Trifox Bike Water Bottle Holder CBC100. This carbon fiber bottle cage boasts a thick version style and is compatible with mountain bikes, road bikes, and gravel bikes. In this comprehensive review, we will examine the top features of the Trifox Lightweight bottle cage CBC100, including its design, material, compatibility, weight, and sturdiness. Design: The CBC100 features a sleek, yet practical design with its thick version style. It measures 14 * 7.5cm / 5.5 * 3.0in (L * D), making it easy to slide in (or out) a water bottle while cycling. One of the key design features of the CBC100 is the inside of the cage, which is coated with a layer of rubber. This rubber layer helps to keep your water bottle securely in place while riding, preventing it from bouncing around or falling out completely. Material: This bottle cage is constructed from high-quality carbon fiber material - T800. This means that it is super lightweight (only 28g ± 2g) yet sturdy. The carbon fiber material ensures that the bottle cage remains corrosion-resistant and durable over time. It is also easy to clean, requiring just a simple wipe down after use to leave it looking as good as new. Compatibility: The Trifox Lightweight bottle cage CBC100 is compatible with a wide range of bike types, including mountain bikes, road bikes, and gravel bikes. This allows you to use it on your primary bike and any backups you may have. Moreover, it is also suitable for folding bikes. Weight: One of the major selling points of the Trifox CBC100 bottle cage is its weight. The cage is incredibly lightweight, which is beneficial for anyone who wishes to eliminate unnecessary weight from their bike or is looking to shave off some seconds from their cycling time. The cage weighs just 28g, making it one of the lightest bottle cages on the market. Sturdiness: Despite being a lightweight and sleek bottle cage, the Trifox CBC100 is also incredibly sturdy and durable. It can hold up to years of use and deformation, thanks to its carbon fiber material. You can confidently use this bottle cage on rough terrain without fear of damage or deformation. It does an excellent job of holding your water bottle in place, no matter how bumpy the ride. Conclusion: The Trifox Bike Water Bottle Holder CBC100 is undoubtedly one of the top choices for anyone in search of a lightweight, durable, and flexible bottle cage. Its carbon fiber construction provides strength and durability while maintaining its lightweight feature. It is easy to install on most types of bikes, and its thick version design ensures that your water bottle stays in place. Overall, the Trifox CBC100 is an excellent investment for anyone looking to improve their cycling experience.
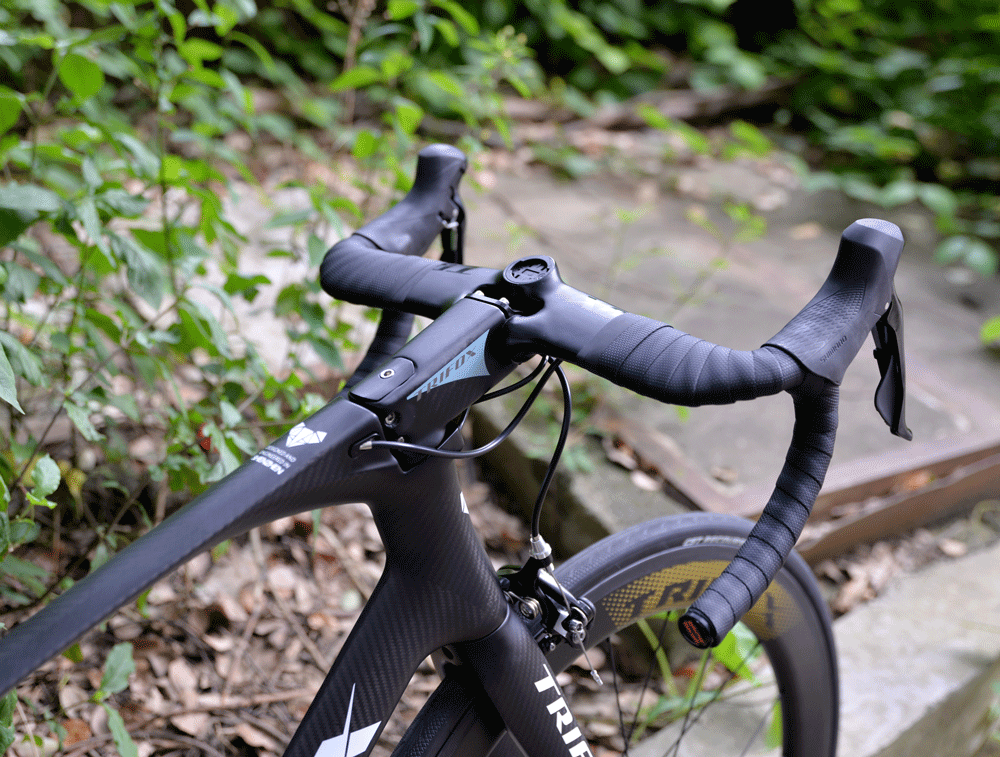
When it comes to cycling, there are many factors to consider, and one of the most important is the type of handlebars you’ll be using. If you’re looking for speed and endurance, drop handlebars could be the perfect choice for you. Not only do they allow for a more aerodynamic ride, but they also provide greater stability and better control over the bike. In this blog post, we’ll explore the art and science of bike control with drop handlebars and introduce you to the TC20UL handlebar. Handlebar shape and material: One of the main benefits of drop handlebars is their aerodynamic shape, which provides a more streamlined riding position. This improved aerodynamics can translate into enhanced speed, endurance, and overall performance. Materials used to manufacture handlebars also play a crucial role in bike control. TC20UL handlebars are made of T800 carbon fiber, which is lightweight and robust enough to withstand the rigors of long-distance cycling. The handlebar is available in four lengths - 380, 400, 420, and 440 mm - making it versatile and suitable for a range of riders. Design Elements: The handlebar’s internal cable routing design is one of its standout features. This unique design conceals cables inside the handlebar, giving your bike a cleaner look, and also improves aerodynamics. Additionally, the design of the sink in the middle and upward lift at the ends makes it easier to change riding postures and reduces the strain on your back during long-distance riding. The AERO uplift breaking wind design of the handlebar, a feature that increases the bar's efficiency in breaking wind and reduces the chance of being blown off course in strong winds. Compatibility with Accessories: The TC20UL handlebar's design is compatible with various accessories, including stopwatches such as Garmin and Bryton. The handlebar comes with a stopwatch bracket, allowing riders to keep accurate track of riding times. This feature may be crucial to road racers or long-distance touring enthusiasts who want to measure their progress accurately. What are the benefits to riders? The benefits of drop handlebars include better control and handling over the bike, making it easier to navigate steep descents and tight corners. Additionally, due to their aerodynamic shape, drop handlebars can reduce wind resistance and increase speed. The comfortable geometry of the TC20UL handlebar's uplift design also allows riders to take a more natural, comfortable grip and minimize fatigue when riding for long hours. Conclusion: The TC20UL handlebar is a versatile and high-quality drop handlebar that offers riders improved aerodynamics, greater stability and control of their bikes, and compatibility with various accessories. The internal cable routing design reduces drag and looks clean while significantly improving riding comfort thanks to its sink in the middle and upward lift at the ends. The uplifting AERO design is well-suited to riders who enjoy the road, gravel, and cyclocross riding. Drop handlebars are a popular choice among experienced riders and have become synonymous with speed and performance. By understanding the benefits of drop handlebars and selecting high-quality options like the TC20UL, you can take your riding to new heights.
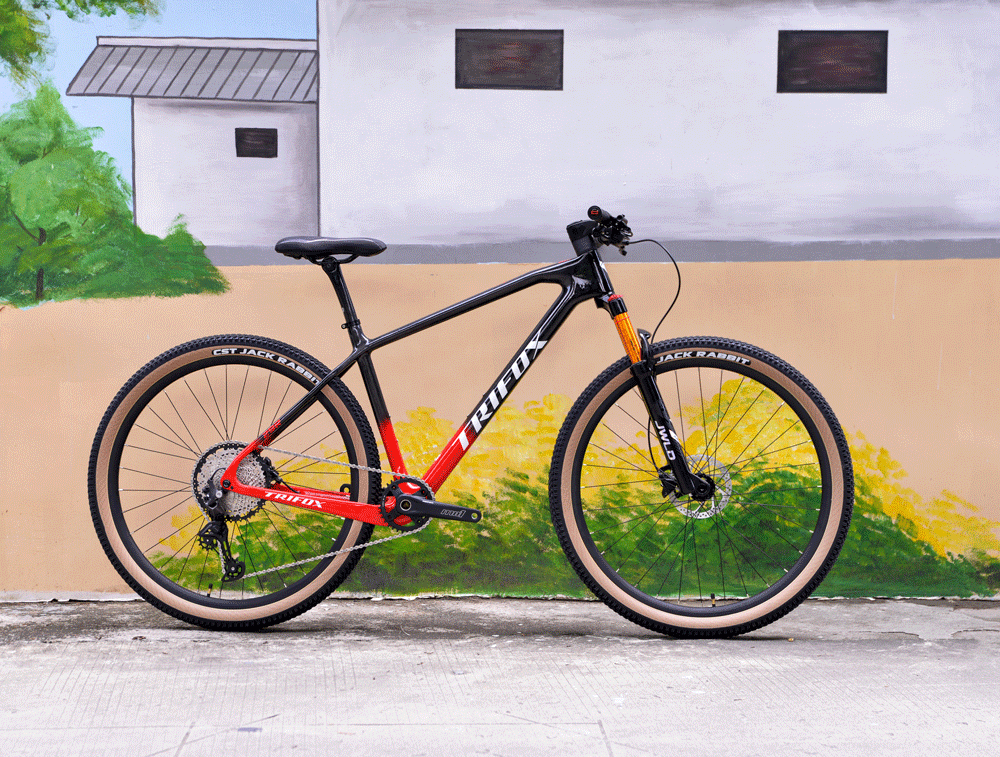
Mountain biking is a thrilling outdoor activity that is enjoyed by many. But, to ride smoothly and comfortably, you need the right equipment. One of the most critical components of your bike is the frame. A strong, lightweight, and sturdy frame can ensure a smooth and effortless ride. In this blog post, we'll take a closer look at the MTB Carbon Frameset: 29er Full Internal Hardtail SDY21, an exceptional choice for serious mountain bikers. 1. T800 Carbon Fiber, Ultra-lightweight, UD Matte Finish The SDY21 mountain bike frame features T800 carbon fiber, offering ultra-lightweight performance and a Red gradient, full glossy painting. This state-of-the-art material is known for its excellent strength-to-weight ratio, which provides a rigid and responsive ride. With an estimated weight of 1150 grams for a size medium, this frame is exceptionally light, making it perfect for competitive racing or just a fast and fun trail ride. 2. New Seatpost to prevent slipping The SDY21 frame comes with a particle paint finish, which helps to prevent the seat tube from descending, ensuring a secure and stable ride. This means you can ride more confidently on steep inclines and declines without worrying about the seat shifting. 3. Streamlined Internal Cabling, simple and beautiful The internal cable routing of the SDY21 frame simplifies the routing of cable housings and brake hoses, enabling a neat and tidy setup with ease. The process of feeding and securing the cables within the frame can be completed swiftly and efficiently. 4. Flexible tire compatibility TRIFOX Hardtail Frame SDY21 is designed for swift performance, facilitating the use of 29er *2.4'' wheels as standard, enabling you to confidently navigate diverse terrains. The SDY21 frame takes on tough terrains and provides a smooth ride, even in challenging locations. 5. Replace multiple O.L.D styles The SDY21 frame can accommodate various hub widths, including traditional quick-release systems with a 135mm O.L.D. or a modern thru-axle design with a wider 142mm O.L.D or 148mm BOOST, adapting to your cycling requirements. This flexibility extends to different derailleur hangers as well, ensuring a smooth and efficient gear shifting experience irrespective of your setup. To sum it up, the MTB Carbon Frameset: 29er Full Internal Hardtail SDY21 provides an overall exceptional biking experience that is ideal for mountain bikers. With its lightweight and sturdy frame design coupled with advanced features such as a particle paint finish, streamlined internal cabling, flexible tire compatibility, and adaptability to various hub widths, this bike frame is an excellent choice for anyone who is serious about their mountain biking hobby. So whether you're a casual rider, just starting out, or an experienced pro looking for a competitive edge, the SDY21 mountain bike frame is sure to offer years of trouble-free performance and an enjoyable mountain biking experience.
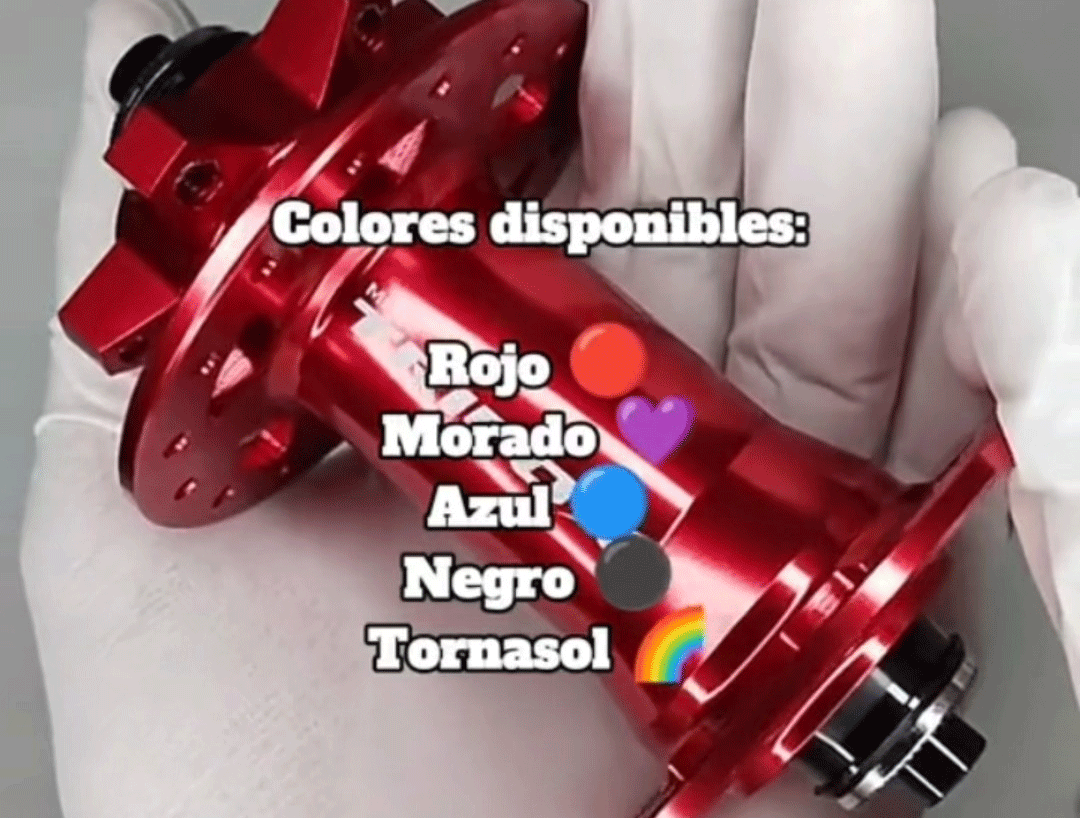
When it comes to bicycles, the hub is an essential part that holds the wheel in place. Over the years, the design of the hub has undergone significant changes. From quick-release setups to thru-axle and boost options, bike makers have continuously strived to improve the experience for bike riders. The hub spacing has become one of the most critical aspects of bike design. If you're looking to buy a new bike or upgrade your existing one, it's essential to understand the differences between hub spacing standards. This article will take you through the different hub spacing standards, their benefits, and which one would be best for you. 1) Quick-Release The quick-release standard was the most common hub spacing standard in the past. It involved a simple setup where the hub was held in place by a skewer that passed through the axle. It made it easy for the rider to change a flat tire or remove the wheel. The quick-release standard is still common in road bikes and some mountain bikes. Its disadvantage is that it's not as stiff as the newer options, making it unsuitable for demanding mountain bike applications. 2) Thru-Axle The thru-axle configuration involves a larger diameter axle that passes through the hub and the fork, locking the wheel in place. The thru-axle standard offers better stability and stiffness compared to the quick-release. This makes it more suitable for mountain bikes and other high-performance bicycles. The thru-axle standard has become popular in recent years, and it's likely to become the standard hub spacing for most bicycles. 3) Boost Boost is a hub spacing standard developed by mountain bike makers to improve the stiffness and handling of mountain bikes. Boost spacing involves a longer thru-axle and wider hub spacing than standard thru-axle spacing. The wider spacing provides more clearance for wider tires and improves the bike's stability. The Boost spacing standard has become popular in recent years and is now common in most new mountain bikes. 4) Super Boost Super Boost is a hub spacing standard developed to improve the handling of bikes with plus-size or fat tires. It features an even wider spacing than Boost, making it more comfortable to handle larger tires without sacrificing stability. Super Boost standard is not yet a common feature in most bicycles, but it's popular in some high-end mountain bikes. 5) Which Hub Spacing Standard is Best for You? The choice of the hub spacing standard you choose depends on the bike's intended use. If you're looking for a road bike, the quick-release standard is still suitable. However, for mountain bikes, the thru-axle or Boost standard is the better option, offering better stiffness and stability. If you're looking to fit plus-sized tires or fat tires, the Super Boost standard would be the best option. Conclusion: Understanding hub spacing standards is essential when it comes to buying a new bike or upgrading your existing one. Each standard has its benefits and drawbacks, making it essential to choose one that suits your needs. While the quick-release standard is still prevalent in road bikes, the thru-axle and Boost/Hope hub spacing standards are becoming more popular in mountain bikes. The Super Boost standard is still a new concept, but it's gaining popularity, especially in fat tire bikes. In conclusion, the choice of hub spacing standard depends on the type of riding you intend to do, and it's essential to choose one that suits your needs.
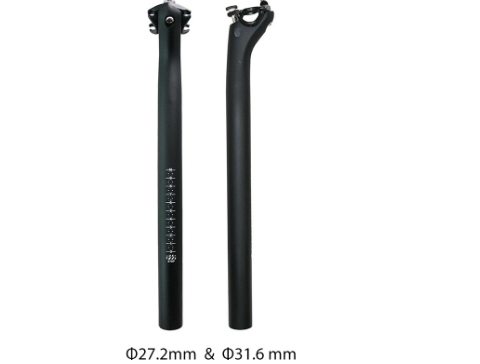
Whether it’s for daily commute or weekend trail rides, cycling is a great way to maintain our health and well-being. However, there are certain factors that can hinder our comfort while riding, leading to pain or injuries. One such factor is the seatpost, which connects the saddle to the bike frame. It may not seem like a big deal, but the angle, length, and material of the seatpost can significantly impact the way you feel on the bike. In this blog post, we’ll discuss how layback seatposts can help maximize your cycling comfort and provide a review of Trifox 400mm Carbon MTB Layback Seatpost CDS100. A layback seatpost is different from a traditional or straight seatpost in that it has a backward angle, which positions the saddle further behind the pedals. This puts you in a more upright and relaxed posture on the bike, reducing the strain on your lower back, hips, and shoulders. Additionally, it gives you more room to move around the saddle and shift your weight, which can come in handy during long rides or technical sections. Layback seatposts come in different degrees of angle, usually ranging from 10 to 30, depending on the type of riding you do and your body geometry. Trifox 400mm Carbon MTB Layback Seatpost CDS100 is one of the best layback seatposts on the market today, especially for mountain biking. Made of high-quality carbon fiber T800, it is lightweight, flexible, and strong enough to withstand rough terrains and impacts. The length of the seatpost is 400mm, which is long enough to accommodate a wide range of riders and saddle positions. The layback angle is 20 degrees, which is the sweet spot for most riders, providing a good balance between comfort and control. The layback offset is 20mm, which means the saddle position is pushed back by 20mm from the center of the seatpost. The diameter of the seatpost can be either 27.2mm or 31.6mm, which fits most standard frames and saddles. The screws are made of titanium, which is light and durable, and the finish is UD matte, which gives a sleek and professional look. Installing Trifox 400mm Carbon MTB Layback Seatpost CDS100 is easy and straightforward. Depending on your bike frame, you may need to use an adapter or shim to match the diameter of the seatpost. Once the seatpost is in place, adjust the saddle position and angle to your liking and tighten the screws. It’s important to use a torque wrench and follow the manufacturer’s recommended torque specs to avoid over-tightening or under-tightening, which can damage the seatpost or saddle rails. Riding with Trifox 400mm Carbon MTB Layback Seatpost CDS100 is a joy. The backward angle of the seatpost provides a stable and comfortable platform, allowing you to maintain a good pedaling rhythm and absorbing the bumps and vibrations of the trail. The flexibility of the carbon fiber reduces the harshness of the ride and dampens the noise. The length of the seatpost gives you room to adjust your saddle position for different terrains or riding styles. The screws are easy to access and tighten without any slipping or creaking. Overall, Trifox 400mm Carbon MTB Layback Seatpost CDS100 is a great investment for any mountain biker who wants to improve their comfort and performance. Conclusion: Layback seatposts can make a big difference in your cycling comfort and Trifox 400mm Carbon MTB Layback Seatpost CDS100 is a prime example of how a high-quality seatpost can enhance your riding experience. The carbon fiber construction, 20-degree layback angle, 20mm layback offset, and titanium screws all contribute to a lightweight, durable, and comfortable seatpost that can handle any trail you throw at it. Whether you’re a beginner or a pro, a casual rider or a racer, a layback seatpost can help you ride longer, stronger, and happier. So, don’t let your seatpost hold you back, invest in a layback seatpost and enjoy the ride!


